Have you ever walked on a beautiful wooden floor and wondered how it was made? Engineered wood flooring is a popular choice that many people love. It looks great and is strong too. But do you know how to install it? One common method is the nail down technique.
Nail down engineered wood flooring is not just for professionals. It’s something you can do yourself if you take your time. Imagine finishing a room in your house all on your own! You can choose from different colors and styles to match your home.
Did you know that engineered wood is made from real wood? It uses layers of wood for strength, making it less likely to warp. This means you can enjoy your beautiful floor for years.
In this article, we will explore the benefits of nail down engineered wood flooring. You’ll learn how to install it, tips to make the job easier, and some common mistakes to avoid. Let’s dive in and see how you can transform your space!
Table of Contents
Engineered Wood Flooring Nail Down: A Comprehensive Guide

Engineered Wood Flooring Nail Down
Engineered wood flooring offers a durable and stylish option for homeowners. With a nail down method, planks securely attach to the subfloor, ensuring stability. This technique allows for easy installation, making it a favorite among DIY enthusiasts. Did you know engineered wood can handle moisture better than solid wood? Choosing nail down helps reduce gaps and lifts, keeping your flooring looking neat. Discover the beauty and reliability of engineered wood today!
What is Engineered Wood Flooring?
Definition and characteristics. Comparison with solid wood flooring.
Engineered wood flooring is a clever blend of natural beauty and modern technology. It features thin layers of real wood on top of a sturdy core made from high-quality plywood or fiberboard. This unique structure gives it strength and stability, making it less likely to warp compared to solid wood flooring.
Unlike solid wood, which can shrink or expand in humidity, engineered wood stays calm and collected. Imagine a wooden superhero, saving your floor from the drama of weather changes! Plus, it’s usually easier to install, cutting down on the time and effort you need.
| Characteristic | Engineered Wood Flooring | Solid Wood Flooring |
|---|---|---|
| Stability | High | Variable |
| Installation | Easy | Challenging |
| Cost | Typically lower | Usually higher |
So, if you want a beautiful floor that can brave the elements, Engineered Wood Flooring could be your best buddy!
Advantages of Nail Down Installation
Durability and stability. Moisture resistance benefits.
Nail down installation of engineered wood flooring offers great durability. This method secures the planks tightly to the subfloor, making it less likely to shift or squeak. Imagine having a floor so stable, it could win a limbo contest! Plus, it fights against moisture, which can be a sneaky troublemaker. With added resistance to spills and humidity, your floor stays as fresh as a daisy, even when you accidentally knock over your juice cup.
| Benefit | Description |
|---|---|
| Durability | Stays strong and lasts longer with steady installation. |
| Moisture Resistance | Protects against water damage for a happy, healthy floor. |
Tools Required for Nail Down Installation
Essential tools list. Safety equipment recommendations.
Before diving into the world of nail-down flooring, you’ll need some trusty tools. Think of them as the superheroes of your project! Here’s a handy list:
| Essential Tools | Safety Equipment |
|---|---|
| Nail gun | Safety goggles |
| Hammer | Ear protection |
| Saw (circular or miter) | Dust mask |
| Measuring tape | Gloves |
These tools will help you tackle your flooring like a pro. Don’t forget to wear your safety gear! After all, we want you to nail down that floor and not your finger. Safety first, right?
Preparing the Subfloor
Importance of subfloor preparation. Steps to ensure a level and clean surface.
Getting the subfloor ready is like preparing a stage for a grand performance. A clean and level surface is key for your engineered wood flooring to shine. If the subfloor is uneven, your floor might look like it’s doing a dance! Here are steps to make sure your subfloor is in tiptop shape:
| Step | Description |
|---|---|
| Check for Damage | Look for any cracks or holes. Repair them for a smooth surface. |
| Clean the Surface | Dust and debris are the enemies! Sweep and vacuum thoroughly. |
| Level the Floor | Use a level tool to find dips or bumps and fix them. No one likes a lumpy carpet! |
Remember, a well-prepped subfloor leads to a happy home! As the saying goes, “Measure twice, cut once.” A little effort now saves a lot of headaches later.
Choosing the Right Engineered Wood Planks
Factors to consider (thickness, species, finish). How to select based on room usage.
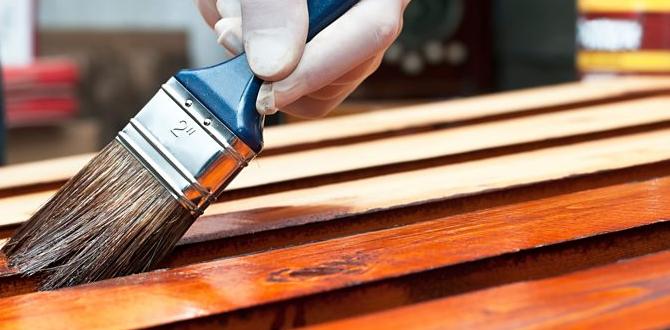
When picking engineered wood planks, think about a few important things. Start with the thickness of the planks. Thicker planks usually last longer and feel better underfoot. Next, check the species. Different woods, like oak or maple, give unique looks and strengths. Finally, consider the finish. A good finish protects the wood and can make it shine. Choose planks based on how you’ll use them in each room. For busy areas, like kitchens, stronger planks are best. For quieter spaces, lighter ones work well.
What factors should I consider for engineered wood flooring?
Key factors include thickness, species, and finish. Each affects the look and durability of your flooring. Choose wisely for the best results!
Quick Tips:
- Thicker planks last longer.
- Oak is strong; maple is beautiful.
- Different finishes offer various looks.
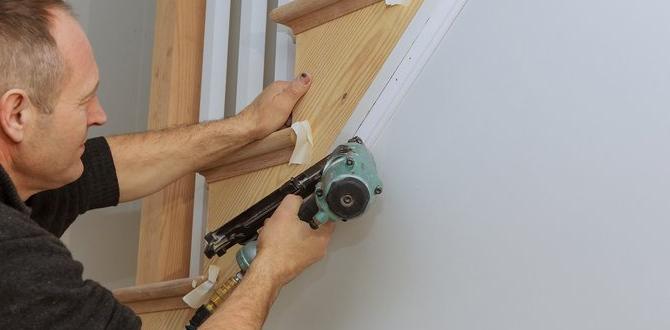
Step-by-Step Installation Process
Detailed breakdown of each installation stage. Techniques for ensuring proper alignment and spacing.
Installing engineered wood flooring can be simple with the right steps. Start with a clean, dry surface. Lay down a moisture barrier if needed. Next, measure and plan your layout.
During installation, use these tips:
- Ensure proper alignment by starting at a straight wall.
- Leave gaps for expansion between the flooring and walls.
- Check each row with a level for evenness.
With careful planning and attention, you’ll create a beautiful floor. Happy installing!
How do you ensure proper spacing and alignment?
To guarantee perfect alignment and spacing, always check each row. Use spacers to maintain space between walls and flooring. This helps avoid bulging and damaged boards later.
Common Mistakes to Avoid
Frequent errors during nail down installation. Tips to prevent issues.
Installing engineered wood flooring can be tricky, and some mistakes are common. One big error is not measuring the room properly. Always double-check your measurements, or you may find yourself with excess planks or, worse, not enough. Another frequent goof is driving nails at the wrong angle. This can lead to squeaky floors. Make sure to nail down correctly to avoid this sound! Here are some tips:
| Common Mistake | Tip to Avoid |
|---|---|
| Incorrect Measurements | Always measure twice! |
| Poor Nailing Angle | Nail straight for less squeak! |
| Skipping Underlayment | Don’t be lazy; your floor will thank you. |
A little attention to detail can save you from future headaches and noisy tiles!
Maintenance Tips for Nail Down Engineered Wood Flooring
Best practices for cleaning and care. Recommended products for longevity.
Taking care of your nail down engineered wood flooring is easy with a few simple steps. Regular cleaning keeps it looking great. Use a soft broom or a vacuum without a beater bar. For deeper cleaning, use a damp mop with a gentle cleaner meant for wood floors. Avoid harsh chemicals that can damage the finish.
To help your floors last, try these products:
- Mild pH-neutral cleaners – Safe for wood and effective in removing dirt.
- Soft microfiber mops – Gentle on the surface and helps prevent scratches.
- Furniture pads – Place them under heavy items to avoid dents.
What should you avoid for best care?
Avoid using steam cleaners and wet mops that soak the floor, as they can cause damage. Do not use abrasive tools for cleaning. Protect your floor from direct sunlight to prevent fading.
FAQs About Engineered Wood Flooring Nail Down
Commonly asked questions and concise answers. Troubleshooting tips for common issues.
People often have questions about engineered wood flooring nail down. Here are some common ones:
How do I install it?
Start by preparing your subfloor. Make sure it’s clean and dry. Then, lay down the boards, nailing them down securely. Use a nail gun for the best results.
What if my floors squeak?
Squeaky floors can happen if boards aren’t secured tightly. Check the nails and add more if needed. You can also apply talcum powder between the boards.
Can I use it in the bathroom?
Yes, but be careful. Engineered wood can tolerate some moisture. Still, it’s best to use it in areas with less water exposure.
These tips can help you enjoy your flooring and solve any problems you face.
Conclusion
In conclusion, engineered wood flooring nail down is a strong, stylish option for your home. It’s durable and easy to maintain, making it perfect for busy families. By choosing this flooring, you enhance your space while enjoying comfort. If you’re ready to upgrade your floors, explore local stores or online resources for more information. Happy decorating!
FAQs
What Are The Benefits Of Using Nail-Down Engineered Wood Flooring Compared To Other Installation Methods?
Nail-down engineered wood flooring is strong and stable. You can walk on it right after it’s installed. It stays in place, so it won’t move or warp. Plus, it can last a long time if we take good care of it. This method also helps the floor feel warmer and quieter.
What Type Of Nails Or Fasteners Are Recommended For Installing Nail-Down Engineered Wood Flooring?
For installing nail-down engineered wood flooring, we should use flooring nails or special fasteners. These nails are strong and hold the wood firmly. You can also use staples made for flooring. Make sure they are the right size for your floor. This will help keep your flooring safe and looking great!
How Do I Prepare The Subfloor For Nail-Down Installation Of Engineered Wood Flooring?
To prepare the subfloor for nail-down engineered wood flooring, first, clean the area. Remove any dirt, dust, or old flooring. Next, check if the subfloor is level. You can use a long board to see if it lies flat. If there are bumps, sand them down. Finally, make sure the subfloor is dry and free of moisture.
What Are The Common Mistakes To Avoid During The Nail-Down Installation Of Engineered Wood Flooring?
When installing engineered wood flooring with nails, don’t skip the underlayment. It helps with noise and moisture. Make sure the boards fit tightly together; gaps can cause problems later. Always check for straight lines as you go. Lastly, avoid using too many nails; this can damage the wood.
How Do Temperature And Humidity Affect The Performance Of Nail-Down Engineered Wood Flooring After Installation?
Temperature and humidity can really change how nail-down engineered wood flooring works. If it’s too hot or too cold, the wood can expand or shrink. High humidity makes the wood absorb moisture, which can cause it to warp. It’s best to keep the room at a comfortable temperature and level of humidity for the flooring to stay strong and look nice.
{“@context”:”https://schema.org”,”@type”: “FAQPage”,”mainEntity”:[{“@type”: “Question”,”name”: “What Are The Benefits Of Using Nail-Down Engineered Wood Flooring Compared To Other Installation Methods? “,”acceptedAnswer”: {“@type”: “Answer”,”text”: “Nail-down engineered wood flooring is strong and stable. You can walk on it right after it’s installed. It stays in place, so it won’t move or warp. Plus, it can last a long time if we take good care of it. This method also helps the floor feel warmer and quieter.”}},{“@type”: “Question”,”name”: “What Type Of Nails Or Fasteners Are Recommended For Installing Nail-Down Engineered Wood Flooring? “,”acceptedAnswer”: {“@type”: “Answer”,”text”: “For installing nail-down engineered wood flooring, we should use flooring nails or special fasteners. These nails are strong and hold the wood firmly. You can also use staples made for flooring. Make sure they are the right size for your floor. This will help keep your flooring safe and looking great!”}},{“@type”: “Question”,”name”: “How Do I Prepare The Subfloor For Nail-Down Installation Of Engineered Wood Flooring? “,”acceptedAnswer”: {“@type”: “Answer”,”text”: “To prepare the subfloor for nail-down engineered wood flooring, first, clean the area. Remove any dirt, dust, or old flooring. Next, check if the subfloor is level. You can use a long board to see if it lies flat. If there are bumps, sand them down. Finally, make sure the subfloor is dry and free of moisture.”}},{“@type”: “Question”,”name”: “What Are The Common Mistakes To Avoid During The Nail-Down Installation Of Engineered Wood Flooring? “,”acceptedAnswer”: {“@type”: “Answer”,”text”: “When installing engineered wood flooring with nails, don’t skip the underlayment. It helps with noise and moisture. Make sure the boards fit tightly together; gaps can cause problems later. Always check for straight lines as you go. Lastly, avoid using too many nails; this can damage the wood.”}},{“@type”: “Question”,”name”: “How Do Temperature And Humidity Affect The Performance Of Nail-Down Engineered Wood Flooring After Installation? “,”acceptedAnswer”: {“@type”: “Answer”,”text”: “Temperature and humidity can really change how nail-down engineered wood flooring works. If it’s too hot or too cold, the wood can expand or shrink. High humidity makes the wood absorb moisture, which can cause it to warp. It’s best to keep the room at a comfortable temperature and level of humidity for the flooring to stay strong and look nice.”}}]}