Discover genius, easy woodworking projects perfect for beginners. These simple designs will help you build confidence, hone basic skills, and create impressive pieces for your home with minimal fuss. Get ready to transform wood into something wonderful!
Feeling intimidated by the world of woodworking? You’re not alone! Many beginners see beautiful wooden creations and think, “I could never do that.” It often seems like you need a workshop full of fancy tools and years of experience. But the truth is, starting with the right projects makes all the difference. We believe anyone can learn to work with wood and create something they’re proud of, even with just a few basic tools and a little guidance.
This guide is designed to change that mindset. We’ll walk you through straightforward projects with clever designs that are perfect for honing your skills. You’ll learn essential techniques in a fun, low-pressure way. Ready to turn that woodworking dream into a reality? Let’s get started on a journey that’s both rewarding and achievable!
Table of Contents
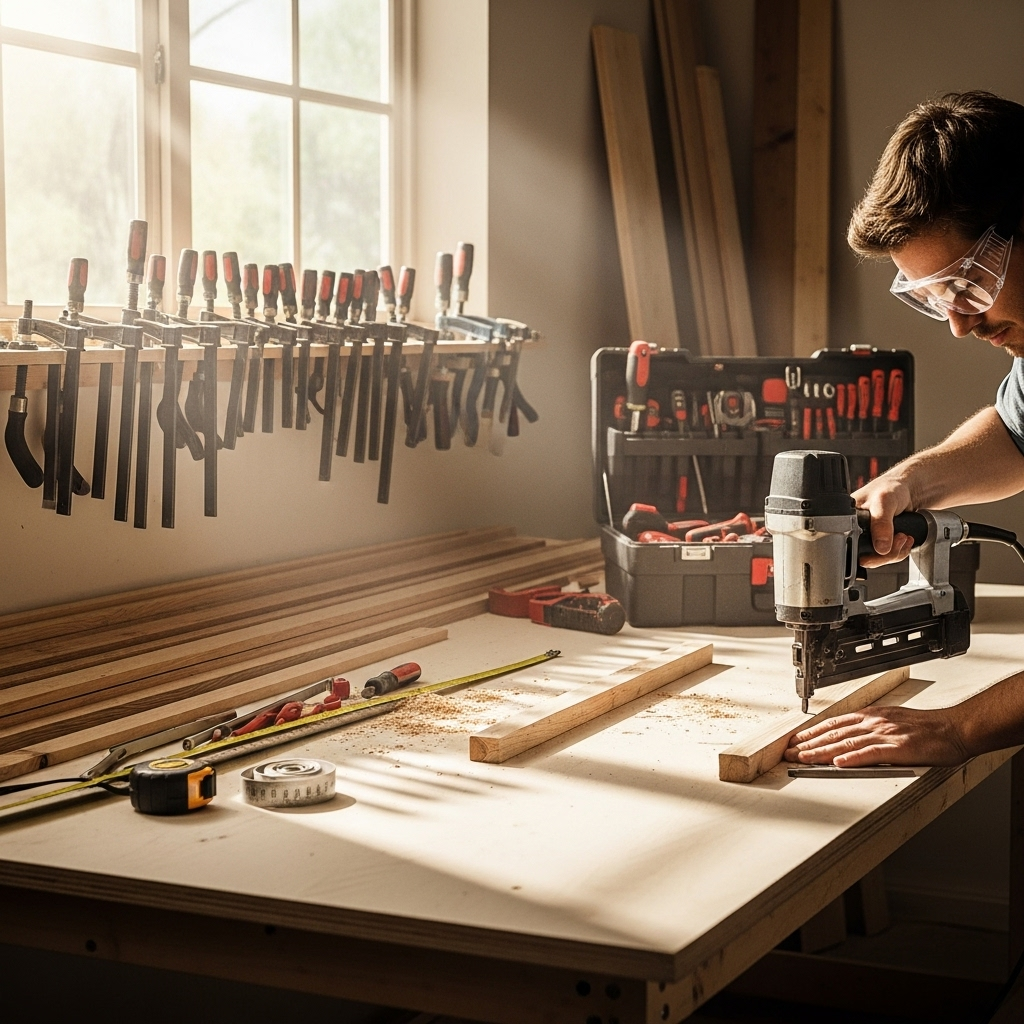
Your First Steps: Essential Tools & Safety First!
Before we dive into the fun projects, let’s talk about the basics. Having the right tools and understanding safety are key to a positive woodworking experience. Don’t worry, you don’t need to break the bank! We’ll focus on the essentials that will get you started and keep you safe.
Must-Have Tools for Beginner Woodworkers
Starting out, a few core tools will serve you incredibly well. These are versatile and will be used in almost every project you tackle. Think of them as your woodworking toolkit foundation.
- Measuring Tape: Precision is everything in woodworking. A good quality 16-foot or 25-foot tape measure is indispensable.
- Pencil: For marking your cuts and layout lines.
- Safety Glasses: Your eyes are precious! Always wear safety glasses when cutting, sanding, or drilling.
- Hand Saw: A reliable handsaw is a beginner’s best friend. Look for one with a comfortable grip and a good number of teeth per inch (TPI) for cleaner cuts.
- Clamps: Essential for holding pieces together while glue dries or while you’re working on them. Bar clamps, C-clamps, and spring clamps are all useful.
- Hammer: For driving nails, though for many beginner projects, screws and a drill are often easier.
- Screwdriver Set: Both Philips and flathead screwdrivers are vital.
- Drill/Driver: A cordless drill/driver is a game-changer. It handles drilling pilot holes and driving screws with ease.
- Sandpaper: Various grits (e.g., 80, 120, 220) for smoothing out your wood.
- Wood Glue: A strong, reliable wood glue is crucial for creating durable joints.
Safety is Non-Negotiable
Woodworking can be incredibly safe and enjoyable when you prioritize safety. It’s not about being fearful; it’s about being prepared and mindful. Always remember these crucial points:
- Wear Safety Glasses: This cannot be stressed enough. Wood chips and dust can cause serious eye injury.
- Listen to Your Tools: Understand the sounds your tools make. If something sounds off, stop and investigate.
- Keep Your Workspace Tidy: Clutter is a tripping hazard. Keep your work area clean and organized.
- Know Your Tools: Read the manuals for any power tools you use. Understand how they operate and their safety features. For extensive guidance on tool safety, the Occupational Safety and Health Administration (OSHA) offers valuable resources.
- Secure Your Workpiece: Always use clamps to hold your wood firmly in place before cutting or drilling.
- Unplug When Necessary: If you’re changing blades or making adjustments on power tools, ensure they are unplugged.
- Work in a Ventilated Area: Especially when sanding or using finishes, good ventilation is important to avoid inhaling dust or fumes.
Genius Design #1: The Simple Floating Shelf
Floating shelves are incredibly popular because they look like they’re magically attached to the wall! The “magic” is actually a clever internal support system. This project is fantastic for beginners because it teaches precise measuring, drilling, and mounting techniques.
Why it’s Genius for Beginners
- Minimal visible hardware: Creates a clean, modern look.
- Teaches shelf installation: A valuable skill for many home improvement tasks.
- Customizable: Easily adjust size and finish to match your decor.
- Quick build time: You can often complete this in an afternoon.
Materials You’ll Need
- Wood board for the shelf (e.g., 1×6 or 1×8 pine, poplar, or even plywood cut to size)
- Wood for the internal bracket (scrap wood or 1×2 lumber)
- Wood screws (1.5-inch and 2.5-inch)
- Wall anchors (if not mounting into studs)
- Sandpaper (medium and fine grit)
- Wood glue (optional, for reinforcement)
- Wood finish (paint, stain, or sealant)
Tools You’ll Need
- Measuring tape
- Pencil
- Saw (hand saw or power saw)
- Drill/Driver with drill bits (including a bit slightly smaller than your screws for pilot holes)
- Level
- Stud finder
- Clamps
- Safety glasses
Step-by-Step Guide
- Measure and Cut Your Shelf: Decide on the length and depth of your shelf. Cut your main shelf board to the desired length.
- Create the Internal Bracket: Cut pieces of scrap wood (1x2s are great) to create a frame that will fit inside your shelf. This frame should be slightly shorter than the shelf’s length. The width of the frame should be such that when the shelf slides over it, there’s a snug fit leaving the ends of the bracket exposed for mounting to the wall. Imagine an “H” shape from the side, with the shelf sliding over the middle bar. The two arms of the “H” will secure to the wall.
- Attach the Bracket to the Wall: Locate wall studs using your stud finder. Mark the desired height for your shelf. Hold the bracket against the wall, ensuring it’s level, and mark where the bracket arms align with studs or pre-drilled holes for anchors. Drill pilot holes and securely attach the bracket to the wall using 2.5-inch screws (or appropriate screws for your wall anchors). Use a level to ensure it’s perfectly straight.
- Prepare the Shelf: If your shelf is made of multiple pieces, assemble your hollow box shape first. Then, slide the prepared bracket into the hollow shelf. You might need to trim the bracket slightly to ensure a snug fit without forcing it.
- Secure the Shelf to the Bracket: Once the shelf is slid over the bracket, drill pilot holes through the top and bottom of the shelf into the bracket. Use 1.5-inch screws to secure the shelf to the bracket. For extra strength, you can add a bead of wood glue to the bracket before sliding the shelf on.
- Finish and Enjoy: Fill any screw holes with wood filler, sand the entire shelf smooth, and apply your chosen finish (paint, stain, or a clear sealant). Once dry, load it up with your favorite books or decor!
Genius Design #2: The Classic Wooden Crate
Wooden crates are incredibly versatile. They can be used for storage, as rustic side tables, or even as decorative planters. Their simple box construction makes them an excellent project for practicing basic joinery and assembly.
Why it’s Genius for Beginners
- Teaches basic box construction: Fundamental for many woodworking projects.
- Forgiving: Small imperfections are often part of the rustic charm.
- Highly adaptable: Can be made in various sizes and configurations.
- Great for practicing measurements and square cuts.
Materials You’ll Need
- Wood boards (e.g., 1×4 or 1×6 pine are common and affordable)
- Wood screws (e.g., 1.25-inch) or finishing nails
- Wood glue
- Sandpaper (medium and fine grit)
- Wood finish (optional)
Tools You’ll Need
- Measuring tape
- Pencil
- Saw (hand saw or power saw)
- Drill/Driver with drill bits (for pilot holes)
- Clamps
- Hammer (if using nails)
- Safety glasses
Step-by-Step Guide
- Design Your Crate: Decide on the dimensions. A common size is about 18 inches long, 12 inches wide, and 10 inches tall.
- Cut Your Boards:
- For the long sides: Cut two boards to your desired length (e.g., 18 inches).
- For the short sides: Cut two boards to your desired width (e.g., 12 inches).
- For the ends: Cut several boards to your desired length (e.g., 18 inches).
- For the bottom: Cut several boards to your desired width (e.g., 12 inches).
- Assemble the Sides: Take one long side board and one short side board. Apply wood glue to the end of the short board. Butt the glued end against the inside face of the long board, ensuring the edges are flush. Clamp them together. Drill pilot holes and secure with screws or nails. Repeat for all four sides to create a rectangular frame.
- Attach the End Boards: Apply wood glue to the edges of the end boards. Position them on the outside of the side frame, flush with the edges. Clamp and screw/nail them in place.
- Add the Bottom Slats: Turn the crate upside down. Apply glue to support pieces of wood (or directly to the bottom edges if desired) and lay them as supports. Place your bottom slats across these supports, leaving small gaps between them for a classic crate look. Secure each slat with glue and fasteners.
- Sand and Finish: Once the glue is dry, sand all surfaces smooth. Start with a coarser grit and move to finer grits. Apply your desired finish, such as stain, paint, or a clear sealant.
Genius Design #3: The Minimalist Picture Frame
Showcasing memories is a joy, and a simple, well-made picture frame is a perfect beginner project. This design focuses on clean lines and accurate cuts, teaching you the importance of precision in woodworking.
Why it’s Genius for Beginners
- Focuses on precise cutting: Essential for perfect joinery.
- Teaches basic assembly: Gluing and clamping corners.
- Uses small amounts of wood: Great for using up scrap pieces.
- Highly customizable: Works with any photo size and decor style.
Materials You’ll Need
- Wood for the frame (e.g., 1×2 or 1×3 pine, poplar, or hardwood scraps)
- Wood glue
- Small finishing nails or brad nails (optional, for added strength)
- Sandpaper (medium and fine grit)
- Wood finish
- Picture frame backing (cardboard or thin plywood)
- Glass or acrylic for the front
- Mounting hardware (sawtooth hanger or D-rings)
Tools You’ll Need
- Measuring tape
- Pencil
- Miter saw or handsaw with miter box (for precise 45-degree cuts)
- Drill/Driver (if using screws or need pilot holes)
- Corner clamps or band clamp for frames
- Hammer (if using nails)
- Safety glasses
Step-by-Step Guide
- Determine Photo Size and Frame Width: Decide the size of the photo you want to frame. Then, decide how wide you want the frame material to be (e.g., 1.5 inches).
- Calculate and Cut Frame Pieces: For a photo of size X by Y, and a frame width of W, you’ll need to cut four pieces. The inside dimension of each piece needs to be X or Y. For example, if your photo is 8×10 inches and your frame material is 1.5 inches wide, you’ll cut two pieces that, when joined at 45 degrees, create an inside length of 8 inches, and two pieces that create an inside length of 10 inches. The outer dimensions will be larger. The easiest way is to measure the photo, add the frame width twice (e.g., 8 + 1.5 + 1.5 = 11 inches), and then cut your first two pieces to that length. Then, cut the other two pieces to be the width of the photo plus the frame width twice (e.g., 10 + 1.5 + 1.5 = 13 inches). Crucially, each cut must be at a perfect 45-degree angle. For this, a miter saw is ideal, but a handsaw with a miter box can also yield good results. Ensure the long point of the miter is on the outside.
- Test Fit the Corners: Lay out your four cut pieces to form the frame. The 45-degree angles should meet perfectly.
- Glue and Assemble: Apply wood glue to the mitered ends of two opposing pieces. Bring them together to form a corner and clamp them securely. Use corner clamps or a band clamp to hold the entire frame together while the glue dries. For extra strength, you can carefully drive a small brad nail through the corner. Repeat for all four corners.
- Add the Backing and Glass: Once the glue is fully cured, remove clamps. Sand the frame smooth, working your way up through finer grits. You’ll need a rabbet (a small recess) on the inside back of the frame to hold the glass and backing. If your wood wasn’t milled with a rabbet, you might need to carefully chisel one out or use a router. Alternatively, you can simply glue and nail/screw thin backing directly to the back of the frame pieces. Cut your glass/acrylic and backing board to fit snugly inside the frame opening. Secure the backing using glazier’s points or small staples.
- Finish and Hang: Apply your chosen finish. Once dry, attach your hanging hardware to the back.
Genius Design #4: The Modern Monitor Stand
Raise your computer monitor to an ergonomic height with this sleek, modern stand. It’s a project that looks sophisticated but uses simple joinery and can be made from a single board, making it budget-friendly and efficient.
Why it’s Genius for Beginners
- Teaches precise cuts and assembly.
- Looks professional and functional.
- Can be made from a single, wide board.
- Satisfyingly practical result.
Materials You’ll Need
- One board of high-quality plywood or solid wood (e.g., a 1×10 or 1×12 board, about 3 feet long)
- Wood screws (1.25-inch recommended for 3/4-inch thick boards)
- Sandpaper (medium and fine grit)
- Wood finish (e.g., Danish oil, polycrylic)
Tools You’ll Need
- Measuring tape
- Pencil
- Circular saw or handsaw (a miter saw is ideal for accurate angle cuts)
- Drill/Driver with drill bits
- Clamps
- Safety glasses
- Optional: Router with a roundover bit for smooth edges
Step-by-Step Guide
- Determine Dimensions: Decide the desired height and width of your monitor stand. A common height is 4-5 inches, and a width of 18-24 inches works for most monitors. The depth could be around 8-10 inches.
- Cut Your Pieces: From your single board, you’ll need to cut:
- Top Panel: Cut one piece to your desired width and depth (e.g., 20″ x 9″).
- Side Panels: Cut two pieces to your desired height (e.g., 4.5″). You’ll likely need to rip these down to your desired depth (e.g., 9″).
- Support Feet (Optional but recommended): Cut two small blocks for the bottom of the side panels, about 1-inch thick.
- Cut Angle for Sides (Optional but stylish): For a more modern look, you can cut a slight angle (around 10-15 degrees) on the bottom of the side panels so they don’t sit flat on your desk, or bevel the top edge where they meet the top panel.
- Prepare the Top Panel: If you have a router, consider rounding over the front edge of the top panel for comfort and aesthetics.
- Assemble the Sides and Feet: If using support feet, attach them to the bottom of the side panels using glue and screws. Ensure they are centered.
- Attach Sides to Top Panel: Position the side panels under the top panel, flush with the ends and back. Clamp them in place. From the top, drill pilot holes down into the side panels (two screws per side should be sufficient).
- Secure with Screws: Drive your wood screws to firmly attach the top panel to the side panels.
- Sand and Finish: Sand the entire stand, paying attention to edges and corners. If you used a router, the rounded edges will already feel smooth. Apply your chosen finish. Danish oil gives a natural, matte look, while polycrylic offers more protection.
Beginner Project Comparison Table
Here’s a quick overview to help you choose your first project!
| Project | Difficulty Level | Key Skills Learned | Approximate Time | Tool Requirements |
|---|---|---|---|---|
| Floating Shelf | Easy | Mounting, drilling into studs, precise cuts | 2-4 hours | Drill, level, stud finder, saw, measuring tape |
| Wooden Crate | Easy | Box construction, basic joinery, consistent cuts | 3-5 hours | Saw, drill, measuring tape, clamps |
| Picture Frame | Easy | Mitered cuts, corner joinery, sanding accuracy | 2-3 hours (plus drying time) | Miter saw/box, clamps, saw, measuring tape |
| Monitor Stand | Easy | Accurate straight cuts, simple assembly planning | 2-3 hours | Saw, drill, measuring tape, clamps |
Frequent Questions for Beginner Woodworkers
Got questions? We’ve got answers!
What is the easiest wood to start with?
Pine is a fantastic choice for beginners. It’s readily available, relatively inexpensive, soft enough to work with hand tools if needed, and easy to cut, sand, and finish. Poplar is also a good option, being slightly harder but still easy to manage.
Do I need a lot of expensive tools to start?
No! You can start with basic hand tools like a handsaw, measuring tape, pencil, hammer, screwdrivers, and a few clamps. Adding a cordless drill/driver will significantly speed up your work and is a worthwhile investment. You can gradually add more specialized tools as you tackle more complex projects.
How important is measuring and marking?
It’s extremely important! Accuracy in measuring and marking your cuts is the foundation of successful woodworking. “Measure twice, cut once” is a classic saying for a reason. Precise measurements lead to pieces that fit together well and projects that look professional.
What’s the difference between screws and nails?
Nails are typically faster to drive and are best for projects where appearance isn’t paramount or for temporary holding. Screws offer a much stronger, more reliable hold, especially in structural applications. They require drilling pilot holes to prevent wood splitting and are generally considered better for projects designed to last.
How do I avoid splitting wood when screwing?
Always drill pilot holes! A pilot hole is a small hole drilled into the wood that is slightly smaller than the diameter of your screw. This creates a channel for the screw threads, making it easier for the screw to drive in and significantly reducing the risk of the wood splitting, especially near edges or in hardwoods.
What’s the best way to get a smooth finish?
Sanding is key! Always start with a medium-grit sandpaper (like 80 or 120) to remove major imperfections or saw marks, then move to finer grits (like 180 or 220) to achieve a smooth surface. Sand with the grain of the wood. Wipe away all dust before applying your finish. For an even smoother finish, you can apply a pre-stain conditioner (for softwoods like pine) and sand lightly between coats of finish.
Can I use these projects for practical home storage?
Absolutely! The wooden crate is designed for storage versatility, and the floating shelf transforms blank wall space into functional display or storage. Even the monitor stand adds practical, ergonomic storage to your desk.
Conclusion
See? Woodworking doesn’t have to be complicated! By starting with these easy, genius designs, you’re not just building objects; you’re building skills, confidence, and a fantastic new hobby. We’ve covered everything from essential tools to step-by-step guides for projects like floating shelves, wooden crates, picture frames, and monitor stands. Each one is crafted to be beginner-friendly, rewarding, and capable of enhancing your home.
Remember, the most important tools you have are patience and a willingness to learn. Don’t be afraid to make mistakes – they are part of the process! Keep practicing, keep experimenting, and most importantly, keep building. You’ve got this, and the satisfaction of creating something with your own hands is truly unmatched. Happy woodworking!