What is a dual-mode nailer? A dual-mode nailer is a versatile tool that can switch between sequential (single shot) and contact (bump fire) firing modes, offering precision for detailed work and speed for rapid fastening. This guide breaks down its features, benefits, and uses for any DIYer.
Hey there, DIY enthusiasts! Jack Shaffer here from Nailerguy, ready to demystify a tool that can seriously level up your woodworking game: the dual-mode nailer. Ever felt like you needed one nailer for delicate trim work and another for quickly framing up a project? It’s a common frustration, but the dual-mode nailer is designed to be your one-stop solution. Without needing two separate tools, you can tackle a surprising range of jobs with just one powerful device. In this guide, we’ll break down exactly what a dual-mode nailer is, why it’s so useful, and how you can start using one with confidence. Let’s get building!
Table of Contents
What Exactly is a Dual-Mode Nailer?
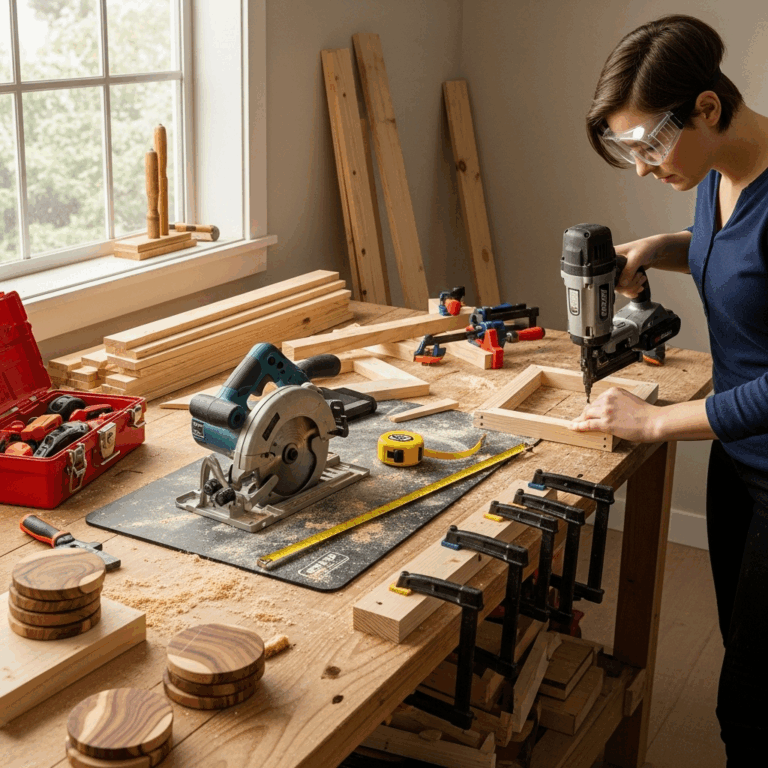
At its core, a dual-mode nailer is a power tool designed to drive nails into wood or other materials. What makes it special is its ability to operate in two distinct firing modes: sequential mode and contact mode (also known as “bump fire”). This dual functionality makes it incredibly adaptable for various tasks, from intricate finish work to quick framing jobs.
Understanding the Two Firing Modes
Let’s break down these two modes, as they are the heart of what makes a dual-mode nailer so versatile:
- Sequential Mode (Single Shot): In this mode, you can only drive one nail at a time. To fire another nail, you must first lift the safety contact tip (the nose of the nailer) off the workpiece and then pull the trigger. This mode is crucial for precision. It allows you to carefully place each nail exactly where you want it, making it ideal for detailed trim, crown molding, or any situation where accuracy is paramount. Think of it as a single, deliberate action for each nail.
- Contact Mode (Bump Fire): This mode allows for rapid nail firing. You depress the safety contact tip against the surface, and then repeatedly pull and release the trigger while “bumping” the nose against the material. Each bump drives a nail. This “fire-while-you-pump” action is incredibly fast and perfect for jobs where speed is more important than pinpoint accuracy, like framing walls, sheathing, or building decks. It’s like laying down a line of nails quickly.
How the Mode Switch Works
Most dual-mode nailers have a simple switch, often located near the trigger or on the side of the tool, that allows you to toggle between sequential and contact modes. It’s usually clearly labeled, making it easy to change modes as needed. Understanding which mode to use for a specific task is key!
Why Choose a Dual-Mode Nailer? The Big Benefits
The convenience and versatility of a dual-mode nailer offer several significant advantages for DIYers and woodworkers alike. It’s more than just having two features; it’s about enhancing your workflow and project quality. Here are some of the key benefits:
- Versatility: As we’ve discussed, the ability to switch between precision and speed means one tool can handle a much wider range of projects. You won’t need to buy separate nailers for trim and framing, saving you money and storage space.
- Efficiency: For tasks like framing or sheathing, the contact mode allows you to drive nails much faster than you could with a single-shot nailer or, heaven forbid, a hammer. This significantly speeds up your project timelines.
- Precision & Control: When you flip to sequential mode, you gain complete control over where each nail is placed. This is invaluable for fine woodworking, installing delicate trim, or when working with expensive materials where one misplaced nail could be a disaster.
- Safety (when used correctly): While contact mode can be very fast, sequential mode adds a layer of safety by requiring a deliberate trigger pull for each nail, reducing the chance of accidental firing. Always practice safe operation, no matter the mode. We’ll cover safety tips later.
- Cost-Effectiveness: Purchasing one dual-mode nailer is generally more economical than buying two separate, single-mode nailers that perform the same range of tasks.
- Space Saving: For those with limited garage or workshop space, having one tool that does the job of two is a huge advantage.
These benefits collectively make the dual-mode nailer a smart investment for anyone who tackles a variety of DIY projects.
Common Applications for Dual-Mode Nailers
So, where exactly can you use this nifty tool? The beauty of its dual functionality means it can be your go-to for a surprising array of projects around the house and workshop.
Projects Benefiting from Sequential Mode (Precision)
When you need to be absolutely sure where every nail goes, sequential mode is your best friend. This is perfect for:
- Installing Trim and Molding: Think baseboards, crown molding, chair rails, and door/window casings. You want each nail to be perfectly placed, often near the edge of the wood, without damaging the surface.
- Cabinetry and Furniture Building: Precision is key when assembling cabinets or furniture. Sequential mode ensures nails are driven exactly where planned for strong, clean joins.
- Picture Frames and Decorative Woodworking: For any detailed woodworking or hobby projects where a clean finish and exact nail placement are critical.
- Repair Work: Fixing a loose piece of trim or a wobbly shelf requires control to blend the repair seamlessly.
Projects Benefiting from Contact Mode (Speed)
When speed is the priority, contact mode shines. This is ideal for:
- Framing Walls: Quickly attaching studs, joists, and rafters. The ability to “bump fire” significantly speeds up the construction process.
- Sheathing: Fastening plywood or OSB (Oriented Strand Board) to wall studs or roof rafters.
- Deck Building: Attaching deck boards, joist hangers, and other structural components.
- Fencing and Siding Installation: Rapidly attaching boards to fence posts or siding panels to your house.
- Building Crates or Pallets: For projects where quick assembly is more important than a show-quality finish.
As you can see, the dual-mode nailer truly is a jack-of-all-trades in the world of fastening.
Types of Dual-Mode Nailers
Dual-mode nailers come in a few flavors, primarily differentiated by their power source. The type you choose will depend on your budget, power availability, and the typical nature of your projects.
1. Pneumatic Dual-Mode Nailers
These are the most traditional type. They run off compressed air supplied by an air compressor, which needs to be purchased separately if you don’t already own one. They are often lighter and more powerful than their cordless counterparts.
Pros:
- Generally more powerful and faster firing.
- Lighter tool weight compared to battery-powered models.
- Lower initial cost for the nailer itself (but factor in the compressor).
- Less downtime waiting for batteries to charge.
Cons:
- Requires an air compressor and air hose, which can be cumbersome.
- Need access to an electrical outlet for the compressor.
- Compressor noise can be significant.
- Hose can get in the way, especially in tight spaces.
2. Cordless Dual-Mode Nailers (Battery-Powered)
These nailers have the motor and power source (battery) built directly into the tool. Many are “oil-free” and don’t require an air compressor, offering the ultimate in portability and ease of use.
Pros:
- No air compressor or hose needed – maximum freedom of movement.
- Extremely portable and convenient for job sites or remote locations.
- Quick setup and takedown.
- Quieter operation than pneumatic setups.
Cons:
- Can be heavier due to the battery pack.
- Often more expensive than pneumatic nailers.
- Firing speed might be slightly slower than high-end pneumatic models.
- Requires charged batteries; you might need spares for long workdays.
- Battery life is a factor to consider.
3. Electric Corded Dual-Mode Nailers
These nailers are powered directly from a wall outlet via a power cord. They don’t require batteries or compressors but are tethered to an electrical source.
Pros:
- No fuel or batteries to worry about.
- Unlimited runtime as long as power is available.
- Often more affordable than cordless models.
Cons:
- Tethered by a power cord, limiting mobility and posing a tripping hazard.
- May have less power than pneumatic or high-end cordless models.
- Not ideal for large job sites or areas far from outlets.
Choosing the Right Nailer for You
When deciding which type of dual-mode nailer is best, consider these factors:
- Your Projects: Are you mostly doing interior trim, or are you building decks and fences?
- Power Source Availability: Do you have an air compressor? Do you have easy access to power outlets?
- Portability Needs: Will you be working far from an outlet or needing to move around a large job site quickly?
- Budget: Consider the initial cost of the tool, plus any necessary accessories (compressor, hose, batteries).
For ultimate freedom and convenience on a variety of projects, a cordless dual-mode nailer is often a top choice for DIYers. If you already have a robust air compressor, a pneumatic version might be more cost-effective and powerful.
How to Safely Operate a Dual-Mode Nailer
Safety is paramount when working with any power tool, especially one that drives sharp fasteners at high speed. Dual-mode nailers are designed with safety features, but it’s up to you to use them correctly.
Essential Safety Precautions
Always remember these rules:
- Read Your Manual: Seriously, take a few minutes to read the instruction manual that came with your specific nailer. Every tool is slightly different. You can often find PDFs online at the manufacturer’s website.
- Wear Safety Glasses: This is non-negotiable. Always wear ANSI Z87.1-compliant safety glasses or a face shield to protect your eyes from flying debris or ricocheting nails.
- Keep Fingers Off the Trigger: When moving the nailer or connecting it to power (air or battery), keep your finger off the trigger and disengage the tool’s firing mechanism if possible.
- Never Point the Nailer at Anyone: Treat it like a firearm. Never aim it at yourself or others, even if no nail is loaded.
- Depress the Safety Contact Tip Before Firing: Both modes require the contact tip to be firmly pressed against the workpiece before the nail can be driven. This prevents accidental firing into the air.
- Understand Your Mode Switch: Double-check that the nailer is in the correct mode for the task. Accidentally using contact mode for delicate trim could lead to serious errors.
- Use the Right Nails: Ensure you are using the correct type, size, and gauge of nails specified for your nailer. Using incorrect fasteners can lead to jams and damage the tool or workpiece.
- Disconnect Power When Not In Use: If it’s pneumatic, disconnect the air hose. If it’s cordless, remove the battery. If it’s corded, unplug it. Do this before performing maintenance, clearing jams, or storing the tool.
- Be Aware of Your Surroundings: Ensure no one is behind your work surface, as a nail can sometimes pass through.
- Maintain Your Tool: Keep your nailer clean and well-maintained. Refer to your manual for lubrication and cleaning instructions. A well-maintained tool is a safer tool.
Switching Modes Safely
When switching between modes:
- Ensure the nailer is not powered (air disconnected or battery removed).
- Locate the mode selector switch.
- Carefully move the switch to the desired mode (often indicated by a symbol or text like “S” for sequential/single shot and “C” or “B” for contact/bump fire).
- Crucially: Before you start firing again, test the mode on a scrap piece of wood to confirm it’s operating as expected. This small test can prevent major mistakes on your actual project.
Following these safety guidelines will help ensure your projects are completed successfully and without injury.
Tips for Clearing Jams
Nail jams are an occasional annoyance with any nailer. Fortunately, dual-mode nailers are usually designed for relatively easy jam clearing. Always remember safety first when clearing a jam!
Step-by-Step Jam Clearing
- Disconnect Power: This is the most important step! Disconnect the air hose, remove the battery, or unplug the tool.
- Remove the Magazine: Most nailers have a magazine that holds the nails. You may need to slide it open or remove it entirely, depending on your model.
- Locate the Jam: Look into the nail channel or at the nose of the tool to see where the jammed nail is.
- Use Pliers or Tweezers: For most jams, you can carefully use a pair of needle-nose pliers or tweezers to grip the jammed nail and gently pull it out. Wiggle it slightly if needed.
- For Stubborn Jams: Some nailers have an access plate or cover near the nose that can be removed to get better access to a stubborn jam. Consult your tool’s manual for specific instructions on how to do this safely.
- Check for Damage: Once the nail is out, inspect the nail channel and driving mechanism for any damage.
- Reassemble and Test: Reassemble any parts you removed, reconnect the power, and then test the nailer on a scrap piece of wood to ensure it’s firing correctly before continuing your project.
A common cause of jams is using the wrong size or type of nails, or trying to fire nails too quickly without proper contact with the surface. Regularly cleaning and lubricating your nailer (as per the manufacturer’s instructions) can also help prevent jams.
Comparing Dual-Mode Nailers: Pneumatic vs. Cordless
To help you visualize the choice between pneumatic and cordless, let’s look at a comparison table. This can highlight the key differences in practical terms.
| Feature | Pneumatic Dual-Mode Nailer | Cordless Dual-Mode Nailer |
|---|---|---|
| Power Source | Air Compressor & Hose | Rechargeable Battery Pack |
| Portability | Limited by air hose length and compressor location | Highly portable; no cords or hoses |
| Initial Cost (Tool Only) | Often Lower | Often Higher |
| Running Cost | Electricity for compressor | Electricity for battery charging; potential battery replacement |
| Power/Speed | Generally higher power and faster firing rates | Excellent power, but might be slightly slower than top-tier pneumatic |
| Weight | Tool itself is lighter; but need to factor in hose | Tool can be heavier due to battery |
| Noise Level | Compressor can be very loud | Tool is quieter than compressor; battery charging is silent |
| Setup Time | Connect compressor, hose, tool | Insert battery, ready to go |
| Ideal For | Workshops, fixed workbenches, contractors with existing compressor | On-site work, remote locations, DIYers valuing convenience and freedom |
This table should give you a clearer picture of the trade-offs. Think about your typical work environment and project needs.
Frequently Asked Questions (FAQ)
Here are some common questions beginners have about dual-mode nailers:
Q1: How do I know which mode to use?
A1: Use sequential (single shot) mode for precision tasks like trim, molding, or detailed joinery where you need to place each nail exactly. Use contact (bump fire) mode for speed on tasks like framing, sheathing, or deck building where rapid fastening is the priority.