Quick Summary: To drive finish nails flush, use a finish nailer at the correct air pressure, position the nailer perpendicular to the surface, and adjust the depth setting. A slight angle or an extra tap can help sink stubborn nails just below the surface for a clean finish.
Table of Contents
How To Drive Finish Nails Flush: An Essential Guide
Hey there, DIYers! Jack Shaffer, Nailerguy, here. You’re working on a project, everything’s going smoothly, and then… you hit a snag. You’re trying to drive in those finish nails, and they’re just not sitting right. Some stick out too far, looking awkward and ruining the clean look you’re going for. Others are sunk too deep, creating unnecessary holes. It’s a common frustration, especially when you’re starting out. But don’t worry! Getting your finish nails perfectly flush is a skill you can definitely master. It all comes down to understanding your tools and practicing a few simple techniques. In this guide, I’ll walk you through everything you need to know to achieve that smooth, professional finish every time. Let’s get those nails sitting just right!
Why Are Finish Nails Important?
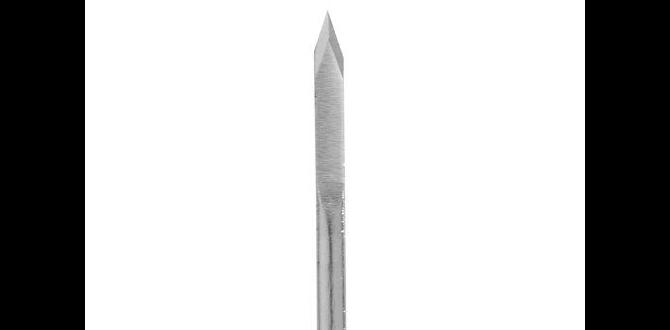
Finish nails are the unsung heroes of woodworking and DIY projects. They’re designed to be slender with a small head, which makes them less visible than standard framing nails. This is crucial for projects where appearance matters, like installing trim, baseboards, crown molding, or even building furniture. When driven correctly, the small head of a finish nail is either flush with the wood surface or slightly countersunk, allowing you to easily fill the tiny hole with wood filler or putty. This creates a seamless look that doesn’t detract from the beauty of your project. If they’re not driven flush, these small heads become prominent, defeating their purpose and often requiring more extensive filling and sanding to hide.
Understanding Your Tools for Flush Nails
Before we dive into how to drive nails flush, let’s quickly talk about the tools primarily involved. The star of the show is usually a finish nailer. These are pneumatic or cordless power tools that drive thin nails (finish nails) into wood. They come in various gauges, with 15-gauge and 16-gauge being the most common for trim work.
Types of Finish Nailers
While the technique is similar across the board, knowing your nailer type can help:
- Pneumatic Finish Nailers: These require an air compressor and hose. They are generally lighter and more powerful, offering consistent performance. They are a staple in many professional workshops.
- Cordless Finish Nailers: These use batteries or fuel cells. They offer great portability and convenience, eliminating the need for a compressor and hoses, which is fantastic for job sites or moving around the house. Battery-powered models are common, while some use a small fuel canister in addition to a battery.
- Bbrad Nailers: While often confused, brad nailers (typically 18-gauge) drive even thinner nails with very small heads. They’re great for delicate trim or where minimal hole size is paramount. The principles of driving them flush are the same, but they require even more care due to their delicate nature.
Regardless of the type, your nailer has adjustable settings that are key to driving nails flush. The most important is the depth adjustment.
The Key to Driving Finish Nails Flush: Depth Adjustment & Air Pressure
This is where the magic happens. Most modern finish nailers have a dial or lever that controls how deep the nail penetrates. If your nailer is sinking nails too deep, it’s likely set too aggressive. If they’re left proud, it might not be set aggressive enough, or your air pressure might be too low.
Finding the Right Air Pressure (for Pneumatic Nailers)
For pneumatic nailers, air pressure is critical. Too little pressure, and the nail won’t drive deep enough. Too much, and you risk damaging the wood surface or driving the nail too deep. A good starting point for most finish nailing is between 80-100 PSI (pounds per square inch). It’s always best to consult your nailer’s manual for manufacturer recommendations. You can adjust this at the regulator on your air compressor.
Mastering the Depth Adjustment Dial
This is your primary tool for controlling nail depth. Look for a dial, typically near the nose of the nailer, or sometimes a lever. Turning it one way will drive nails deeper, and turning it the other will make them sit shallower. The process of finding the perfect setting involves a little trial and error, but it’s worth it.
Here’s the typical process:
- Start with a Test Piece: Grab a scrap piece of the same wood you’ll be working with.
- Set Your Depth: Begin with the depth adjustment at a medium setting, or what feels intuitively right to start. Ensure your air pressure is at the recommended level.
- Drive a Nail: Place the nailer flush against the wood and pull the trigger.
- Inspect the Nail:
- Too proud (sticking out): Turn the depth adjustment to sink the nail deeper.
- Too deep (creating a large hole or breaking through): Turn the depth adjustment to make it sit shallower.
- Repeat: Drive another nail and inspect. Continue adjusting and testing until you consistently achieve a nail that is just flush or slightly below the surface.
Remember to drive your test nails into areas that won’t be visible on your final project. A good place is often near an edge or on the back of a piece.
Step-by-Step Guide: How to Drive Finish Nails Flush
Now that you understand the tools and settings, let’s get to the actual process of driving those nails like a pro.
Step 1: Prepare Your Workspace and Tools
Before you start nailing, a little preparation goes a long way. Ensure you have all your safety gear, your nailer is set up correctly, and your project piece is ready.
- Safety First! Always wear safety glasses. A nailer can accidentally discharge, and flying debris is no joke. Hearing protection is also a good idea, especially if you’re using a compressor.
- Gather Your Nails: Make sure you have the correct gauge and length of finish nails for your project and nailer. Check your nailer’s manual for the acceptable nail range.
- Connect Your Nailer (Pneumatic): If using a pneumatic nailer, connect your air hose securely. Ensure the compressor is on and set to the correct PSI.
- Check Battery (Cordless): For cordless nailers, ensure the battery is charged and properly seated.
- Inspect the Nailer: Give the nose of your nailer a quick look. Ensure it’s clean and free of debris that could impede its operation.
Step 2: Position the Nailer Correctly
This is crucial for a clean drive and to prevent marring the wood. The nose of the nailer (where the nail exits) should be held flat and perpendicular to the surface you’re nailing into. Think of it as holding a pencil straight up and down to write. Holding it at an angle can cause the nail to go in crookedly or to drive unevenly, making it difficult to get flush.
When you place the nailer, make sure the safety contact tip (the part that depresses just before the nail fires) is firmly against the wood. This safety feature prevents accidental firings and ensures the nailer is in the firing position.
Tip: For very delicate wood or when working close to the edge of a piece, some woodworkers gently push the nailer into the wood. This ensures good contact without excessive force.
Step 3: Drive the Nail
With the nailer positioned correctly and the safety tip engaged:
- Align your nail: Visually place where you want the nail to go.
- Press firmly: Ensure the nailer is snug against the surface.
- Pull the Trigger: A smooth, steady pull of the trigger will drive the nail.
You should hear a quick puff of air (for pneumatic) and feel a firm strike as the nail is driven.
Step 4: Inspect and Adjust
Immediately after driving the nail, take a look. Is it perfect? Great! If not, it’s time to adjust.
- Nail is Proud (sticks out): Your depth setting might be too shallow, or you might need a slightly higher PSI. If you’ve already optimized your depth and pressure, you can sometimes gently tap down a proud nail with a hammer and a nail set. This works best if the nail is only slightly proud.
- Nail is Sunk Too Deep: Your depth setting is too aggressive. Adjust the dial to make it sit shallower. If a nail is sunk too deep, you’ll need to fill the hole. For very deep nails, you might consider using a plug cutter to create a small wooden plug to glue in, which offers a cleaner repair than just filler.
- Nail is Crooked: This is usually a result of the nailer not being held perpendicular to the surface. Try to be more mindful of your positioning on the next nail.
The “Just Under” Sweet Spot: For trim work and applications where you’ll be filling, the ideal is often slightly countersunk – just enough for the head to be below the surface but not so deep that it blows out the back of thin material or creates a massive hole.
Step 5: Dealing with Tricky Woods and Stubborn Nails
Sometimes, even with the right settings, certain hardwoods or dense areas can resist a nail, leaving it proud. Here are a few tricks:
- Slight Angle: If a nail is consistently proud despite your best efforts, try holding the nailer at a very slight angle towards the nail head. This can sometimes give it the extra leverage needed to drive it flush. Be careful not to overdo this, as it can still cause the nail to bend or damage the wood.
- Hammer Tap: As mentioned, if a nail is just a hair proud, a quick, light tap with a hammer on a nail set (a tool designed for this purpose, to avoid damaging the wood with the hammer face) can sink it the rest of the way.
- Increase PSI Slightly: For pneumatic nailers, a small increase in PSI (2-5 PSI) might help. Don’t exceed the maximum recommended pressure for your nailer or air hose.
- Check Nail Quality: Occasionally, a batch of nails might be slightly too thick or soft, making them difficult to drive.
- Pre-drilling (Rarely Needed for Finish Nails): For extremely dense hardwoods and very thin trim, you might consider pre-drilling a pilot hole. However, this is rarely necessary for standard finish nailing and can be time-consuming. It’s usually a last resort.
Common Mistakes and How to Avoid Them
We all make mistakes, especially when learning. Here are some common pitfalls when driving finish nails flush and how to sidestep them.
Mistake 1: Holding the Nailer at an Angle
- Why it’s bad: Leads to crooked nails, poor seating depth, and can damage the wood.
- How to avoid: Consciously focus on keeping the nose of the nailer perpendicular to the wood surface. Practice holding it straight before you trigger.
Mistake 2: Incorrect Air Pressure (Pneumatic)
- Why it’s bad: Too low pressure means nails won’t seat properly. Too high can damage wood or drive nails too deep.
- How to avoid: Always start with the pressure recommended in your nailer’s manual. Adjust and test on scrap wood before starting your project.
Mistake 3: Not Adjusting Depth Setting
- Why it’s bad: Leads to consistently proud or too-deep nails, requiring extra work to fix.
- How to avoid: Make the depth adjustment your first stop after setting air pressure or when starting with a new material. Test, test, test!
Mistake 4: Firing Without Proper Contact
- Why it’s bad: The nailer can fire unexpectedly, or the nail might not drive correctly if the safety contact tip isn’t engaged with the wood.
- How to avoid: Always ensure firm contact between the safety tip and the wood surface before pulling the trigger.
Mistake 5: Hammering Proud Nails Too Hard
- Why it’s bad: You can bend the nail, create a larger dent or chip the wood around the nail head.
- How to avoid: Use a nail set and a light, controlled hammer tap. If the nail doesn’t budge easily, it might indicate a deeper issue with your nailer setup or the wood itself.
Table: Nailer Depth Setting Adjustments
This table provides a general guideline for adjusting your nailer’s depth setting. Always test on scrap material first!
| Problem | Suggested Adjustment | Potential Cause/Other Factors |
|---|---|---|
| Nail head is sticking out (proud) | Turn depth adjustment to sink deeper (often marked with ‘+’ or a more aggressive setting). | Low air pressure (pneumatic), depth set too shallow, weak nail. |
| Nail head is sunk too deep (creating large hole, damaging wood) | Turn depth adjustment to sit shallower (often marked with ‘-‘ or a less aggressive setting). | Depth set too aggressive, high air pressure (pneumatic) for the material thickness. |
| Nail is bent or driven at an angle | Ensure nailer is held perpendicular to the surface. Check nail collation/straightness. | Angle of nailer, bent nail in the magazine, obstruction on nailer nose. |
| Nail doesn’t fire | Check air pressure/battery, ensure safety contact tip is depressed, check for nail jams. | No power, safety engaged, jammed magazine. |
Filling Nail Holes for a Seamless Finish
Once your nails are driven flush or perfectly countersunk, the next step is to make them disappear. This is where wood filler or putty comes in. For best results:
- Choose the Right Filler: Use a wood filler or putty that matches your wood’s finish or is stainable/paintable. For stained wood, a stainable putty is essential. For painted wood, any good quality filler will work.
- Apply Sparingly: Use a putty knife or your finger to apply a small amount of filler into the nail hole. Overfilling can lead to mounds that are harder to sand smooth.
- Slight Overfill is Okay: It’s better to slightly overfill than underfill, as the filler can shrink slightly as it dries. You want the filler to be just proud of the surface so you can sand it flush.
- Let it Dry: Allow the filler to dry completely according to the manufacturer’s instructions. Rushing this step can lead to the filler pulling away or creating dents.
- Sand Smooth: Once dry, gently sand the area smooth with fine-grit sandpaper (180-220 grit is common). You can use a sanding block for larger areas or fine steel wool for very delicate work. Make sure you sand only the excess filler, not the surrounding wood.
- Wipe Clean: Wipe away any sanding dust with a tack cloth or a slightly damp rag.
For more information on achieving a perfect finish, check out resources like Woodworkers Journal’s sanding tips; proper sanding after filling is key!
What About Using a Hammer and Nail Set?
While nailers are incredibly efficient, sometimes you might be in a situation where you need to drive a finish nail by hand. This is common for very small jobs, delicate detail work, or if your nailer isn’t cooperating. Here’s how to do it:
- Start the Nail: Hold the finish nail in place where you want it. Gently tap the head with a hammer to start it into the wood. Once it’s set securely, remove your fingers.
- Drive Most of the Way: Continue hammering the nail in, keeping the hammer square to the nail head. Drive it until the head is very close to the surface, but still slightly proud.
- Use the Nail Set: Place the tip of the nail set on the head of the nail.
- Tap the Nail Set: Give the end of the nail set a controlled