Quick Summary:
Depth control on nailers allows you to adjust how deep the nail penetrates the material. This is essential for achieving flush finishes, preventing damage to delicate surfaces, and ensuring nails are set perfectly for your project, from framing to intricate trim work.
Hey there, fellow DIYers and aspiring woodworkers! Jack Shaffer here, your guide from Nailerguy. Ever grabbed a nailer for a project and ended up with nails sticking out or, even worse, sunk too deep, leaving a mangled mess? It’s a common frustration, especially when you’re starting out. But what if I told you there’s a simple little feature on most modern nailers that can solve all these problems and give you professional-looking results every time? That’s right, we’re talking about depth control. Stick around, and I’ll break down exactly what it is, why it’s an absolute game-changer, and how to use it like a pro, no matter what you’re building!
Table of Contents
The Magic of Depth Control: What It Is and Why It Matters
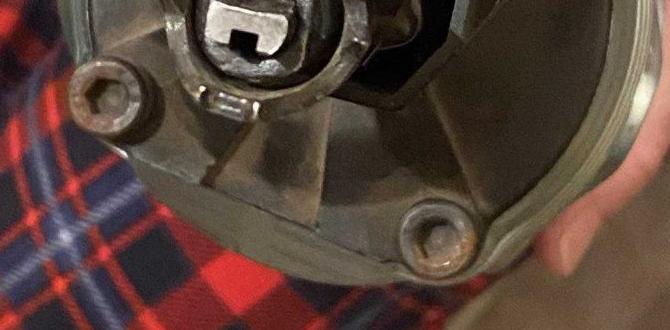
So, what exactly is this magical depth control? Think of it as the “set it and forget it” feature for your nailer’s driving power. It’s a dial or a lever, usually located near the nose of the nailer, that lets you fine-tune how far each nail is driven into the wood. Without it, your nailer drives nails with a fixed force. This might be fine for some basic tasks, but for most jobs? Not so much.
Why is this so important? Imagine you’re working with soft pine for some decorative trim. If your nailer drives too deep, it’ll crush the wood, leaving an ugly dent around the nail head. On the flip side, if you’re building something sturdy like a deck or framing a wall with dense hardwood, you need nails driven deep enough to hold securely. Too shallow, and they might pop out under stress. Depth control gives you that precise command over every single nail.
It’s not just about nail depth; it’s about the overall finish and integrity of your project. Getting the nail head flush with the surface is often the goal for a clean look, especially when painting or staining. For applications where you want the nail head slightly countersunk (below the surface) to be filled later, depth control is your best friend. And for those times when you’re working with different materials or thicknesses, it’s the key to consistent results.
Understanding How Depth Control Works
The exact mechanism can vary slightly between manufacturers and types of nailers (like pneumatic, cordless, or electric), but the principle is the same: regulating the force and travel of the driver blade.
Most depth control adjustments work by changing the distance the air (in pneumatic and some cordless models) travels or the power delivered to the drive mechanism. Here’s a simplified look:
- Pneumatic Nailers: These use compressed air. The depth control mechanism typically restricts the amount of air that reaches the piston driving the nail. Less air = less force = shallower driving. More air = more force = deeper driving.
- Cordless Electric/Battery Nailers: These often use a motor and flywheel system or a spring-loaded mechanism. The depth control adjusts how much spring tension is applied or how much power the motor delivers for a single shot.
- Electric (Corded) Nailers: Similar to cordless models, they adjust the electrical input or mechanical force for each nail.
The adjustment itself is usually straightforward. You’ll find a wheel, a knob, or a sliding lever on the nailer. Turning the knob or sliding the lever in one direction will typically increase the driving depth, while turning it the other way will decrease it. Often, there are visual indicators, like ‘+’ and ‘-‘ symbols or a numbered scale, to guide you.
A crucial point often overlooked by beginners is the relationship between depth control and air pressure (for pneumatic tools). While depth control fine-tunes the nailer’s output, air pressure sets the baseline power. You’ll usually need to set your compressor’s regulator to the manufacturer’s recommended PSI for your specific nailer. Then, you use the depth control for precise adjustments.
For a great resource on tool-specific settings, always refer to your nailer’s owner’s manual. It’s the ultimate guide for your specific tool!
When to Use Different Depth Settings
Knowing how to adjust depth control is one thing; knowing when to use specific settings is another. This is where experience comes in, but let’s break down some common scenarios to get you started. The goal here is always to achieve the desired outcome for your specific task.
1. Flush Driving (The Default Goal)
This is what most DIYers aim for most of the time. You want the head of the nail to be perfectly level with the surface of the wood.
- When to use it: Attaching trim, mounting cabinet hardware, building furniture where the surface needs to be smooth, general woodworking.
- How to achieve it: Start with a medium setting on your depth control. Drive a test nail into a scrap piece of the same material you’ll be working with. Check the result. If the nail head is slightly proud (sticking out), increase the depth. If it’s sunk too deep (leaving a noticeable crater), decrease the depth. Repeat until you get it just right.
2. Countersunk Driving (Nails Below Surface)
In some applications, you’ll want the nail head to be slightly below the surface of the material. This is common when you plan to fill the nail holes with putty, wood filler, or caulk before painting or finishing.
- When to use it: Preparing surfaces for painting, finishing intricate trim, covering nail heads on visible surfaces.
- How to achieve it: After achieving a flush setting, make a small adjustment to increase the depth further. Again, test on scrap material. The amount you countersink depends on the filler you’ll use. Usually, 1/16th to 1/8th of an inch is sufficient.
3. Slightly Proud Driving (Nails Sticking Out)
This is less common for finished projects but has its place. It might be used temporarily during assembly, or in certain construction scenarios where the nail head needs to be accessible for removal or further fastening.
- When to use it: Temporary assembly where nails might need to be removed, certain types of sub-flooring or sheathing (though often flush is preferred here too), fastening materials that might be damaged by full penetration.
- How to achieve it: Set your depth control to a shallower setting than for flush driving. This is often achieved on the lower end of the adjustment scale.
4. Working with Different Materials
The hardness and density of the material you’re nailing into significantly affect how deep a nail will penetrate. Depth control is essential for consistency across various materials.
- Softwoods (e.g., pine, cedar): Nails sink in easily. You’ll generally need shallower settings or less driving force compared to hardwoods.
- Hardwoods (e.g., oak, maple, hickory): Nails require more force to penetrate. You might need higher air pressure (for pneumatic) and a deeper setting on the depth control.
- Engineered Woods (e.g., MDF, particle board): These can be brittle. Too much depth can cause chipping or blow-out. You’ll often need very precise, shallower settings.
- Sheet Goods (e.g., plywood, OSB): Consider the thickness. For thin veneers or underlayment, you don’t want the nail to go through to the sublayer or cause damage. For thicker structural panels, you need enough depth for holding power.
Pro Tip: Always test your depth setting on a scrap piece of the exact same material and thickness you’ll be working with. It’s the golden rule of nailer calibration!
Step-by-Step Guide: Setting Your Nailer’s Depth Control
Ready to get that perfect nail depth? Follow these simple steps:
Step 1: Understand Your Nailer’s Adjustment Mechanism
Locate the depth control on your nailer. Is it a rotating wheel, a lever, or a sliding button? Familiarize yourself with its movement and any indicators (like +, -, or numbers).
Step 2: Set Your Baseline (Air Pressure for Pneumatic Tools)
If you’re using a pneumatic nailer, ensure your air compressor is set to the recommended PSI for your nailer. Check your nailer’s manual for this. Typically, it’s between 70-120 PSI. This is your starting point.
Step 3: Choose Your Test Material
Grab a piece of scrap wood that is the same type and thickness as your project material. This is critical for accurate calibration.
Step 4: Set an Initial Depth Control Setting
For most projects where you want a flush finish, start with a medium setting on your depth control dial. If you’re unsure, consult your nailer’s manual for a recommended starting point.
Step 5: Drive a Test Nail
Hold the nailer firmly against the scrap wood, ensuring the contact tip is flat on the surface. Squeeze the trigger and drive one nail.
Step 6: Inspect the Nail Depth
Examine the nailhead. Is it:
- Flush? Perfect!
- Sticking out (proud)? The nail isn’t driven deep enough.
- Sunk too deep (creating a crater)? The nail is driven too deep.
Step 7: Adjust and Repeat
Based on your inspection:
- If proud, adjust the depth control to drive deeper (usually by turning the knob or moving the lever in a specific direction – check your manual if uncertain).
- If sunk too deep, adjust the depth control to drive shallower.
Drive another test nail and inspect again. Continue this process of driving, inspecting, and adjusting until the nail head is precisely where you want it – flush, slightly countersunk, or as required.
Step 8: Fine-Tune for Different Materials or Angles
If your project involves different types of wood or you’re working at different angles (e.g., nailing into the edge versus the face of a board), you might need to make slight adjustments. For example, nailing into end grain often requires less depth than nailing into face grain.
Step 9: Lock In Your Setting
Once you’ve achieved the perfect depth, remember that setting! For most adjustments, the dial or lever stays in place as you work. However, some nailers have a locking mechanism; ensure it’s secured if applicable.
Nailer Depth Control: A Comparative Look
While the core function of depth control is the same, the implementation and ease of use can vary between different nailer types. Understanding these differences can help you choose the right tool for your needs.
| Nailer Type | Depth Control Mechanism | Typical Ease of Adjustment | Common Applications Where Depth Control is Crucial |
|---|---|---|---|
| Pneumatic Framing Nailer | Usually a rotating wheel or a dial near the magazine. Can sometimes be less intuitive. | Moderate. May require a few test shots. Air pressure is the primary driver. | Driving large nails into dense lumber for structural integrity. Ensuring nails are deep enough for maximum hold. |
| Pneumatic Finish Nailer | Often a more precise dial, sometimes with detents or numbered settings. | Easy to Moderate. Crucial for flush or slightly countersunk nails for trim and molding. | Achieving a clean, flush finish on trim, baseboards, crown molding. Setting nails just below the surface for filling. |
| Cordless Framing/Roofing Nailer | Similar to pneumatic, often a dial or wheel. Some higher-end models offer tool-free adjustments. | Moderate. Performance can be influenced by battery charge and nail collation. | Securely seating large nails into framing members. Ensuring consistency across varying wood densities. |
| Cordless Finish/Brad Nailer | Typically a user-friendly dial or thumbwheel, often with clear markings. | Easy. Designed for fine woodworking and detail work. | Attaching delicate trim, casing, intricate moldings. Preventing damage to soft woods like pine or poplar. Ensuring nails are flush or perfectly countersunk for finishing. |
| Electric (Corded) Nailer | Varied mechanisms, from dials to simple levers. | Moderate. Consistency can be a factor depending on the tool’s power. | Smaller DIY projects, upholstery, crafts. Where precise seating is needed but extreme power isn’t. |
It’s worth noting that some of the highest-end nailers, especially cordless models, offer very intuitive, tool-free depth adjustment systems that are incredibly easy to dial in precisely. Always try to feel the mechanism if you can at a store, or read reviews focusing on the depth adjustment feature.
Troubleshooting Common Depth Control Issues
Even with depth control, you might run into hiccups. Here are a few common problems and their solutions:
- Nails consistently too shallow, even at max depth setting:
- Cause: Insufficient air pressure (pneumatic).
- Solution: Increase your compressor’s regulator setting. If it’s a cordless tool, the battery might be low, or the tool might be designed for lighter duty.
- Nails consistently too deep, even at min depth setting:
- Cause: The depth control mechanism might be faulty or the tool isn’t designed for such fine control.
- Solution: For pneumatic tools, try slightly reducing the air pressure from your regulated output. For cordless, ensure you’re using the correct nail size and type. If the tool is damaged, it may need repair.
- Inconsistent nail depth:
- Cause: Uneven air pressure delivery, a worn driver blade, or the sequential firing mechanism (if engaged) malfunctioning. Or, you might be pressing the tool unevenly.
- Solution: Ensure consistent air supply. Check the driver blade for damage. If using sequential fire, try switching to contact fire briefly to see if depth becomes consistent. Make sure you are pressing the tool flush and evenly against the surface.
- Depth adjustment dial is stiff or doesn’t move:
- Cause: Dirt, debris, or damage to the adjustment mechanism.
- Solution: Clean the area around the dial. Consult your manual for cleaning or lubrication instructions. If it’s damaged, contact the manufacturer.
Never force any adjustment. If something feels wrong, stop and consult your tool’s manual or the manufacturer’s support. A bit of maintenance and careful operation go a long way.
Safety First: Always!
While we’re talking about features that improve precision and finish, it’s paramount to remember that nailers are powerful tools. Depth control doesn’t change their inherent danger.
- Always wear safety glasses – no exceptions.
- Disconnect the air hose (pneumatic) or remove the battery (cordless) before performing any maintenance, clearing jams, or making adjustments.
- Never point the nailer at yourself or anyone else.
- Be aware of your surroundings. Ensure no one is behind the material you are nailing into, as a nail can pass completely through. A good resource for nail gun safety is the Canadian Centre for Occupational Health and Safety.
- Use the correct nails for your nailer and project.
- Understand the firing mode of your nailer (sequential vs. contact trip) and ensure it’s set appropriately for your task to prevent accidental firing.
Depth control helps you work more efficiently and with better results, but safety is always the top priority.
Frequently Asked Questions About Nailer Depth Control
Let’s tackle some common questions beginners have about this essential feature.
Q1: Do all nailers have depth control?
A: Most modern nailers, especially finish, brad, and framing nailers designed for woodworking and construction, come equipped with some form of depth control. However, very basic or older models, and some specialized nailers (like certain roofing or concrete nailers), might not have this feature.