Quick Summary: Flush nailing is a woodworking technique that sinks nails just below the wood surface for a clean, professional look. This guide provides essential steps and tips to master this skill, ensuring your projects are not only strong but also aesthetically pleasing, even if you’re new to DIY.
When you’re working on a woodworking project, the little details often make the biggest difference. One of those details is how you finish your nails. Nobody wants to see nail heads sticking out of their beautiful new shelf or picture frame, right? That’s where flush nailing comes in. It’s a super useful technique that helps you achieve that smooth, polished look.
Don’t worry if you’ve never heard of it or if the thought of sinking nails perfectly seems daunting. I’m Jack Shaffer, your go-to guy for all things nailers and DIY, and I’m here to break it down for you. This guide will walk you through exactly how to do flush nailing. We’ll cover the tools, the steps, and some pro tips to make sure you nail it every time. Get ready to elevate your DIY game!
Table of Contents
What is Flush Nailing and Why Bother?
So, what exactly is flush nailing? It’s a method where you drive a nail into wood so that the head of the nail sits perfectly level with the surface of the wood. Think of it like this: instead of a little bump sticking up, the top of the nail is smooth and even with the grain.
Why do we go through the extra effort? Well, it’s all about aesthetics and preparation.
- Clean Finish: The most obvious reason is a cleaner, more professional appearance. No exposed nail heads means a smoother surface that’s ready for paint, stain, or a clear finish without any bumps getting in the way.
- Prevents Snags: Exposed nail heads can snag clothing, catch dust, or just look unfinished. Flush nailing eliminates these issues.
- Prepares for Filling: When you sink the nail just right, it creates a small dimple that’s easy to fill with wood putty or filler. Once filled and sanded, you’ll barely know the nail is there.
- Durability: In some applications, like flooring or paneling, flush nails help keep the pieces secure without creating a trip hazard.
It’s a key skill for anyone wanting their projects to look like they came from a professional workshop. And the good news? It’s totally achievable for beginners with the right approach!
Tools You’ll Need for Flush Nailing
Before we dive into the “how-to,” let’s get our toolkit ready. You don’t need a whole workshop full of fancy gadgets, but having the right tools will make the job much easier and give you better results.
Essential Tools:
- Nail Gun (Nailer): While you can do this with a hammer and nail set, a nail gun is the modern way to go for efficiency and consistency. The type of nailer depends on your project, but common choices include:
- Brad Nailer: Great for trim, molding, and smaller decorative pieces. Uses small “brad” nails with minimal heads.
- Finish Nailer: A step up from the brad nailer, suitable for more substantial trim, cabinet doors, and lighter construction. Uses slightly larger “finish” nails.
- Framing Nailer: For heavy-duty construction, not typically used for flush nailing in the decorative sense, but the principle can apply for specific structural needs.
- Compressor (if using pneumatic nailer): You’ll need an air compressor to power most brad and finish nailers.
- Air Hose: Connects the compressor to your nail gun.
- Power Source (for electric/cordless nailer): If you opt for an electric or battery-powered nailer, ensure it’s charged or plugged in.
- Safety Glasses: This is non-negotiable! Always protect your eyes when working with tools.
- Nails: Make sure you have the correct type and size of nails for your nail gun and your project materials.
Helpful Additions:
- Dampening Pad or Rubber Mallet: For manual hammering, this helps cushion the blow and allows for finer control.
- Nail Set: If you’re using a hammer, a nail set is crucial for sinking the nail head below the surface.
- Measuring Tape and Pencil: For layout and marking.
- Wood Filler or Putty: For covering those flush-sunk nail heads afterward.
- Putty Knife: For applying wood filler.
- Sanding Block or Sandpaper: For smoothing the filled area.
How to Do Flush Nailing: Step-by-Step
Alright, let’s get down to business. We’ll cover both the nail gun method and the traditional hammer and nail set method. Choose the one that best suits your tools and comfort level.
Method 1: Using a Nail Gun (The Efficient Way)
This is by far the fastest and most consistent method, especially for beginners.
Step 1: Set Up Your Nail Gun
- Check Your Nailer: Ensure your nail gun is loaded with the correct size and type of nails. If it’s pneumatic, connect the air hose and set the compressor to the recommended PSI for your nailer (check the manufacturer’s manual). If it’s electric or cordless, make sure it’s powered up.
- Adjust Depth Setting: This is the MOST IMPORTANT step for flush nailing with a nail gun. Most modern nail guns have an adjustable depth setting. You want to set this low enough so the nail sinks just below the surface of the wood, but not so deep that it punches completely through or blows out the back.
- Start with a lower setting and test it on a scrap piece of the same wood you’ll be using for your project.
- Gradually increase the depth until the nail head is just below the surface. You’re aiming for a slight dimple.
- Some nailers have a “contact trip” or “bump fire” mode and an adjustable depth wheel. Others require you to manually pull the trigger for each nail. Understand how your specific nailer works!
- Test Fire: Always test your depth setting on a piece of scrap wood. Drive a nail and check if the head is flush. Adjust as needed.
Step 2: Position the Nail Gun
- Place the nose of the nail gun firmly against the surface of the wood where you want to drive the nail.
- Ensure the nail gun is perpendicular (straight up and down) to the wood surface. Angling the gun can lead to bent nails or poor seating.
Step 3: Drive the Nail
This is where technique comes in. There are usually two main firing modes:
- Sequential Trip (or Single Shot): You must pull the trigger AND then push the nose of the gun against the wood to fire each nail. This offers more control.
- Contact Trip (or Bump Fire): You hold the trigger down, and each time you push the nose of the gun against the wood, it drives a nail. This is faster but requires more precision to avoid accidental firing.
For flush nailing, especially when you need to be precise with depth, sequential trip is often preferred. If using contact trip, be sure to lift the nose slightly between each drive to ensure the depth setting is consistently applied.
Step 4: Check and Adjust
- After driving each nail, quickly check its depth.
- If a nail is slightly proud (sticking up), you can often go back over it carefully with your nail gun set to a slightly deeper setting, or use a nail set (see Method 2, Step 4).
- If a nail is sunk too deep, you may need to fill the hole. The goal is a consistent, slight indention below the surface.
Method 2: Using a Hammer and Nail Set (The Traditional Way)
This method requires a bit more finesse but is absolutely doable and a great skill to learn.
Step 1: Choose Your Nails and Hammer
- For most woodworking projects where you’ll be setting nails flush, use finish nails or brads. These have smaller heads designed to be driven below the surface.
- Select a hammer that feels comfortable in your hand. A 16-ounce claw hammer is a good all-around choice.
Step 2: Drive the First Nail (Partially)
- Position the first nail where you need it.
- Using your hammer, tap the nail gently to set it into the wood. Just enough to get it to stand on its own.
Step 3: Drive the Nail Flush
- Now, strike the nail head squarely with your hammer. Aim for a clean hit.
- As the nail head gets closer to the wood surface, you’ll need to slow down and be more deliberate.
- You’re aiming to have the nail head sink just slightly below the wood surface. It should create a small dimple.
- Pro-Tip: Sometimes, the nail head might resist sinking further without bending. This is when the nail set comes in handy.
Step 4: Use the Nail Set (If Needed)
A nail set is a tool with a tapered, pointed tip. It looks a bit like a thick nail itself.
- Place the tip of the nail set directly onto the head of the nail you just drove.
- Hold the nail set in place with one hand, keeping your fingers well away from the striking area.
- With your hammer, strike the end of the nail set firmly. This will drive the nail head the rest of the way down, sinking it just below the surface.
- Use controlled taps, checking frequently, to avoid overdriving and damaging the wood.
Step 5: Check and Repeat
- After driving each nail with the hammer and nail set, visually inspect it to ensure it’s flush or slightly recessed.
- Continue this process for all your nails, aiming for consistency.
Tips for Perfect Flush Nailing
Mastering flush nailing is about more than just hitting the nail. Here are some extra tips to help you nail it every time:
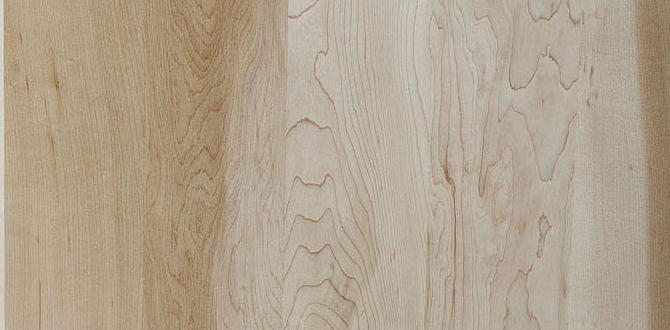
- Wood Type Matters: Softer woods like pine are easier to drive nails into without blow-out. Hardwoods like oak or maple can be trickier and might require a bit more force or a deeper nail gun setting.
- Grain Direction: Be aware of the wood grain. Driving nails parallel to the grain can sometimes cause splitting. If possible, drive them perpendicular to the grain or at a slight angle.
- Pilot Holes: For hardwoods or when nailing near the edge of a board, consider drilling a pilot hole slightly smaller than your nail. This helps prevent splitting and makes driving easier. It’s especially useful when using a hammer.
- Don’t Overdrive: This is crucial! Sinking the nail too deep can weaken the joint or damage the wood, creating a larger hole that’s harder to fill cleanly. A nail head just slightly recessed is often better than one sunk too deep.
- Practice, Practice, Practice: Like any skill, flush nailing gets easier with repetition. Grab some scrap wood and practice driving nails until you feel confident. It’s the best way to get a feel for your tools and materials.
- Know Your Nailer: Every nail gun is slightly different. Take time to read your manual and understand its depth adjustment, firing modes, and air pressure requirements.
- Safety First: Always wear safety glasses. Keep fingers away from the nail gun nose and the hammer path.
Common Problems and How to Fix Them
Even with the best intentions, you might run into a few snags. Here’s how to troubleshoot:
| Problem | Cause | Solution |
|---|---|---|
| Nail Head Sticking Up (Proud) | Nail gun depth setting too high, or hammer not driven deep enough. |
|
| Nail Sunk Too Deep (Overdriven) | Nail gun depth setting too low, or too much force applied with hammer/nail set. | The best solution is to drive another carefully placed nail nearby to secure the piece, and then fill both holes with wood putty. |
| Nail Bent or Angled | Hitting the nail off-center, hitting a knot, or not driving straight. | Remove the bent nail with pliers or a claw hammer and try again, ensuring a perpendicular strike and a clear path. Predrilling can help with knots. |
| Wood Splitting or Blow-out | Nailing too close to the end of a board, not predrilling in dense wood, or using excessive force. |
|
| Nail Gun Jamming | Incorrect nail size, worn parts, or low air pressure. | Follow your nail gun’s manual for clearing jams. Ensure you’re using the correct fasteners and that the tool is properly maintained. Check air pressure and connections. |
Don’t get discouraged if you encounter these issues. They are part of the learning process for any DIYer. With a little patience and these solutions, you’ll be back on track in no time.
Filling and Finishing Your Flush Nails
Once all your nails are successfully flush-set, the final step is to make them disappear (or at least become less noticeable). This is where wood filler or putty comes in.
- Choose Your Filler: Select a wood filler or putty that matches your wood’s color or is stainable/paintable. Some fillers shrink as they dry, so choose a good quality one.
- Apply the Filler: Using a putty knife, apply a small amount of filler directly into the dimple created by the nail head. Overfill slightly, as most fillers shrink a bit when drying.
- Smooth Excess: Scrape away any excess filler from the surrounding wood surface. You want the filler to be contained within the dimple.
- Let it Dry: Allow the filler to dry completely according to the manufacturer’s instructions. This can take anywhere from a few minutes to several hours.
- Sand Smooth: Once dry, use a sanding block or sandpaper (start with a medium grit like 120 and finish with a finer grit like 220) to gently sand the filled area until it’s perfectly flush with the surrounding wood. Be careful not to sand away too much of the surrounding wood.
- Clean Dust: Wipe away all sanding dust with a tack cloth or a damp rag.
- Apply Finish: Now your surface is ready for paint, stain, or a clear coat. The filled nail spots should blend in seamlessly.
This finishing step is key to that professional look. It’s where your hard work in flush nailing truly pays off!