Transform your backyard into a cozy oasis with these easy DIY woodworking projects for seating! From simple benches to stylish conversation sets, you can create comfortable and beautiful outdoor spaces without breaking the bank. This guide provides beginner-friendly plans and tips to get you building confidently.
Hey there, fellow DIYers! It’s Jack Shaffer from Nailerguy, and I know how much a great outdoor space can add to your home. But finding the perfect backyard seating can sometimes feel like a treasure hunt – often ending with a hefty price tag. Don’t you worry, though! We’re going to swap that frustration for satisfaction.
Imagine yourself relaxing in a beautiful bench you built with your own hands, or enjoying a summer evening with friends around a conversation set you crafted. It’s totally achievable, even if you’re just starting out with woodworking. We’ll walk through some fantastic, beginner-friendly ideas that will make your backyard the envy of the neighborhood.
Ready to grab your tools and get building? Let’s dive into some genius DIY woodworking projects for backyard seating that are both stylish and surprisingly simple to create!
Table of Contents
Genius DIY Woodworking Projects for Backyard Seating
Creating your own backyard seating is incredibly rewarding. Not only do you save money, but you also get exactly what you want – the right size, style, and color for your outdoor haven. Plus, it’s a fantastic way to practice your woodworking skills and boost your confidence!
We’ve rounded up some of the best DIY woodworking projects for backyard seating that are perfect for beginners. These ideas focus on using common tools and straightforward construction techniques, so you can achieve professional-looking results without the stress.
1. The Classic Adirondack Chair
The Adirondack chair is an icon of outdoor comfort. Its slatted design and reclined back make it perfect for lounging. While it might look complex, the basic construction is quite manageable for beginners. You’ll be amazed at how satisfying it is to sit in a chair you’ve built yourself.
Why it’s great for beginners:
- Uses mostly straight cuts.
- Plans are widely available and easy to follow.
- Can be made with just a few standard lumber sizes.
- Highly customizable with paint or stain.
You’ll typically need common lumber like 2x4s and 1x6s. A good set of plans will detail the angles for the backrest and seat, which are crucial for comfort. For assembly, a nail gun with finishing nails is a lifesaver, but screws work perfectly well too. Just remember to pre-drill holes to prevent the wood from splitting.
2. The Modern Crate Bench
Looking for something quick and incredibly versatile? The modern crate bench is your answer! This project involves repurposing wooden crates, often found at craft stores or even salvaged. You can arrange them in various configurations to create a bench, a corner seating area, or even a modular coffee table with seating.
How to build it:
- Gather your crates: Find 2-4 sturdy wooden crates of similar size.
- Reinforce them: If they feel a bit wobbly, add some extra screws or brackets to strengthen the crate construction.
- Connect them: Place the crates together in your desired arrangement. Use wood screws to join them securely from the inside or bottom where possible.
- Add a cushion: Cut a piece of plywood to the top of your crate arrangement and secure it. Then, add a custom-made cushion or large outdoor pillows for comfort.
This project is fantastic because it requires minimal cutting. The focus is on assembly and finishing. Painting or staining the crates to match your outdoor decor makes a huge difference!
3. The Simple Farmhouse Bench
A classic farmhouse bench is a staple for any garden or patio. It’s sturdy, inviting, and surprisingly easy to build. This design typically features robust legs and a solid top, making it perfect for seating multiple people.
Key features of a farmhouse bench:
- Simple, straight lines.
- Often uses thicker lumber for a rustic feel (like 4x4s for legs).
- Can be built in an afternoon with basic tools.
For this project, you’ll likely be working with 2x6s for the seat and 4x4s for the legs. Using strong wood glue along with screws or nails will ensure a durable build. Sanding and then sealing the wood is essential to protect it from the elements. A good exterior paint or stain will give it that perfect farmhouse charm.
4. The Pallet Sectional Sofa
Pallets are a woodworker’s best friend for budget-friendly projects! With a little effort, you can transform several wooden pallets into a unique and comfortable sectional outdoor sofa. This project offers a modern, industrial vibe that looks fantastic.
Steps to your pallet sofa:
- Source your pallets: Look for heat-treated (HT) pallets, not chemically treated ones (MB). You can often find them for free from local businesses or lumber yards.
- Disassemble and prepare: Take the pallets apart carefully. Sand all the wood pieces smooth to remove splinters and rough edges.
- Build the base: Construct a sturdy frame for each seating module using the disassembled pallet wood. You can stack and secure pallets to create varying heights for seats and backs.
- Add cushions: Measure and create comfortable cushions that fit perfectly onto your pallet modules. Outdoor fabric is a must!
This project is a bit more involved but incredibly rewarding. Remember to focus on safety when disassembling pallets. A power nailer or screw gun will speed things up considerably. For durability, consider sealing the wood with a protective coating. Learn more about safe pallet sourcing and handling at the Environmental Protection Agency (EPA) website for guidance on pest control and material safety.
5. The DIY Planter Bench
Combine seating and greenery with a charming planter bench! This project adds a functional and beautiful focal point to your garden. It’s perfect for a walkway, a patio corner, or even flanking a doorway.
Why you’ll love it:
- Dual purpose: seating and plant display.
- Adds natural beauty and color to your outdoor space.
- Relatively simple construction.
You can build this in various styles. A common design involves building two planter boxes and then creating a solid bench seat that spans between them. You’ll likely use 2x6s or 2x8s for the seating area and deck boards or plywood for the planter box construction. Ensure you line the planter boxes to protect the wood from moisture. Drainage is also key to keeping your plants healthy!
6. The Corner Conversation Bench
Maximize your patio space with a custom corner conversation bench. This design is perfect for smaller yards or for creating an intimate seating area. It’s ideal for enjoying your morning coffee or an evening chat with a loved one.
Benefits of a corner bench:
- Efficient use of space.
- Creates a cozy gathering spot.
- Can be adapted to fit any corner.
This project involves building two benches that meet at a perfect 90-degree angle. You can make them as simple or as elaborate as you like, adding storage underneath or incorporating built-in side tables. Using pocket hole joinery can create very strong and clean joints. A good exterior wood sealant is crucial for longevity.
7. The Minimalist Two-Seater Bench
For those with limited space or a preference for clean lines, a minimalist two-seater bench is a perfect choice. This design focuses on simplicity and functionality, often built with just a few pieces of wood.
Design tips:
- Keep the design uncluttered.
- Focus on comfortable seating dimensions.
- Use clean joinery methods.
This bench can be made using 2x4s and 2x6s. The simplicity of the design means less material and less time. It’s a great project for practicing precise cuts and strong joints with screws or nails. A coat of weather-resistant paint or stain will keep it looking great for years.
Essential Tools for Your DIY Seating Projects
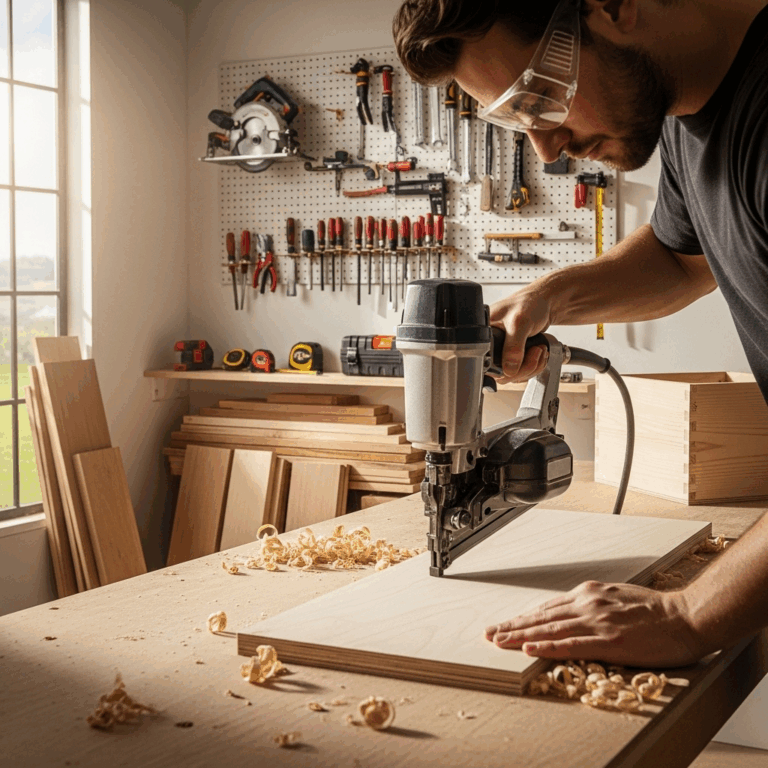
To tackle most of these DIY woodworking projects for backyard seating, you’ll need a few essential tools. Don’t worry if you don’t have them all; many can be borrowed or are relatively inexpensive to acquire.
Must-Have Tools:
- Measuring Tape and Pencil: For accurate measurements and marking cuts.
- Saw: A circular saw is versatile, but a handsaw can work for smaller projects. A miter saw makes angled cuts much easier and more precise.
- Drill/Driver: Essential for pre-drilling holes and driving screws. Cordless is king for convenience!
- Screws and/or Nails: Use exterior-grade fasteners that resist rust.
- Hammer or Nail Gun: A nail gun, like a brad nailer or finish nailer, can speed up assembly significantly.
- Sander: An orbital sander makes smoothing surfaces a breeze. Sandpaper of various grits is also a must.
- Safety Gear: Always wear safety glasses, gloves, and hearing protection when operating power tools.
Helpful, But Not Essential Tools:
- Pocket Hole Jig: Creates strong, hidden joints, perfect for a clean look.
- Clamps: Hold pieces together while you fasten them, ensuring accuracy.
- Orbital Sander: Speeds up the sanding process significantly.
- Wood Glue: Adds extra strength to your joints.
Choosing the Right Wood for Outdoor Projects
Selecting the right lumber is crucial for the longevity of your outdoor seating. You want wood that can withstand moisture, insects, and UV rays.
Best Wood Options:
| Wood Type | Pros | Cons | Best For |
|---|---|---|---|
| Cedar | Naturally resistant to rot and insects, lightweight, beautiful aroma. | Can be more expensive, softer wood so can dent. | Benches, chairs, Adirondacks. |
| Redwood | Excellent resistance to rot and insects, very stable, rich color. | Often the most expensive option, availability can be limited. | High-end benches, detailed projects where durability is paramount. |
| Pressure-Treated Pine | Affordable, widely available, treated to resist rot and insects. | Can warp or crack if not sealed properly, contains chemicals (ensure proper handling). | Most outdoor structures, cost-effective furniture. |
| Cypress | Good natural resistance to rot and insects, durable, attractive color. | Can be more expensive than pine, availability varies by region. | Benches, seating, deck furniture. |
Always ensure your wood is rated for outdoor use. For pressure-treated lumber, look for treatments designed for ground contact if the project will be near the ground.
Sealing and Finishing Your Project:
No matter which wood you choose, a good finish is essential. Apply exterior-grade paint, stain, or sealant to protect your creation from the elements. This step not only preserves your work but also allows you to customize the look to match your backyard aesthetic.
Safety First, Always!
Woodworking is fun, and safety should always be your top priority. Whether you’re a seasoned pro or just starting, a little caution goes a long way.
Key Safety Practices:
- Read tool manuals: Understand how your tools work before you use them.
- Wear protective gear: Safety glasses are non-negotiable. Gloves and hearing protection are also highly recommended.
- Keep your workspace clean: A tidy area reduces the risk of trips and falls.
- Secure your work: Use clamps to hold wood in place while cutting or drilling.
- Unplug tools: Always unplug power tools when changing blades or bits.
- Be aware of your surroundings: Keep pets and children away from the work area.
Following these simple guidelines will help ensure your DIY woodworking projects for backyard seating are not only beautiful but also built safely. Check out the Occupational Safety and Health Administration (OSHA) for comprehensive workplace safety standards, which can offer valuable insights for your DIY projects.
Frequently Asked Questions
Q1: Can a beginner really build their own backyard seating?
Absolutely! Many DIY woodworking projects for backyard seating are designed with beginners in mind. Projects like simple benches, crate seating, and some Adirondack chair variations use straightforward cuts and assembly methods. The key is to start with a well-written plan and use the right tools.
Q2: What are the most budget-friendly woodworking projects for seating?
Pallet furniture and crate seating are generally the most budget-friendly options, as you can often source materials for free. Simple pine or fir lumber for basic benches and chairs are also cost-effective choices.
Q3: How do I protect my wood from weather damage?
Proper sealing and finishing are vital. After building, sand your project smooth and apply several coats of an exterior-grade sealant, stain, or paint. Reapply the protective finish annually or as needed to keep your seating in good condition.
Q4: What is the best type of lumber for outdoor use?
Cedar, redwood, and cypress are naturally resistant to rot and insects, making them excellent choices. Pressure-treated pine is a more affordable option that is treated to withstand the elements. The best choice often depends on your budget and desired lifespan of the project.
Q5: How long does a DIY backyard seating project typically take?
This varies greatly depending on the project’s complexity and your skill level. A simple two-seater bench might take an afternoon, while a more elaborate Adirondack chair or pallet sofa could take a weekend or two. Take your time, focus on accuracy, and enjoy the process!
Q6: Do I need special tools for these projects?
For most beginner projects, standard woodworking tools like a drill, saw, measuring tape, and sander are sufficient. A nail gun can make assembly faster and easier, but screws are a perfectly good alternative. Pocket hole jigs are helpful for cleaner joints but not strictly necessary for basic builds.
Conclusion: Your Outdoor Oasis Awaits!
There you have it – a fantastic lineup of DIY woodworking projects for backyard seating that are both achievable and incredibly rewarding. From the iconic Adirondack chair to the versatile pallet sofa and the charming planter bench, you’ve got plenty of ideas to get your creative juices flowing.
Remember, the most important tool you have is your willingness to learn and try. Start with a project that feels manageable, follow the steps, prioritize safety, and don’t be afraid to make it your own with paint, stain, or cushions.
Building your own backyard seating isn’t just about saving money; it’s about the satisfaction of creating something functional and beautiful with your own hands. It’s about crafting a space where you can relax, entertain, and make lasting memories. So, gather your lumber, grab your tools, and get ready to build your dream outdoor oasis. Happy building!