Build a beautiful DIY wooden wall-mounted herb garden planter easily with this essential guide. Get fresh herbs right outside your door!
Want to bring a touch of green and fresh flavor to your kitchen or patio? A DIY wooden wall-mounted herb garden planter is a fantastic project for beginners. It’s a great way to grow your favorite herbs within easy reach, and it adds a lovely rustic charm to any space. You might think woodworking is complicated, but with clear steps, you can build this planter yourself and enjoy the rewards.
This guide will walk you through everything you need, from choosing your wood to mounting your finished planter. Let’s get growing and building!
Table of Contents
Why Build a Wooden Wall Mounted Herb Garden Planter?
As a woodworker, I love projects that are both functional and beautiful. A wall-mounted herb garden planter ticks all the boxes! It’s a smart solution for small spaces, keeping your precious herbs off the ground and neatly organized. Plus, the smell of fresh herbs right outside your kitchen door is simply unbeatable.
Here are a few reasons why this project is a winner:
Space Saver: Perfect for apartments, small yards, or if you just want to maximize your garden space.
Freshness at Your Fingertips: Imagine snipping fresh basil for your pasta or mint for your tea in seconds!
Customizable: You can make it any size and style to fit your home décor perfectly.
Satisfying DIY: It’s a rewarding project that’s achievable for most skill levels.
Eco-Friendly: Growing your own herbs reduces packaging waste and food miles.
Choosing Your Wood: What You Need to Know
When planning your DIY wooden wall mounted herb garden planter, selecting the right wood is key. You want something that can withstand the elements if it’s going outdoors, and looks good indoors. Durability and appearance are your main concerns.
For outdoor planters, pressure-treated lumber is a good choice because it’s resistant to rot and insects. However, some people prefer to avoid it if growing herbs they’ll be eating. Cedar and redwood are naturally resistant to decay and insects, making them excellent, albeit pricier, options. They also have a beautiful natural color that ages gracefully.
For indoor use or if your planter will be protected from direct rain, pine or fir are more budget-friendly options. They are easy to work with. You’ll just want to seal them well, especially the inside of the planter boxes, to protect against moisture from the soil.
Here’s a quick look at common wood choices:
| Wood Type | Pros | Cons | Best For |
|---|---|---|---|
| Cedar/Redwood | Naturally rot and insect resistant, beautiful appearance | More expensive | Outdoor use, natural beauty |
| Pine/Fir | Affordable, easy to work with | Less durable outdoors, requires sealing | Indoor use, budget-friendly projects |
| Pressure-Treated Lumber | Highly resistant to rot and insects | May contain chemicals, appearance can be less desirable for some | Outdoor use where durability is paramount |
Essential Tools and Materials
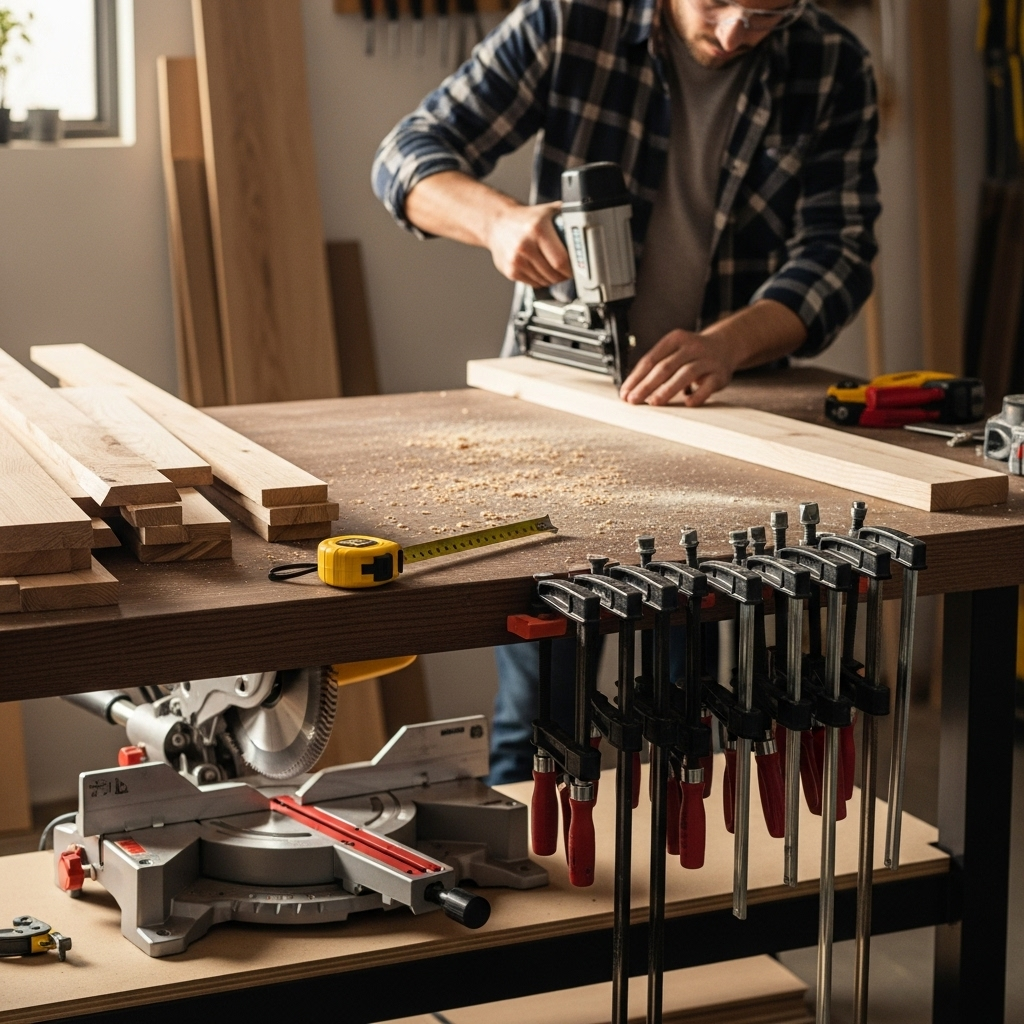
To build your DIY wooden wall mounted herb garden planter, you’ll need a few basic tools and materials. Don’t worry if you don’t have everything; many can be borrowed or are relatively inexpensive to acquire. Safety first, always! Make sure to wear safety glasses when cutting or drilling.
Tools You’ll Need:
Saw: A handsaw will work, but a miter saw or circular saw will make cutting much faster and more accurate. For precise cuts on a budget, a good handsaw and a miter box are excellent.
Drill: For pre-drilling holes and driving screws. A cordless drill is super handy.
Measuring Tape: Essential for accurate measurements.
Pencil: For marking your cuts.
Screwdriver Bits: To match your screws.
Sandpaper (medium and fine grit): To smooth rough edges.
Safety Glasses: Non-negotiable for protecting your eyes.
Clamps (optional but helpful): To hold pieces together while you work.
Level: To ensure your planter is mounted straight on the wall.
Stud Finder: Crucial for securely mounting the planter to the wall.
Drill Bits: For pilot holes and creating drainage holes in the planter boxes.
Materials You’ll Need:
Wood: Your chosen lumber. The amount will depend on the size of your planter. For a typical 3-bin planter, you might use about 10-12 feet of 1×4 or 1×6 lumber and a couple of feet of 1×2 or 1×3 for cleats.
Wood Screws: Exterior-grade screws are best, especially if the planter will be outdoors. 1 ¼” or 1 ½” screws are usually a good length for joining 1-inch thick boards like 1x4s or 1x6s.
Wood Glue (exterior grade): Adds extra strength to your joints.
Wood Sealer/Stain/Paint (optional): To protect the wood and give it a finished look. Use a food-safe product if possible for indoor planters.
Landscape Fabric or Liners: To line the planter boxes, prevent soil from washing out through drainage holes, and protect the wood.
Mounting Hardware: Strong screws or lag bolts suitable for your wall type (e.g., wood studs, brick).
Designing Your Planter: Simple is Best
For your first DIY wooden wall mounted herb garden planter, keeping the design simple is a great strategy. A common and effective design involves a frame that mounts to the wall, with individual planting boxes or troughs that slide into or rest within the frame. This makes it easy to remove the boxes for replanting or cleaning.
Here’s a breakdown of a popular design:
The Backer Board: This is a sturdy piece of wood (or multiple pieces) that attaches directly to your wall. It acts as the main support.
The Cleats: These are horizontal strips of wood attached to the backer board. They create ledges for your planting boxes to rest on.
The Planting Boxes: These are essentially small wooden troughs. They can be made in various sizes and configurations – commonly in rows of two or three.
Consider the dimensions:
Width: How much wall space do you have?
Height: How many rows of herbs do you want?
Depth: Deep enough for herb roots (usually 6-8 inches is plenty for most herbs).
Width of each planting box: Enough to comfortably fit a few plants of each herb variety (around 6-8 inches wide is a good start).
A common and manageable size for a beginner project might be a planter that’s about 24-30 inches wide and 18-24 inches tall, with three planting boxes that are roughly 8 inches wide and 6 inches deep.
Step-by-Step: Building Your Planter
Let’s get building! Remember to measure twice and cut once to avoid mistakes.
Step 1: Cut Your Wood Pieces
Based on your chosen design and dimensions, carefully measure and cut your wood. If you’re making three 8-inch wide planting boxes, each about 6 inches deep and 24 inches long, here’s how you might cut your pieces:
For the Planting Boxes:
Two pieces for the long sides (e.g., 24 inches long) from 1×6 lumber.
Two pieces for the short ends (e.g., 6 inches long minus the thickness of your side boards) from 1×4 lumber.
A piece for the bottom (e.g., 24 inches long by about 6 inches wide) from 1×6 lumber. You might need to join two narrower boards for the bottom.
For the Wall Mount Frame:
Two long vertical pieces (e.g., 24 inches) from 1×4 or 1×6 lumber.
Two short horizontal pieces (e.g., 24 inches) from 1×4 or 1×6 lumber.
For the Cleats:
Two short horizontal pieces (e.g., 22 inches) from 1×3 or 1×4 lumber.
Step 2: Assemble the Planting Boxes
This is where the magic happens!
1. Apply a thin bead of exterior wood glue to the edges where the boards will join.
2. Using your drill, pre-drill pilot holes slightly smaller than your screw diameter. This prevents the wood from splitting.
3. Drive screws to secure the bottom to the side pieces.
4. Then attach the end pieces to the bottom and sides. Ensure the boxes are square. You should now have three sturdy troughs.
Step 3: Sand and Finish the Boxes (Optional but Recommended)
Once your boxes are assembled and the glue is dry, give them a good sanding. Start with medium-grit sandpaper to smooth out any rough spots or pencil marks, then move to fine-grit for a nice, smooth finish.
If you plan to seal, stain, or paint your planter, now is the time. Apply your chosen finish according to the product’s instructions. For outdoor use, a good exterior-grade sealer or paint is essential. Make sure to seal the inside of the boxes too, to protect the wood from constant moisture. Let it dry completely.
Step 4: Assemble the Wall Mount Frame
The wall mount frame is what connects your planter boxes to the wall.
1. Lay out your two long vertical pieces and two short horizontal pieces to form a rectangle.
2. Apply wood glue to the joining edges.
3. Pre-drill and screw the frame together. Ensure it’s square.
4. Now, attach the cleats to this frame. Position them horizontally on the inside of the frame, at the height where you want your planting boxes to sit. They should be slightly set in from the front edge so the boxes can slide in or rest against them. Pre-drill and screw them firmly in place. Make sure they are level!
Step 5: Prepare the Planting Boxes for Drainage
Before you add soil, every planting box needs drainage holes.
1. Flip your planting boxes upside down.
2. Using a drill bit (½ inch to ¾ inch is good), drill several holes evenly spaced across the bottom of each box. This is crucial to prevent waterlogged soil and root rot.
Step 6: Install Liners (Optional but Recommended)
To add an extra layer of protection and help contain the soil, you can line your planting boxes.
1. Cut pieces of landscape fabric or other planter liners to fit the inside of each box.
2. Staple or tack the fabric in place along the top edges. This stops soil from falling out of the drainage holes.
Mounting Your DIY Wooden Wall Mounted Herb Garden Planter
This is a critical step for safety and stability. You need to mount your planter securely so it doesn’t fall.
Step 1: Find a Suitable Location
Choose a spot on your wall that gets the right amount of sunlight for your chosen herbs. Many herbs, like basil, thyme, rosemary, and mint, thrive in full sun (6+ hours a day). Others, like parsley and chives, can do well with partial shade.
Also, consider accessibility. You’ll want to be able to easily water and harvest your herbs. Think about proximity to your kitchen or outdoor entertaining areas.
Step 2: Locate Wall Studs
Using a stud finder, locate the wall studs in your chosen mounting area. Wooden wall studs are the strongest point to attach anything heavy. Mark the center of each stud with your pencil. If you can’t find studs where you need them, you’ll need to use heavy-duty wall anchors suitable for the weight of the planter and soil when wet. For outdoor mounting on a fence or shed, ensure the fence/shed structure is sound.
According to the International Association of Certified Home Inspectors (InterNACHI), for safe mounting of structures, locating studs or using substantial anchors is essential for preventing structural failure.
Step 3: Attach the Wall Mount Frame
1. Hold your assembled wall mount frame against the wall at the desired height. Use a level to ensure it’s perfectly straight.
2. Mark the screw hole locations clearly on the wall, aligning with the center of the studs you marked.
3. Pre-drill pilot holes through the frame where you marked.
4. Align the frame on the wall again.
5. Using your stud finder or a long drill bit, you can poke through the pilot holes in the frame to confirm you’re hitting the stud center on the wall.
6. Drive long, strong screws (lag bolts are ideal for heavy loads) through the frame’s pilot holes into the wall studs. Use at least two screws per stud, spaced vertically. If you are not drilling into studs, use appropriate heavy-duty wall anchors.
Step 4: Insert Your Planting Boxes
Once the wall mount frame is securely attached, carefully slide or place your prepared planting boxes into the frame, resting them on the cleats. They should fit snugly.
Planting Your Herbs: The Fun Part!
Now for my favorite part – getting some greenery in there!
Step 1: Choose Your Herbs
Select herbs that have similar light and water needs if you plan to plant them together in the same box. Some classic choices for a wall planter include:
Full Sun Lovers: Basil, Rosemary, Thyme, Oregano, Sage, Lavender, Marjoram.
Partial Shade Tolerant: Parsley, Chives, Mint (mint can be invasive, so it’s often best in its own box or well-contained!).
Step 2: Add Potting Mix
Fill your planting boxes with a good quality potting mix. Don’t use garden soil, as it can become too compacted in containers. Leave about an inch of space at the top for watering.
Step 3: Plant Your Herbs
Gently remove your herbs from their nursery pots. Loosen any tightly bound roots. Dig a hole in the potting mix large enough for the root ball. Place the herb in the hole, ensuring the top of the root ball is level with the soil surface. Backfill with soil and gently firm it around the base of the plant.
Step 4: Water Thoroughly
After planting, water each herb gently but thoroughly. This helps settle the soil and reduce transplant shock.
Caring for Your Herb Garden
Keeping your DIY wooden wall mounted herb garden planter thriving is simple with a little attention.
Watering: Check the soil moisture regularly. Water when the top inch or two of soil feels dry. Overwatering is a common mistake, so ensure your drainage holes are clear.
Sunlight: Make sure your herbs are getting the amount of sunlight they need. Rotate plants if one side consistently gets more sun.
Harvesting: Harvest regularly! Pinching back herbs encourages fuller growth. Don’t be afraid to use your fresh herbs in the kitchen.
Fertilizing: Herbs generally don’t need a lot of fertilizer, especially if you’re using good potting mix. If growth seems slow, a diluted liquid fertilizer every 4-6 weeks during the growing season can help.
* Pest Control: Keep an eye out for common pests. Often, a strong spray of water can dislodge aphids. Neem oil is a good organic option for more persistent issues.
FAQ: Your Questions Answered
Q1: How deep do the planter boxes need to be?
For most common herbs like basil, mint, and parsley, a depth of 6 to 8 inches is sufficient. This allows for adequate root development without making the planter excessively heavy.
Q2: What kind of wood is best for an outdoor herb garden planter?
Cedar, redwood, or cypress are excellent choices for outdoor planters due to their natural resistance to rot and insects. If using pine or fir, ensure it is pressure-treated or thoroughly sealed with an exterior-grade, food-safe sealant to prolong its life.
Q3: How often should I water my wall-mounted herb garden?
Watering frequency depends on your climate, the type of herbs, and sunlight exposure. A good rule of thumb is to check the soil moisture with your finger. If the top inch or two feels dry, it’s time to water thoroughly. Ensure good drainage to prevent overwatering.
Q4: Can I use regular garden soil in my planter?
It’s best to use a high-quality, sterile potting mix designed for containers. Garden soil tends to compact too much in planters, hindering drainage and aeration, which can be detrimental to herb roots.
Q5: How do I make sure my planter stays securely on the wall?
Locating wall studs is the most secure method. Use long, sturdy screws or lag bolts (at least 2-3 inches long) that go deeply into the center of the studs. If studs aren’t available, use heavy-duty toggle bolts or concrete anchors rated for significant weight. Always consider the total weight of the planter, soil, and plants when wet.
Q6: What if I don’t have a saw?
You can often have lumber cut to size at your local hardware or home improvement store when you purchase it. Alternatively, a sturdy handsaw and a miter box can provide