Have you ever thought about making something with your own hands? Imagine building a DIY wooden stool that you can proudly show off. Not only is it fun, but it’s also a great skill to learn.
In this article, we’ll guide you through simple steps to create your own stool. Whether you’re looking for extra seating or a spot to rest your feet, a wooden stool can be perfect. Plus, it makes a fantastic project for a rainy afternoon!
Did you know that making furniture can boost your confidence? When you see your finished DIY wooden stool, you’ll feel proud and accomplished. Let’s explore how easy and enjoyable it can be to build something special.
Table of Contents
Diy Wooden Stool: Simple Steps For Building Your Own

DIY Wooden Stool: Simple Steps for Building Your Own
Creating your own DIY wooden stool can be a fun and rewarding project. Picture this: a cozy corner in your home, made even better with a stool you built yourself! You’ll learn how to gather materials, cut wood, and assemble everything step by step. This project is perfect for beginners. Imagine impressing your friends with your craftsmanship! Plus, it’s a great way to express your creativity while saving money. Ready to start crafting?Materials Needed
List of essential wood types and tools required. Optional materials for personalization and durability.To build your own wooden stool, gather some essential materials. First, select wood types like pine, oak, or maple. Each offers unique beauty and strength. Next, you need tools such as a saw, hammer, and drill. Without these, it’s like trying to eat soup with a fork! You might also consider some optional materials like paint or varnish for style and to make it last longer. Now, let’s look at a quick summary:
| Materials | Description |
|---|---|
| Pine | Lightweight and easy to work with. |
| Oak | Strong and stylish, perfect for stools. |
| Maple | Durable and smooth finish, great for a polished look. |
| Tool Set | Includes saw, drill, and hammer. |
| Paint/Varnish | For colors or protection. |
Measuring and Cutting the Wood
Stepbystep instructions for measuring dimensions. Tips for accurate cutting and avoiding mistakes.First, grab a tape measure and find your inner carpenter. Measure the length, width, and height of your stool. Write down those numbers, or they might float away like my last pizza slice! For cutting, use a saw that suits your comfort. Remember, measure twice, cut once. It’s like confirming your snack is really chocolate cake before indulging!
| Measurement | Dimension |
|---|---|
| Seat Diameter | 12-16 inches |
| Leg Height | 18-24 inches |
Use a straight edge to guide your cuts. If it feels off, double-check those measurements. Mistakes can turn a stool into a fancy paperweight! So be accurate, have fun, and keep those fingers safe!
Assembling the Stool Frame
Detailed guide on joining pieces for the frame structure. Importance of using wood glue and screws for stability.To create a sturdy stool frame, start by laying out all your wooden pieces. Join the legs and top with both wood glue and screws. This method keeps everything stable and strong. Remember, wood glue fills gaps while screws hold it tight. Together, they make your stool last longer.
- Apply wood glue on ends of the pieces.
- Use screws to connect legs to the seat.
- Check the frame for square by measuring diagonals.
Why is wood glue and screws important?
Using wood glue and screws ensures your stool is strong and stable. Wood glue fills tiny spaces, while screws keep everything in place. This combination makes your stool safe to use and less wobbly!
Creating the Stool Seat
Options for seat design and shape. Instructions for attaching the seat to the frame securely.Choose a fun design for your stool seat! You can go with a simple square, a round circle, or an interesting hexagon shape. Select what you like best. To attach the seat securely to the frame, use strong screws. Make sure to place them evenly around the edges. This keeps everything stable and safe. Don’t forget to double-check the fit before you tighten the screws!
What shapes can I use for a stool seat?
You can use a square, round, or even a hexagon shape for your stool seat.Tips for good seat attachment:
- Use strong screws.
- Place screws evenly around the edge.
- Check the fit before tightening.
Finishing Touches
Sanding techniques for a smooth finish. Choosing the right stain or paint for aesthetic appeal.To give your wooden stool a perfect finish, start with sanding. Use fine sandpaper to smooth out rough spots. Sand in the same direction as the wood grain. This helps avoid scratches and gives a polished look. Next, choose a stain or paint that matches your style. A nice color can bring your stool to life!
- For a classic touch, try a natural wood stain.
- If you want color, go for bright paints.
- Always test on a small area first.
What sanding techniques should I use for a smooth finish?
Use fine sandpaper and sand with the wood grain. This gives a smooth and clean surface.
How do I choose the right stain or paint for my stool?
Pick a color that matches your home. Always test it on a small area first.
Safety Considerations
Essential safety gear to wear while building. Tips for safe handling of tools and materials.Building a wooden stool is fun, but safety is key! Always wear essential safety gear to protect yourself. A good pair of goggles will keep your eyes safe from dust. Gloves can protect your hands from splinters. Ear protection is also wise when using loud tools.
When handling tools and materials, follow these tips:
- Always keep your workspace clean.
- Store tools in their right place after use.
- Use tools properly to avoid accidents.
Stay alert and focused while you work. A fun project can turn into a disaster if you aren’t careful!
What safety gear do I need for DIY projects?
You need goggles, gloves, and ear protection. These items can help keep you safe while you build your wooden stool.
Common Mistakes to Avoid
List of frequent pitfalls and how to prevent them. Tips for troubleshooting issues that may arise during the process.Building a wooden stool can be fun, but there are common mistakes to avoid. Here are some pitfalls and how to steer clear of them:
- Wrong Measurements: Always double-check your sizes before cutting.
- Poor Wood Choice: Use sturdy wood like pine or oak for durability.
- Unsafe Assembly: Use screws or nails correctly to prevent accidents.
- Ignoring Sanding: Smooth edges prevent splinters; never skip this step.
If issues pop up, here are some tips:
- Ask a friend for help; two heads are better than one!
- Take breaks if you feel frustrated. Returning with fresh eyes can help.
- Consult online tutorials or guides for extra tips.
What should I check before I start building?
Check your space and tools first. Make sure you have enough room and the right equipment. This will save time and ensure better results.
Variations and Customizations
Ideas for different styles and designs of stools. Suggestions for incorporating unique features or additional functionality.There are many fun ways to design your wooden stool. You can create different styles to match your space. Try these ideas:
- Use bright colors or paint patterns for a lively look.
- Make a stool with storage under the seat for toys or books.
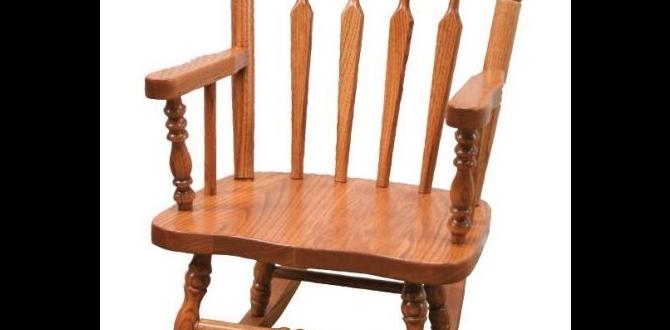
- Add a backrest for extra comfort.
- Use different shapes, like round or square stools.
- Combine wood types for a unique look.
Adding these features will make your stool special. Let your creativity shine!
What are some unique features for a DIY stool?
You can include hidden compartments for storage and different shapes to stand out.
Conclusion
In conclusion, building a DIY wooden stool is fun and easy. You only need basic tools and materials. Start by gathering your supplies and following clear steps. Measure carefully and take your time. You’ll create a useful item for your home. Now, why not try making one yourself? Explore more designs and ideas to inspire your next project!FAQs
What Materials And Tools Do I Need To Build A Diy Wooden Stool?To build a DIY wooden stool, you need some wood boards. Choose sturdy wood like pine or oak. You also need screws to hold the pieces together. Get wood glue for extra strength. For tools, you will need a saw to cut the wood, a drill to make holes, and a screwdriver to fasten the screws. Lastly, sandpaper helps make the edges smooth.
What Are The Essential Steps To Ensure Stability And Safety When Constructing A Wooden Stool?To build a safe and stable wooden stool, start with strong, dry wood. Make sure all the pieces fit together well. Use screws or nails to hold the parts tightly. Sand the edges to remove any sharp spots. Finally, check that the stool can hold your weight before using it.
How Can I Customize My Wooden Stool In Terms Of Design And Finish?You can customize your wooden stool in many fun ways! First, you can paint it any color you like. You can also use stickers or stencils to add cool designs. If you want a shiny look, you can apply a clear finish or varnish. Lastly, think about adding a soft cushion on top for comfort!
What Type Of Wood Is Best Suited For Building A Sturdy And Durable Stool?Hardwood is best for building a strong and long-lasting stool. Oak and maple are great choices because they are tough. You want wood that won’t break easily. Softwoods, like pine, are weaker and can wear out faster. So, choose hardwood for a sturdy stool!
Are There Any Common Mistakes To Avoid When Making A Diy Wooden Stool?Yes, there are some common mistakes to avoid when making a DIY wooden stool. First, make sure to measure your pieces carefully. If the parts don’t fit, your stool won’t be sturdy. Second, use the right kind of wood glue to hold everything together. Lastly, remember to sand the edges so they are smooth and safe.