Build your own stunning DIY wooden mirror leaning frame with this easy, step-by-step guide. Perfect for beginners, this project adds style and function to any room without complicated tools or techniques.
Ever walk into a room and feel like something’s missing? Often, that’s a beautiful statement piece like a large leaning mirror. But the price tags on those can be a real shocker! Don’t let that stop you. Building your own DIY wooden mirror leaning frame is not only budget-friendly but also incredibly rewarding. You get to choose the wood, the finish, and create something perfectly suited to your space. This guide will walk you through every step, ensuring you end up with a gorgeous, sturdy frame you’ll be proud of. Ready to add some reflective charm to your home? Let’s get started!
Table of Contents
Why Build Your Own Leaning Mirror Frame?
There are so many great reasons to go the DIY route for your next mirror project. For starters, the cost savings can be significant compared to buying a ready-made one. High-quality, large leaning mirrors can easily set you back hundreds of dollars. By building your own frame, you can achieve a similar, if not higher, level of craftsmanship for a fraction of the price.
Beyond the savings, you get complete creative control. Want a rustic farmhouse look? Go for reclaimed barn wood. Prefer something modern and sleek? Choose a clean-lined hardwood like oak or maple. You can customize the size, shape, stain color, and finish to perfectly match your existing decor. Plus, the sense of accomplishment from building something beautiful with your own hands is incredibly satisfying!
Tools and Materials You’ll Need
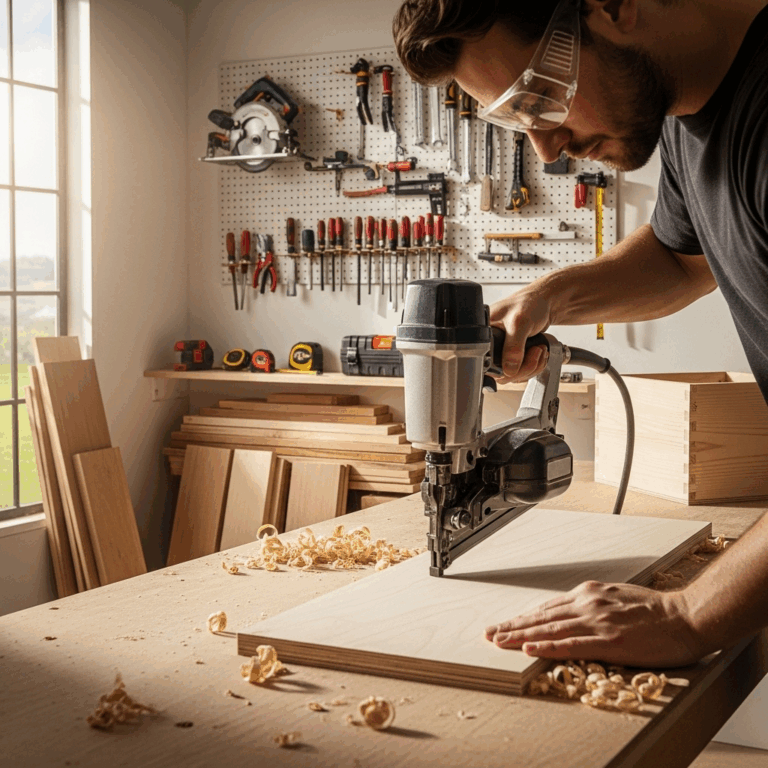
Gathering your supplies is the first big step. Don’t worry if you’re new to woodworking; most of these tools are pretty straightforward to use, and we’ll cover safety as we go. Having the right gear makes the job so much smoother and safer.
Essential Tools
- Tape Measure: For precise measurements.
- Pencil: To mark your wood.
- Safety Glasses: Absolutely crucial for protecting your eyes. Never skip this!
- Work Gloves: To protect your hands from splinters and rough edges.
- Miter Saw or Hand Saw with Miter Box: For making accurate angled cuts. A miter saw will make things much faster and more precise.
- Clamps: To hold pieces together while you work. Bar clamps or pipe clamps are great for this.
- Drill/Driver: For pre-drilling holes and driving screws.
- Level: To ensure your frame is straight.
- Sander (Orbital or Belt): For smoothing out the wood.
- Putty Knife: For applying wood filler.
- Paintbrush or Rag: For applying stain or finish.
- Mirror Clips or Silicone Adhesive: To secure the mirror.
Materials List
- Wood for Frame: Choose based on your desired style. Common choices include pine, poplar, oak, or even reclaimed wood. You’ll need enough for four sides of your frame plus any decorative elements.
- Wood Screws: Appropriate length for joining your frame pieces.
- Wood Glue: For extra strong joints.
- Wood Filler: To fill any gaps or screw holes.
- Sandpaper: Various grits (e.g., 80, 120, 220) for smoothing.
- Stain or Paint: Your choice for finishing.
- Polyurethane or Sealer: To protect the finish.
- Mirror: Measure your desired frame size and order or cut a mirror to fit. Ensure it’s tempered glass for safety if it’s a large mirror. Reputable glass suppliers can cut mirrors to custom sizes.
- Mirror Holders: Small metal clips or heavy-duty silicone adhesive specifically designed for mirrors.
Planning Your Mirror Frame
Before you cut any wood, it’s important to plan. This is where you decide on the dimensions and style of your frame. A leaning mirror is typically taller than it is wide and designed to rest against a wall, not hang on it.
Sizing Your Mirror and Frame
First, decide on the overall dimensions of your mirror. Measure the space where you envision it. Then, decide how wide you want your frame to be. A wider frame can make a bolder statement, while a narrower one is more subtle. A common width for the frame material itself might be 3 to 6 inches.
Let’s say you want a mirror that’s 24 inches wide and 60 inches tall. If you choose a frame material that is 4 inches wide, here’s how your outer dimensions will be calculated:
- Outer Width: Mirror Width + (2 Frame Width) = 24 inches + (2 4 inches) = 32 inches
- Outer Height: Mirror Height + (2 Frame Width) = 60 inches + (2 4 inches) = 68 inches
Choosing Your Wood and Style
The type of wood you select will dramatically impact the look and feel of your frame. Here’s a quick look at popular choices:
| Wood Type | Pros | Cons | Best For |
|---|---|---|---|
| Pine | Affordable, lightweight, easy to work with, takes stain well. | Softer wood, prone to dents and scratches. | Rustic, farmhouse, or budget-friendly modern styles. |
| Poplar | Relatively inexpensive, strong, paints very smoothly. | Can have greenish streaks, not ideal for dark stains unless you prime. | Painted finishes, modern or transitional styles. |
| Oak | Hardwood, durable, beautiful natural grain, takes stain well. | More expensive, heavier, harder to cut and sand than pine. | Traditional, craftsman, or elegant modern styles. |
| Redwood/Cedar | Naturally resistant to rot and insects, aromatic. | Can be more expensive, requires sealing for indoor use. | Can lend a unique outdoor-inspired or spa-like feel. |
| Reclaimed Wood | Unique character, rustic charm, environmentally friendly. | Can be inconsistent in size/condition, requires extra prep (cleaning, denailing). | Farmhouse, industrial, or eclectic styles. |
Consider adding decorative elements like a bevel, a routered edge, or even different types of wood for an inlay effect. For a beginner project, sticking to simple straight cuts is perfectly fine and will still result in a beautiful frame.
Step-by-Step Guide to Building Your Frame
Alright, let’s get building! This guide assumes you’re using a simple butt joint, which is the easiest for beginners. We’ll also cover a strong corner joint using screws and glue.
Step 1: Measure and Cut Your Wood
This is the most critical step for a professional-looking result. Double-check your measurements before you cut!
- Determine the length of each piece. For a frame with outside dimensions of 32 inches wide and 68 inches tall, and using 4-inch wide wood:
- You will need two “width” pieces. Their length will be the desired outer width of the frame. So, cut two pieces at 32 inches.
- You will need two “height” pieces. Their length will be the desired outer height of the frame. So, cut two pieces at 68 inches.
Important Note: This calculation results in a frame where the side pieces overlap the top and bottom pieces (or vice versa). This is often the simplest way to assemble a frame for beginners.
- Set up your saw for 90-degree cuts. Ensure your miter saw or hand saw is set to a perfect 90-degree angle. A slight deviation here will be noticeable.
- Cut your wood. Carefully cut your four pieces to the lengths you determined. Always cut on the waste side of your pencil line to ensure accuracy.
- Safety First! Always wear safety glasses when operating any power tool. Ensure your workpiece is securely clamped before making cuts. If using a hand saw, use a miter box to guide your cuts and keep your fingers away from the blade.
Step 2: Prepare the Wood for Assembly
Now that you have your pieces, it’s time to smooth them out and prepare for joining. Even if your wood looks smooth, there are often tiny splinters or rough spots.
- Sand all cut edges. Use medium-grit sandpaper (around 120) to lightly sand all the cut ends. This removes any stray fibers.
- Sand the surfaces. Using your orbital sander or by hand, sand all faces of your wood pieces. Start with a medium grit (like 120) and then move to a finer grit (like 220) for a smooth finish. Sanding now is much easier than after assembly.
- Wipe down the wood. After sanding, use a tack cloth or a clean, dry cloth to remove all sawdust. Any remaining dust will show up under your finish.
Step 3: Assemble the Frame
This is where your frame starts to take shape! We’ll use glue and screws for strong joints. This method is often called a “butt joint” construction.
- Lay out your pieces. Arrange the four cut pieces on a flat surface in the shape of your frame. Decide which pieces will overlap. For example, the two longer side pieces could overlap the ends of the two shorter top/bottom pieces.
- Apply wood glue. Apply a thin, even bead of wood glue to the end of one of the shorter pieces where it will meet the longer piece.
- Position and clamp. Carefully position the two pieces to form a corner, ensuring they are flush at the edges. Use your clamps to hold them firmly in place. Make sure the outside edges are perfectly aligned.
- Pre-drill pilot holes. Using a drill bit slightly smaller than your screw diameter, drill two pilot holes through the face of the longer piece and into the end of the shorter piece. This prevents the wood from splitting, especially near the ends. Consider drilling at a slight angle so the screws go into the center of the end grain.
- Drive the screws. Using your drill/driver, drive wood screws through the pilot holes to secure the joint. Don’t overtighten, as this can strip the wood.
- Repeat for all corners. Follow steps 2-5 for the remaining three corners. Ensure each corner is square using a carpenter’s square and that the frame lays flat.
- Check for squareness. Measure the diagonals of your assembled frame. If the measurements are equal, your frame is square. Make adjustments if needed while the glue is still wet.
- Allow glue to dry. Let the wood glue cure according to the manufacturer’s instructions, typically for at least a few hours.
Step 4: Fill Holes and Finish Sanding
Once the glue is dry, it’s time to clean up the joints.
- Fill screw holes (optional). If you don’t want visible screw heads, use a putty knife to fill the pilot holes and any small gaps with wood filler. Choose a filler that matches your wood or is stainable/paintable.
- Let filler dry. Allow the wood filler to dry completely, usually for a few hours.
- Sanding the filler. Once dry, sand the filled areas smooth and flush with the surrounding wood using fine-grit sandpaper.
- Final sanding. Give the entire frame a final light sanding with 220-grit sandpaper to ensure a perfectly smooth surface for finishing.
- Clean off dust. Again, thoroughly clean all dust off the frame with a tack cloth or damp cloth.
Step 5: Apply Your Finish
Now for the fun part – bringing your frame to life with color and protection!
- Stain or Paint. In a well-ventilated area, apply your chosen stain or paint according to the product instructions. If staining, apply it evenly, let it penetrate for the recommended time, and then wipe off the excess. If painting, apply thin, even coats, allowing each coat to dry before applying the next.
- Allow finish to cure. Let the stain or paint dry and cure completely. This can take 24-72 hours depending on the product and humidity.
- Apply a protective sealer. Once the stain or paint is fully cured, apply one or two coats of polyurethane or a similar sealer. This will protect the finish from wear and tear. Lightly sand with very fine-grit sandpaper (e.g., 320 or 400) between coats for an extra smooth finish.
Step 6: Attach the Mirror
This step requires care, as mirrors can be heavy and fragile.
- Clean the mirror. Ensure both the mirror and the inside edge of your frame are clean.
- Position the mirror. Carefully lay the frame face down on a clean, padded surface (like a blanket). Place the mirror into the frame. Ensure it’s centered and fits snugly.
- Secure the mirror. There are a couple of common methods:
- Mirror Clips: These small metal or plastic clips screw into the back of the frame and hold the mirror in place. Use enough clips to provide secure support, typically one every 12-18 inches along the edges. Pre-drill pilot holes for the screws.
- Silicone Adhesive: Apply beads of mirror-grade silicone adhesive along the inside back edge of the frame where the mirror will rest. Press the mirror firmly into place. You may need to hold it or use temporary supports while the adhesive cures (this can take 24 hours or more).
- Safety Warning: If you are working with a large or heavy mirror, it is highly recommended to have another person assist you during this step to prevent dropping or breaking the mirror. For very large mirrors, consider a professional glass shop to install it for added safety.
Step 7: Adding a Backing and Hanging Hardware (Optional)
While a leaning mirror doesn’t technically need to be hung, adding a backing can provide extra stability and protect the mirror’s back.
- Cut backing material. You can use thin plywood, hardboard, or even a heavy-duty cardboard. Cut it to the exact size of the back of your frame.
- Attach backing. Secure the backing material to the back of the frame using small nails, staples, or screws.
- Optional: Hanging Hardware. If you plan to lean the mirror in a high-traffic area or have children or pets, consider adding heavy-duty D-rings and wire on the back of the frame. You would then secure the frame to a wall stud using a wall cleat or strong picture hooks. Always ensure the hardware is rated for the weight of your mirror. For leaning mirrors, the primary stability comes from leaning it against a sturdy wall, but extra security doesn’t hurt.
Tips for Success and Common Pitfalls
Even with a simple project, a few pointers can make a big difference. Avoiding common mistakes will save you time and frustration.
DIY Mirror Frame Best Practices
- Measure Twice, Cut Once: This old adage is gold in woodworking. Always re-confirm your measurements before making the cut.
- Use a Square: A good carpenter’s square is your best friend here. Ensure your corners are