Have you ever needed extra storage but found nothing that fits your style? DIY wood boxes might just be the answer. These boxes are not only useful but also fun to make. Imagine crafting beautiful storage pieces with your own hands. You can make them big or small, plain or colorful. The choice is yours!
Let’s dive into the world of DIY wood boxes. Did you know that making your own boxes can save you money? Store-bought options can be expensive. Plus, handmade boxes have a charm that factory-made ones lack. Think about it: wouldn’t it be lovely to show off a piece you created?
Building DIY wood boxes can be quite simple. You just need some wood, a few tools, and a bit of creativity. What if you could turn a boring corner of your room into a beautiful display? With DIY wood boxes, that dream can come true!
Are you ready to unleash your imagination? Let’s explore how to craft your own storage masterpieces. The joy of creating something special is just a few steps away!
Table of Contents
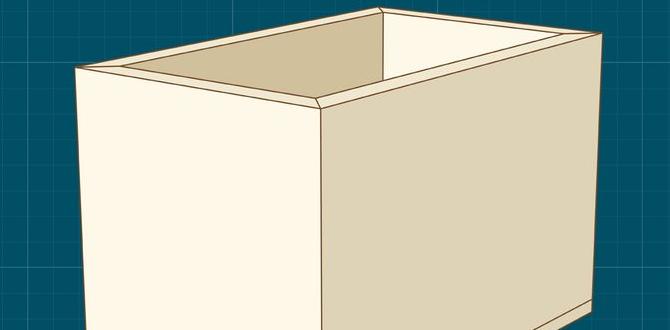
Diy Wood Boxes: Craft Your Own Storage Masterpieces Today! Creating Diy Wood Boxes Can Be A Fun And Rewarding Project That Not Only Enhances Your Home Decor But Also Provides Practical Storage Solutions. From Small Keepsake Boxes To Larger Storage Bins, The Possibilities Are Endless When You Harness Your Creativity And Woodworking Skills. In This Article, We Will Explore Various Techniques, Materials, And Ideas For Crafting Your Very Own Wood Boxes. Getting Started With Diy Wood Boxes Before Diving Into Your Project, It’S Essential To Gather The Right Materials. Basic Supplies You Might Need Include: – **Wood**: Choose The Type Of Wood That Fits Your Project; Popular Options Are Pine, Cedar, And Plywood. – **Tools**: A Saw, Hammer, Nails, Wood Glue, And Sandpaper Are Fundamental Tools For Constructing Your Box. – **Finishing Supplies**: Consider Paints, Stains, Or Sealants To Give Your Box The Desired Aesthetic And Durability. Different Styles Of Wood Boxes 1. **Keepsake Boxes**: These Can Be Used For Storing Jewelry, Letters, Or Small Mementos. Decorate With Personal Touches For An Added Unique Flair. 2. **Storage Bins**: Larger Wood Boxes Can Serve As Stylish Storage Options For Blankets, Toys, Or Books While Keeping Your Space Organized. 3. **Nested Boxes**: Crafting A Set Of Nested Boxes Allows For Efficient Storage And An Attractive Display Option. Step-By-Step Guide To Crafting A Simple Diy Wood Box 1. **Design Your Box**: Sketch Out The Dimensions And Style Of Your Box. Consider Features Like Lids Or Compartments. 2. **Cut The Wood**: Using A Saw, Cut The Wood To Match Your Desired Measurements For The Bottom, Sides, And Top Of The Box. 3. **Assemble The Box**: Starting With The Bottom, Attach The Sides Using Nails Or Wood Glue. Ensure All Edges Are Aligned Properly. 4. **Sand The Edges**: After Assembly, Sand The Edges And Surfaces To Remove Splinters And Ensure A Smooth Finish. 5. **Finish Your Box**: Apply Paint, Stain, Or Sealant As Desired To Protect The Wood And Enhance Its Appearance. Personalization Ideas For Your Diy Wood Boxes – **Engraving**: Add Names, Quotes, Or Designs To Personalize Your Box. – **Decoupage**: Decorate With Images Or Patterns Using Decoupage Techniques. – **Color Themes**: Choose Colors That Match Your Home Décor To Create A Cohesive Look. Conclusion Diy Wood Boxes Are Versatile Projects That Blend Functionality With Creativity. Whether You’Re Making Them For Yourself Or As Gifts, These Storage Masterpieces Can Elevate Any Space. So Gather Your Materials, Unleash Your Creativity, And Start Crafting Your Own Unique Wood Boxes Today!

DIY Wood Boxes: Craft Your Own Storage Masterpieces
Building your own DIY wood boxes can be a fun and creative project. Imagine transforming simple wood into beautiful storage pieces that fit your style. You can choose different sizes and designs, making them perfect for any room. Plus, working with wood boosts your skills! Did you know that crafting can also reduce stress? So gather your tools, let your imagination run wild, and start creating these unique masterpieces today!Essential Tools for Wood Box Projects
List of musthave tools for beginners and advanced crafters. Safety tips for using tools effectively.Creating wood boxes is fun and rewarding! To get started, you need some essential tools. Beginners should have a saw, measuring tape, and hammer. Advanced crafters may want to add a miter saw and a power drill to their toolkit.
Don’t forget safety! Always wear goggles and keep fingers away from the blade. A little caution goes a long way. Here’s a quick reference table to keep you on track:
| Tools | Level |
|---|---|
| Saw | Beginner |
| Measuring Tape | Beginner |
| Hammer | Beginner |
| Miter Saw | Advanced |
| Power Drill | Advanced |
Now you’re set to make magical wood boxes! Happy crafting!
Step-by-Step Guide to Building Your First Wood Box
Detailed instructions for crafting a simple wooden box. Common mistakes to avoid for beginners.Building your first wood box can be fun! Start by gathering wood planks, nails, and glue. Make sure to measure twice and cut once, just like your wise grandma always said. Don’t skip sanding the edges; splinters are no one’s friend! A simple design includes four sides, a bottom, and a lid. If this is your first try, remember: don’t nail your fingers! Common mistakes? Forgetting to pre-drill holes can lead to a wood disaster. And no, you can’t use duct tape as a substitute. Here’s a quick checklist:
| Step | Tip |
|---|---|
| Measure Wood | Check twice! |
| Cut Pieces | Watch those fingers! |
| Sanding | Keep splinters away! |
| Nail and Glue | Pre-drill holes! |
Now, you’re on your way to becoming a DIY pro!
Creative Designs and Styles for Wood Boxes
Inspiration for unique shapes and designs. How to incorporate decorative elements (e.g., carvings, paint).Creating wood boxes can be a fun way to show your creativity. Think outside the box—literally! You can make shapes like hearts, stars, or even dinosaurs. Add a splash of color with paint or some cool carvings to make your box stand out. Get inspired by nature or your favorite cartoon. You can even turn an old shoe box into a treasure chest! Remember, every masterpiece needs a little laughter, so make your next project a playful adventure!
| Design Ideas | Decorative Elements |
|---|---|
| Heart-shaped box | Colorful paint |
| Star-shaped box | Fun carvings |
| Animal-themed designs | Stickers or decals |
Organizing with DIY Wood Boxes
Tips on how to use wood boxes for effective organization. Ideas for different spaces (e.g., home office, kitchen, playroom).Wood boxes can help you bring order to your space. They are not only practical but also add style. Here are some tips for using these boxes effectively:
- In your home office, use boxes for paperwork and supplies.
- In the kitchen, organize spices or snacks in wooden boxes.
- For the playroom, store toys neatly and make clean-up fun!
Customizing these boxes with colors or designs can make them fit your space even better. Crafting your own also adds a personal touch to your organization.
How can I use wood boxes to organize my space?
You can use wood boxes to sort items by category. They keep things tidy and easy to find. Try labeling each box for quick access!
Customizing Your Wood Boxes
Techniques for personalizing your boxes (e.g., stencils, engravings). Ideas for gifting and showcasing your custom creations.Personalizing wood boxes is fun and creative! You can use different techniques to make your boxes special. Try using stencils for cool shapes and designs. Engravings are great for adding names or dates. These methods make your boxes unique.
If you’re gifting these boxes, make them more exciting by:
- Wrapping them in colorful paper.
- Adding a personal note inside.
- Using bright paint or markers for more flair.
Your custom creations will surely impress friends and family!
What are some techniques to personalize your wood boxes?
You can use stencils and engravings to create unique designs. These methods help you add your personal touch easily.
Maintenance and Care for Wood Boxes
Best practices for cleaning and maintaining wooden boxes. Tips on repairing common issues like scratches or damage.Taking care of your wooden boxes keeps them beautiful and strong. Cleaning is simple! Use a soft cloth and warm, soapy water. Wipe with a damp cloth afterward. Avoid soaking the wood. For scratches, gently rub a walnut over the area. This works magic! If there’s damage, sand it lightly and apply wood glue if needed. Keep your boxes in a dry, cool place to prevent warping. Follow these tips, and your DIY wood boxes will last for years!
How to Fix Common Issues?
Wondering how to fix common wooden box problems?
- Scratches: Use a walnut to fill them in.
- Loose Joints: Apply wood glue and clamp until dry.
- Water Damage: Lightly sand and refinish.
Locating Inspiration and Tutorials Online
Recommended websites, blogs, and YouTube channels for DIY enthusiasts. How to participate in DIY wood box communities and forums.Finding ideas for your DIY wood boxes can be fun! Many websites and blogs share great projects. Check out sites like Pinterest, Instructables, and DIY Network. YouTube has amazing channels for visual learners, like Home Repair Tutor and Ana White. Joining online forums or groups also helps. You can ask questions and share your creations. Try these tips:
- Explore Pinterest for inspiration.
- Join Facebook groups for DIY enthusiasts.
- Follow blogs dedicated to woodworking.
Where can I find DIY wood box tutorials?
You can find tutorials on YouTube, Pinterest, and popular DIY blogs. They show step-by-step guides, making it easy to follow. The more you explore, the more ideas you’ll discover!
Conclusion
In conclusion, DIY wood boxes are fun and useful projects for everyone. You can create beautiful storage pieces that fit your needs. Start with simple plans and choose materials that inspire you. Remember, practice makes perfect! Explore more ideas online or gather your supplies today. Let’s get crafting and turn your wood into masterpieces!FAQs
What Materials Are Best Suited For Constructing Durable Diy Wood Boxes?For making strong wood boxes, use plywood or pine wood. Plywood is tough and can hold weight well. Pine is lighter but still sturdy. Make sure to use wood glue and screws for extra strength. You want your box to last a long time!
What Tools Do I Need To Create Different Styles Of Wood Boxes, Such As Decorative Or Functional Designs?To make wood boxes, you need some basic tools. First, get a saw to cut the wood. You will also need a hammer and nails or screws to hold the pieces together. Sandpaper helps smooth the edges so they feel nice. Finally, paint or varnish will make your boxes look pretty and shiny!
How Can I Personalize My Diy Wood Boxes With Finishes Or Embellishments?You can make your DIY wood boxes special by adding colors or designs. First, paint your box with your favorite color. Next, you can use stickers or stamps to add fun pictures. If you like, try adding some glitter for sparkle! Finally, you could decorate it with rope or ribbon for a nice touch.
What Techniques Can I Use To Ensure My Wood Box Has A Strong And Sturdy Construction?To make your wood box strong, start with thick wood. Use screws instead of nails for better strength. Always glue the corners before screwing them together. Make sure to sand the edges so they fit well. Finally, check that everything is tight and secure!
Are There Specific Designs Or Plans You Recommend For Beginners Looking To Make Their First Wood Box?Yes! For beginners, I recommend a simple square or rectangular box. You can use just four sides and a bottom. Start with a box that is about 12 inches long. This size is easy to measure and cut. You can decorate it later with paint or stickers!