Have you ever looked at a plain wall and thought it needed something special? A DIY birch picture frame could be just what you need. It’s an easy project that makes your favorite photos shine. Imagine hanging a beautiful frame that you made yourself!
Using birch wood gives the frame a warm and natural feel. Birch is not only pretty; it’s also very strong. You can create a frame that holds your memories for years to come.
Did you know that making your own picture frame can be fun and relaxing? It’s a great way to express your creativity. Plus, you can customize the size and style to fit your home perfectly. How cool is that?
In this article, we will explore how to craft your own DIY birch picture frame step by step. You’ll soon see that this project is easy, enjoyable, and rewarding!
Table of Contents
Create A Stunning Diy Birch Picture Frame For Your Home
Creating a DIY birch picture frame is a fun and simple project. Birch wood is light and beautiful, perfect for showcasing your favorite photos. You only need a few materials, like birch branches, glue, and a saw. Have you ever thought about turning nature into art? This frame can brighten up any room. Plus, each frame tells a unique story through its wood’s texture. Get inspired, and let your creativity shine!
Materials Needed for DIY Birch Picture Frame
List of essential materials: birch wood, tools, and supplies. Tips for selecting the right type of birch wood.
Creating a DIY birch picture frame is simple and fun! You will need a few basic materials. Here’s what you’ll want to gather:
- Birch Wood: Choose smooth and straight pieces.
- Tools: You’ll need a saw, sandpaper, and a drill.
- Supplies: Get screws, wood glue, and a cute picture to frame!
When picking birch wood, look for light color and a fine grain. This makes your frame look great! Happy crafting!
What tools do you need for a DIY birch picture frame?
For a DIY birch picture frame, you need basic tools like a saw, drill, and sandpaper. These tools help you cut, assemble, and smooth your frame quickly!
Measuring and Cutting Birch Wood
Guidelines for measuring picture dimensions accurately. Techniques for cutting the wood to desired sizes.
To create a stunning birch picture frame, start by measuring your picture’s dimensions accurately. Use a tape measure and write down the width and height. Remember, it’s better to measure twice than risk looking like a wobbly frame! For cutting, use a fine saw to ensure smooth edges. Always cut from the back to hide any rough spots. Safety first—wear goggles so you look cool while working!
| Dimension | Measurement |
|---|---|
| Width | Picture width |
| Height | Picture height |
These guidelines will help you make precise cuts. Trust me, a clean cut is like a happy dance for woodworkers!
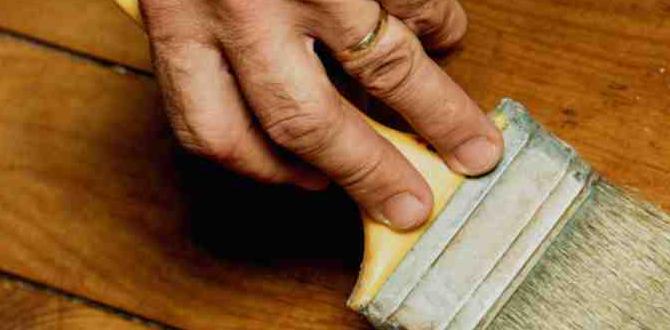
Sanding and Preparing the Birch Wood
Importance of sanding for a smooth finish. Stepbystep instructions for preparing the wood surface.
Sanding birch wood is like giving it a spa day. It makes the surface smooth and ready for your masterpiece. To get started, follow these simple steps:
| Step | Action |
|---|---|
| 1 | Use coarse sandpaper (about 80 grit) to remove rough spots. |
| 2 | Switch to medium sandpaper (150 grit) for a finer finish. |
| 3 | Finish with fine sandpaper (220 grit) to make it silky smooth. |
This process is essential for a polished look. Smooth wood means no splinters—who wants those in their hands? Remember, a little elbow grease goes a long way!
Assembling the Birch Picture Frame
Detailed instructions for joining the frame pieces. Tips for ensuring the frame is square and sturdy.
Start by laying out your frame pieces on a flat surface. Make sure the corners fit well. Use wood glue to join the pieces. Add clamps to hold them in place while they dry. This will keep your DIY birch picture frame square and strong. Check the corners with a square tool to ensure they’re even. If needed, adjust before the glue dries.
How do you make sure the frame is sturdy?
To ensure your frame is sturdy, use enough glue at the joints and allow it to dry completely. Clamps help keep it secure while drying. Regular checks will help keep it square.
- Check all corners with a square tool.
- Add clamps to hold the pieces together.
- Ensure glue covers all joints.
Finishing Touches: Staining and Sealing
Options for staining the birch wood: colors and techniques. Recommendations for sealing the frame to protect it.
Staining birch wood adds beauty to your DIY project. You can choose from colors like oak, walnut, or even a bright blue! Use a rag to apply the stain. For a smoother finish, try brushing it on. After staining, sealing is important. It protects your frame from scratches and water. A clear polyurethane seal works well. It keeps the color bright and shiny. Always let it dry before using your frame.
What are good colors for staining birch wood?
You can use shades like light oak, medium walnut, and even dark cherry to enhance your birch frame.
Sealing Options
- Polyurethane
- Varnish
- Lacquer
Displaying Your DIY Birch Picture Frame
Creative ideas for showcasing your finished frame. Suggestions for themed arrangements and décor placements.
After completing your DIY birch picture frame, it’s time to show it off! Here are some fun ideas for displaying your masterpiece:
- Hang it in a special place, like your bedroom or living room.
- Group it with similar frames for a cozy gallery wall.
- Place it on a desk or shelf with colorful plants nearby.
- Add it to a theme, like nature or family memories.
Each choice brings your unique style to life. Remember, showing your frame can inspire others, too!
What are fun ways to show a picture frame?
Creative displays include hanging themes, arranging multiple frames, or placing it on a stylish shelf.
Common Mistakes to Avoid in DIY Frame Projects
Highlight frequent errors made during the construction process. Tips for troubleshooting and ensuring a successful project.
When creating your frame, easy mistakes can happen. One big error is not measuring correctly. This can lead to parts that don’t fit. Another mistake is using the wrong glue. Strong glue is important for holding the frame together. Also, check for uneven cuts. Smooth edges help your frame look nice. Don’t forget to allow time for glue to dry. Small missteps like these can ruin your project!
What tools do I need for a DIY birch picture frame?
You need a few basic tools to start your project: scissors or a saw, glue, and sandpaper. These tools help you cut, stick, and smooth your frame!
- Measure twice, cut once.
- Choose the right type of glue.
- Make sure cuts are even.
Resources for Further DIY Projects
Suggested websites or books for more DIY ideas. Online communities or forums for sharing and gaining inspiration.
If you’re ready to dive deeper into the world of DIY projects, there are tons of resources waiting for you! Websites like Pinterest and Instructables are treasure troves of ideas. You’ll find everything from simple crafts to more challenging undertakings. Don’t forget about books! Titles like “The Creative DIY Handbook” can spark your imagination.
Online communities such as Reddit DIY and Facebook groups are great spots to share your work and get inspired. Who knows, maybe your frame will become the next viral sensation! Take your crafting to a new level with these amazing resources. Remember, the only thing better than a great DIY project is sharing it with others!
| Resource Type | Name |
|---|---|
| Website | |
| Website | Instructables |
| Book | The Creative DIY Handbook |
| Forum | Reddit DIY |
| Forum | Facebook DIY Groups |
Conclusion
In conclusion, making a DIY birch picture frame is fun and simple. You can personalize your space with creativity. Gather materials like birch branches, glue, and tools. Follow easy steps, and you’ll have a beautiful frame! Try it out yourself. For more ideas, check online tutorials and unleash your artistic side! Enjoy making memories with your new frame!
FAQs
What Materials Do I Need To Create A Diy Birch Picture Frame?
To create a DIY birch picture frame, you need a few simple materials. First, get some birch wood. You will also need wood glue to stick the pieces together. Don’t forget a saw to cut the wood to the right size. Finally, grab some sandpaper to smooth the edges.
How Do I Properly Cut And Assemble Birch Wood For A Picture Frame?
To cut birch wood for a picture frame, start by measuring the size you want. Use a saw to cut straight pieces. You need four pieces: two long sides and two short sides. To put the frame together, use wood glue in the corners and press them tightly. Clamp them for a few minutes to hold everything in place while the glue dries.
What Techniques Can I Use To Finish And Seal My Diy Birch Picture Frame For Durability?
To finish and seal your DIY birch picture frame, you can use wood stain or paint to add color. After that, apply a clear sealant like polyurethane. Use a soft brush to spread it evenly. Let it dry completely before using your frame. This will help protect it and make it last longer!
Are There Any Specific Tools That Are Essential For Crafting A Birch Picture Frame?
To make a birch picture frame, you need a few tools. First, grab a saw to cut the wood. You’ll also need a hammer and some nails to put it together. A measuring tape helps you make the right sizes. Finally, use sandpaper to smooth the edges.
How Can I Personalize My Diy Birch Picture Frame With Additional Designs Or Embellishments?
You can make your DIY birch picture frame special by adding fun designs. Try painting it in your favorite colors. You can also glue on little decorations like stickers or buttons. If you like nature, add some leaves or flowers. Lastly, use string or ribbon to hang it up!