Quick Summary:
Understanding nailer firing modes is key to project success. Most nailers offer two main modes: single or sequential fire for precision, and contact or bump fire for speed. Choosing the right mode ensures safety and efficiency, preventing accidental nail placements and speeding up your work.
Hey folks, Jack Shaffer here from Nailerguy! Ever grabbed a nailer, ready to dive into a project, only to find a switch you’re not quite sure about? That little dial or lever controlling how your nailer fires can feel a bit mysterious to beginners. It’s one of those things that, once you understand it, makes a huge difference in how smoothly your project goes. Getting this right isn’t just about speed; it’s about safety and making sure your nails land exactly where you want them. Don’t worry, we’re going to break down these firing modes in a way that’s super simple. By the end of this guide, you’ll be a pro at selecting the perfect mode for any job!
Table of Contents
Understanding Your Nailer’s Firing Modes: The Nailerguy Essential Guide
Picking the right tool is only half the battle. Knowing how to use it effectively is where the real magic happens. For nail guns, this means understanding their firing modes. These modes are essentially the brains behind how your nailer delivers fasteners. They range from precise, one-nail-at-a-time actions to rapid-fire bursts. Mastering these modes will transform your woodworking experience, making it safer, more efficient, and a lot more enjoyable!
Think of it like having different settings on your camera. Sometimes you need that perfect, crisp shot (single fire), and other times you want to capture a fast-moving subject in a blur of action (contact fire). Your nailer is no different! These modes are designed for specific tasks and materials, and understanding them is crucial for both hobbyists and seasoned pros. Let’s dive in and demystify what’s going on under that trigger guard.
The Two Primary Firing Modes Explained
Most modern nail guns come equipped with, or can be switched between, two fundamental operating modes. These are often called different names by manufacturers, but their core functionality remains the same. Knowing these two is your foundation for understanding anything more complex.
1. Single Sequential Trip (SST) Mode: Precision Over Speed
This is often referred to as “single fire,” “exact fire,” or “limited trigger mode.” It’s the mode you want when accuracy is paramount. Here’s how it works:
How it Works: To fire a single nail, you must first press the contact tip (the part that touches the wood) firmly against the surface. Only then will the nailer be ready to fire. With the tip engaged, you then pull the trigger. The nailer drives one nail. If you want to fire another nail, you must release the trigger, then engage the contact tip again, and pull the trigger once more. This means there’s a distinct three-step process for each nail: push, pull, push. (Push the nose onto the wood, pull the trigger for one nail, then push the nose again for the next).
When to Use It:
- Precise Nailing: Ideal for detailed trim work, installing crown molding, window and door casings, or any situation where a misplaced nail could ruin the aesthetic or function.
- Fine Woodworking: Perfect for delicate joinery or assembling furniture where exact placement is critical.
- Beginner Confidence: This mode is fantastic for newcomers to nail guns. It requires deliberate actions for each nail, reducing the risk of accidental firing and giving you time to think about nail placement.
- Working Near Edges: When nailing close to the edge of a workpiece, this mode prevents accidental firing if the trigger is bumped.
Pros:
- Unmatched accuracy and control.
- Significantly reduces the chance of accidental nail firing.
- Great for learning and for critical placement jobs.
Cons:
- Significantly slower for large projects.
- Requires more deliberate trigger and contact tip action for each nail.
2. Contact Trip (CT) Mode: Speed for Big Jobs
This is the mode synonymous with speed. You’ll often hear it called “bump fire,” “continuous fire,” or “multi-fire mode.” This mode is excellent for quickly fastening materials over a large area.
How it Works: In contact trip mode, you first press the contact tip firmly against the surface where you want to drive a nail. Then, you hold the trigger down. As you move the nailer along the workpiece, each time you push the contact tip against the surface, it will fire a nail. This allows for rapid, successive nailing by simply moving the tool. You can lay down a line of nails very quickly by “bumping” the tool along!
When to Use It:
- Framing: Perfect for quickly assembling wall studs, floor joists, and roof rafters.
- Sheathing: Attaching plywood or OSB to the framing structure is a breeze with this mode.
- Fencing and Decking: Great for installing deck boards or fence pickets where speed is beneficial.
- Any large-scale fastening task: If you have many nails to drive in a straight or curved line, contact fire will save you a lot of time.
Pros:
- Extremely fast for repetitive fastening.
- Significantly speeds up large projects.
- Efficient for laying down multiple nails in quick succession.
Cons:
- Less precise; higher chance of nail placement errors.
- Requires extreme caution to prevent accidental firing.
- Can be tiring to hold the trigger down for extended periods.
The Safety Shift: Understanding Sequential vs. Contact Firing
The biggest difference and the most crucial distinction between these modes lies in safety and control. Regulatory bodies like the Occupational Safety and Health Administration (OSHA) strongly recommend using sequential trip mode for most applications due to its inherent safety features.
To understand why, let’s look at the trigger mechanism and the role of the contact trip nose.
Sequential Trip (SST): This mode requires a two-step action to drive a nail: the contact tip must be depressed against the work surface, AND the trigger must be pulled. This “AND” logic means both conditions must be met simultaneously or in a specific sequence for a nail to fire. This prevents accidental discharge if the tool is bumped or dropped.
Contact Trip (CT): This mode operates on an “OR” logic. The trigger can be held down, and then the nail will fire ANY TIME the contact tip is depressed. This is what allows for rapid firing by “bumping” the tool. However, it also means that if the trigger is already held down and you bump the tool against any surface – even clothing, a hose, or your hand – it will fire a nail. This is where many injuries occur.
It’s vital for everyone using a nail gun to understand these differences. Always refer to your nailer’s manual for specific instructions on how to switch between modes and for essential safety precautions. For a comprehensive overview of nail gun safety, the National Institute for Occupational Safety and Health (NIOSH) provides excellent resources.
How to Switch Firing Modes on Your Nailer
The exact method for switching firing modes can vary slightly between different brands and models of nailers, but the general principle is the same. Most nailers have a selector integrated into the tool itself, often near the trigger or on the grip.
Common Types of Mode Selectors:
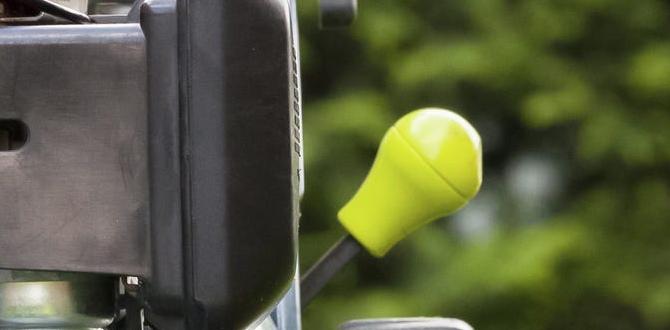
- Lever or Button: Many electric and cordless nailers use a small lever or a push-button switch. You’ll typically see symbols or text indicating the modes (e.g., “S” for sequential, “C” for contact). You move this lever or press the button to cycle through the available modes.
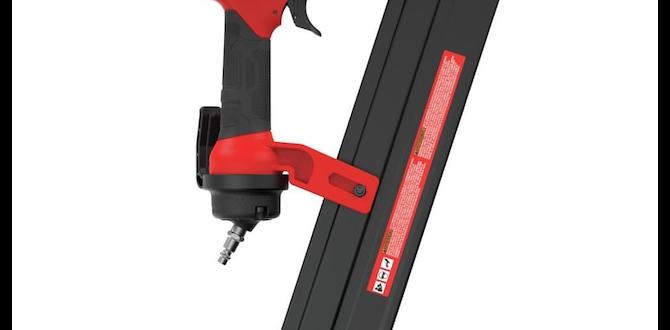
- Rotating Dial: Some models feature a small, often red, dial. You rotate this dial to align a mark with the symbol for the desired firing mode.
- Trigger Switch: Higher-end models might incorporate a switch directly on the trigger assembly itself.
General Steps to Change Modes:
- Ensure the Nailer is Unloaded: Always remove the battery and/or disconnect the air hose before making any adjustments. This is a non-negotiable safety step.
- Locate the Mode Selector: Consult your user manual if you’re unsure where it is. It’s usually within easy reach of your thumb or index finger.
- Identify the Mode Indicators: Look for symbols or text that clearly label “Sequential” (often “S”) and “Contact” (often “C”).
- Make the Switch: Move the lever, press the button, or rotate the dial to your desired setting.
- Visually Confirm: Double-check that the selector is clearly indicating the mode you want. Some selectors will have a visible indicator showing the selected mode.
- Re-load and Test (Safely): Reconnect your air hose or battery. Point the nailer in a safe direction (away from yourself and others) at a piece of scrap wood. Test the firing mode to ensure it’s acting as expected. If you selected sequential, it should only fire when you press the tip and pull the trigger. If you selected contact, it should fire repeatedly as you hold the trigger down and press the tip.
Important Note: Not all nailers offer both modes. Some entry-level or specialized nailers might be fixed to one mode (often sequential for safety). Always check your nailer’s specifications or manual to know what modes are available.
Nailer Firing Modes: A Quick Comparison Table
To help solidify your understanding, here’s a table that summarizes the key aspects of each firing mode:
| Feature | Single Sequential Trip (SST) | Contact Trip (CT) |
|---|---|---|
| Common Names | Single Fire, Exact Fire, Limited Trigger | Bump Fire, Multi-Fire, Full Auto (misnomer) |
| Action Required Per Nail | Press tip & pull trigger for each nail | Hold trigger, press tip to fire |
| Speed of Nailing | Slow | Fast |
| Accuracy/Control | High | Lower |
| Safety Level | High | Lower (requires more caution) |
| Best For | Precision work, trim, fine furniture, beginners | Framing, sheathing, decking, large projects |
| Risk of Accidental Fire | Low | Higher |
When Are Firing Modes NOT Enough? Understanding “Full Auto”
It’s a common misconception that “contact trip” mode is “full auto.” While it feels like it, true full-auto nailers are very different and rarely found outside of industrial or specialized manufacturing settings. A true automatic nailer would continuously fire nails as long as the trigger is held down and the tool is powered, without needing to press the contact tip.
The “bump fire” or “contact trip” mode on consumer and professional nail guns isn’t truly automatic. It requires the sequential action of pressing the contact tip against a surface to trigger each nail. This distinction is important for safety. If you see a nail gun advertised as “full auto,” be highly skeptical unless you’re looking at very specialized industrial equipment. For the vast majority of DIYers and woodworkers, the choice is between sequential and contact trip modes.
Advanced Trigger Systems: Selectable Modes
Many modern nail guns are far more versatile than older models and offer what’s called a “selectable trigger” or “configurable trigger.” This means you can switch between the two primary modes with a button or lever, often directly on the tool’s trigger assembly. This is incredibly convenient, allowing you to adapt your nailer to different tasks on the fly.
Common Configurations for Selectable Triggers:
- Sequential as Default: Many tools are set to sequential fire by default for safety. You then press a button or move a lever to enable contact fire.
- “All-in-One” Trigger: Some advanced triggers allow you to achieve both modes with a single trigger mechanism, but it usually requires a specific technique for each mode.
- Mode Selector Switch: The most common implementation is a distinct switch, as discussed earlier, allowing you to lock the nailer into either sequential or contact mode.
Why are Selectable Triggers Great?
- Versatility: One tool can handle a wide range of tasks, from fine trim work to framing.
- Efficiency: No need to switch tools; you can switch modes in seconds.
- Safety First: They often default to sequential mode, promoting safer practices.
When purchasing a new nailer, especially if you plan on tackling diverse projects, opting for a model with a selectable trigger is a smart investment. It maximizes the utility of your tool.
Beyond the Basics: Specialty Nailer Modes
While sequential and contact modes cover the majority of uses, some more specialized nail guns might have slight variations or additional features. For instance:
- Pro-Series Triggers: Some premium professional nailers offer highly refined trigger systems that allow for even more nuanced control, although they typically still operate on the principles of sequential and contact firing.
- Depth Adjustment: While not a “firing mode” in the same sense, the depth of drive adjustment is a critical setting that works in conjunction with your firing mode. It controls how deeply the nail is driven into the material. Always make sure this is set correctly for your material to avoid overdriving (nail head sinks too deep) or underdriving (nail head sticks out).
- “Mode Indicator Lights”: Some newer cordless models feature small LED lights that visually indicate the currently selected firing mode, adding an extra layer of confirmation.
For the vast majority of DIY projects, understanding and correctly using sequential and contact trip modes will be all you need. It’s about mastering the core functionality first.
Tips for Safe and Effective Mode Selection and Use
Now that you’re more familiar with the different firing modes, let’s talk about how to use them safely and effectively on your projects. Even with the best tools, safety is always the top priority.
Safety First, Always!
- Read Your Manual: This can’t be stressed enough! Every tool is slightly different. Your manual is the ultimate guide to your specific nailer’s features and safety protocols.
- Wear Safety Glasses: Always wear ANSI-approved safety glasses or a face shield to protect your eyes from flying debris or ricocheting nails.
- Keep Fingers Off the Trigger: When not actively firing a nail, keep your finger completely off the trigger. This is especially crucial in contact trip mode.
- Never “Dry Fire”: Firing a nail without it penetrating a surface (called dry firing) can damage the tool.
- Disconnect Power When Not in Use: Remove the battery or disconnect the air hose when the nailer is not in use, when changing nails, or when performing maintenance.
- Be Aware of Recoil and Bounce: Especially in contact fire mode, be mindful that the tool can bounce after driving a nail. Ensure you’re in control and that the contact tip doesn’t re-engage accidentally.
- Know Your Surface: Be aware of what’s behind the material you’re nailing into. Ensure there are no electrical wires, plumbing, or people on the other side.
Effective Use on Your Projects:
- Start with Sequential: If you’re new to a particular project or nailer, start in sequential trip mode. It gives you time to get a feel for the tool and ensures precision.
- Switch to Contact for Speed: Once you’re comfortable and the project calls for speed (like framing or attaching sheathing), switch to contact trip mode. Just be extra vigilant with safety.
- Practice on Scrap: Before tackling your main project, always test your nailer on scrap pieces of the same material. Adjust depth settings and practice switching between modes.
- Maintain a Good Grip: Hold the nailer firmly but comfortably. A secure grip helps maintain control, especially when using contact fire.
- Don’t Force It: If the nail isn’t driving properly, don’t keep the trigger pulled