Quick Summary:
Roofing and siding nail guns look similar but are distinct. Roofing nailers use longer, wider nails for shingles and have a larger, flatter trigger for speed and safety. Siding nailers use shorter, thinner nails for panels like vinyl or wood, with more precise control for aesthetics. Choosing the right one ensures durability and a polished finish for your home projects.
Hey there, DIYers! Jack Shaffer, your friendly neighborhood Nailerguy, here. Ever stare at your toolbox and wonder about those speedy nail guns? You’ve probably seen them on construction sites, making quick work of tough jobs. Today, we’re diving into two workhorses that often get mixed up: the roofing nailer and the siding nailer. It’s a common point of confusion for beginners, leading to frustration or even damaged materials if you grab the wrong one. But don’t worry! With a little bit of know-how, you’ll be confidently choosing and using the right tool for your home improvement projects. We’ll break down exactly what makes them different, so you can get the best results without the guesswork. Stick around, and let’s nail this!
Table of Contents
Roofing vs. Siding Nail Guns: What’s the Deal?
When you’re looking to protect your home from the elements, especially with roofing and siding projects, efficiency and the right tools are key. Nail guns are fantastic for this, speeding up the process dramatically. However, there’s a crucial difference between a roofing nailer and a siding nailer. This isn’t just a minor detail; it’s about using the tool designed for the specific job, ensuring your shingles stay put through storms and your siding looks sharp for years to come. Getting this distinction right means better performance, longer-lasting results, and a safer, more satisfying DIY experience.
Understanding the Core Differences
At first glance, you might think they’re almost identical. They both shoot nails rapidly, after all! But the devil is in the details – or rather, the nails and the design of the tool itself. These differences are engineered for specific materials and applications, making each tool specialized.
1. The Nails They Use
This is perhaps the most significant differentiator. The type of nail a nail gun drives is directly related to the material it’s designed to fasten.
- Roofing Nailer Nails: These are typically larger, sturdier nails with a wide head. Think of them as little anchors. The wide head is crucial for roofing shingles because it helps distribute the force over a larger surface area, preventing the shingle from tearing. They also often have a coil design, meaning they’re loaded onto a wire and fed into the gun from a canister that spins. This allows for a higher nail capacity, meaning fewer reloads when you’re covering a large roof. The nails themselves are usually made of galvanized steel or stainless steel to resist rust and corrosion, which is essential given their outdoor exposure.
- Siding Nailer Nails: Siding nails are generally thinner and shorter than roofing nails. They are designed to go through materials like wood clapboard, fiber cement, or vinyl siding and into the underlying structure without over-penetrating or splitting the material. The nail head is often smaller to be less noticeable, contributing to a cleaner aesthetic. Siding nailers typically use “collated” nails, meaning they are glued or clipped together at an angle (usually 15 or 22 degrees) and loaded into a straight magazine. This design is important for getting into tighter spots and maintaining a consistent look on your siding.
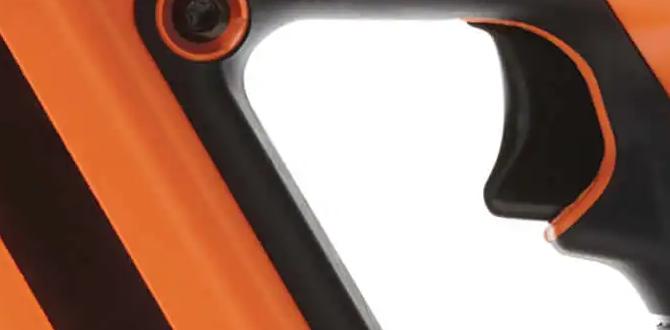
2. The Design and Features of the Nail Gun
Beyond the nails, the tools themselves have design features tailored to their purpose.
- Roofing Nailer Design:
- Larger Magazine/Coil System: As mentioned, to speed up the roofing process, these guns often hold a large number of nails, fed from a rotating coil. This minimizes downtime.
- Depth Adjustment: While important for all nailers, roofing nailers need to drive nails just deep enough to hold the shingle securely without crushing it or going too deep into the underlayment. Many have easy-to-use depth adjustment wheels.
- Aggressive Nose Piece: Some roofing nailers have a specific nose piece designed to “hook” onto the shingle for better positioning and a consistent drive depth.
- Trigger Mechanism: Often, roofing nailers have a sequential trigger or a restrictive trigger that requires the nose to be pressed against the material before the trigger can be pulled. This is a safety feature to prevent accidental firing. Some higher-end models might have contact fire for speed, but safety is always paramount when working at heights.
- Siding Nailer Design:
- Straight or Angled Magazine: Depending on the type of siding and manufacturer, siding nailers might have a straight magazine or an angled one (typically 15-22 degrees) to reach into corners and under overhangs more easily.
- Precise Depth Control: For siding, the appearance is crucial. Siding nailer depth control needs to be very precise so the nail head sits flush or slightly countersunk without damaging the siding material. Too deep, and you risk cracking or creating a hole that lets water in. Too shallow, and the nail head will be visible and could snag.
- Slimmer Nose: The tip of the siding nailer is often narrower to allow for accurate placement between siding panels and in tighter areas.
- Contact Actuation (Bump Fire): Many siding nailers feature a contact actuation or “bump fire” mode. This allows you to rapidly fire nails by holding down the trigger and bumping the nose of the tool against the surface. This is excellent for quickly attaching long siding panels.
3. Power Source and Weight
Both types of nail guns can be pneumatic (air-powered), cordless (battery-powered), or even gas-powered. However, the power needs can differ slightly. Roofing nailers, driving larger nails, might require a bit more power from the compressor. Siding nailers, driving smaller fasteners, can often get away with less air pressure or lower-powered battery systems.
Weight is also a factor. Roofing nailers can sometimes be a bit heavier due to their construction and the need for durability when working on steep roofs. Siding nailers are often designed to be more maneuverable, especially when working on walls and scaffolding.
When to Use Which Nailer: Practical Applications
Choosing the right tool for the job makes all the difference. Here’s a breakdown of typical scenarios:
Using a Roofing Nailer
The primary use for a roofing nailer is, as the name suggests, for installing roofing materials. This includes:
- Asphalt Shingles: This is the most common application. The wide-headed nails are perfect for securely fastening shingles to the roof deck.
- Wood Shakes and Shingles: If you’re going for a more rustic or natural look, these nailers can handle the thicker, often more irregular wood pieces.
- Certain Types of Roll Roofing: In some cases, roofing nailers can be used for specific types of roll roofing products.
- Roof Underlayment Stapling (with adapters): Some roofing nailers can be equipped with adapters to drive staples, useful for securing roofing felt or underlayment.
Key Benefit: Speed and Security for Large Areas. When you’re covering hundreds or thousands of square feet of roof, the ability to rapidly fire nails with minimal reloading is paramount. The robust nails also ensure the shingles will withstand wind and weather.
For more information on roofing safety and best practices, the Occupational Safety and Health Administration (OSHA) provides extensive guidelines and resources for working safely at heights.
Using a Siding Nailer
Siding nailers are designed for fastening various exterior wall covering materials:
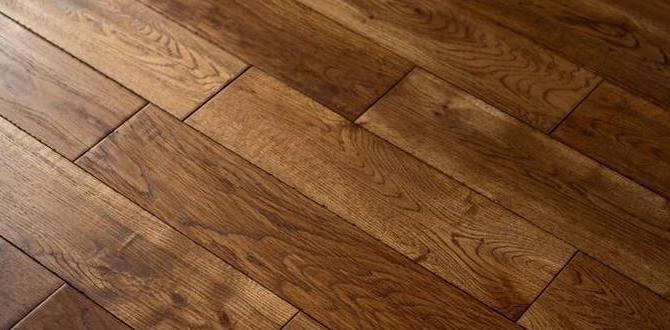
- Wood Siding: This includes clapboard, lap siding, and channeled wood. Siding nailers are excellent for driving nails flush without splitting the wood.
- Vinyl Siding: While many vinyl siding systems “snap” into place and may not require nails for main fastening, blind nailing is often used for securing certain types or at specific points, and a siding nailer is ideal for this.
- Fiber Cement Siding: This increasingly popular material requires specific fasteners, and a siding nailer can be the right tool for the job, provided you use the correct cement board nails.
- Engineered Wood Siding: Products like LP SmartSide require specific nail types and patterns, for which siding nailers are well-suited.
- Trim and Corner Boards: Getting a clean finish on your siding often involves attaching trim pieces. A siding nailer provides the precision needed for this aesthetic detail.
Key Benefit: Precision and Aesthetics on Walls. For siding, the appearance is just as important as function. A siding nailer allows for controlled fastening, ensuring nails are hidden or sit perfectly flush, creating a professional and attractive finish.
Key Features to Look for: A Decision Guide
When you’re out shopping or deciding if you need to add one of these tools to your arsenal, consider these features:
Roofing Nailer Checklist:
- NailCollator Type: Coil nailers are generally preferred for roofing due to high capacity.
- Magazine Capacity: Aim for higher capacity (200+ nails) to minimize reloads.
- Adjustable Depth of Drive: Essential for proper shingle seating.
- Lightweight Design (relative to power): You’ll be holding it overhead a lot!
- Durability: It’s an outdoor tool, likely to get banged around.
- Safety Features: Look for contact actuation or sequential triggers.
Siding Nailer Checklist:
- Magazine Type: Straight or angled, depending on your siding material and preference.
- Nail Collator: Usually straight collation (paper or plastic collated).
- Adjustable Depth of Drive: Crucial for a flush finish without damaging material.
- Slim Nose: For precise placement and tight areas.
- Contact Actuation (Bump Fire): For rapid fastening of long panels.
- Lightweight and Ergonomic: You’ll be maneuvering it on walls.
Nail Gun Comparison Table
Here’s a quick reference table to help you visualize the differences:
| Feature | Roofing Nail Gun | Siding Nail Gun |
|---|---|---|
| Primary Use | Installing shingles and roofing materials | Installing siding panels and trim |
| Nail Size/Type | Larger, wide-head nails (e.g., 1-1/4″ to 1-3/4″ diameter heads) | Shorter, thinner nails (e.g., 1-1/2″ to 2-1/2″ length, smaller heads) |
| Nail Collation | Typically Coil system (wire-fed) | Straight or angled magazine (paper or plastic collated) |
| Magazine Capacity | High (100-200+ nails) | Moderate (50-100 nails) |
| Nose Design | Often larger, sometimes with a hook for shingle placement | Slimmer, designed for precise placement between panels |
| Actuation Mode | Sequential or contact (safety prioritized) | Primarily contact actuation (bump fire) for speed |
| Grip/Ergonomics | Designed for stability on roofs | Designed for maneuverability on walls |
| Ideal For | Speed and secure fastening over large areas | Precision, aesthetics, and speed on vertical surfaces |
Safety First! Always.
No matter which nail gun you choose, safety is non-negotiable. These tools are powerful and can cause serious injury if not handled with respect.
- Eye Protection: Always wear safety glasses or goggles. A flying nail or debris can cause permanent eye damage.
- Hearing Protection: Nail guns are loud. Wear earplugs or earmuffs to protect your hearing, especially during prolonged use.
- Proper Grip and Stance: Maintain a firm grip and stable stance. Don’t overreach.
- Understand Depth Control: Ensure the depth is set correctly for the material to avoid driving nails too deep or leaving them proud.
- Trigger Lock/Power Disconnect: When not in use, engage the trigger lock or disconnect the power source (air hose or battery).
- Never Point at Anyone: Treat every nail gun as if it were loaded.
- Read the Manual: Familiarize yourself with your specific tool’s operation, maintenance, and safety features.
For comprehensive safety guidelines, check out resources from organizations like the Tool Crib which offers practical advice for tool users.
Frequently Asked Questions (FAQ)
Q1: Can I use a roofing nailer for siding?
While you can physically drive a nail into siding with a roofing nailer, it’s generally not recommended. The nails are too large and can split wood siding or damage other materials. The wide head will also look out of place, and the gun’s bulkier nose might make precise placement difficult.
Q2: Can I use a siding nailer for basic roofing jobs?
For very small emergency repairs on a few shingles, you might get away with it. However, a siding nailer is not designed for large roofing projects. Its nails are too small and don’t have wide enough heads to securely fasten shingles, risking blow-offs in wind. Reloading would also be constant.
Q3: What kind of nails do I need for fiber cement siding?
Fiber cement siding requires specific nails, often stainless steel or hot-dip galvanized, with a minimum coating of G185. They are usually 1-1/2” to 2-1/2” long with a smaller, clipped head. Always check the fiber cement manufacturer’s recommendations, as they will specify the exact type and size of nail required for their product.
Q4: How do I adjust the depth on my nail gun?
Most nail guns have a knob, lever, or dial near the nose of the tool. You rotate it to increase or decrease the driving depth. Refer to your specific tool’s manual, but generally, higher settings mean driving the nail deeper.
Q5: What’s the advantage of a cordless siding nailer?
Cordless siding nailers offer incredible freedom of movement, eliminating the need for an air hose and compressor. This makes them faster to set up and much easier to maneuver around the job site, especially when working on ladders or scaffolding.
Q6: How many nails can a roofing nailer hold?
Roofing nailers, with their coil systems, typically hold between 100 to 200 nails, sometimes more depending on the model. This high capacity significantly speeds up the roofing process by reducing the frequency of reloads.
Q7: Is it better to use a pneumatic or cordless nailer for siding?
For siding, both have advantages. Pneumatic nailers are often lighter and more powerful, with less recoil. Cordless nailers offer unmatched portability and ease of use. If you always have access to power and an air compressor, pneumatic is great. If you value speed, flexibility, and working in remote areas, cordless is the way to go.
Conclusion
So there you have it! While they might look similar at first glance, roofing and siding nail guns are specialized tools designed for very different tasks. Understanding the distinctions – from the nails they drive to their unique power and handling features – is key to a successful project. Using the right nailer ensures your shingles are securely fastened against the elements and your siding provides a durable, attractive finish for your home.
Remember, proper tool selection isn’t just about efficiency; it’s about the quality and longevity of your work. Always prioritize safety by wearing the appropriate protective gear and familiarizing yourself with your tool’s operation. With this guide, you’re now well-equipped to make the right choice. Happy building, and may your projects be ever so well-nailed!