Quick Summary
The main difference between contact and sequential trigger modes on nailers is how they fire. Contact triggers fire when you press the trigger and bump the nose. Sequential triggers fire only when you activate the trigger and then bump the nose, allowing more control. Understanding this proven difference helps you choose the right mode for your project’s safety and efficiency.
Hey there, DIYers and woodworking enthusiasts! Jack Shaffer, your fellow nailer fan, here. Ever grabbed your nail gun, ready to blast through a project, only to find nails going exactly where you didn’t want them? It can be frustrating, right? Most of the time, it boils down to understanding your nailer’s trigger settings. Today, we’re diving deep into the “difference between contact and sequential trigger modes” so you can nail your next project perfectly. We’ll break down exactly what each trigger does, when to use it, and how to stay safe. Get ready to boost your confidence and your project quality!
Table of Contents
Understanding Your Nailer’s Brain: Contact vs. Sequential Triggers
Think of your nailer’s trigger mode as its “brain.” It dictates how and when that powerful little nail gets fired into your workpiece. While both modes involve a trigger and a contact to activate the nail firing mechanism, the order in which these actions happen is the key difference. This might seem like a small detail, but it makes a huge impact on how you work, your accuracy, and, most importantly, your safety. Let’s get this sorted so you can pick the right mode for the job!
What is a Contact Trigger (Bump Fire)?
The contact trigger, often called “bump fire,” is designed for speed and efficiency. With this mode, you set your nailer to fire as soon as two things happen simultaneously: you pull the trigger, and the safety contact element (the part that touches the wood) is depressed.
Here’s how it generally works:
- You pull and hold the trigger.
- You press the nose of the nailer against your workpiece.
- The nail fires.
- You lift the nose, and then you can release the trigger.
The beauty of the contact trigger is that once you’re holding the trigger down, every time you bump the nose against a surface, a nail fires. This is fantastic for quickly attaching things like framing lumber, subfloors, or siding where you need to lay down a lot of fasteners in rapid succession. It feels much like a stapler, just with more power!
Pros of Contact Trigger Mode:
- Speed: Fires nails as fast as you can bump the tool against the material.
- Efficiency: Great for large areas and repetitive tasks.
- Ease of Use: Simple operation for quick work.
Cons of Contact Trigger Mode:
- Less Precision: Can lead to accidental firing if the trigger is held down and the nose is bumped unintentionally; this is a key safety concern for beginners.
- Potential for Misfires: If not careful, you might place a nail slightly off-target due to the rapid fire.
- Not Ideal for Detailed Work: Less control means it’s not the best choice for delicate joinery or working near edges.
What is a Sequential Trigger?
The sequential trigger, sometimes called “single shot” or “fire-then-fire,” prioritizes precision and safety. This mode requires a specific sequence of actions for a nail to fire, ensuring you have deliberate control over each shot. It’s the safer option for most situations, especially for beginners learning the ropes.
Here’s the step-by-step to fire a nail in sequential mode:
- First, you pull and hold the trigger.
- Then, you press the nose of the nailer against your workpiece.
- Only after both of those actions have occurred will the nail fire.
- To fire another nail, you must release the trigger, then repeat the process: pull the trigger, then bump the nose.
This deliberate action means you can precisely place each nail without worrying about the tool firing unintentionally. You can position the nailer exactly where you want it, ensure it’s flush against the surface, and then pull the trigger before it fires. This is super important for cabinetry, trim work, or any situation where accuracy is paramount.
Pros of Sequential Trigger Mode:
- Precision: Allows exact placement of each nail.
- Safety: Significantly reduces the risk of accidental firing.
- Control: Ideal for detailed work, trim, and areas where nail placement is critical.
Cons of Sequential Trigger Mode:
- Slower: Firing one nail at a time is naturally slower than rapid fire.
- More Awkward for Large Jobs: Can be tedious for tasks requiring hundreds of nails quickly.
The Proven Difference: How They Actually Work
The core of the “difference between contact and sequential trigger modes” lies in the internal mechanism and the order of activation. Both modes typically have a trigger that needs to be squeezed and a safety contact element (the “nose” of the nailer) that needs to be pressed against your material. The magic, and the crucial difference, is how the nail gun’s internal valve system responds to these actions in combination.
Contact Trigger (Bump Fire) Mechanism Explained
In contact trigger mode, the nail gun is essentially armed and ready the moment you pull the trigger. The safety contact element acts as the final “go” switch. When the trigger is held down, the internal valve is already in a position to release a burst of air and drive a nail the instant the bumper nose is pushed inwards. This is why it’s called “bump fire” – you can literally bump the nose and fire repeatedly, as long as your finger stays on the trigger.
Imagine a light switch. In contact mode, you flip the main power on (pull the trigger) and then flick a small switch (bump the nose) to turn the light on. You can flip that small switch on and off as many times as you want; the light stays on until you turn the main power off (release the trigger).
Sequential Trigger Mechanism Explained
Sequential trigger mode requires a clear two-step process. The safety contact element must be depressed first. This action signals to the nailer’s internal mechanism that you are positioned and ready to fire. Only after the safety element has been pressed will the trigger itself become active. This means you must pull the trigger after you’ve placed the nailer on your work surface. Once a nail is fired, the system resets, and you must again press the safety contact element and then pull the trigger for the next nail. This ensures you have deliberate control for each and every shot.
Continuing the light switch analogy: in sequential mode, you first close a safety door (press the nose). Then, and only then, can you flip the main power switch (pull the trigger) to turn the light on. Once the light is off, you have to close the safety door again before you can flip the main switch. This creates a controlled, single-shot operation.
When to Use Which Trigger Mode: Project-Specific Guidance
Choosing the right trigger mode is crucial for project success and safety. It’s not just about preference; it’s about matching the tool’s capability to the task at hand.
Use Contact Trigger For:
- Framing walls: Quickly driving many nails to assemble studs, joists, and rafters. Speed is key here.
- Attaching subflooring: Laying down a solid base for your finished floor requires rapid fastening.
- Roof sheathing: Covering large roof areas with plywood or OSB needs efficiency.
- Installing siding: Attaching large panels of siding quickly and efficiently.
- Building crates or pallets: Where speed and volume of fasteners are more important than pinpoint accuracy.
For these tasks, think bulk. You’re holding the nailer in place for a while and need to drive fasteners almost as fast as you can move. For more on framing, resources like Fine Homebuilding’s framing guides offer excellent context on the speed required.
Use Sequential Trigger For:
- Installing trim (baseboards, crown molding, window/door casings): Requires precise placement to ensure clean, professional-looking joints.
- Cabinet installation: You need to carefully position cabinets and fasteners for a perfect fit and strong hold.
- Attaching decorative elements: Anything where a misplaced nail could ruin the look of the material.
- Working near edges or corners: Minimizing the risk of shooting a nail through the material or into an unintended spot.
- Any job where safety is the absolute top priority, especially for beginners: This mode is inherently safer due to its controlled firing.
Here, the focus is on accuracy. You want to see exactly where that nail is going before it’s fired. For tips on trim work, check out guides from sources like This Old House that highlight the need for precision.
Making the Switch: How to Change Your Nailer’s Trigger Mode
The good news is that most modern nail guns are designed to be versatile! Switching between contact and sequential trigger modes is usually straightforward, though the exact method can vary slightly depending on the brand and model of your nailer.
Typically, you’ll find a switch or a button located on the nailer itself, often near the trigger assembly or on the side of the tool. This switch will usually have symbols indicating the two modes:
- Sequential Mode Symbol: Often looks like a single nail firing, or might have a symbol like “1” or a checkmark.
- Contact Mode Symbol: Often looks like multiple nails firing in rapid succession, or might have a symbol like “||” or a dot.
Important Safety Note: Always ensure the nailer is unloaded (no nails in the magazine) and unplugged (if it’s an electric model) or the battery is removed (if it’s cordless) before attempting to change trigger modes. Consult your nailer’s owner’s manual for the specific instructions for your model. It’s the best resource to ensure you’re doing it correctly and safely.
Safety First, Always!
No matter what trigger mode you’re using, safety with nail guns is paramount. They are powerful tools and require respect and proper handling.
- Always wear safety glasses: This is non-negotiable. Protect your eyes from flying debris or ricocheting nails. The National Institute for Occupational Safety and Health (NIOSH) emphasizes the importance of Personal Protective Equipment (PPE).
- Keep your fingers away from the trigger: Especially in contact mode, be mindful of where your finger is.
- Never point the nailer at anyone: Even when not in use or if you think it’s unloaded.
- Be aware of your surroundings: Ensure no one is behind your workpiece where a nail could potentially pass through.
- Use the correct nails for your nailer: Using the wrong size or type can cause jams or dangerous misfires.
- Maintain your tool: Clean and lubricate your nailer regularly as per the manufacturer’s instructions. A well-maintained tool is a safer tool.
Understanding the difference between contact and sequential triggers is a huge step in using your nail gun safely and effectively. For more detailed safety guidelines, your tool manufacturer’s manual is the best place to start.
When Durability Matters: Pneumatic vs. Cordless Nailers and Triggers
The type of nailer you’re using—pneumatic (air-powered) or cordless (battery-powered)—often influences its trigger capabilities and how those modes are implemented. While the fundamental difference between contact and sequential operation remains the same, the technology behind them can differ.
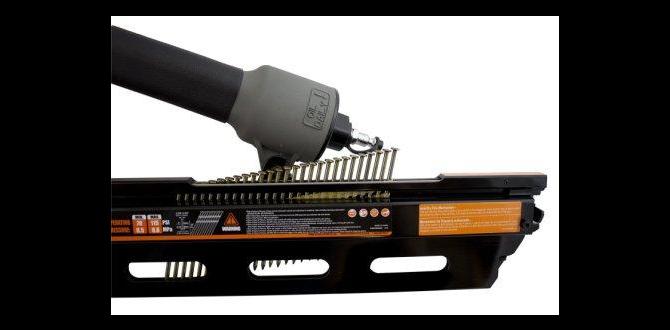
Pneumatic Nailers
Pneumatic nailers have been the workhorses of construction for decades. They rely on compressed air from an air compressor to drive nails.
- Trigger Mechanism: They typically have a clear switch to select between contact and sequential firing. The air pressure is managed rapidly to achieve the desired firing mode.
- Pros: Generally lighter weight (excluding the compressor), powerful, and can run for extended periods as long as the compressor is supplied with air. They often have more readily available and affordable parts.
- Cons: Require an air compressor and hose, which limits mobility and adds another piece of equipment to manage.
Cordless Nailers
Cordless (battery-powered) nailers have exploded in popularity, offering incredible freedom and portability. They use either a battery to power a motor that drives a piston, or a battery to heat a small gas fuel cell that then drives a piston. Some also use a charged capacitor to drive the nail. This difference in driving mechanism can sometimes affect the feel and responsiveness of the trigger modes.
- Trigger Mechanism: Similar to pneumatic, most cordless models feature a switch for selecting modes. Some higher-end models might offer electronic adjustments via an app, but for basic selection, it’s usually a physical switch.
- Pros: Extremely portable, no hoses or compressors needed, quick setup.
- Cons: Can be heavier due to the battery pack, battery life is a factor, and they can sometimes be more expensive upfront than pneumatic setups. They also might not offer the same raw power or consistent drive depth for very dense hardwoods compared to high-PSI pneumatic tools.
Regardless of the power source, the operational difference between contact and sequential triggers is a user-selectable feature designed to enhance how you use the tool. Always check your specific model’s manual to confirm its capabilities and how to switch modes.
Common Trigger Issues and How to Troubleshoot
Even with clear instructions, sometimes things don’t work as expected. Here are a few common issues with nailer triggers and quick fixes:
- Nailer fires randomly (especially in sequential mode): This is a serious safety concern! It usually means the safety contact element is stuck or faulty, or there’s an internal valve issue. Stop using the tool immediately and have it inspected or repaired.
- Nailer won’t fire in contact mode:
- Is the trigger held down?
- Is the safety nose firmly depressed against your material?
- Is the magazine loaded with nails?
- Is the air pressure (for pneumatic) or battery charge (for cordless) sufficient?
- Nailer won’t fire in sequential mode:
- Are you pulling the trigger after bumping the nose?
- Is the safety nose being depressed fully?
- Is the trigger mechanism itself obstructed or dirty?
- Trigger feels stiff or unresponsive: This could be due to dirt or debris in the trigger mechanism or internal valve. Try cleaning the area around the trigger and nose as per your manual’s instructions. If it persists, it may need professional servicing.
Remember, if you’re unsure about any issue, it’s always best to consult your tool’s manual or contact the manufacturer’s customer support. Don’t risk injury by trying to force a malfunctioning tool to work.
FAQ Section
What is the primary safety advantage of sequential triggers over contact triggers?
Sequential triggers offer a significant safety advantage because they require a deliberate two-step process: pressing the tip to the surface and then pulling the trigger. This prevents accidental discharge if you bump the tool or if your hand slips, which can happen with contact (bump fire) triggers.
Can I use a nailer in contact mode for all my woodworking projects?
No, contact mode is best suited for speed-related tasks like framing or subflooring. For projects requiring precision, like trim work, cabinetry, or fine furniture, sequential mode is far superior and safer.
Does the type of nailer (pneumatic, cordless, electric) affect the trigger modes?
The fundamental difference between contact and sequential triggers remains the same across all nailer types. However, the responsiveness and feel might vary slightly due to the power source (air, battery, or electric motor). Most modern nailers, regardless of type, offer selectable trigger modes.
How do I know if my nailer can switch between modes?
Most modern nailers from reputable brands are designed with selectable triggers. Look for a switch on the side of the tool, usually near the trigger assembly. If you’re unsure, your best bet is to consult your nailer’s owner’s manual.
Is one trigger mode better than the other?
Neither mode is inherently “better” than the other; they are