Quick Summary:
Coil framing nailers use round wire collation, offering high capacity for continuous work like siding. Stick framing nailers use paper or plastic collation, ideal for framing studs and joists due to their slimmer profile and angled heads. Choosing depends on your project’s needs for speed, access, and nail type.
Hey there, fellow DIYers and woodworking enthusiasts! Jack Shaffer here from Nailerguy. Are you standing in the tool aisle, scratching your head, wondering about the difference between coil and stick framing nailers? You’re not alone! Deciding which nailer to grab can feel a bit overwhelming, especially when you’re just starting out. These workhorses can speed up your projects immensely, but using the wrong one can lead to frustration or even damage to your materials. Don’t worry, we’re going to break down exactly what sets these two popular framing nailers apart. We’ll look at what they are, how they work, and most importantly, which one is the perfect fit for your next project. Let’s get your projects built faster and better!
Table of Contents
What Are Framing Nailers?
Before we dive into the specifics of coil versus stick, let’s quickly touch on what framing nailers are designed for. In a nutshell, framing nailers are powerful, pneumatic tools (though some are battery-powered) that drive nails quickly and efficiently into bulky lumber. They are essential for constructing the skeletal frame of a building—think walls, floors, and roofs. They replace the tedious and time-consuming work of hammering nails one by one. Because framing involves driving many nails in tough materials, framing nailers are built for power and speed.
Understanding Nail Collation
The main difference between coil and stick framing nailers lies in how their nails are held together, or “collated,” before being fed into the tool. Think of collation as the glue or wire that keeps a strip of nails in order. The type of collation directly impacts the nailer’s capacity, size, and how it feeds nails into the workpiece.
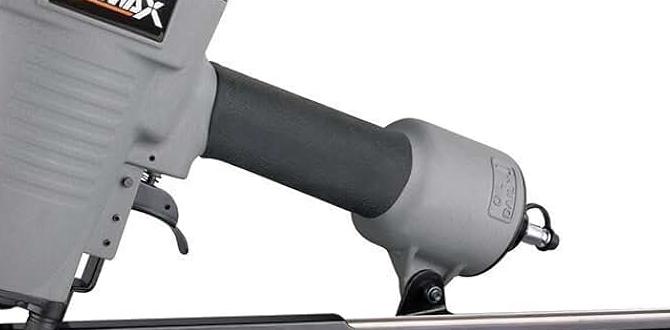
Coil Nailers: The High-Capacity Workhorses
Coil framing nailers get their name from the way their nails are arranged. These nails are typically held together by a thin wire, forming a coil. Imagine a roll of coins spun together – that’s a good visual for how coil nails look.
How Coil Nails Work:
When you load a coil of nails into a coil nailer, the tool is designed to accept this circular arrangement. As a nail is driven, the wire holding it is either cut or bent and fed into a waste channel. This design allows for a very large number of nails to be loaded into a single magazine at once. Many coil nailers can hold anywhere from 200 to 300 nails, making them incredibly efficient for jobs requiring a high volume of fastening.
Pros of Coil Nailers:
- High Capacity: Significantly fewer reloads means less downtime, especially on large projects.
- Versatility in Nail Type: Can often fire both wire-collated and, with certain adapters, plastic-collated nails.
- Durable Construction: Built for the heavy demands of framing and construction.
- Good for Continuous Work: Excellent for repetitive tasks like siding installation where you’re driving nails in quick succession.
Cons of Coil Nailers:
- Bulkier Design: The nail magazine is often wider to accommodate the coil, which can make it harder to reach tight corners or dense areas.
- Nail Debris: The wire holding the nails can sometimes create small metal debris in the work area that needs cleaning up.
- Weight: Can be slightly heavier than some stick nailer models due to their robust build and larger capacity.
Common Uses for Coil Nailers:
- Siding installation (vinyl, wood, fiber cement)
- Roof decking
- Sheathing
- Fencing
- General framing where access isn’t an issue
Stick Nailers: The Precision and Access Champions
Stick framing nailers, on the other hand, use nails that are held together in a straight line. These are typically collated with either paper or plastic. Think of a strip of paper with nails glued or embedded into it, or a plastic strip holding them together.
How Stick Nails Work:
Stick nailers feed nails one after another from a straight magazine. When a nail is fired, the collation material (paper or plastic) is either cleanly broken off or ejected as waste. This mechanism allows for a slimmer magazine profile. Stick nailers commonly come in two main types based on the collation angle: 21-degree and 30-degree (or sometimes 20-degree). The angle refers to the angle of the collation strip, which often dictates the angle of the nailer’s nosepiece. This angled design is crucial for reaching into corners and tight spaces where a straight nailer would struggle.
Pros of Stick Nailers:
- Slimmer Profile: The straight magazine, especially with angled heads, allows for much better access into tight corners and between studs.
- Precision Placement: Ideal for precise nailing into specific framing members.
- Less Debris: Paper collation disintegrates easily, and plastic collation is often ejected cleanly, leaving less to clean up.
- Variety of Angles: Available in different collation angles (e.g., 21-degree, 30-degree) to suit different framing applications and user preference.
- Often Lighter: Some stick nailer models can be lighter, making them easier to handle for extended periods.
Cons of Stick Nailers:
- Lower Capacity: Stick magazines hold fewer nails (typically 50-100) compared to coil nailers, requiring more frequent reloads.
- Collation Material: Paper collation can be affected by moisture, and the “sticks” or strips can sometimes break apart before loading if handled roughly.
- Nail Compatibility: You must match the nail collation angle (e.g., 21-degree) to what the nailer is designed for.
Common Uses for Stick Nailers:
- Traditional wall framing (studs, top and bottom plates)
- Joist and rafter connections
- Rafter-to-top plate connections
- Second-fix framing where precise placement is critical
- Working in confined spaces
Key Differences at a Glance
To help solidify the distinctions, let’s look at a quick comparison. This table highlights the most important factors to consider when you’re trying to decide between the two types.
| Feature | Coil Framing Nailer | Stick Framing Nailer |
|---|---|---|
| Nail Collation | Round wire | Paper or Plastic (straight strips) |
| Magazine Capacity | High (200-300 nails) | Lower (50-100 nails) |
| Magazine Profile | Wider, bulkier | Slimmer, often angled nosepiece |
| Best For | High-volume work, continuous fastening, less demanding access areas | Precise placement, tight spaces, framing specific components |
| Nail Debris | Wire fragments | Paper or plastic fragments (less prominent) |
| Typical Nail Angle | Straight | Angled nose (21°, 30°, etc.) or straight |
Factors to Consider When Choosing
Now that you know the basics, how do you pick the right one for your needs? It really comes down to the type of projects you’ll be tackling most often and your personal preferences.
1. Project Scope and Frequency
If you’re building a large deck, framing an entire house addition, or installing siding on a big home, a coil nailer’s high capacity will save you a ton of time and frustration. You’ll spend more time actually fastening and less time reloading. For smaller projects or specific framing tasks within a larger build, multiple reloads with a stick nailer might not be a big deal.
2. Access to Tight Spaces
This is where the stick nailer often shines. If your work involves framing in close quarters, between studs, or in corners where a wider tool won’t fit, the slimmer profile of a stick nailer, especially one with an angled nosepiece, is invaluable. Think about your most common framing scenarios – will you be working in the open or in confined areas?
3. Nail Type and Size
Both coil and stick nailers come in various sizes for driving different lengths and types of framing nails (e.g., clipped head, full round head, smooth shank, ring shank). You’ll need to ensure the nailer you choose can drive the specific nails required by your building codes or project plans. For example, some applications might require full round head nails, which are common in coil nailers, while others might specify clipped head nails, available in both.
It’s also important to note that framing nails are typically large and meant for structural integrity. For lighter tasks like trim work or attaching thinner materials, you would use a different type of nailer altogether, such as a finish nailer or brad nailer. Understanding your job’s requirements helps immensely.
For a deeper dive into nail types themselves, resources like the Wood Magazine guide to nail types can offer valuable insights.
4. Power Source
Both coil and stick framing nailers are most commonly pneumatic, meaning they require an air compressor and hose. However, battery-powered (cordless) versions are becoming increasingly popular. Cordless nailers offer greater portability and freedom from air hoses, but they tend to be more expensive and can be heavier due to the battery. Consider whether you already have an air compressor or if investing in a cordless system makes sense for your woodworking setup.
5. Budget
Generally, both types of framing nailers can vary widely in price based on brand, features, and quality. However, coil nailers, due to their higher capacity and often beefier construction for heavy-duty use, might sometimes carry a slightly higher initial price point than a comparable basic stick nailer. Keep in mind that you’ll also need to factor in the cost of nails, an air compressor (if needed), and safety gear.
Safety First, Always!
No matter which type of framing nailer you choose, safety is paramount. These tools are powerful and can cause serious injury if not used correctly. Always:
- Wear safety glasses: This is non-negotiable. Flying debris or accidental nail discharge can cause eye injury.
- Read the manual: Familiarize yourself with your specific tool’s operation and safety features.
- Keep fingers away from the trigger and nosepiece: Never point the nailer at yourself or others.
- Ensure the workpiece is stable: A shifting material can lead to misfired nails.
- Be aware of your surroundings: Ensure no one is behind your work where a nail might pass through.
- Disconnect the air hose or battery when not in use: Prevent accidental firing.
For comprehensive safety guidelines and best practices regarding air-powered tools, the Occupational Safety and Health Administration (OSHA) provides extensive resources that are invaluable for anyone using these tools, available on OSHA’s Pneumatic Tools page.
Making Your Decision: A Quick Guide
To simplify, here’s a quick way to decide:
- Need to drive LOTS of nails quickly and don’t worry too much about tight spots? → GO FOR A COIL NAILER.
- Need to get into corners, between studs, or require precise nail placement? → GO FOR A STICK NAILER (likely angled).
- Are you doing mostly siding or sheathing? → COIL NAILER is often preferred.
- Are you doing structural wall framing or floor/roof framing connections? → STICK NAILER is often preferred, especially angled.
Final Thoughts from Nailerguy
Choosing between a coil and a stick framing nailer isn’t about one being inherently “better” than the other; it’s about finding the right tool for the specific job at hand. Both are fantastic tools that can dramatically improve your productivity and the quality of your woodworking and construction projects. By understanding the core differences in their collation, capacity, and design, you can now confidently select the nailer that will best serve your DIY aspirations.
Think about your typical projects, the access you’ll need, and the sheer volume of work. If you’re just starting and plan a mix of tasks, you might even find yourself wanting both in your arsenal eventually! But for your first framing nailer, focus on the task that will dominate your time. Whatever you choose, remember that practice, patience, and a commitment to safety will ensure you get fantastic results every time. Happy building!
Frequently Asked Questions
Q1: Can I use any type of framing nail in my nailer?
A1: No. It’s crucial to use the correct type and collation of nails designed for your specific nailer. Stick nailers are designed for paper or plastic collated nails at a specific angle (e.g., 21-degree, 30-degree), while coil nailers use wire-collated nails. Using the wrong nails can jam the tool, damage it, or lead to misfires.
Q2: Are coil nailers only for exterior use?
A2: Not at all! While they are excellent for siding and exterior framing due to their high capacity, coil nailers are perfectly suitable for interior framing tasks as well. Their efficiency makes them great for any large-scale framing job.
Q3: Which is better for framing walls, a coil or stick nailer?
A3: Both can be used for wall framing. However, stick nailers, especially those with angled noses, are often preferred for their ability to reach into tighter spots between studs and plates, offering more precision. Coil nailers are great if speed is the absolute priority and access isn’t a major concern.
Q4: Do I need an air compressor for framing nailers?
A4: Most framing nailers are pneumatic and require an air compressor, a hose, and an air regulator to operate. However, cordless, battery-powered framing nailers are also available and do not require an air compressor, offering more portability but at a higher cost and potentially more weight.
Q5: What is the difference between 21-degree and 30-degree stick nailers?
A5: The degree refers to the angle of the nail collation strip and, consequently, the nosepiece of the nailer. A 21-degree nailer uses nails collated at a