Quick Summary: Adjusting nailer air pressure correctly is vital for safety and effectiveness. Too low and your nailer won’t drive nails properly; too high and you risk damaging your workpiece or causing injury. This guide will show you exactly how to set the right pressure for your nailer every time.
Hey there, fellow DIYers and woodworking enthusiasts! Jack Shaffer here from Nailerguy. Ever feel like your nailer is acting up? Maybe it’s not sinking nails deep enough, or worse, it’s blowing right through your beautiful wood. Often, the culprit isn’t the nailer itself, but something super simple: the air pressure. Getting this just right can transform your nailing game, making projects smoother and safer. Don’t worry if this sounds complicated; we’re going to walk through it step-by-step, making it easy as pie. Let’s dive into finding that sweet spot for your nail gun!
Table of Contents
Why Nailer Air Pressure Matters More Than You Think
When you first unbox a new nailer or connect your air compressor, the temptation is to just crank up the pressure and go. But hold on just a second! Air pressure is the powerhouse behind your nail gun. It’s what drives the piston and, in turn, shoots the nail. If this pressure is too low, the nail might just sit on the surface or only partially sink, leaving you with frustrating follow-up work. On the flip side, if the pressure is set too high, you can cause all sorts of problems.
Think about it: too much force can dent or even split your wood, especially softer materials. It can also cause the nailer to bounce too hard on the surface, leading to inconsistent results or even damaging the tool’s internal components over time. In more serious cases, excessive pressure can be a safety hazard, making the tool harder to control and increasing the risk of accidental firing or ricochets. Setting the correct air pressure is the first, most crucial step to a successful and safe nailing experience.
Understanding Your Nailer’s Anatomy: What You Need to Know
Before we start adjusting, let’s get familiar with the key players involved. You’ve got your air compressor, which is the heart of the operation, storing and supplying the compressed air. Then there’s your nailer, the tool that uses that air. Connecting them is the air hose, and typically, you’ll have a regulator attached to your compressor or inline with the hose. This regulator is the magic knob you’ll be turning.
- Air Compressor: This machine compresses air and stores it in a tank. It has its own pressure gauges to monitor the tank pressure.
- Air Hose: The flexible conduit that carries the compressed air from the compressor to your nailer.
- Regulator: This device controls and lowers the high pressure from the compressor tank to a lower, usable pressure for your nailer. Most compressors have one built-in, or you can add an inline regulator.
- Nailer Gauge: Some nailers have a small gauge, but most rely on the regulator’s display.
Your air compressor will have a main gauge showing the tank pressure (often around 90-150 PSI) and another gauge that displays the regulated output pressure. This output pressure is what we’ll be focusing on. The regulator typically has a dial or a knob that you turn to set the desired PSI (pounds per square inch) output.
The Magic Number: What’s the Right PSI for Your Nailer?
This is the million-dollar question! There isn’t one single PSI setting that fits every nailer and every project. It depends on several factors, including the type of nailer, the type of wood you’re working with, and the length of the nails you’re using. However, most manufacturers provide starter recommendations.
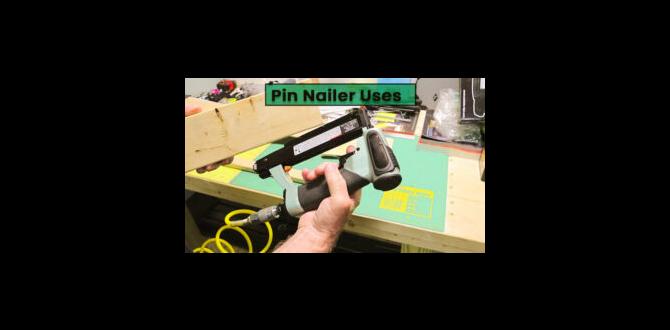
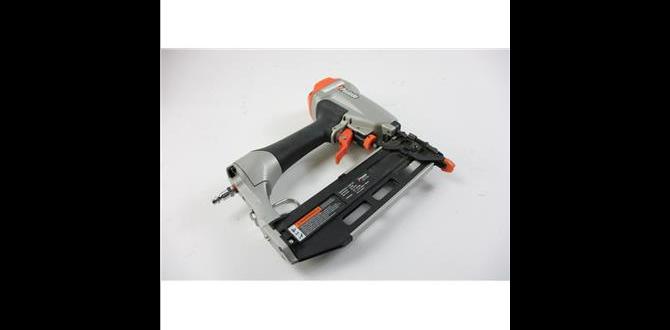
A good general rule of thumb for common framing and finishing nailers hovers between 70 and 120 PSI. Brad nailers and pin nailers often operate at lower pressures, typically 60 to 100 PSI, while heavier-duty framing nailers might require the higher end of the spectrum. Always, always check the manual that came with your specific nailer. It’s the best source for this information. You can usually find the recommended PSI range printed directly on the tool as well.
For example, Paslode, a popular brand, often recommends specific pressure ranges for their various framing and finishing nailers. Always refer to your tool’s documentation or the manufacturer’s website for the most accurate advice. For a great overview of different nailer types and their typical operating pressures, this Nail Gun PSI Chart from Tool Reviews on Demand can be a helpful visual reference, though remember your tool’s manual is king.
Factors Influencing Your PSI Setting
Even with a recommended range, you might need to fine-tune. Here’s what to consider:
- Nailer Type: Framing nailers need more power than brad nailers.
- Nail Length: Longer nails require more force to drive fully.
- Wood Hardness: Hardwoods like oak need higher pressure than softwoods like pine. Dense woods also risk splitting if pressure is too high.
- Wood Thickness: Driving nails into thicker material might require a slight increase in pressure.
- Depth Adjustment: Your nailer likely has a depth adjustment wheel or lever. This works in conjunction with air pressure. Sometimes, you can achieve the desired depth by adjusting both.
Step-by-Step: Dialing In Your Nailer’s Air Pressure
Alright, let’s get down to business. Follow these steps to set your nailer’s air pressure perfectly. Remember to always work with a disconnected nailer or an empty magazine when making initial pressure adjustments.
Step 1: Connect Your Air Compressor and Hose
Ensure your air compressor is plugged in and turned on. Connect your air hose securely to the compressor’s output. Make sure the connection is snug to prevent leaks.
Step 2: Understand Your Regulator
Locate the regulator on your air compressor. It typically has a main gauge for tank pressure and a smaller gauge for output pressure. There will be a knob or dial to adjust the output PSI. To increase pressure, you usually turn the knob clockwise; to decrease, turn counter-clockwise. Sometimes there’s a locking mechanism for the knob.
Step 3: Set Initial Pressure Based on Manual
Refer to your nailer’s manual for the recommended operating pressure range. Start by setting your regulator to the lower end of this recommended range. For example, if the manual says 70-100 PSI, set your regulator to 70 PSI for your first test.
Step 4: Connect Nailer and Test Fire (Safely!)
Load a few nails into your nailer. Point the nailer at a scrap piece of the wood you’ll be working with. Make sure the work area is clear and safe. Engage the safety contact tip (if your nailer has one) firmly against the wood, and then squeeze the trigger. Do NOT fire into the air!
Step 5: Evaluate the Nail Depth
Examine how deep the nail drove into the wood.
- If the nail is too high (proud): The pressure is too low.
- If the nail is sunk too deep (below the surface): The pressure is too high, or your depth adjustment needs tweaking.
- If the nail is perfect: Congratulations! You’ve found a great starting point.
Step 6: Adjust and Retest
If the nail wasn’t driven deep enough, slowly increase the air pressure on your regulator by 5 PSI increments. Re-test fire on another spot. Continue this process, testing and adjusting, until the nail consistently sinks to the desired depth. Most often, you want the nail head to be flush with the wood surface or slightly countersunk, depending on your project. For applications where you’ll be filling nail holes with putty, a slightly countersunk nail is ideal.
Step 7: Fine-Tune with Depth Adjustment (If Needed)
If you find yourself needing to push the pressure very high to sink nails, or if lower pressures require a lot of fine-tuning, check your nailer’s depth adjustment setting. Most nailers have a wheel or lever near the nose that controls how deep the nail is driven. Adjust this according to your nailer’s manual. Then, you can often use a slightly lower air pressure and rely on the depth adjustment for precise control. It’s a combination of both.
Step 8: Consider Wood Type and Nail Length
Once you have a good general setting, remember to adjust slightly based on your materials. If you switch from pine to a dense hardwood, you might need to bump the pressure up by 5-10 PSI. If you switch from 1.5-inch nails to 2.5-inch nails, you’ll likely need more pressure. Always test again on scrap wood after changing materials or nail sizes!
Troubleshooting Common Air Pressure Issues
Even with careful adjustments, you might run into hiccups. Here are some common problems and how to solve them:
Problem: Nails Not Driving Deep Enough
- Cause: Air pressure is too low.
- Solution: Increase PSI on the regulator.
- Cause: Air leak in the hose or fittings.
- Solution: Check all connections for hissing sounds and tighten or replace faulty parts.
- Cause: Undersized compressor or running compressor too long without refill.
- Solution: Ensure your compressor is adequate for the tool’s CFM (Cubic Feet per Minute) requirements and allow it to reach full pressure between uses.
- Cause: Nailer needs lubrication or maintenance.
- Solution: Consult your nailer’s manual for maintenance schedules.
Problem: Nails Driving Too Deep or Splitting Wood
- Cause: Air pressure is too high.
- Solution: Decrease PSI on the regulator.
- Cause: Depth adjustment on the nailer is set too deep.
- Solution: Adjust the nailer’s depth setting.
- Cause: Working with very soft wood.
- Solution: Reduce PSI slightly, even below the minimum recommended if necessary, and use the depth adjustment.
Problem: Inconsistent Nail Depth
- Cause: Fluctuating air pressure from the compressor.
- Solution: Check regulator and ensure it’s functioning correctly. Ensure compressor tank is adequately pressurized.
- Cause: Worn internal parts in the nailer.
- Solution: Perform maintenance as per the manual or consider professional repair.
- Cause: Holding the nailer at an angle.
- Solution: Ensure the nailer is held perpendicular to the surface for consistent driving.
A Quick Reference: Typical PSI Ranges for Different Nailers
To give you a general idea, here’s a table with common PSI ranges. Remember, these are guidelines; always check your specific tool’s manual!
| Nailer Type | Typical PSI Range (Low – High) | Notes |
|---|---|---|
| Framing Nailer | 80 – 120 PSI | For construction framing, joists, etc. Needs power. |
| Finish Nailer (15 & 16 Gauge) | 70 – 100 PSI | For trim, molding, cabinets. Good balance of power and finesse. |
| Brad Nailer (18 Gauge) | 60 – 100 PSI | For delicate trim, small moldings, attaching thin panels. Less likely to split wood. |
| Pin Nailer (23 Gauge) | 50 – 80 PSI | For almost invisible nail entry, attaching small parts, tacking. Very low impact. |
| Cap Nailer | 70 – 110 PSI | Used with a plastic cap and nail for house wrap, roofing felt. |
It’s also important to consider the CFM (Cubic Feet per Minute) requirement of your nailer. While PSI is about force, CFM is about volume of air. Make sure your air compressor can supply enough CFM for continuous operation of your nailer. You can find the CFM rating on your nailer and compressor specifications. The tooling.com article on nail gun air pressure also provides useful insights into balancing PSI and CFM for optimal performance.
Safety First: Always Be Aware!
We’ve talked a lot about how to get the best results, but safety is paramount when working with pneumatic tools. Always follow these safety practices:
- Disconnect Air When Not in Use: Always disconnect the air hose from the nailer when you are loading nails, performing maintenance, clearing jams, or leaving the tool unattended.
- Never Point at People or Yourself: Treat the nailer as you would any firearm – never point it at anyone, including yourself.
- Engage Safety Tip Firmly: Ensure the safety contact tip is pressed firmly against the workpiece before you squeeze the trigger. This prevents accidental firing.
- Wear Safety Glasses: Always wear safety glasses or goggles to protect your eyes from flying debris or ricocheting nails.
- Know Your Tool: Read and understand the entire owner’s manual for your nailer and air compressor before operating.
- Secure Workpiece: Ensure your workpiece is stable and not likely to move suddenly when a nail is fired.
Proper air pressure not only makes your nailer perform better but also contributes to safer operation by making the tool more predictable and controllable.
Frequently Asked Questions (FAQ)
Q1: How do I know if my air pressure is too high or too low?
Answer: If nails are not sinking fully into the wood, the pressure is likely too low. If nails are going too deep, damaging the wood, or causing the nailer to bounce excessively, the pressure is likely too high. A perfect drive will have the nail head flush with or slightly below the surface.
Q2: Can I use my nailer without an air compressor?
Answer: Most common pneumatic nailers require an air compressor. However, there are battery-powered (cordless) and electric nailers available that do not require an air compressor.
Q3: What is the difference between tank pressure and regulated pressure on my compressor?
Answer: Tank pressure is the maximum pressure stored in your compressor’s tank. Regulated pressure (or output pressure) is the pressure you set using the regulator, which is the pressure delivered to your tool. You always adjust the regulated pressure for your nailer.
Q4: My nailer is weak even at the highest recommended PSI. What could be wrong?
Answer: Check for air leaks in your hose, fittings, or the nailer itself. Also, ensure your air compressor is powerful enough (CFM rating) for your nailer. The nailer might also need lubrication or maintenance.
Q5: Does the type of wood really affect the needed air pressure?
Answer: Yes, significantly. Denser hardwoods require higher pressure to drive nails effectively compared to softwoods like pine. Conversely, working with very soft wood might require you to lower the pressure to prevent damage.
Q6: How often should I check and adjust my nailer’s air pressure?
Answer: You should check and adjust your air pressure every time you start a new project, switch nail types, or change work materials. A quick test fire on scrap wood is a good habit to get into.
Conclusion: Master Your Nailer with Perfect Pressure
And there you have it! You’re now well-equipped to tackle the essential task of setting the right air pressure for your nailer. Remember, it’s not a one-size-fits-all scenario. It’s a dance between your tool’s recommendations, the materials you’re using, and a little bit of testing. By taking the time to dial in that PSI correctly, you’re not just ensuring your nails go in straight and true; you’re also making your projects easier, your tools last longer, and most importantly, ensuring your own safety.
Don’t be afraid to experiment with that regulator knob. Start with the manufacturer’s recommendations, make small adjustments, and always test on scrap. You’ll quickly develop an intuitive feel for what your nailer needs. So, next time you pick up your nailer, remember these tips, and you’ll be on your way to becoming a nailing pro. Happy building, and may your nails always be perfectly driven!