Get the job done right with a Craftsman nailer combo kit! These versatile kits offer the power and convenience of multiple nailers in one package, perfect for DIYers tackling various projects from framing to finish work. It’s your affordable, reliable solution for professional results.
Hey everyone, Jack Shaffer here, your go-to guy for all things nailguns and woodworking! Ever feel like you need a different nailer for every little task? It can get overwhelming, and frankly, expensive! That’s where a good nailer combo kit comes in, especially from a reliable brand like Craftsman.
These kits are brilliant because they bundle the tools you need, often at a fantastic price. No more searching for the right nailer; it’s all in one convenient package, ready for your next DIY adventure. Let’s dive into why a Craftsman nailer combo kit might be the best addition to your toolbox.
Table of Contents
Why a Craftsman Nailer Combo Kit is a DIYer’s Best Friend
As a DIYer, you’re always looking for tools that do more with less hassle and cost. That’s exactly what a Craftsman nailer combo kit delivers. Think about it: instead of buying a framing nailer, a finish nailer, and maybe a brad nailer separately, you can get a kit that includes two or even three of these essential tools. This makes starting out or expanding your tool collection much more manageable.
Craftsman has a long-standing reputation for offering dependable tools at prices that don’t break the bank. Their nailer combo kits are no exception. They’re designed to be user-friendly for beginners while still offering the power and performance intermediate woodworkers need. Plus, having a matched set of tools often means they’ll share batteries or accessories, simplifying your workflow even further.
Understanding Nailer Types in a Combo Kit
Nailer combo kits typically include a combination of the most commonly used nail guns. Knowing what each one does is key to understanding the value of your kit.
Framing Nailer
This is your heavy-duty workhorse. A framing nailer is designed to drive larger nails (typically 2 to 3 ½ inches long) used for structural work like building wall frames, roof trusses, and decks. They pack a serious punch and are essential for any serious construction projects. You’ll often find these are pneumatic, meaning they require an air compressor, or cordless, powered by robust batteries.
Finish Nailer
A finish nailer drives slimmer, smaller nails (usually 1 ¼ to 2 ½ inches long) with a smaller head. These are perfect for attaching trim, moulding, and baseboards. The advantage here is that the nail head is small enough to be easily concealed or even sunk slightly below the surface so you can fill the hole with putty for a seamless look. They are often available in both pneumatic and cordless electric versions.
Brad Nailer
The smallest of the bunch, a brad nailer uses very thin nails (around 18-gauge) that are almost headless. These are fantastic for delicate work, like attaching small trim, thin mouldings, or even for hobbyist projects where a minimal marring of the surface is crucial. Because the nails are so small, they offer excellent holding power without splitting delicate wood. Brad nailers are usually electric or pneumatic.
Other Potential Kit Inclusions
Some kits might also include:
- Staple Guns: For upholstery or attaching screening.
- Pin Nailers: Even finer than brad nailers, leaving practically invisible marks.
- Air Compressors: For pneumatic kits, this is the power source.
- Batteries and Chargers: Crucial for cordless models.
- Carrying Cases: To keep everything organized and protected.
Choosing the Right Craftsman Nailer Combo Kit for Your Needs
With a few different Craftsman kits on the market, how do you pick the one that’s right for you? It boils down to your typical projects and preferences.
Consider Your Projects
If you plan on building furniture, doing extensive trim work, or even tackling shed construction, a kit with a framing nailer and a finish nailer will be incredibly versatile. If you’re a hobbyist or focusing on intricate decorative pieces, a finish nailer and brad nailer might be more suitable.
Pneumatic vs. Cordless (Battery-Powered)
This is a big decision:
- Pneumatic Kits: These require an air compressor.
- Pros: Often lighter tool weight, generally more affordable for the tool itself, powerful performance.
- Cons: Requires an air compressor (an additional purchase if you don’t have one), hose management can be cumbersome, compressor noise can be significant.
- Cordless (Battery-Powered) Kits: These use rechargeable batteries. Technologies like lithium-ion have made these incredibly powerful and convenient.
- Pros: Ultimate portability – no hoses or compressors, quick setup, quieter operation than compressors.
- Cons: Generally more expensive upfront, tool can be heavier due to the battery, battery life is a consideration.
For many DIYers, especially those starting out or who prioritize ease of use and portability, a cordless Craftsman nailer combo kit is often the preferred choice. The freedom from hoses and compressors is a game-changer for many projects around the house.
Key Features to Look For in a Craftsman Nailer Combo Kit
When comparing different Craftsman kits, keep an eye out for these important features:
Nail Compatibility
Ensure the kit includes nailers that accept the nail sizes you’ll need for your projects. Check the gauge, length, and collation type (e.g., clipped head vs. round head for framing). Reputable sources like Lowe’s guides offer great insights into nail types.
Power Source
As discussed, decide between pneumatic and cordless. If going cordless, how many batteries are included? How long do they typically last, and how fast do they charge?
Depth Adjustment
A tool-free depth of drive adjustment is a must. This feature lets you easily control how deep the nail sinks into the material. Too shallow, and the nail sticks out; too deep, and it punches through or leaves an unsightly divot. Look for a simple dial or lever.
Jam Release Mechanism
Nail jams happen. A kit with an easy, tool-free jam release will save you a ton of frustration and time. You want to be able to clear a jam quickly and get back to work.
Ergonomics and Weight
You’ll be holding these tools, sometimes for extended periods. A comfortable grip, good balance, and manageable weight are important for reducing fatigue and maintaining control. Cordless models can feel heavier due to the battery.
Included Accessories
What else comes in the box? Some kits are bare-tool only (you provide batteries), while others come with batteries, chargers, a case, and even starter nails. A good case is invaluable for keeping your tools organized and protected.
Getting Started: Your First Craftsman Nailer Combo Kit Project
Let’s say you’ve decided on a Craftsman cordless finish and brad nailer combo kit. What’s a great starter project that showcases its versatility?
Project Idea: Building a Simple Bookshelf
This project is perfect for learning how to use both a finish nailer and a brad nailer.
Materials You’ll Need:
- Wood boards (e.g., 1×8 or 1×10 pine, depending on desired depth)
- Wood screws (for initial assembly/stability if desired)
- Wood glue
- Sandpaper (various grits)
- Wood finish (stain, paint, or sealant)
- Craftsman Finish Nailer (e.g., 16-gauge)
- Craftsman Brad Nailer (e.g., 18-gauge)
- Appropriate nails for each nailer (e.g., 1 ½ inch finish nails, 1 ¼ inch brad nails)
- Safety glasses
- Work gloves
- Measuring tape
- Pencil
- Miter saw or circular saw
- Clamps
Step-by-Step Guide:
- Plan Your Design: Decide on the dimensions of your bookshelf. Simple designs are best for beginners. A basic box shape with a few shelves is ideal.
- Cut Your Wood: Carefully measure and cut your wood boards to size using your saw. For simple shelves, you’ll need two side pieces, a top, a bottom, and your shelf pieces. Accuracy here is key!
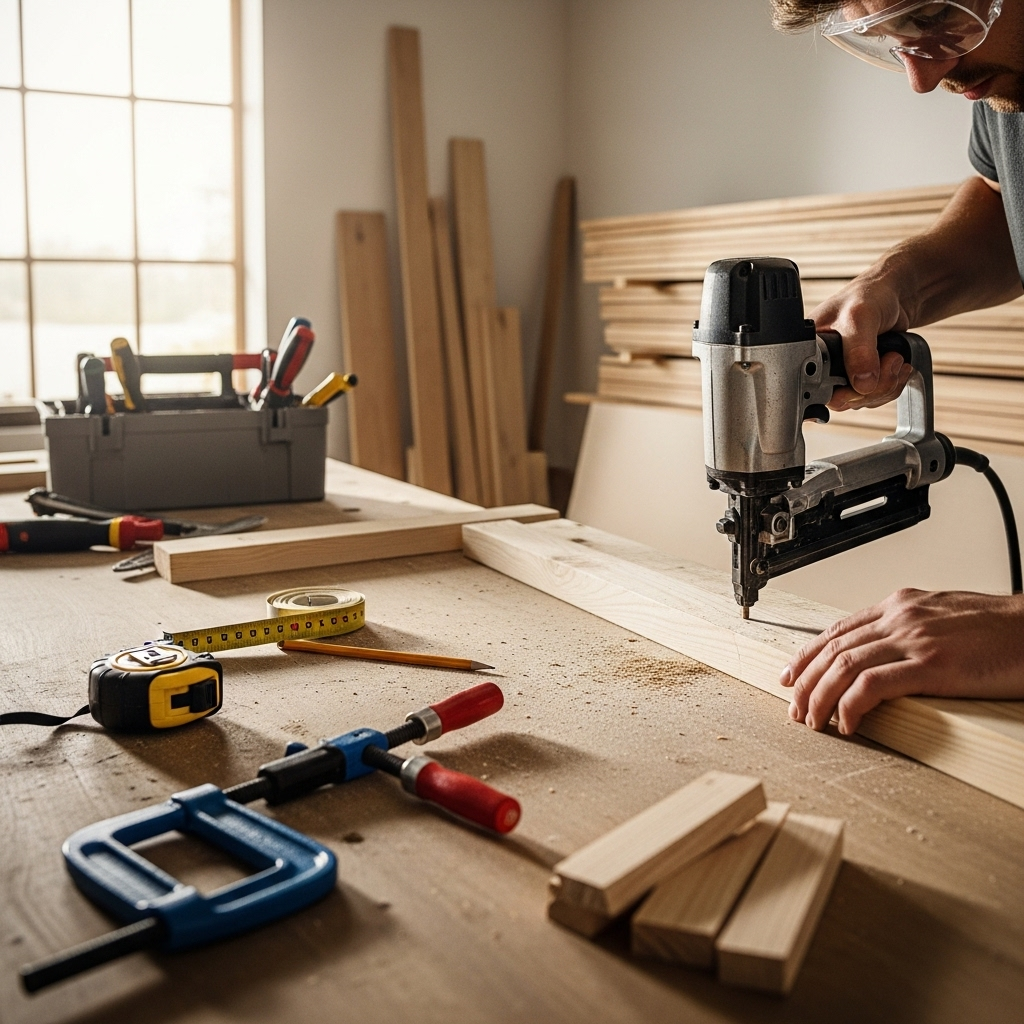
- Assemble the Outer Frame: Apply wood glue to the edges where your side pieces will meet the top and bottom boards. Clamp them together securely. For added strength, you can pre-drill and use a few wood screws. Then, use your Craftsman finish nailer to drive 1 ½ inch finish nails through the sides into the top and bottom pieces. Aim for about every 6-8 inches.
Tip: Always wear safety glasses and consider work gloves. Check out safety guidelines from organizations like the Occupational Safety & Health Administration (OSHA) regarding tool safety.
- Install the Shelves: Measure and mark the positions for your shelves on the inside of the side panels. Apply wood glue to the edges of the shelves. Position each shelf, clamp it in place, and then use your Craftsman finish nailer to secure them by driving nails through the side panels into the shelf ends. Ensure they are level before nailing.
- Add a Back Panel (Optional but Recommended): For extra stability and a cleaner look, cut a thin piece of plywood or hardboard to fit the back of your bookshelf. You can attach this using your Craftsman brad nailer and 1 ¼ inch brad nails, spaced about every 4-6 inches. Brad nails are ideal here because they leave a very small hole.
- Fill and Sand: Once the glue is dry and all nails are set, use wood filler or putty to fill any nail holes you don’t want visible. Let it dry, then sand the entire bookshelf. Start with a coarser grit paper (like 80 or 100) to smooth out any imperfections and then move to finer grits (like 150 and 220) for a smooth finish.
- Apply Finish: Clean off all the dust. Apply your chosen paint, stain, or sealant according to the product instructions. You might need multiple coats, with light sanding in between for the best result.
Essential Maintenance for Your Craftsman Nailer Combo Kit
To keep your Craftsman nailer combo functioning smoothly for years, a little regular maintenance goes a long way.
Cleaning
After each use, wipe down your nailers to remove sawdust and debris. Pay special attention to the nose of the nailer, ensuring it’s free of buildup that could cause jams.
Lubrication (Pneumatic)
If you have pneumatic nailers, you’ll need to periodically add a few drops of specialized pneumatic tool oil to the air inlet fitting. This lubricates the internal mechanisms. Follow the manufacturer’s recommendations on frequency – usually daily or weekly depending on usage.
Checking O-Rings and Seals
Over time, seals can wear out, leading to air leaks (with pneumatic tools) or reduced performance. Inspect them periodically and replace if they appear cracked or brittle. For cordless tools, ensure the battery contacts are clean.
Storing Your Kit
When not in use, store your nailers in their carrying case. This protects them from dust, moisture, and accidental damage. For cordless tools, it’s often recommended to store batteries at room temperature and not leave them fully discharged for long periods.
Troubleshooting Common Issues
Even with quality tools, you might run into minor hiccups. Here’s how to handle them:
Nail Jam
The most common issue. First, disconnect the power source (air hose or battery). Then, use the tool-free jam release mechanism if available. If not, you might need a small screwdriver or pliers to carefully remove the jammed nail. Always refer to your tool’s manual for specific instructions.
Nails Not Firing
For Pneumatic: Check that the air compressor is on, the pressure is set correctly (usually 90-120 PSI for most nailers, but check your manual), and the air hose is securely connected. Ensure the safety tip is depressed.
For Cordless: Make sure the battery is fully charged and properly seated. Ensure the safety tip is depressed.
For Both: Check the nail magazine to ensure it’s loaded correctly and there are no bent nails. You might also have a “dry fire lockout” feature that prevents firing when almost empty.
Nails Not Sinking Deep Enough (or Too Deep)
This is usually an issue with the depth-of-drive setting. Adjust the setting to sink the nail deeper or shallower.
For Pneumatic: If adjusting the depth knob doesn’t work, your air pressure might be too low.
For Deeper Sinking: Ensure you are not firing into extremely hard materials without adequate power. For cordless, ensure the battery is charged.
Craftsman Nailer Combo Kit vs. Individual Nailers: A Cost/Benefit Table
Let’s break down the value proposition.
| Feature | Craftsman Nailer Combo Kit | Buying Individual Nailers |
|---|---|---|
| Initial Cost | Often lower for 2+ tools vs. buying separately. | Higher upfront investment for multiple tools. |
| Convenience | All-in-one package, often with shared batteries/chargers. Ready to go. | Requires research, purchasing, and managing systems for each tool. |
| Versatility | Excellent. Covers common tasks (framing, finish, brad). | Can customize exactly, but might miss core needs initially. |
| Storage/Organization | Usually includes a carrying case for all included tools. | Requires separate cases or bags for each tool. |
| Beginner Friendliness | High. Designed for accessible use and clear value. | Can be overwhelming to choose the right individual tools. |
| Long-Term Value | Good, provides a foundation for many projects. | Potentially higher if you need very specific features for advanced work. |
FAQs about Craftsman Nailer Combo Kits
Q1: Are Craftsman nailers good for DIYers?
A1: Yes, Craftsman nailers are generally considered good for DIYers. They offer a good balance of performance, durability, and affordability, making them an excellent choice for home projects.
Q2: What is the difference between a finish nailer and a brad nailer?
A2: A finish nailer uses larger nails (typically 15 or 16 gauge) for attaching trim and moulding, while a brad nailer uses thinner, smaller nails (18 gauge) for more delicate work or where nail marks need to be minimal.
Q3: Do I need an air compressor for a Craftsman nailer combo kit?
A3: Not all of them! Craftsman offers both pneumatic (air compressor required) and cordless (battery-powered) nailer combo kits. Cordless kits offer greater portability.
Q4: How do I choose the right nail size for my nailer?
A4: Always check the specifications for your specific nailer model. Typically, the nailer’s manual will list the compatible nail gauges and lengths. Using incorrect nails can cause jams or damage the tool.
Q5: How often should I lubricate my pneumatic Craftsman nailer?
A5: For pneumatic tools, it’s often recommended to add a few drops of pneumatic tool oil daily or after several hours of continuous use. Always consult your tool’s owner’s manual for the manufacturer’s specific lubrication schedule.