Quick Summary
Preventing nailer corrosion is simple with regular cleaning, proper lubrication, dry storage, and using the right air line accessories. These essential tips will keep your nailer working smoothly and prevent rust, ensuring it lasts for years of successful DIY projects.
Hey there, DIYers and woodworking enthusiasts! Jack Shaffer here from Nailerguy. Ever felt that sinking feeling when you reach for your trusty nailer, only to find it’s looking a bit… rusty? It’s a common frustration, especially if your nailer spends time in damp garages or humid workshops. Rust and corrosion can gum up moving parts, lead to misfires, and even permanently damage your tool. But don’t worry! Keeping your nailer in tip-top shape is entirely achievable, and I’m here to walk you through it step-by-step. We’ll cover everything from what causes corrosion to the simple, proven methods to prevent it, ensuring your nailer is always ready for your next big project.
Table of Contents
Why Does My Nailer Get Corroded? Understanding the Culprits
Before we dive into the solutions, it’s helpful to understand what causes corrosion in the first place. Think of it like this: metal + moisture + oxygen = rust. Your nailer, with its many metal parts, is a prime candidate for this unwelcome reaction.
Several common factors contribute to nailer corrosion:
- Moisture in the Air Line: Compressed air often carries moisture. When this moisture sits inside your nailer, especially during storage, it can start to degrade metal surfaces. This is a huge one, and we’ll tackle it with specific tools.
- Humidity and Damp Storage: Storing your nailer in a damp garage, basement, or shed is like giving rust an open invitation. High humidity means more moisture in the air, which can settle onto and inside your tool.
- Dew Point Issues: On cool mornings, moisture can condense on cooler metal surfaces. If your nailer has been sitting out or in a fluctuating temperature environment, this condensation can initiate corrosion.
- Improper Cleaning and Lubrication: Letting sawdust, debris, or old lubricant build up can trap moisture against metal parts.
- Exposure to the Elements: Leaving your nailer out in the rain or snow, even for a short time, is a recipe for corrosion.
Essential Tips for Corrosion Prevention: Your Nailer’s Best Defense
Keeping your nailer rust-free is all about consistent, simple maintenance. It doesn’t take a lot of time, but doing it regularly makes a world of difference. Here are the proven strategies you need to know.
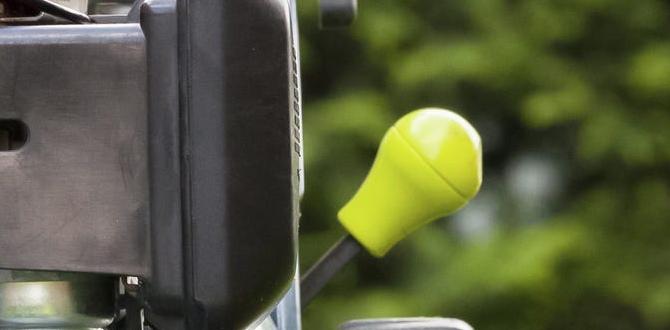
1. Master Your Air Line: The First Line of Defense
The most significant source of internal moisture comes from your air compressor and air lines. Tackling moisture here prevents it from even reaching your nailer.
- Drain Your Air Compressor Regularly: Most air compressors have a drain valve at the bottom. Open it up at the end of each use to let out condensed water. This is crucial! A quick daily drain prevents a lot of future problems.
- Install an Air Line Water Separator/Filter: This is arguably the most important accessory for any air-powered tool user. A water separator filters out moisture and oil mist before it reaches your tool. They are relatively inexpensive and incredibly effective. The Occupational Safety and Health Administration (OSHA) also provides guidelines on compressed air safety, which indirectly relates to maintaining air quality for tools.
- Use an Air Line Dryer (For Serious Users): If you’re extremely concerned about moisture or have a large workshop, consider an air dryer. These systems actively remove moisture from the compressed air.
- Bleed Lines After Use: After you’re done using your nailer, disconnect it from the air hose and give the hose a quick shake or use a blow gun to remove any residual moisture.
2. Proper Lubrication: The Smooth Operator
Lubrication isn’t just for smooth operation; it also creates a protective barrier against moisture.
- Use the Right Lubricant: Always use a dedicated pneumatic tool oil. Regular motor oil or WD-40 is generally not recommended for the internal mechanisms of most nailers as they can break down seals or gum up the works over time.
- How to Lubricate:
- Inline Oiler: The easiest method is using an inline oiler installed in your air line. This small device automatically adds a measured amount of oil to the air as it passes through. Set it and forget it (mostly – you’ll need to refill it).
- Manual Oiling: If you don’t have an inline oiler, you can manually add a few drops of oil directly into the air inlet port of the nailer before you connect the air hose. Do this at the start of a work session.
- Frequency: Consult your nailer’s manual, but a general rule of thumb is to lubricate every few hours of use or at the start of each work session. Over-oiling can cause problems too, so follow manufacturer recommendations.
3. Cleaning is Caring: Keep it Tidy
Dirt, sawdust, and old lubricant residues can trap moisture. A clean nailer is a happy, rust-free nailer.
- Wipe Down After Each Use: After unplugging the air and ensuring the nailer is safe, give it a quick wipe-down with a clean, dry cloth. Pay attention to the magazine or track where nails feed, and the main body.
- Periodic Deep Cleaning: Every so often (perhaps after a larger project or at the end of a season), you might need to do a more thorough cleaning. This often involves disassembling minor parts like the nosepiece or magazine. Always refer to your nailer’s specific manual for disassembly and cleaning instructions. Don’t force parts; if it feels stuck, stop and check your manual.
- Use Compressed Air for Dust: A blast of compressed air (use safety glasses!) can help dislodge stubborn dust and debris from nooks and crannies.
4. Storage Savvy: Where and How
Where you store your nailer significantly impacts its susceptibility to corrosion.
- Keep it Dry: This is paramount. Store your nailer in a dry environment. A tool cabinet, a dry workbench, or a dedicated hard case is ideal. Avoid leaving it on the floor in a damp garage or shed.
- Use a Tool Case: A good quality tool case not only protects your nailer from physical damage but also helps maintain a more stable, drier environment for storage. Opt for cases with some form of desiccant or moisture-absorbing material if you live in a very humid climate.
- Avoid Extreme Temperatures: While dryness is key, extreme temperature fluctuations can also lead to condensation. Try to store your tool in an area with relatively stable temperatures.
- Store Safely: Always store your nailer unloaded, with the safety mechanism engaged, and the air disconnected. This is both for safety and to ensure air pressure doesn’t inadvertently push moisture into parts.
5. Protect the Exterior: A Shield Against the Elements
The outside of your nailer is the first line of defense against external moisture.
- Exterior Wipe-Downs: As mentioned in cleaning, a quick wipe with a dry cloth after use is essential.
- Light Lubrication for Exterior Metal: For metal exteriors (especially on older models), a very light coating of a rust-inhibiting spray or even a silicone spray can offer an extra layer of protection. Apply sparingly and wipe off any excess. Be careful not to get this on moving parts or areas where you might be sliding your hand, as it can become slippery.
- Inspect for Damage: If the paint or coating on your nailer is chipped or scratched, it can expose the metal underneath to moisture. Touch up minor paint chips if you’re feeling meticulous, or at least ensure those areas are extra dry and clean.
Nailer Maintenance Checklist: A Quick Reference
Here’s a handy checklist breakdown for easy reference. Stick this on your workshop wall!
| Task | Frequency | Importance Level | Notes |
|---|---|---|---|
| Drain Air Compressor | Daily (after each use) | Essential | Releases condensed water. |
| Wipe Nailer Exterior | After each use | High | Removes dust, debris, and potential moisture. |
| Check/Add Pneumatic Oil | Before each use or every few hours | High | Use dedicated pneumatic tool oil. Refer to manual for exact quantity. |
| Inspect Air Filter/Water Separator | Weekly or as needed | High | Clean or replace filter element if clogged. Ensure it’s functioning. |
| Deeper Cleaning (Magazine/Nosepiece) | Monthly or after heavy use | Medium | Consult nailer manual for specific instructions. |
| Inspect for Visible Rust/Damage | Regularly | Medium | Address minor issues promptly. |
| Check Storage Location | Regularly | High | Ensure it’s dry and temperature-stable. |
Different Nailer Types and Corrosion Concerns
While the principles of corrosion prevention are universal, there are slight nuances depending on your nailer type:
- Pneumatic (Air) Nailers: These are the most common and are heavily reliant on clean, dry air. The tips discussed above are especially critical for pneumatic tools. The internal workings can be sensitive to moisture, leading to sticky triggers, misfires, and internal rust.
- Electric Nailers (Corded & Cordless): While they don’t use compressed air, electric nailers can still suffer from external corrosion. Battery terminals on cordless models can corrode if exposed to moisture. Keep these dry, wipe them down, and store them in a protected environment. Ensure battery contacts are clean and free from debris. For reliable battery performance, keeping them clean and dry is key.
- Gas/Fuel Cell Nailers: These have fewer internal metal parts exposed to air moisture compared to pneumatic tools, but the exterior can still be affected. The fuel cell mechanism needs to be kept clean and dry. Battery contacts (if it has an electric start) should also be kept clean.
No matter the power source, a consistent approach to keeping your tool clean and dry is the best strategy.
Troubleshooting Common Corrosion Issues
Even with the best prevention, sometimes issues creep up. Here’s how to handle them:
- Slight Surface Rust: If you see a bit of surface rust, often on the magazine or exterior housing, you can usually tackle it with a mild abrasive. A fine-grit Scotch-Brite pad or some very fine steel wool (use #0000 grade and be very gentle) can remove light rust. After removing the rust, clean the area thoroughly and apply a light coat of rust inhibitor or paste wax to protect it. Always wipe away any residue.
- Sticky Trigger or Misfires: This is often a sign of internal moisture or debris. Try running a few drops of pneumatic oil through the air inlet and firing it a few times in a safe direction (away from yourself and others, with scrap wood). If it persists, a more thorough internal cleaning might be needed, following your manual’s instructions.
- Corroded Battery Terminals (Cordless): For cordless nailers, corroded battery terminals can prevent proper charging or connection. Clean them gently with a pencil eraser or a cotton swab dipped in a tiny amount of isopropyl alcohol. Ensure they are completely dry before reinserting the battery.
For significant corrosion or damage that affects operation, it might be time to consult your nailer’s manual for repair guides or contact the manufacturer’s customer service. Sometimes, a small problem that’s ignored can become a big, expensive one.
FAQs About Nailer Corrosion Prevention
Q1: How often should I lubricate my nailer?
A: It’s best to check your nailer’s manual. Generally, a few drops of pneumatic oil before each use or every 2-3 hours of continuous operation is a good rule of thumb. Using an inline oiler automates this process.
Q2: Can I use WD-40 to prevent rust on my nailer?
A: While WD-40 can displace moisture temporarily, it’s not ideal for lubricating the internal mechanisms of pneumatic tools. It can break down seals and doesn’t provide long-lasting lubrication. Stick to dedicated pneumatic tool oil for the best results.
Q3: What’s the best way to store my nailer during the winter?
A: The key is to keep it dry. Store it in a temperature-controlled environment if possible, or at least in a sealed tool case. Ensure the air line is disconnected and drained, and the nailer itself is clean and dry.
Q4: My nailer is stored in a damp basement. What’s the minimum I should do?
A: At a minimum, always drain the air compressor completely, wipe down your nailer thoroughly after each use, and store it in a sealed, dry container or tool bag. Consider adding a reusable desiccant pack inside the container to absorb ambient moisture.
Q5: Can rust damage my nailer permanently?
A: Yes, severe corrosion can damage internal components, make parts stick or break, and eventually lead to tool failure. Regular maintenance is the best way to prevent this permanent damage.
Q6: Do I need an air line water separator for all types of nailers?
A: It’s highly recommended for all pneumatic nailers. Even if you drain your compressor, moisture can still build up. A separator provides an extra, crucial layer of protection against internal corrosion for air-powered tools.
Q7: What should I do if I find rust inside my nailer?
A: If you can access it safely and the rust is minor, carefully clean it with fine steel wool (#0000) or a Scotch-Brite pad, then immediately lubricate the area with pneumatic oil. If the rust is extensive or affects performance, refer to your manual or seek professional repair.
Conclusion: Your Nailer, Your Reliable Partner
Preventing corrosion on your nailer isn’t a daunting task. It’s about building a consistent, simple routine of cleaning, lubricating, and storing your tool properly. By mastering the tips we’ve covered – from managing moisture in your air lines with a good water separator, to giving your nailer a quick wipe-down after use and storing it in a dry place – you’re investing in its longevity and reliability. Think of your nailer as a partner in your DIY adventures; treat it well, and it will serve you faithfully project after project. Happy building, and more importantly, happy rust-free building!