Yes, a cordless nail gun is a brilliant tool for installing baseboards, making a DIY project faster, cleaner, and more professional for beginners. Its portability means no tangled cords and precise nailing for a perfect finish.
Installing baseboards might sound like a job for seasoned pros, but with the right tools, it’s totally achievable for any DIYer. The biggest game-changer? A cordless nail gun. Forget fumbling with hammers, struggling with nails that bend, or tripping over extension cords. A cordless nail gun makes attaching baseboards a breeze, giving you clean lines and a professional look with a lot less stress. We’ll walk through exactly how to use one, making this project feel simple and rewarding.
Table of Contents
Why a Cordless Nail Gun is Your Baseboard Best Friend
When you’re lining your walls with fresh baseboards, you want a look that’s seamless and polished. Traditionally, this meant a hammer and nails, which can be slow and frustrating. Nails can bend, your hammering rhythm might be off, and getting them perfectly flush is an art. Enter the cordless nail gun. It’s designed to drive nails quickly and accurately, letting you focus on precise placement and those satisfying clean corners. Plus, cordless means freedom! No cords to wrestle with, no need to find an outlet in every room. It’s efficiency and ease rolled into one powerful tool.
Benefits at a Glance:
- Speed: Drives nails in a fraction of the time it takes with a hammer.
- Precision: Consistent nail depth for a clean, professional finish.
- Cleanliness: No bent nails, no searching for that perfect swing.
- Portability: Work anywhere without the hassle of cords or air hoses.
- Reduced Fatigue: Less physical strain compared to hammering.
Choosing the Right Cordless Nail Gun for Baseboards
Not all cordless nail guns are created equal, especially when it comes to baseboards. You’ll primarily be looking at two types: finish nailers and brad nailers. For baseboards, a finish nailer is usually the top choice. They use a slightly thicker gauge nail (often 15 or 16 gauge) that provides enough holding power for the trim, while still being slender enough to minimize wood splitting and surface damage. A brad nailer uses even smaller nails and might not be strong enough for some heavier baseboard materials.
Nail Gauge Matters
The “gauge” of a nail refers to its thickness. Lower gauge numbers mean thicker nails. For baseboards, you want a good balance of holding power and minimal damage.
| Nailer Type | Typical Gauge | Nail Head Size | Best For | Pros for Baseboards | Cons for Baseboards |
|---|---|---|---|---|---|
| Finish Nailer | 15 or 16 Gauge | Medium | Baseboards, crown molding, chair rails | Sufficient holding power, relatively small hole, good balance | May be overkill for very thin, delicate trim |
| Brad Nailer | 18 Gauge | Small | Small trim, craft projects, detailed work | Very small hole, minimal wood damage | Limited holding power; may not be suitable for all baseboards |
When picking your cordless nailer, look for features like adjustable depth control. This is crucial for sinking nails just right – not too deep to damage the wood, and not too proud to require excessive filling. Battery life is also important, especially if you have a lot of baseboards to install. Most modern cordless tools use rechargeable lithium-ion batteries that offer good runtimes.
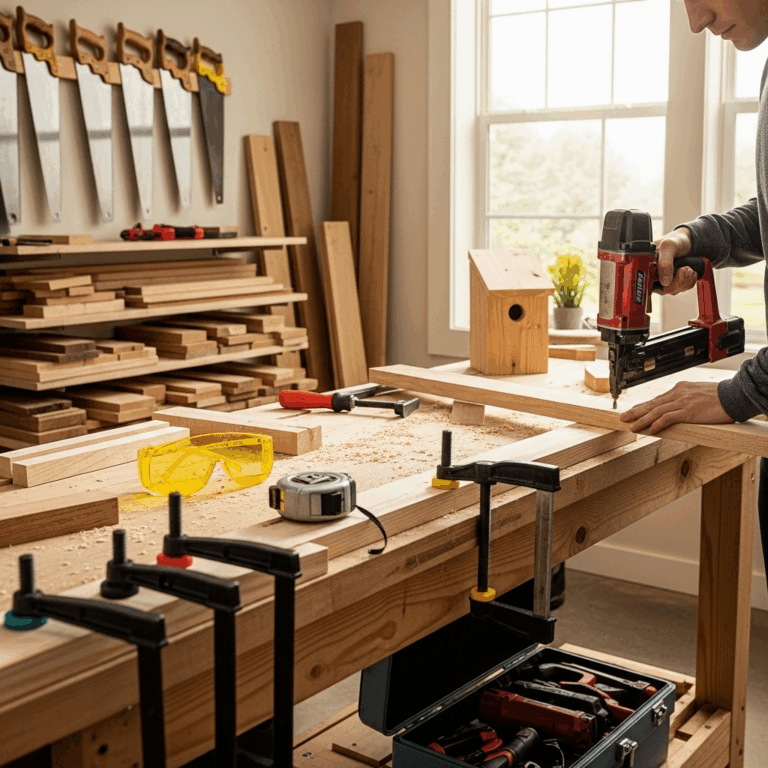
Tools and Materials You’ll Need
Gathering everything before you start will make the installation process smooth and efficient. Here’s a checklist of what you’ll need:
Essential Gear:
- Cordless Nail Gun: A 15 or 16-gauge finish nailer is ideal.
- Nails: Make sure they match your nail gun’s specifications (e.g., 16-gauge x 1 1/2-inch).
- Safety Glasses: Non-negotiable for eye protection.
- Measuring Tape: For accurate measurements of your walls.
- Pencil: To mark cut lines and nail placements.
- Miter Saw: For making precise angled cuts for corners. A simple manual miter box and hand saw can also work for shorter runs.
- Stud Finder: To locate wall studs for secure attachment.
- Caulk Gun and Paintable Caulk: For filling gaps and nail holes.
- Wood Filler or Putty: For filling nail holes.
- Sandpaper: Fine-grit (around 120-150) for smoothing.
- Optional: Wood glue, a coping saw (for inside corners), a level.
Step-by-Step: Installing Baseboards with Your Cordless Nail Gun
Let’s get down to it! This guide breaks down the process into manageable steps, ensuring you get that professional finish. Remember, take your time, measure twice, and cut once.
Step 1: Prepare Your Workspace and Baseboards
Before you start cutting or nailing, make sure your walls are ready. If you’re painting or wallpapering, it’s best to do that before installing baseboards. Clean any dust or debris from the wall and floor. If you’re installing new baseboards, lay them out and inspect them for any defects. It’s also a good idea to have your baseboards already cut to length for each wall section. Make sure you have your nail gun loaded and ready to go, confirming it’s set to the correct depth.
Step 2: Locate Wall Studs
This is a critical step for a secure installation. Baseboards need to be fastened securely to the wall studs for stability. Use your stud finder to locate the center of each stud along the line where the baseboard will be placed. Mark these stud locations lightly with your pencil. Most studs are 16 or 24 inches apart, center-to-center. Knowing these locations will guide where you aim your nail gun.
For more detailed information on finding studs, check out resources from reliable building guides.
Step 3: Measure and Cut Your Baseboards
This is where your miter saw comes in handy. Measure the length of the wall section you’re covering. For baseboards, you’ll typically need to make mitered cuts for corners to create a professional look.
- Outside Corners: Cut at a 45-degree angle, with the long point facing out.
- Inside Corners: Typically, you’ll cut one piece square and the other at a 45-degree bevel that fits into the corner. Some prefer coping inside corners for a tighter fit.
Dry-fit each piece to ensure it sits flush against the wall and floor and fits snugly into the corners. Make any necessary adjustments with your miter saw or a hand saw.
Step 4: Position and Nail the First Piece
Place your first baseboard piece against the wall, ensuring it’s flush with the floor and the corner. If your cordless nail gun has a contact tip, press it firmly against the baseboard, about 1/2 inch from the top edge. Aim your nailer so it’s centered over a stud mark. Gently squeeze the trigger. You should hear a satisfying ‘thump’ as the nail drives into the wood and the wall. Drive nails about every 12-16 inches, ensuring each nail hits a stud. Use your adjustable depth setting to control how far the nail is countersunk. You want the nail head to be slightly below the surface of the wood, ready for filling.
Tip: For the top edge of the baseboard, aim to place nails about 1/2 to 3/4 inch down from the top. This hides them slightly and makes filling easier.
Step 5: Continue Nailing Along the Wall
Once the first piece is secure, move on to the next. If you have multiple pieces for one wall, you might join them with a “scarf joint” (two angled cuts that overlap) or simply butt them together. Nailing these joints securely is important. Continue positioning, checking for flush fit, and nailing into studs. Remember to place nails strategically to hold the board tight against the wall. If a nail doesn’t drive completely, adjust the depth setting and try again, or use a manual nail set to finish the job.
Step 6: Tackling Inside and Outside Corners
For outside corners, ensure your mitered cuts meet cleanly. A small amount of wood glue on the mitered edges before joining can add extra strength. Nail into the stud behind the baseboard, driving nails at an angle where necessary to secure both pieces. For inside corners, whether you’ve mitered or plan to cope, the nail gun will help you secure the trim firmly. Drive nails into the stud to hold the board tight against the adjoining wall.
A helpful video on cutting and fitting baseboard corners can provide visual guidance.
Step 7: Finishing Touches – Filling and Filling
Once all your baseboards are installed, stand back and admire your work! Now for the final polish. Use a paintable caulk to fill any gaps between the top edge of the baseboard and the wall, and along the shoe molding if you have it. This creates a seamless look. For nail holes, use a good quality wood filler or putty. Apply it generously, ensuring each hole is filled. Once the filler is dry, lightly sand the filled areas and any rough spots on the baseboards with fine-grit sandpaper. Wipe away dust with a tack cloth or damp rag, and you’re ready for paint or stain!
Common Issues and How to Solve Them
Even with the best tools, you might run into a few snags. Here are some common problems and their easy fixes:
- Nails Not Driving Fully: Your nail gun depth might be set too shallow, or the battery might be low. Adjust depth, ensure battery is charged. For stubborn hardwood, you might need to use a nail set.
- Nails Bending: This can happen if you hit a knot or if the nail is too long for the material. Ensure you’re nailing into a stud for support. If attempting very hard wood, consider a brad nailer for pilot holes, or a tool with more power.
- Wood Splitting: This is more common with certain hardwoods or if the nail is too close to the edge of the wood. Ensure your nailer’s depth is set correctly. Consider using a slightly thinner gauge nail if your tool allows and the baseboard material is delicate.
- Baseboard Not Sitting Flush: Check that your wall is relatively flat and the baseboard isn’t warped. You can try adding shims behind the baseboard in spots or using a bit more caulk to fill minor gaps.
Battery Powered vs. Pneumatic Nail Guns for Baseboards
The convenience of cordless is hard to beat, but let’s compare it to its pneumatic (air-powered) cousin. This can help you understand why the cordless option is so popular for DIYers tackling baseboards.
| Feature | Cordless Nail Gun | Pneumatic Nail Gun |
|---|---|---|
| Power Source | Battery (Lithium-ion) | Air Compressor & Hose |
| Portability | High (no hoses or compressor) | Low (requires bringing compressor and hose to job site) |
| Setup Time | Low (charge battery, load nails) | Medium (set up compressor, connect hose, check air pressure) |
| Maintenance | Low (battery charging) | Medium (compressor oil, filter cleaning, hose management) |
| Cost (Initial) | Often Higher (tool + batteries + charger) | Can be Lower (tool itself, but compressor is an added cost) |
| Tool Weight | Slightly Heavier (due to battery) | Lighter tool, but hose adds weight/bulk |
| Nail Power/Consistency | Very Good, can sometimes vary slightly with battery level | Excellent, very consistent power |
For baseboard installation, the freedom from an air compressor and hose is a significant advantage. You can move around the room easily, work on stairs, or even in a garage without lugging bulky equipment. While pneumatic nailers are fantastic for professional shops and high-volume work, the cordless option offers unparalleled convenience for homeowners and DIYers.
Safety First!
Your safety is paramount. Cordless nail guns are powerful tools and should be treated with respect. Always follow these safety guidelines:
- Wear Safety Glasses: Always wear ANSI-approved safety glasses or goggles when operating any nail gun, even for a few nails.
- Never Point at Yourself or Others: Treat the nail gun as if it’s always loaded.
- Keep Fingers Away From Trigger: Don’t keep your finger on the trigger when not actively nailing.
- Engage Safety Tip: Ensure the safety contact tip is depressed against the workpiece before firing.
- Disconnect Battery When Not In Use: Remove the battery when the tool is not in use, when clearing jams, or when performing any maintenance.
- Read the Manual: Familiarize yourself with your specific nail gun’s operation and safety features.
For more comprehensive safety information, consult the Occupational Safety and Health Administration (OSHA) guidelines on power tool safety.
FAQ: Your Cordless Baseboard Nail Gun Questions Answered
Q1: What kind of nailer is best for baseboards?
A: A cordless finish nailer, typically a 15 or 16-gauge model, is the best choice for baseboards. It provides enough holding power without damaging the wood significantly.
Q2: How many nails should I use per baseboard section?
A: Aim for one nail every 12 to 16 inches, ensuring that each nail strikes a wall stud for maximum security. You’ll also want nails near the top and bottom edges for a snug fit.
Q3: Can I use a brad nailer for baseboards?
A: While an 18-gauge brad nailer can work for very thin, lightweight trim, it’s generally not recommended for standard baseboards. The nails are too small and don’t provide enough holding power, and they can bend more easily. A finish nailer offers better strength and stability.
Q4: Do I need to use glue with my nails?
A: Using wood glue on the back of the baseboard before attaching it can add extra strength and help it conform better to slightly uneven walls. It’s an optional but recommended step for a more robust installation.
Q5: What if I miss a stud with a nail?
A: If you miss a stud, the nail won’t be securely anchored. You can try to carefully remove the nail and try again slightly to the left or right, or if it’s just a little off and holding well, you can leave it. However, for the best results, try to hit a stud with every nail.
Q6: How do I adjust the depth of the nail?
A: Most cordless nail guns have an adjustable depth setting, usually a dial or lever near the nose of the tool. You’ll want to set it so the nail head is just slightly below the surface of the wood, ready for filling. Practice on a scrap piece of wood first to get it right.
Conclusion
There you have it! Installing baseboards with a cordless nail gun is entirely within your reach. By choosing the right tool, understanding your materials, and following these simple steps, you can achieve a professional, polished look for your home. The speed, precision, and sheer convenience of a cordless nailer transform this project from daunting to doable. So, clear your schedule, grab your gear, and get ready to add that finishing touch that makes a house feel like a home. Happy building!