Quick Summary:
Connecting your nail gun to an air compressor is straightforward: ensure both are off, attach the air hose securely to the compressor’s regulated output and the nail gun’s inlet, check the pressure, and then power on the compressor. Always follow safety guidelines.
Hey there, DIYers and woodworkers! Jack Shaffer here, your go-to guy for all things nail guns and shop tips. So, you’ve got a shiny new air-powered nail gun, but it’s sitting there, quiet and un-nail-like. The missing link? Your trusty air compressor.
Connecting them might seem a bit daunting at first, especially if you’re new to air tools. But trust me, it’s not rocket science! We’ll break it down step-by-step. Getting this connection right is key to making your nailer sing and saving you a heap of frustration and potential headaches down the line.
In this guide, we’ll walk through everything you need to know, from picking the right parts to making the final connection safely. By the end, you’ll be ready to power up and start tackling those projects with confidence. Let’s get your nail gun ready for action!
Table of Contents
Why Connecting Your Nail Gun Is Crucial for Success
An air-powered nail gun is an absolute game-changer for any woodworking project. Whether you’re framing a wall, building a deck, crafting intricate furniture, or just hanging some trim, a nail gun makes the job faster, easier, and often much neater than using a hammer. But here’s the thing: your nail gun can’t do any of that without air power. That’s where the air compressor comes in. It’s the heart of the operation, supplying the compressed air that drives those nails home with satisfying speed and force.
A proper connection ensures your nail gun receives the right amount of air pressure and volume. Too little, and your nails might not drive fully, leaving them sticking out and requiring manual finishing. Too much, and you risk damaging your nail gun, blowing seals, or even causing a dangerous malfunction. Getting the connection right means your tool will perform at its best, and you’ll work safely and efficiently. It’s the behind-the-scenes magic that makes your nail gun a true workhorse.
Understanding the Basic Components
Before we dive into the connection process, let’s quickly look at the essential pieces you’ll be working with:
- Air Compressor: This is the tank that stores compressed air. It has a motor that pumps air into the tank, building up pressure. You’ll find various controls on it, including an on/off switch, a tank pressure gauge, and a regulator with a gauge for the output pressure.
- Air Hose: This is the flexible tubing that carries the compressed air from the compressor to the nail gun. They come in different lengths and materials (like rubber or polyurethane) and usually have standard fittings on each end.
- Nail Gun: Your nailer! It has an air inlet port where the air hose connects. Different types of nail guns (framing, brad, finish, etc.) have different air requirements, which we’ll touch on.
- Fittings and Couplers: These are the connectors that allow you to hook up the air hose securely to both the compressor and the nail gun. Common types include industrial I/M style or ARO QCT couplers, often made of brass or steel for durability.
Step-by-Step Guide: How to Connect a Nail Gun to an Air Compressor
Alright, let’s get down to business. Connecting your nail gun to the air compressor is a simple, safe process when you follow these steps. We’ll assume you have all your components ready.
Step 1: Safety First – Ensure Everything is Off and Depressurized
This is the most critical step. Before you connect anything, make absolutely sure that both your air compressor and your nail gun are powered off. For most compressors, this means unplugging them or flipping the main power switch to the “off” position. For the nail gun, simply ensure it’s not actively firing. Also, check that there is no residual air pressure in the system. If the compressor has an auto-shutoff, it should be off. If you’re unsure, for the nail gun, you can gently press the trigger (while still aiming in a safe direction away from anyone or anything!) with no air connected to release any trapped air, though modern nailers usually don’t hold much residual air.
Step 2: Prepare Your Air Compressor Outlet
Locate the “Regulator” on your air compressor. This is usually a knob near the air outlet port where you’ll connect your hose. The regulator allows you to control the air pressure sent to your tool. Set the regulator knob so that the output pressure gauge reads slightly lower than the recommended operating pressure for your nail gun. It’s always better to start low and increase if needed. You don’t want the compressor to be running at maximum pressure, as this can be too much for your nailer.
Pro Tip: Most compressors have two gauges: one for the tank pressure (how much air is stored in the tank) and one for the line pressure (the pressure being sent out through the hose). You want to adjust the regulated line pressure.
Step 3: Select and Attach the Correct Hose Fitting
Air hoses typically come with a female fitting on one end that connects to the compressor’s male outlet, and often a male fitting on the other end that connects to the nail gun’s female inlet. Ensure you have the right type of fitting for your tools. The most common in North America is the “industrial” fitting, often called a “coupler.”
To attach the fitting to the compressor:
- Make sure the compressor is off and depressurized as per Step 1.
- Screw the female coupler (the part that the hose’s male fitting will plug into) onto the regulated air outlet of your compressor. Some couplers have a built-in male end that threads directly into the compressor’s port.
- Alternatively, if your hose already has a fitting attached, simply connect that fitting to the compressor outlet. Many compressors have a convenient push-to-connect system or a threaded male nipple.
Step 4: Connect the Air Hose to the Nail Gun
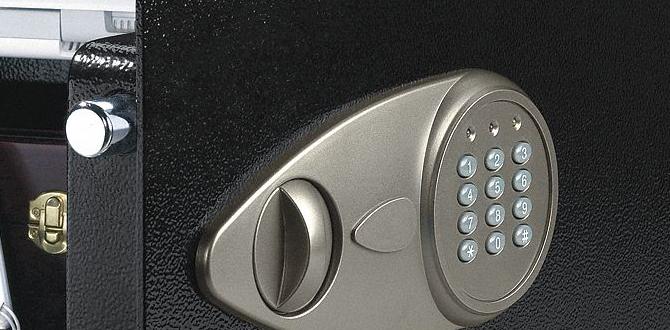
Now for the nail gun itself. You’ll see a small port on the nail gun, usually near the handle or the air exhaust. This is where the compressed air enters.
- Identify the male plug on the end of your air hose that will connect to the nail gun.
- Push this male plug firmly into the female air inlet on the nail gun.
- You should feel or hear a distinct “click” as the fitting seats and locks into place. This ensures a secure, airtight connection. If you’re using a quick-connect coupler, it usually involves pulling back a sleeve on the coupler to release the locking mechanism before inserting the male plug, then releasing the sleeve to secure it.
Important: Never connect or disconnect the hose while the compressor is running or pressurized. Always ensure the nail gun is free of air pressure before disconnecting.
Step 5: Turn on the Air Compressor and Set Pressure
With the hose securely connected to both the compressor and the nail gun, it’s time to power up.
- Ensure the compressor’s main power switch is in the “off” or “standby” position before plugging it in or turning it on at the breaker.
- Plug in the compressor or switch it on at the breaker.
- Turn on the main power switch for the compressor.
- The compressor will start pumping air into the tank. Watch the regulated pressure gauge.
- Once the tank has reached its cut-in pressure and the compressor has shut off (or is idling, depending on your model), begin slowly turning the regulator knob to increase the output pressure.
- Set the pressure according to your nail gun’s manual. This is usually displayed on the regulator’s output gauge.
Check your nail gun’s manual for its recommended operating pressure. Operating outside this range can lead to poor performance or damage. For instance, a framing nailer might need 70-120 PSI, while a brad nailer might only need 50-70 PSI.
Step 6: Test the Connection and Nail Gun
Now for the moment of truth. Aim the nail gun at a scrap piece of wood, keeping your finger away from the trigger. Press the safety contact tip (the nose of the nail gun) against the wood. Then, squeeze the trigger.
- If a nail fires, congratulations! You’ve made a successful connection.
- Listen for any air leaks. A hissing sound indicates a loose connection or a faulty fitting/hose. If you hear leaks, turn off the compressor immediately, disconnect the air, and check all connection points, tightening or replacing fittings as needed.
- Check if the nail drives fully into the wood. If it doesn’t, you might need to slightly increase the regulated air pressure (but always stay within your nail gun’s specified range). If nails are going too deep or bending, you may need to decrease pressure.
Troubleshooting tip: If the nail gun doesn’t fire, double-check that the air hose is fully seated on the nail gun and that the compressor is actually providing air. Also, ensure the safety contact tip is depressed against the work surface.
Essential Accessories for a Great Connection
While the basic hose and fitting is all you technically need, a few accessories can make your setup safer, more efficient, and more convenient. Thinking about these can elevate your workshop experience.
1. Air Filter/Water Separator
Why it’s important: Air compressors can introduce moisture and contaminants into the air line. Moisture can rust your nail gun internally, and dirt can clog its delicate mechanisms. An inline filter/water separator, placed between the compressor and the nail gun (usually near the compressor outlet), catches these things. Many also have small bowls that collect water, which you’ll need to drain periodically.
2. Regulator Maintenance
Why it’s important: As mentioned, the regulator is crucial for setting the correct pressure. Make sure yours is functioning properly. If it’s old or faulty, it might not hold pressure, or it might deliver inconsistent output. Regularly inspect it for damage and keep the adjustment knob free of debris.
3. Quick-Connect Couplers
Why it’s important: Most modern setups use quick-connect fittings. These allow you to easily plug and unplug your air hose from the compressor and even other tools without needing to screw and unscrew threaded fittings every time. They save time and reduce wear on your hands. The industrial style is very common and robust for workshop use
4. Air Hose Quality and Length
Why it’s important: The hose itself matters. Cheaper, thinner hoses might kink easily, reduce airflow, or not withstand the necessary pressure. Look for hoses rated for higher PSI and those made from durable materials like polyurethane or heavy-duty rubber. The length is also key: too short, and you’ll be tethered to the compressor; too long, and you might see a drop in pressure and airflow, especially with smaller compressors. A 25-50 foot hose is usually a good starting point.
Understanding Air Pressure (PSI) and CFM Requirements
This is where you prevent frustration down the road. Every air tool has specific requirements for air pressure and volume.
Air Pressure (PSI – Pounds per Square Inch)
PSI is the measure of force with which the air is delivered. Your nail gun will have a recommended PSI range printed on it or in its manual. This is what your compressor’s regulator controls.
- Too Low PSI: Nails won’t drive fully. You’ll get proud nails that need hammering.
- Too High PSI: Can damage the nail gun’s internal components, blow seals, and cause nails to over-penetrate or bend.
- Just Right PSI: Nails drive flush perfectly, and your tool operates reliably and safely.
Example PSI Ranges:
| Nail Gun Type | Typical PSI Range |
|---|---|
| Framing Nailer | 70-120 PSI |
| Roofing Nailer | 70-110 PSI |
| Brad Nailer | 50-70 PSI |
| Finish Nailer | 40-70 PSI |
| Siding Nailer | 50-80 PSI |
Air Volume (CFM – Cubic Feet per Minute)
CFM is the amount of air your compressor can deliver at a given pressure. This is less about the connection itself and more about whether your compressor can support your nail gun. A nail gun uses a burst of air with each nail. If your compressor can’t keep up with this demand, it won’t be able to replenish the air in the tank fast enough, leading to a drop in pressure and the nail gun’s performance.
What to check:
- Your nail gun manual or specifications will list its CFM requirement, usually at 90 PSI.
- Your air compressor’s specifications will list its CFM output, often at 90 PSI.
- Crucially: Your compressor’s CFM output must meet or exceed your nail gun’s CFM requirement. If your compressor’s CFM is lower than what the nail gun demands, you’ll experience performance issues. For example, a framing nailer might need 2-5 CFM, while a small brad nailer might only need 0.5-1 CFM.
You can find excellent resources detailing compressor and tool CFM at sites like ToolReviews.com, which often break down how these metrics affect tool performance.
Common Mistakes to Avoid
We’ve covered how to connect, but knowing what NOT to do is just as important for a smooth and safe experience.
- Forgetting to De-pressurize: Always turn off the compressor and bleed pressure before connecting or disconnecting. This is a safety must.
- Incorrect Pressure Setting: Setting the regulator too high or too low will cause problems, from nail gun damage to just not working correctly. Always refer to your tool’s manual.
- Using the Wrong Fittings: While many fittings look similar, using incompatible ones can lead to leaks, poor seals, or even parts breaking off. Stick to standard workshop fittings.
- Ignoring Air Leaks: A small hiss can turn into a big problem. Address leaks promptly by tightening fittings or replacing damaged hoses/couplers. Leaks waste energy and can lead to your compressor running more than it should.
- Not Draining the Tank: For compressors with tanks, regular draining is essential to remove collected water. This prevents rust inside your compressor and keeps the air cleaner for your tools. Refer to your compressor’s manual for recommended drain intervals.
- Overlooking CFM: As discussed, connecting a tool that requires more air volume than your compressor can provide will result in disappointment. Ensure your compressor is adequately sized for your nail gun’s demands.
- Using an Extension Cord That’s Too Thin or Long: For electric compressors, using an undersized or excessively long extension cord can starve the motor of power, leading to overheating and poor performance. Use the thickest gauge cord appropriate for the distance.
Nail Gun Maintenance Tips for Longevity
Once you’ve mastered the connection, keeping your nail gun in top shape will ensure it works for years to come. Here are some simple maintenance tips:
- Lubrication: Most air-powered nail guns require a drop or two of specialized air tool oil in the air inlet port before each use. Check your manual for specific instructions. This keeps the internal workings lubricated.
- Keep it Clean: Wipe down your nail gun after each use to remove dust and debris. Pay attention to the nose and driver blade area.
- Check O-Rings and Seals: Periodically inspect the O-rings and seals for wear or damage. Damaged seals can cause air leaks.
- Air Filter Maintenance: If you use an inline filter/water separator, remember to drain the water collection bowl regularly. Clean or replace the filter element as recommended by the manufacturer.
- Staple gun specific: For pneumatic staplers, check the staple magazine for jams or obstructions and clear them promptly.
Proper maintenance, starting with a good connection, means fewer disruptions on your projects. You can find resources on tool maintenance and care from organizations like the Occupational Safety and Health Administration (OSHA) which provides general recommendations for pneumatic tools in their standards.