Common causes of nail misalignment in nail guns include incorrect nail collation, improper tool angle, depth setting issues, damaged nails, and worn-out tool parts. Addressing these simple fixes will improve your nailing accuracy and project efficiency.
Hey there, DIYers! Jack Shaffer here from Nailerguy. Ever been in the middle of a project and found yourself wrestling with nails that just won’t go in straight? It’s a common frustration, especially when you’re just starting out with nail guns. Those bent nails, or “nail pops” as some call them, can really slow down your work and make a piece look less than professional. But don’t worry, these issues are usually easily fixed once you know what to look for.
This guide is all about demystifying why nails miss their mark. We’ll break down the most common culprits, from how you load the nails to how you’re holding the tool. By understanding these common causes of nail misalignment, you’ll gain the confidence to tackle your next woodworking project with smoother, straighter results. Let’s get those nails driving true!
Table of Contents
Common Causes of Nail Misalignment in Nail Guns
It’s a bummer when a nail doesn’t drive in straight. It can split your wood, look messy, or even cause a safety hazard if it bends out too much. Luckily, most of the time, it’s something simple we can fix. Let’s dig into the most frequent reasons your nail gun might be acting up.
1. Nail Collation and Loading Errors
Think of nail collation as the way your nails are held together, usually by glue, plastic, or wire. If they aren’t lined up perfectly, or if you load them into the gun incorrectly, you’re setting yourself up for trouble right from the start.
Incorrect Nail Type or Size
Using the wrong kind of nails is like trying to fit a square peg in a round hole. Different nail guns are designed for specific nail sizes and types. A framing nailer needs stout framing nails, while a finish nailer needs slender finish nails. If you mix them up, the nail might not feed correctly, jamming the mechanism or causing it to drive at an angle.
Solution: Always check your nail gun’s manual for the recommended nail specifications. Look for the gauge (thickness) and length. Ensure the collation type (e.g., paper collated, plastic collated) matches what your gun is designed for.
Improper Loading Technique
Loading nails might seem straightforward, but there’s a knack to it. If the nails aren’t seated properly in the magazine, or if they’re loaded backward, they won’t feed smoothly. This can lead to misfires or nails that drive askew.
Solution: Ensure the nail strip is fully seated against the feeder mechanism. Many nail guns have a visual indicator or a way to feel if the nails are properly in place. For some tools, you might need to push the nail strip forward firmly.
Nail Strip Damage
Sometimes, the nail strip itself can get damaged, maybe during shipping or if a few nails break off. A bent or broken nail in the strip can cause a jam or force subsequent nails to drive at an angle.
Solution: Before loading, inspect the nail strip. Discard any damaged strips or remove any bent or broken nails.
2. Tool Angle and Placement
This is a big one, and it’s all about how you’re holding and positioning the nail gun against the material. Even a slight deviation can send a nail off course.
Too Steep an Angle
When your nail gun is angled too sharply against the surface, the nail tends to enter the wood at an extreme angle. This can cause the nail to deflect off the grain or hit a knot in a way that pushes it sideways, resulting in misalignment.
Solution: Always try to keep the nail gun’s nose as perpendicular (90 degrees) to the surface as possible. Imagine it’s like shooting an arrow – you want a straight shot!
Not Flush Against the Surface
If the nose of your nail gun isn’t pressed firmly against the material, there’s a gap. When the gun fires, the nail can start its journey from an uneven position, leading to an angled entry.
Solution: Press the nail gun’s nose flush against the workpiece before squeezing the trigger. You should feel it seat firmly against the surface you’re nailing into.
Nailing Near an Edge or Corner
Wood is weakest at its edges and corners. When you drive a nail too close to these areas, there’s not enough material to support the nail. It can easily split the wood and veer off track, causing misalignment.
Solution: Mark your nailing points and avoid getting too close to the edge. If you need to secure an edge, consider pre-drilling a pilot hole and using glue in addition to the nail for better holding power.
3. Depth of Drive Settings
Your nail gun has a setting that controls how deep the nail is driven into the material. If this isn’t dialed in correctly, it can also lead to nail misalignment issues.
Nails Driven Too Shallow
If the depth is set too shallow, the nail won’t go in far enough to be securely held. It might stick out at an angle, or the head might not be countersunk. This often happens when the gun isn’t set to overcome harder woods or denser materials.
Solution: Increase the depth setting slightly. Test on a scrap piece of the same material to find the sweet spot where the nail is driven sufficiently without going too deep or causing excessive damage.
Nails Driven Too Deep (Over-Driving)
Conversely, driving nails too deep can also be a problem. When a nail goes too far, it can break through the other side of thin material, or the aggressive drive can cause the wood fibers to mushroom or split, pushing the nail off target on its way in.
Solution: Decrease the depth setting. Again, test on scrap material. You want the nail head to be flush with or slightly below the surface, but not so deep that it pierces the opposite side or causes significant damage.
Inconsistent Material Density
Sometimes, the material you are working with isn’t uniform. You might have knots, glue seams, or variations in wood density within the same piece. A nail gun preset for a softer section might drive too deep into a knot, leading to misfires or bent nails.
Solution: Adjust your depth setting as needed. If you encounter a knot, you might need to back off the depth, or even consider a softer blow by not pressing the tool quite as hard. For precise work on varied materials, a nailer with adjustable depth control is invaluable.
4. Damaged or Defective Nails
You might have the best nail gun in the world and be an expert at using it, but if your nails are bad, you’re going to have problems.
Bent or Deformed Nails
Nails can get bent during manufacturing, in transit, or even when they get jammed in the gun. Driving a bent nail is a recipe for misalignment. The nail won’t follow the intended path, and you’ll end up with a crooked nail or a jam.
Solution: Always inspect your nails before loading. Discard any that are bent, have damaged heads, or look otherwise deformed.
Nails with Poor Collation
As we touched on earlier, if the glue or plastic that holds the nails together is weak, the strip can break apart. This leads to individual nails not feeding correctly, causing them to misfire or drive crookedly.
Solution: Use reputable brands of nails that have strong collation. If you notice a weak collation strip, don’t use it.
Incorrect Nail Size for the Application
Using a nail that is too long for the material thickness, or too thick for fine trim, can cause issues. A nail that’s too long might hit something behind the workpiece or simply not have enough material to drive straight into. A nail that’s too thick can split delicate wood.
Solution: Refer to your nail gun’s manual and project plans for the correct nail size. When in doubt, using lighter gauge nails and plenty of them is often better than using fewer, heavier gauge nails that could split the wood.
Manufacturers Defects
Although rare, it’s possible to get a batch of nails with a manufacturing defect that affects their straightness or how they drive.
Solution: If you consistently experience problems with well-maintained equipment and proper technique, try a different brand or batch of nails.
5. Wear and Tear on the Nail Gun
Like any tool, nail guns have parts that can wear out over time. Gears, springs, and seals can degrade, affecting the tool’s performance and contributing to nail misalignment.
Worn Driver Blade
The driver blade is what strikes the nail head and drives it into the wood. If this blade becomes worn, damaged, or loses its sharp edge, it might not strike the nail squarely. This can cause the nail to be driven at an angle, or even skip off the nail head entirely.
Solution: Inspect the driver blade periodically. If it appears bent, chipped, or excessively dull, it may need to be replaced. Refer to your tool’s manual for replacement procedures. Many manufacturers, like DEWALT, offer service guides and support for their tools.
Issues with the Spring Mechanism
Nail guns often have springs that help with feeding nails or ensuring consistent contact. If these springs weaken or break, the nail might not be pushed forward into the firing chamber properly, or the tool might not seat correctly, potentially leading to misaligned nails.
Solution: Listen for any unusual sounds or changes in how the gun operates. If you suspect a spring issue, it’s often best to have the tool serviced by a professional or the manufacturer.
Damaged O-rings and Seals
While more related to the gun’s power and air leaks, damaged O-rings and seals can lead to inconsistent power delivery. Inconsistent power can affect the depth of drive and, indirectly, how straight a nail enters the wood if the force isn’t consistent.
Solution: If you’re experiencing power issues or air leaks, inspect the O-rings and seals, especially around the piston and cylinder. Replacing these can often restore proper function.
Dirt and Debris in the Magazine or Firing Chamber
Over time, wood dust, glue residue, and other debris can build up inside your nail gun. This gunk can obstruct the smooth feeding of nails or interfere with the driver blade’s action, causing it to strike unevenly.
Solution: Regularly clean your nail gun’s magazine and firing chamber, especially after lengthy projects or working with sticky materials. Refer to your tool’s manual for specific cleaning instructions. A good cleaning can often resolve many performance issues.
6. Air Pressure Inconsistency (for Pneumatic Nailers)
If you’re using a pneumatic nail gun, the air supply is crucial. Incorrect or inconsistent air pressure is a common culprit for many nailing problems, including misalignment.
Too Low Air Pressure
When the air pressure in your compressor is too low, the nail gun won’t have enough power to drive the nail fully or consistently. This can result in nails that stick out at awkward angles or don’t seat properly because the force is insufficient.
Solution: Set your air compressor to the manufacturer’s recommended PSI (pounds per square inch) for your specific nail gun. This information is usually found in the tool’s manual. Also, ensure your air hose is adequate in diameter and length to avoid pressure drops. A standard recommendation for most framing and finishing nailers is between 90-120 PSI, but always verify with your tool’s documentation. You can find general guidelines on air compressor usage from resources like OSHA, which emphasizes safe and proper equipment operation.
Too High Air Pressure
On the flip side, too much air pressure can cause problems too. It might drive the nail too deep, splitting the wood and causing it to push the nail sideways. It can also damage the tool itself over time.
Solution: Use a pressure regulator on your air compressor and set it to the lower end of the recommended range for your nail gun. Gradually increase it if needed, but avoid exceeding the maximum recommended pressure.
Air Leaks
Hoses, fittings, or an unreliable compressor regulator can cause air leaks, leading to fluctuating air pressure. This inconsistency means the nail gun’s power delivery varies from shot to shot, making consistent, straight nailing difficult.
Solution: Check all connections – from the compressor to the hose, the hose to the tool, and any quick-connect fittings. Listen for hissing sounds and tighten or replace any problematic parts.
7. Material and Subsurface Considerations
Sometimes, the problem isn’t the nail gun or the nails themselves, but what you’re nailing into.
Nailing into Hard Knots or Dense Grain
Wood isn’t uniform. When a nail encounters a very hard knot or a section of exceptionally dense grain, it can be deflected. The nail might bend or veer off course as it tries to penetrate the unyielding material.
Solution: If possible, try to avoid nailing directly into knots, especially for critical structural joints. If you must, use a nail gun with adjustable depth control and be prepared to adjust the setting. Sometimes, very light sanding or a slightly different angle can help, but often it’s about careful placement.
Hitting Existing Fasteners or Nails
Driving a new nail too close to a previously driven nail or screw can cause the new nail to be deflected. The existing fastener acts as a barrier or causes the wood fibers to behave unpredictably.
Solution: Be mindful of where you are nailing. If you plan to drive multiple fasteners in the same area, try to space them appropriately. It’s usually best to avoid hitting an existing fastener altogether.
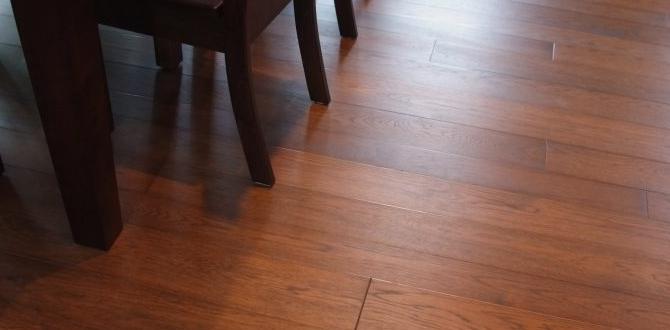
Nailing into Unstable or Soft Subsurfaces
If you’re attaching a piece of trim to drywall without hitting a stud, or nailing into particleboard that’s starting to crumble, the nail won’t have a solid anchor. It can bend or splay out because the material can’t hold it straight.
Solution: Ensure you are nailing into solid framing or a stable substrate. For walls, using a stud finder is essential. For flooring or cabinetry, make sure your base material is sound and provides adequate support for the fasteners.
Troubleshooting Common Nail Misalignment Issues
Here’s a quick reference table to help you diagnose and fix those pesky crooked nails.
| Problem Symptom | Likely Cause | Solution |
|---|---|---|
| Nail enters at an angle, even with tool flush. | Tool angle too steep; incorrect nail collation. | Keep tool as perpendicular as possible; inspect nail strip for damage or incorrect loading. |
| Nails are bent or misshapen. | Damaged nails; worn driver blade; low air pressure (pneumatic). | Discard bent nails; inspect driver blade; check and adjust air pressure. |
| Nail pops out or doesn’t sink. | Depth set too shallow; low air pressure (pneumatic); weak subsurface. | Increase depth setting; check and increase air pressure; ensure solid subsurface. |
| Nail sinks too deep, splitting wood. | Depth set too deep; too high air pressure (pneumatic). | Decrease depth setting; check and decrease air pressure. |
| Nail jam or intermittent misfires with angled nails. | Debris in magazine/firing chamber; damaged nail strip; worn magazine feed. | Clean tool; inspect and discard damaged nails; check for wear on feed parts. |
| Nail deflects off surface or enters erratically. | Nailing into hard knot/dense grain; hitting existing fastener. | Adjust nailing location; avoid existing fasteners; test depth on scrap. |
When to Seek Professional Help
Most nail misalignment issues are fixable with the tips we’ve covered. However, there are times when you might need a professional touch or decide it’s time for a new tool.
Persistent Issues: If you’ve tried all the common fixes, including cleaning and basic maintenance, and you’re still experiencing consistent nail problems, there might be an internal issue with your nail gun that requires professional repair.
* Damaged Tool Components: If you notice significant damage to the driver blade, housing, or other critical parts, it’s often safer and more cost-effective to have it repaired or replaced by a qualified technician. For some manufacturers, you can find resources on their websites like Milwaukee Tool’s service and