Quick Summary:
Choosing between a coil nailer and a stick nailer depends on your project. Coil nailers excel for siding, roofing, and framing due to their high capacity and speed. Stick nailers are great for trim, moldings, and cabinetry where precision and a smaller footprint are key. This guide helps you pick the right one!
Hey there, DIYers and aspiring woodworkers! Jack Shaffer here from Nailerguy. Ever stare at a project and wonder which nailer is the real MVP? You’ve got these two powerhouses: the coil nailer and the stick nailer. They both drive nails, but they do it in fundamentally different ways, and picking the wrong one can turn a smooth build into a frustrating ordeal. Does your siding job need a hundred nails in a hurry, or is your delicate trim work calling for a pinpoint strike? We’ll break down the coil nailer vs stick nailer pros and cons so you can feel confident choosing the perfect tool for your next great creation. Let’s dive in!
Table of Contents
Coil Nailer vs Stick Nailer: Understanding the Basics
Before we get into the nitty-gritty of which nailer is better for what, let’s understand what makes them different. At its heart, a nailer is a tool designed to drive nails quickly and efficiently, replacing the hammer for many woodworking tasks. The main difference between coil and stick nailers lies in how they store and feed the nails.
What is a Coil Nailer?
A coil nailer takes its name from the way it loads nails: in a coil, or spiral. These nails are held together by wire or plastic collation, forming a drum-like shape. The nailer’s magazine is designed to accept these coils. When you pull the trigger, the tool grabs a nail from the coil, positions it, and drives it into your material. Because they hold so many nails – often 200 to 400 per load – coil nailers are built for speed and high-volume work.
What is a Stick Nailer?
A stick nailer, on the other hand, loads nails in a straight line, much like how you might imagine a stick. These nails are typically held together by plastic or paper collation. The magazine on a stick nailer is usually a long, lean channel that accepts one straight row of nails. Stick nailers generally hold fewer nails than coil nailers, ranging from about 50 to 100 nails per load. This design often allows them to be more compact and maneuverable.
Coil Nailer: Pros and Cons
Coil nailers are titans of the framing and structural world. They get a ton of work done with minimal interruption. However, they’re not always the best choice for every job. Let’s look at why you’d love one, and where it might fall short.
Pros of Coil Nailers:
- High Nail Capacity: This is their superpower! With hundreds of nails in a single coil, you can work for extended periods without constantly stopping to reload. This dramatically speeds up projects like roofing, siding, or framing.
- Speed and Efficiency: They are designed for rapid firing. For tasks where you need to drive many nails quickly, a coil nailer is a game-changer.
- Durability for Heavy-Duty Work: Coil nailers are often built robustly, capable of handling tougher materials and the demands of construction sites.
- Versatility in Nail Types: You can find coil nailers designed for various nail sizes and types, including framing nails, roofing nails, and siding nails.
- Reduced Downtime: Fewer reloads mean more time spent building and less time spent fumbling with nails.
Cons of Coil Nailers:
- Size and Weight: Due to their higher nail capacity and robust construction, coil nailers tend to be larger and heavier than stick nailers. This can make them cumbersome in tight spaces or for overhead work.
- Nail Collator Waste: The wire or plastic that holds the nails together in a coil can sometimes break off and leave debris in the work area, which may need cleaning up.
- Nail Breakage: While less common with quality nails, sometimes a nail can break during firing, especially if not aligned perfectly.
- Higher Initial Cost: Generally, coil nailers can have a higher upfront purchase price compared to many basic stick nailers.
- Not Ideal for Delicate Work: Their power and size make them less suitable for fine woodworking, trim, or applications where precision and a subtle nail head are paramount.
Stick Nailer: Pros and Cons
Stick nailers are the precision instruments of the nail gun world. They might not hold as many nails, but they often offer superior control and are perfect for the finishing touches.
Pros of Stick Nailers:
- Compact and Lightweight: Stick nailers are typically smaller and lighter, making them much easier to handle in tight corners, overhead applications, and for extended periods without fatigue.
- Precision and Control: Their smaller size and often more focused nosepiece allow for very precise nail placement. This is crucial for detailed work like trim, molding, and fine cabinetry.
- Less Collator Waste: The plastic or paper that holds stick nails together usually breaks cleanly and is less likely to create debris compared to coil nails.
- Nail Head Appearance: Stick nailers often drive nails with a cleaner, more consistent finish, which is important when the nail head will be visible and needs to be subtle or easily filled.
- Cost-Effective for Specific Tasks: While high-end stick nailers exist, many entry-level models are more affordable, making them a great option for homeowners tackling occasional trim work.
- Versatility for Finishing: They are the go-to for finish carpentry, interior trim, baseboards, crown molding, and even some furniture building.
Cons of Stick Nailers:
- Lower Nail Capacity: You’ll be reloading much more frequently with a stick nailer, which can interrupt workflow on larger projects.
- Slower for High-Volume Work: If your project requires hundreds of nails rapidly, the constant need to reload a stick nailer will slow you down considerably.
- Nail Collation Limitations: Nails are held together by plastic or paper. If the collation breaks awkwardly, it can sometimes jam the tool.
- Less Suitable for Structural Work: Stick nailers are generally not designed for the heavy-duty demands of framing or structural applications where larger, sturdier nails are needed.
When to Choose a Coil Nailer
Think of the coil nailer as your workhorse for projects that involve a lot of nailing and where speed is a major advantage. Its high capacity means you can keep your momentum going without constant interruption.
Ideal Projects for Coil Nailers:
- Roofing: Attaching shingles or other roofing materials requires driving hundreds of nails in quick succession. A coil roofing nailer is essential here.
- Siding Installation: Whether it’s vinyl, wood, or fiber cement, siding needs to be attached securely and efficiently. A siding coil nailer is perfect for this.
- Framing Walls and Decks: For building the skeleton of a house or deck, you’ll be driving a lot of nails into studs, joists, and beams. A framing coil nailer is built for this heavy-duty task.
- Fencing: Attaching fence pickets or rails often involves repetitive nailing where a coil nailer shines.
- Sheathing: Covering walls or roofs with sheathing panels requires numerous fasteners, making a coil nailer a time-saver.
When to Choose a Stick Nailer
If your project demands finesse, precision, and a clean finish, then a stick nailer is likely your best friend. These tools are designed for the more detailed aspects of woodworking and home improvement.
Ideal Projects for Stick Nailers:
- Installing Trim and Moldings: Baseboards, crown molding, door and window casings all benefit from the precise placement and subtle nail heads a stick nailer provides.
- Cabinet Installation: Securing cabinets to walls or assembling cabinet frames requires accuracy.
- Furniture Building: For many furniture projects, especially where aesthetics are important, a stick nailer in the right gauge is ideal.
- Picture Frames and Craft Projects: Smaller, detailed projects often require a lighter touch and a more maneuverable tool.
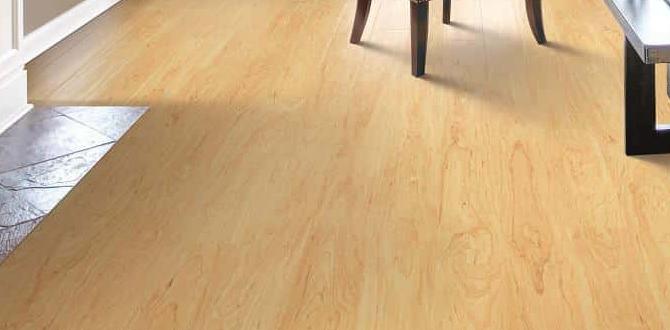
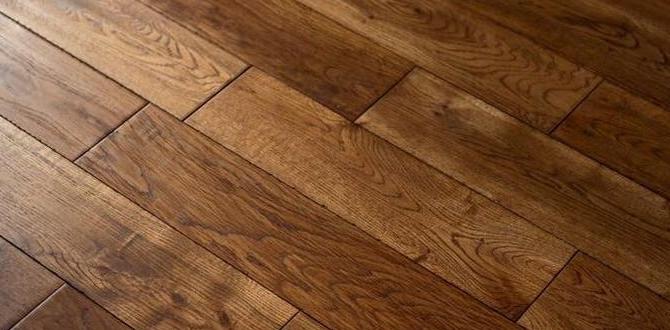
- Hardwood Flooring Installation (specific types): Some types of hardwood floor installation utilize stick nailers, particularly for detail work or where a specific nail type is required.
Key Differences at a Glance: Coil Nailer vs Stick Nailer
To help you visualize the distinctions, here’s a comparative table. It highlights the core differences and where each nailer typically shines.
| Feature | Coil Nailer | Stick Nailer |
|---|---|---|
| Nail Storage | Coiled (wire or plastic collation) | Straight rows (plastic or paper collation) |
| Nail Capacity | High (200-400+ nails) | Medium (50-100 nails) |
| Primary Use | Framing, roofing, siding, fencing | Trim, molding, cabinetry, furniture, finish work |
| Speed | Very High | Medium |
| Size & Weight | Larger & Heavier | Smaller & Lighter |
| Precision | Moderate | High |
| Nail Head Finish | Functional, sometimes larger | Clean, subtle, easily hidden |
| Collation Type | Wire or plastic | Plastic, paper, or glue |
Understanding Nail Gauges and Types
Beyond the nailer type, the nails themselves are critical. Both coil and stick nailers come in different “gauges,” which refer to the thickness of the nail wire. Lower gauge numbers mean thicker nails.
Common Nail Gauges Explained:
- Framing Nails (e.g., .113 – .148 gauge): These are thick, strong nails used in framing. They are typically found in coil nailers.
- Siding Nails (e.g., .080 – .099 gauge): Thinner than framing nails, often with specialized heads to prevent shingle blow-through. Usually in coil nailers.
- Roofing Nails (e.g., 11-15 gauge): Specially designed with wide heads for attaching roofing materials. Exclusively in coil roofing nailers.
- Finish Nails (e.g., 14-18 gauge): Thinner nails designed to minimize wood damage for trim and molding. Found in stick nailers.
- Brad Nails (e.g., 18-20 gauge): Very thin, almost pin-like nails used for delicate trim or craft projects. Found in stick (or dedicated brad) nailers.
The collation (how the nails are held together) also differs. Coil nailers use wire or plastic, while stick nailers use plastic, paper, or sometimes adhesive. Always ensure you are using the correct type and gauge of nail for your specific nailer model and project. Using the wrong nails can damage your tool or lead to misfires and jams. For more on nail specifications, the Tooling.com guide to nail types and sizes offers excellent detail.
Air Pressure and Power Considerations
Both coil and stick nailers typically run on compressed air. The required air pressure (measured in PSI – pounds per square inch) is crucial for proper operation. Consult your nailer’s manual to find the recommended PSI range. Running a nailer at too low a pressure can result in under-driven nails, while too high a pressure can damage the tool, the material, or even cause ricochets.
For Coil Nailers:
Coil nailers, especially framing models, often require higher PSI settings to drive larger nails effectively into dense materials. They also usually need a larger air compressor with a sufficient tank size to keep up with the firing rate.
For Stick Nailers:
Stick nailers, particularly those for trim and brad nails, often operate at lower PSI. This is because they are driving smaller, thinner nails, and higher pressures aren’t necessary and could even split delicate trim.
Make sure your air compressor is adequately sized for the nailer you choose. For high-volume work with a coil nailer, you’ll need a compressor that can deliver consistent airflow. For lighter duty with a stick nailer, a smaller compressor might suffice. Understanding your air compressor’s capabilities is key to tool performance and longevity.
Safety First!
No matter which nailer you choose, safety is paramount. Nail guns are powerful tools and can cause serious injury if not used properly. Here are some essential safety tips:
- Always wear safety glasses: Protect your eyes from flying debris or ricocheting nails.
- Never point the nailer at yourself or others: Treat it like a loaded firearm.
- Keep your fingers away from the trigger when not firing: Don’t hold your finger on the trigger unless you intend to drive a nail.
- Ensure the work surface is stable: Prevent accidental slips or misfires.
- Use the correct nail type and pressure: As discussed, this prevents jams and ensures proper driving.
- Be aware of recoil and kickback: Maintain a firm grip on the tool.
- Disconnect air when changing nails or performing maintenance: Always remove the air hose before any adjustments.
- Read your tool’s manual: Every nailer has specific operating and safety instructions.
Responsible tool use ensures that your DIY projects are not only successful but also safe for you and those around you. For more in-depth safety guidelines, the Canadian Centre for Occupational Health and Safety provides comprehensive information on nail gun safety standards.
Frequently Asked Questions (FAQ)
Q1: Can I use a coil nailer for trim work?
Generally, no. Coil nailers use thicker nails that leave larger holes, and their size and weight make precise placement for delicate trim difficult. Stick nailers (finish nailers or brad nailers) are the appropriate tools for trim.
Q2: Which is better for DIY home renovations, a coil or stick nailer?
It depends on the renovation! For tasks like building a deck, framing a small shed, or installing siding, a coil nailer is useful. For interior renovations involving baseboards, crown molding, door frames, and cabinetry, a stick nailer is essential. Many DIYers end up owning both types for different jobs.
Q3: Do I need an air compressor for both coil and stick nailers?
Most traditional coil and stick nailers are pneumatic, meaning they require an air compressor and hose. However, cordless battery-powered versions are increasingly popular for both types, offering more portability but often at a higher cost and with different power limitations.
Q4: What is the difference between a finish nailer and a brad nailer?
Both are types of stick nailers. A finish nailer uses 14-16 gauge nails and is suitable for installing trim and molding where the nail head might need filling but is still generally visible. A brad nailer uses very thin 18-20 gauge nails, leaving tiny holes that often require no filling, ideal for delicate work or where the nail needs to be almost invisible.
Q5: How do I choose the right nail gauge for my project?
The nail gauge is determined by the type of material you’re working with and the desired finish. Thicker gauges (lower numbers) are for structural work (framing), while thinner gauges (higher numbers) are for finishing and upholstery where minimal damage and a discreet fastener are preferred. Always match the nail gauge to your nailer’s specifications.
Q6: Can I use plastic collated coil nails in a wire collated coil nailer?
No, you must use the collation type (plastic or wire) specified for your nailer model. They feed differently, and using the wrong type can cause jams, damage the tool, or lead to misfires.
Conclusion
So there you have it! We’ve walked through the ins and outs of coil nailers and stick nailers, exploring where each tool truly shines. Remember, the best nailer for you isn’t about which one is “better” overall, but rather