Quick Summary: Cleaning your nail gun magazine properly is simple and vital for tool performance and longevity. Follow these easy steps to clear debris, lubricate, and ensure smooth nail feeding, preventing jams and extending the life of your essential woodworking tool.
Hey there, fellow woodworkers and DIY champs! Jack Shaffer here, your go-to guy for all things nail guns. Ever had your nailer suddenly decide to take a break mid-project? More often than not, the culprit is a dirty or jammed magazine. It’s a frustrating moment, right? But don’t worry, keeping your nail gun’s magazine in tip-top shape is easier than you think. A little bit of regular maintenance goes a long way to ensuring your tool works smoothly and reliably every time you need it. We’ll walk through exactly how to clean it, step-by-step, so you can get back to building with confidence.
In this guide from Nailerguy, we’ll cover everything you need to know to keep your nail gun magazine clean and functional. We’ll show you the simple tools you’ll need, the step-by-step process for a thorough cleaning, and some handy tips to prevent future issues. Ready to make your nail gun purr like a kitten? Let’s dive in!
Table of Contents
Why Cleaning Your Nail Gun Magazine Matters
Think of your nail gun magazine as its feeding system. It’s where the nails line up, waiting for their turn to be driven into your wood. When this system gets clogged with sawdust, nail fragments, lubricant residue, or just plain old gunk, it can cause all sorts of problems.
A dirty magazine can lead to:
- Nail Jams: This is the most common issue. Nails won’t feed correctly, or they get stuck halfway.
- Inconsistent Firing: You might get weak shots or no shots at all.
- Damage to the Tool: Forcing jammed nails can bend components or even damage the firing mechanism.
- Reduced Lifespan: Regular wear and tear are normal, but a dirty magazine accelerates this.
Regular cleaning isn’t just about fixing problems; it’s about preventing them. It ensures your nail gun is always ready when inspiration strikes and keeps your projects moving smoothly.
What You’ll Need: Your Nail Gun Cleaning Toolkit
You don’t need a fancy workshop full of specialized tools to clean your nail gun magazine. Most of what you need is probably already in your toolbox or can be found at a local hardware store. Here’s a quick rundown:
- Safety Glasses: Essential! Always protect your eyes when working with tools, especially when disassembling or cleaning.
- Gloves: Keep your hands clean and protect them from any sharp edges or residue.
- Small Soft-Bristled Brush: An old toothbrush works perfectly.
- Lint-Free Cloths: Microfiber cloths are great for wiping away debris without leaving fibers behind.
- Compressed Air (Optional but Recommended): A can of compressed air or an air compressor with a nozzle attachment is excellent for blowing out stubborn dust and debris.
- Mild Degreaser or Tool Cleaner: A specialized tool cleaner or even a degreaser like WD-40 (used sparingly and wiped off thoroughly) can help with sticky residue. For most cleanings, soap and water is enough.
- Lubricant: A few drops of specialized nail gun oil or a light machine oil. Check your tool’s manual for recommendations.
- Small Screwdriver or Allen Wrench (If needed): Some magazines might require removing a few screws for deeper cleaning. Check your nail gun’s manual.
Always refer to your specific nail gun’s owner’s manual before starting. Different models might have slightly different components or cleaning recommendations. You can usually find these manuals online on the manufacturer’s website if you’ve lost yours. For example, DEWALT’s support page offers manuals for their vast range of tools.
Step-by-Step: How to Clean Your Nail Gun Magazine Properly
Let’s get down to business! Follow these steps carefully, and you’ll have your nail gun magazine cleaner and running like new in no time.
Step 1: Safety First – Disconnect Power!
This is the MOST IMPORTANT step. Before you touch anything or start cleaning, ensure your nail gun cannot accidentally fire.
- For Corded Electric Nail Guns: Unplug it from the power outlet.
- For Pneumatic (Air-Powered) Nail Guns: Disconnect the air hose from the compressor.
- For Cordless/Battery-Powered Nail Guns: Remove the battery pack.
Double-check that the tool is completely de-energized. This prevents accidental firing and serious injury.
Step 2: Remove All Nails from the Magazine
You don’t want any nails rattling around while you’re cleaning. Carefully unload your nail gun.
- Gently slide the magazine follower back as far as it will go.
- Tilt the gun and let any remaining nails slide out.
- Make sure the magazine is completely empty.
Step 3: Open or Detach the Magazine (If Possible)
Many nail gun magazines are designed to be opened for easier cleaning. Check your manual to see if your model allows this. Some have a release latch, while others might require removing a small screw or two.
- Look for any latches or buttons that release the magazine cover or the entire magazine assembly.
- If screws are involved, keep them in a safe place – a small container or a magnetic tray works well.
- If your magazine doesn’t open easily, don’t force it. You can still clean it effectively without full disassembly.
Step 4: Remove Loose Debris
Now it’s time to get rid of the visible gunk.
- Use your soft-bristled brush to sweep away loose sawdust, wood chips, and any other debris from the inside of the magazine.
- Pay attention to the tracks where the nails slide and the follower mechanism.
- A blast of compressed air can be incredibly effective here. Hold the can upright and use short bursts to blow out dust from corners and crevices. If using an air compressor, start with low pressure.
Pro Tip: If you don’t have compressed air, you can try gently tapping the magazine on a clean surface to dislodge dust, then brush or blow it away with your mouth (just make sure you’re not breathing it in!).
Step 5: Clean Stubborn Residue
Sometimes, there’s sticky residue from lubricants, glues, or compressed wood dust. This is where a cleaner might come in handy.
- Dampen a lint-free cloth with a small amount of mild degreaser or tool cleaner. You can also use a tiny bit of soap and water.
- Wipe down the inside surfaces of the magazine.
- For stubborn spots, you might need to gently scrub with your brush while the cloth is damp.
- Crucially: If you use a cleaner, make sure to wipe the magazine dry immediately with a clean, dry cloth afterward. You don’t want any cleaning solution left behind to attract more dust or corrode parts. For air nailers, moisture is the enemy.
Some experts recommend using a solvent like mineral spirits for very tough gunk, but always test in an inconspicuous area first and ensure it’s completely evaporated before reassembling or using the tool. Always read the instructions on any cleaning product you use.
Step 6: Clean and Lubricate the Follower
The follower is the part that pushes the nails forward. It needs to move freely.
- If you opened the magazine, remove the follower.
- Wipe it clean with a dry cloth. If it’s particularly dirty, use a damp cloth with a little cleaner, then dry it thoroughly.
- Once clean and dry, apply a single drop of specialized nail gun oil or light machine oil to the sides of the follower where it slides. Don’t overdo it – too much oil will attract dust.
- Slide the follower back and forth a few times to distribute the oil.
- Reassemble the follower if you removed it.
Step 7: Inspect and Reassemble
Before putting everything back together, take a moment to inspect the magazine for any damage.
- Check for cracks, worn-out springs (if visible), or bent metal parts.
- If you find any damage, consult your tool’s manual or the manufacturer for repair or replacement parts.
- Reassemble the magazine parts carefully, ensuring all screws are snug but not overtightened.
- If your nail gun has a magazine nose or any other small parts that came loose, make sure they are correctly reinstalled.
Step 8: Final Wipe Down and Test
Give the exterior of the magazine a quick wipe down with a clean cloth. This gives it a nice finished look and removes any finger smudges.
- Once reassembled, re-attach the magazine to your nail gun.
- Reconnect the power source (plug in, air hose, or battery).
- Load a few nails into the magazine.
- Test fire the nail gun into a scrap piece of wood a few times to ensure it’s feeding and firing correctly without any issues.
Troubleshooting Common Nail Gun Magazine Issues
Even with regular cleaning, you might encounter a few hiccups. Here’s how to tackle some common problems:
Problem: Nail Jams in the Magazine
Cause: Debris, bent nails, or a misaligned follower.
Solution: Ensure the magazine is empty. If the jam is accessible without forcing, use pliers to gently remove the offending nail. If it’s deeper, you might need to partially disassemble the magazine. Check if your nails are the correct size and type for your gun. Using the wrong nails is a frequent cause of jams.
Problem: Nails Not Feeding Smoothly
Cause: Dirty follower, bent magazine track, or dry follower mechanism.
Solution: Clean the follower thoroughly and lubricate it as described above. Ensure the magazine track is free of debris. If the track looks bent, it might be time for a professional inspection or replacement part.
Problem: Magazine Hitting the Workpiece
Cause: Magazine is too large for the job or the magazine nose bumper is worn.
Solution: For some finish nailers, the magazine can be a bit bulky. For smaller trim work, consider a more compact nailer. Check the rubber bumper on the nose of the nail gun; if it’s damaged or missing, it can cause the magazine to contact the surface.
Problem: Light Firing or Misfires After Cleaning
Cause: Too much lubricant, cleaner residue, or a weak firing mechanism.
Solution: Ensure you’ve wiped away any excess lubricant or cleaner. If the problem persists, it might indicate a more significant issue with the piston seal or O-rings, which may require professional servicing.
For more in-depth troubleshooting and maintenance tips, reliable resources like Fine Homebuilding’s Tool Guide offer excellent insights into tool care.
Preventative Maintenance: Keeping Your Magazine Clean Long-Term
The best way to deal with a dirty nail gun magazine is to prevent it from getting dirty in the first place! Here are some easy habits to adopt:
- Regular Light Cleaning: Don’t wait until you have a jam. After a long day of use, or at the end of a project, give your magazine a quick brush and blow-out.
- Store Tools Properly: Keep your nail gun in a clean, dry place. Avoid storing it in dusty workshops or damp garages without protection. A good tool bag or case helps.
- Use Quality Nails: Cheap or poor-quality nails are more likely to break, bend, and leave fragments in your magazine. Stick to reputable brands.
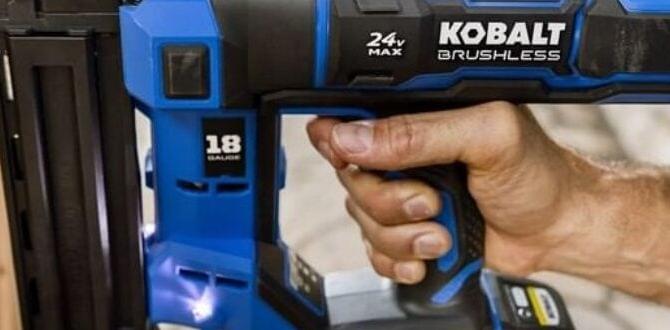
- Correct Nail Gauge: Always use the correct gauge (thickness) and length of nails recommended for your specific nail gun model.
- Avoid Over-Lubrication: Too much oil attracts dust and debris, creating a sticky mess. Follow the manufacturer’s lubrication recommendations precisely.
A little bit of consistent preventative care will save you a lot of headaches and ensure your nail gun remains a reliable partner for years to come.
Cleaning Frequency: How Often Should You Clean?
So, how often should you roll up your sleeves for this maintenance task? The frequency depends heavily on how often you use your nail gun and the conditions it’s used in.
Here’s a general guideline:
- Light DIYer (A few projects a year): A quick visual check and brush-out after each significant project, with a more thorough cleaning perhaps once every 6-12 months.
- Regular Hobbyist/Prosumer (Weekend warrior, several projects a month): Clean the magazine every few months. If you notice any signs of jamming or reduced performance, clean it immediately.
- Professional Use (Daily or almost daily): A quick clean should be part of your daily or weekly tool maintenance routine. Deeper cleaning might be needed monthly or as performance dictates.
Consider these factors:
- Type of Wood: Softwoods like pine produce less dust than denser hardwoods.
- Dusty Environments: Working in a dusty construction site or workshop will require more frequent cleaning than a clean home setting.
- Glue or Finishes: If you’re working with adhesives or sprays near the nail gun, residue can build up faster.
Always err on the side of caution. If your nailer is acting up, even if it’s not “time” for a cleaning by the calendar, it’s a good indicator that your magazine needs attention.
Nail Gun Magazine Types and Differences
While the core principles of cleaning are the same, there are a few types of nail gun magazines that might influence your approach slightly.
| Nail Gun Type | Magazine Style | Cleaning Considerations |
|---|---|---|
| Framing Nailer | Side-loading, robust metal magazine. Often a single slot for nails. | Can handle a lot of abuse and debris. Focus on clearing larger fragments and sawdust. Lubrication is key for the smooth operation of the large follower. |
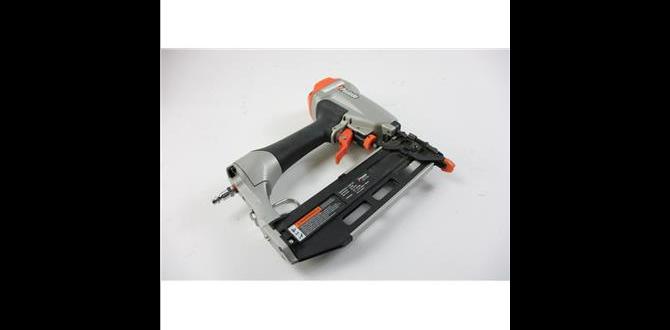
| Finish Nailer | Side-loading or sometimes top-loading. Thinner profile. | More prone to jams due to tighter tolerances. Pay close attention to debris removal and ensure the track is perfectly clear. Lubrication is critical. |
| Brad Nailer | Often a thinner, sleeker magazine. Can be more delicate. | Very sensitive to dust and debris. Minimal lubricant needed, but ensure it’s clean. Often easier to access internal follower mechanisms. |
| Stapler (sometimes grouped with nailers) | Varies, often side-loading. | Residue from staples can be sticky. May require a slightly stronger degreaser if needed, but always followed by thorough drying. |
| Coil Nailer | Stores nails in a coil held by wire. The magazine is the housing for this coil. | The magazine itself is less complex internally than stick nailers. Cleaning focuses on debris that could interfere with the nail coils feeding smoothly. Check the feed chute from the coil area to the gun. |
Regardless of the type, the goal remains the same: keep the pathway clear and moving freely for optimal performance. Your nail gun manual is your best friend here, as it will detail the specific magazine design of your tool.
FAQ: Your Nail Gun Magazine Cleaning Questions Answered
Q1: Can I use household cleaning products to clean my nail gun magazine?
A1: For light dust and debris, yes, a mild soap and water solution is usually fine. For tougher residues, a dedicated tool cleaner or a light degreaser like WD-40 (applied sparingly and wiped off completely) can work. Avoid harsh solvents that could damage plastic parts or rubber seals. Always check your manual for specific recommendations.
Q2: How much lubricant should I use?
A2: Less is more! A single drop is typically sufficient for the follower mechanism. Too much lubricant will attract more dust and debris, creating a sticky mess that hinders performance. Always refer to your tool’s manual for the correct type