Quick Summary
Keeping your nail gun’s exhaust vent clean is crucial for optimal performance and longevity. A clogged vent can lead to reduced power and potential damage. This guide provides a simple, step-by-step process to effectively clean your nail gun’s exhaust vent, ensuring it runs smoothly for every project.
There’s nothing quite like the satisfying thwack of a nail gun driving a fastener perfectly home. It makes DIY projects fly by! But sometimes, your trusty nail gun might start to feel a little sluggish. You might notice it’s not as powerful, or perhaps it’s making funny noises. One of the most common culprits for this performance dip is a dirty exhaust vent. Don’t fret, though! This is a super common issue, and thankfully, it’s quite easy to fix.
We’ll walk through how to clean that exhaust vent together. You’ll be back to nailing with confidence in no time! This guide will show you exactly what to do, so you can keep your tools in top shape without any fuss.
Table of Contents
Why Cleaning Your Nail Gun Exhaust Vent Matters
Think of the exhaust vent on your nail gun like the tailpipe on a car. It needs to be clear for everything to work properly. When sawdust, wood shavings, and tiny bits of debris get stuck in there, it’s like trying to breathe through a straw. This buildup can cause a few frustrating problems:
- Reduced Power: The air that powers your nail gun has to escape somewhere. If the vent is blocked, that air can’t escape freely, leading to less forceful drives. Your nails might not sink all the way in, which is a real project killer.
- Decreased Efficiency: A struggling nail gun works harder and uses more air (if it’s pneumatic). This means more trips to the compressor or a shorter battery life on cordless models.
- Increased Wear and Tear: When the gun is fighting against a blockage, internal components can experience extra stress. Over time, this can lead to premature wear and potentially more expensive repairs.
- Potential for Damage: In extreme cases, a severely blocked vent can cause internal pressure to build up, which could damage seals or other parts of the nail gun.
- Safety Concerns: While less common, any tool not operating as intended can present unexpected risks. Keeping it clean ensures it functions predictably.
Regular maintenance, including cleaning the exhaust vent, is key to getting the best performance and the longest life out of your nail gun. It’s a small effort for a big reward!
What You’ll Need: Tools and Supplies
Gathering your supplies before you start makes the process smooth and efficient. You probably have most of these items around your workshop already!
Here’s a handy list:
- Safety Glasses: Always protect your eyes, especially when dealing with compressed air or small parts.
- Work Gloves: Keep your hands clean and protected.
- Compressed Air Duster (or Can of Air): This is your primary cleaning tool.
- Small Wire Brush or Stiff Bristle Brush: For dislodging stubborn gunk. A toothbrush can also work for gentle cleaning.
- Cotton Swabs or Microfiber Cloths: For wiping away loosened debris.
- Lubricating Oil (Specific for your nail gun type): Essential for pneumatic nailers.
- Owner’s Manual: Always a good reference!
- Damp Cloth: For a final wipe-down.
Make sure your nail gun is completely disconnected from its power source – be it air hose or battery – before you begin any cleaning. Safety first!
Step-by-Step: How to Clean Your Nail Gun Exhaust Vent
Let’s get down to business! This process is straightforward and should take only a few minutes.
Step 1: Disconnect Power and Prepare Your Workspace
This is the most crucial step for safety. If you have a pneumatic nailer, disconnect the air hose from the tool. For cordless nailers, remove the battery pack. For corded electric nailers, unplug them from the power outlet. Always double-check that the tool cannot be accidentally fired.
Find a well-lit area where you can work comfortably. It’s also a good idea to have a trash can or a drop cloth nearby to catch any dust and debris that might fall out.
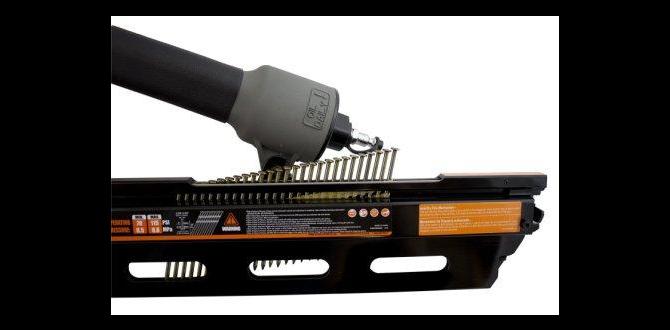
Step 2: Locate the Exhaust Vent
The exhaust vent is usually a small hole or a series of small holes located near the rear of the nail gun, often on the top or side of the body. It’s where the air is expelled after each nail is fired.
Consult your nail gun’s owner’s manual if you have trouble finding it. Sometimes, there might be a small plate or cover over the vents; your manual will show you how to access it if necessary.
Step 3: Remove Loose Debris with Compressed Air
Take your can of compressed air or your air duster. Hold the nozzle a short distance from the exhaust vent. Blow short, powerful bursts of air directly into the vent. You want to force the air through the vent to push out any loose dust and debris.
Be sure to wear your safety glasses during this step, as dust and small particles can be blown back at high speed. Rotate the nozzle of the nail gun slightly and blow air from different angles around the vent to ensure you’re clearing as much as possible.
Step 4: Tackle Stubborn Buildup with a Brush
If compressed air alone doesn’t do the trick, you’ll need to gently dislodge any caked-on grime. Use your small wire brush or stiff bristle brush (like a toothbrush).
Carefully work the bristles into the vent opening. You’re aiming to break up any sticky residue or packed-in sawdust. Be gentle! You don’t want to damage any internal components or scratch the finish of your tool. Work the brush around the inside of the vent opening as much as you can.
Step 5: Clean Up with More Compressed Air and Wipes
After using a brush, you’ll likely have loosened more debris. Return to your compressed air and blow out the vent again. Make sure you get all the loose bits out.
Use cotton swabs or a microfiber cloth to wipe away any remaining dust or residue that’s visible on the outside of the vent or around the opening. If there’s any sticky residue, slightly dampen a cloth (not wet!) with a little bit of water or a mild, tool-safe cleaner to gently wipe the area. Ensure the vent is completely dry before the next step.
Step 6: Lubricate (Crucial for Pneumatic and Some Electric)
This step is vital, especially for pneumatic nailers. After cleaning, and before reassembling or reconnecting, you need to lubricate the tool correctly. This ensures smooth operation and protects internal parts from wear and corrosion.
Most pneumatic nailers have a small oil port near the air inlet. Refer to your owner’s manual for the exact location and the type of compressor oil or lubricant recommended. Add the recommended number of drops (usually 2-3) into the oil port. Then, connect the air hose and fire the nailer a few times into scrap wood to distribute the oil throughout the tool’s internal mechanism. This process is often called “cycling” the tool.
Some electric and battery-powered nailers also have lubrication requirements, though it’s less common and may involve different procedures. Always check your manual!
Step 7: Final Check and Reassembly
Give the vent area a final wipe with a clean, dry cloth. Make sure there’s no visible debris left. If you removed any covers or plates in Step 2, reattach them now.
Once you’re confident the vent is clean and, if required, the tool is lubricated, you can reconnect your power source: attach the air hose (ensure it’s securely connected), insert the battery, or plug it in.
Your nail gun is now ready to get back to work! Test it on a piece of scrap wood to ensure it’s firing powerfully and smoothly.
Pneumatic vs. Cordless Nailer Exhaust Vent Cleaning
While the basic principle of cleaning an exhaust vent remains the same, there are slight differences in how you handle pneumatic and cordless nailers.
Pneumatic Nailers
These are the most common type of nail gun, powered by an external air compressor. Their exhaust systems are usually quite robust.
- Air Exhaust Location: Typically at the rear of the tool, allowing compressed air to escape after driving a nail.
- Lubrication: Absolutely essential. Pneumatic nailers require regular lubrication to keep internal O-rings and seals healthy and to prevent friction. Cleaning the exhaust vent is a perfect time to add a few drops of specialized air tool oil into the oil port. This is a recommendation supported by many tool manufacturers, such as DeWalt and Porter-Cable, for optimal tool life.
- Power Source: Air hose connected to a compressor. Disconnect the hose before cleaning.
Cordless (Battery-Powered) Nailers
These offer fantastic portability, running on rechargeable batteries and often using a small gas canister or electric motor mechanism. The exhaust mechanism is usually integrated into a compact design.
- Air Exhaust Location: Similar to pneumatic, often at the rear or top. Some models might have a more complex venting system to expel air from the motor and drive mechanism.
- Lubrication: Typically, cordless nailers are sealed and do not require user-added lubrication for the drive system. However, always check your manual. If there are specific areas to lubricate, follow the manufacturer’s instructions meticulously.
- Power Source: Rechargeable battery pack. Remove the battery pack before cleaning to prevent accidental firing.
The core cleaning of the vent itself—using compressed air and a brush—is identical for both types. The key difference lies in the post-cleaning lubrication step, which is a must-do for pneumatic tools and usually not required for cordless ones.
Common Problems and Troubleshooting
Even with regular cleaning, you might encounter a few hiccups. Here’s how to address them:
- Stubborn Residue: If you have a sticky residue that won’t budge, try a slightly stronger (but still tool-safe) cleaner like isopropyl alcohol applied to a cotton swab. Be sure to wipe it all away and let it dry completely before using the tool again. Avoid harsh solvents that could damage plastic components.
- Vent Seems Blocked Internally: If compressed air and brushing don’t seem to clear the issue, the blockage might be deeper inside the tool. This could indicate a more significant problem that might require professional servicing or a deeper dive into disassembly. Always consult your owner’s manual for any user-serviceable parts or recommended maintenance procedures beyond basic cleaning. The Occupational Safety and Health Administration (OSHA) emphasizes proper tool maintenance for workplace safety.
- Reduced Power After Cleaning: If your nail gun still lacks power after cleaning the vent and lubricating (if applicable), the issue might be elsewhere. It could be a problem with the air compressor (for pneumatic), the trigger mechanism, driver blade, or internal seals. Double-check that your air pressure is set correctly (most framing nailers operate between 70-120 PSI, but always check your manual).
- Nail Gun Leaking Air: If you notice air leaking from the exhaust vent even when you aren’t firing, it could signify a worn O-ring or seal inside the tool. This typically requires a repair kit or professional service.
Remember, your owner’s manual is your best friend for troubleshooting specific models.
Frequency of Cleaning
So, how often should you be cleaning your nail gun’s exhaust vent? The answer depends on how much you use your tool and the type of materials you’re working with.
- Heavy Usage (Daily/Weekly): If you’re a contractor or a serious DIYer using your nail gun frequently, aim to give the exhaust vent a quick blast of compressed air after each day of use. A more thorough cleaning with a brush might be needed weekly or bi-weekly, depending on dust levels.
- Moderate Usage (Monthly): For hobbyists or those who use their nail gun for regular home projects, cleaning the vent once a month is a good practice. Perform the full cleaning steps then.
- Occasional Usage (Quarterly or As Needed): If your nail gun sits in the workshop for long stretches between projects, give it a clean and a quick cycle with oil (if pneumatic) before starting a new project and perhaps every 3-6 months to keep it in good working order.
It’s always better to clean it a bit more often than not enough. A quick check before a big project is a smart move.
Advanced Maintenance and Care
Beyond just cleaning the exhaust vent, a few other maintenance tips can keep your nail gun performing at its peak:
- Keep it Clean Overall: Wipe down the exterior of your nail gun regularly with a damp cloth to remove sawdust and grime. A clean tool is a happy tool!
- Inspect Regularly: Before and after use, quickly inspect the tool for any visible damage, loose parts, or frayed hoses (for pneumatic).
- Proper Storage: Store your nail gun in a dry, clean place. If it’s a pneumatic tool, ensure the air line is disconnected and the pressure is released. For battery-powered tools, store batteries according to the manufacturer’s recommendations.
- Use the Right Fasteners: Always use the fasteners (nails, staples, etc.) that are specifically designed for your nail gun model. Using the wrong size or type can cause jams and damage the tool. You can find excellent resources on fastener types from organizations like the Industrial Fasteners Institute, which provides deep dives into fastener specifications.
- Don’t Force It: If your nail gun jams, don’t just keep hammering the trigger. Follow the manufacturer’s instructions for clearing jams safely.
Cleaning Schedule Example
To help you visualize a maintenance routine, here’s a sample cleaning schedule. You can adjust this based on your usage patterns.
| Maintenance Task | Frequency (Heavy Use) | Frequency (Moderate Use) | Frequency (Occasional Use) |
|---|---|---|---|
| Quick Exhaust Vent Air Blast | After each use / Daily | Monthly | Before first use / Quarterly |
| Thorough Exhaust Vent Cleaning (Brush & Air) | Weekly | Monthly | Before first use / Annually |
| Lubrication (Pneumatic Only) | Daily / Weekly (as per manual) | Monthly | Quarterly |
| Exterior Cleaning | Weekly | Monthly | Before first use / Quarterly |
| Full Inspection | Weekly | Monthly | Before first use |
Frequently Asked Questions (FAQs)
Here are some common questions beginners have about cleaning nail gun exhaust vents.
Q1: Can I use WD-40 to clean my nail gun exhaust vent?
A: It’s generally not recommended to use WD-40 or similar multi-purpose lubricants inside your nail gun’s exhaust system or for regular lubrication. WD-40 is primarily a water displacement and rust inhibitor; it’s not a high-quality lubricant for the moving parts and O-rings in a pneumatic tool. Using it can actually attract more dirt or degrade rubber seals over time. Stick to specialized air tool oil for pneumatic nailers.
Q2: Is it safe to blow compressed air into the exhaust vent if the battery/air hose is still attached?
A: Absolutely not. Always disconnect the power source—either remove the battery pack or disconnect the air hose—before cleaning or performing any maintenance. This is a critical safety precaution to prevent accidental firing of the nail gun.
Q3: My nail gun seems less powerful after cleaning the vent. What did I do wrong?
A: If power is reduced, double-check that you haven’t inadvertently dislodged an internal component or damaged a seal. Ensure your air pressure is set correctly if it’s a pneumatic nailer. The most common reason for lack of power, however, is insufficient lubrication for pneumatic tools. Make sure you’ve added