Choosing the right nailer size depends on your project needs, nail head type, and the material you’re working with. This guide simplifies the selection process, ensuring you pick the perfect nailer for everything from delicate trim work to framing sturdy structures. Let’s find your ideal nail gun!
Getting the right tool for the job makes all the difference, especially when it comes to nailers. It can be a bit confusing at first, with so many sizes and types out there. You might wonder, “Which nailer size is best for my project?” Don’t worry, it’s a common question, and I’m here to help you figure it out. We’ll break down everything you need to know in a way that’s easy to understand. By the end, you’ll feel confident choosing the perfect nailer. Let’s dive in!
Table of Contents
Why Nailer Size Matters for Your Project
Choosing the right nailer size isn’t just about picking a tool; it’s about ensuring your project looks great and holds together strong. The “size” of a nailer usually refers to the gauge of the nails it fires and the size of the nail head it can accommodate. Using the wrong size can lead to a world of problems, from nails that are too small and don’t hold securely, to nails that are too big and split your wood or leave unsightly holes.
Think of it like this: you wouldn’t use a tiny finishing nail to build a deck, nor would you use a massive framing nail to attach delicate crown molding. Each task requires a specific tool for optimal performance and appearance. Understanding nailer sizes helps you achieve professional-looking results without frustration.
Understanding Nail Gauges and Nail Heads
When we talk about nailer “size,” we’re primarily talking about two things: the nail gauge and the nail head diameter. These two factors work together to determine how a nail performs and what kind of projects it’s suited for.
What is Nail Gauge?
Nail gauge is a bit of a reverse system. The higher the gauge number, the thinner the nail shank (the part that goes into the wood). Conversely, a lower gauge number means a thicker nail.
- Higher Gauge = Thinner Nail (e.g., 18-gauge, 16-gauge): These are good for finer work where you want minimal damage to the wood surface.
- Lower Gauge = Thicker Nail (e.g., 10-gauge, 8-gauge): These are for structural applications where strength is key.
What is Nail Head Diameter?
The nail head is the flat part at the top of the nail. Its size is important for holding power and aesthetics. Some nails have small, almost invisible heads, while others have large heads designed to prevent the material from pulling through the nail shank.
- Small Heads (e.g., brads, finishing nails): Designed to be easily hidden or painted over.
- Larger Heads (e.g., framing nails, roofing nails): Provide more surface area to hold materials securely, especially under stress.
Common Nailer Types and Their Sizes
Different nailers are designed for different jobs, and their size specifications reflect this. Here’s a look at some of the most common nailer types and the nail sizes they typically use:
Framing Nailers
These are the heavy-duty workhorses of the nailer world. They’re built to drive large, thick nails (low gauge) for structural framing of walls, floors, and roofs. They can handle the most demanding tasks.
- Nail Gauge: Typically 8- to 12-gauge.
- Nail Head: Large heads to ensure strong holding power.
- Common Uses: House framing, deck building, fences.
- Nailer Type: Often large and powerful, can be pneumatic or cordless.
Roofing Nailers
Specifically designed for attaching shingles and underlayment to roofs. They use wide-headed nails to keep roofing materials securely in place, even in harsh weather.
- Nail Gauge: Usually 11- to 15-gauge.
- Nail Head: Large, circular heads (often 1 inch or more in diameter).
- Common Uses: Laying asphalt shingles, felt paper, and other roofing materials.
- Nailer Type: Durable and often lightweight for extended use.
Siding Nailers
These nailers are perfect for installing various types of siding, including vinyl, wood, or fiber cement. They drive nails that are strong enough to hold the siding but often have a slightly smaller head to minimize visibility.
- Nail Gauge: Typically 15-gauge.
- Nail Head: Medium-sized heads, often clipped or lost heads to fit into channels of siding.
- Common Uses: Installing clapboard, shakes, and other siding materials.
- Nailer Type: Often sequential trip triggers for precise placement.
Finish Nailers
Finish nailers are versatile tools for attaching trim, molding, baseboards, and window/door casings. They use relatively thin nails with small heads that are easy to conceal.
There are two main types of finish nailers, distinguished by the nail head:
- 16-Gauge Finish Nailers (Straight Nailers): Drive nails that are slightly thicker with a more visible head. These are great for heavier trim or areas where the nail head can be easily filled or painted.
- Nail Gauge: 16-gauge (about 1.6mm in diameter).
- Nail Head: About 2.8mm diameter.
- Common Uses: Baseboards, chair rails, door casings, general trim work.
- 18-Gauge Finish Nailers (Brad Nailers): Drive much thinner nails with very small heads. These are ideal for delicate trim, intricate molding, and smaller projects where minimal visibility of the fastener is crucial.
- Nail Gauge: 18-gauge (about 1.0mm in diameter).
- Nail Head: About 1.3mm diameter.
- Common Uses: Picture frames, delicate molding, small cabinetry, attaching thin wood pieces.
Brad Nailers
Often used interchangeably with 18-gauge finish nailers. Brad nailers are essentially 18-gauge finish nailers. They are excellent for detailed work and fine woodworking projects.
- Nail Gauge: 18-gauge.
- Nail Head: Very small, barely visible.
- Common Uses: As mentioned above, picture frames, crafts, attaching delicate trim.
Pin Nailers
These are the most delicate of the nailer family. They fire extremely thin, headless or nearly headless pins (23-gauge). They are used for very fine woodworking, crafts, and attaching tiny trim pieces where even an 18-gauge nail would be too noticeable.
- Nail Gauge: 23-gauge (the thinnest).
- Nail Head: Virtually non-existent (sometimes called “headless” or “micro-pins”).
- Common Uses: Attaching delicate molding, model making, upholstery, securing small pieces before glue sets.
- Nailer Type: Very small and lightweight.
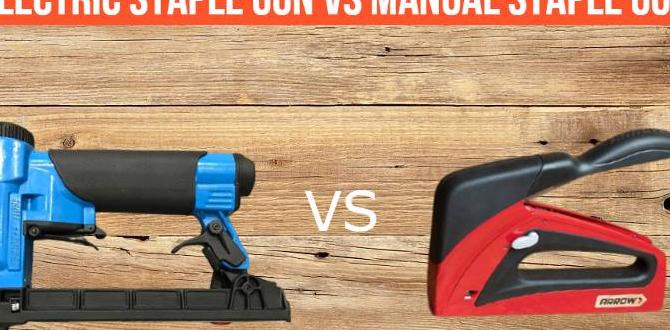
Staplers
While not strictly a “nailer,” staplers are often discussed in the same breath. They drive staples, which have a flat crown. Different staplers are designed for upholstery, fencing, or even framing.
- Crown Width: The primary measurement for staples. Common widths include 1/4 inch, 7/16 inch, and 9/16 inch.
- Leg Length: The length of the staple legs that penetrate the material.
- Common Uses: Upholstery, screening, light construction, and sheathing.
How to Choose the Right Nailer Size for Your Project
Now that you know the different types, let’s get down to how you pick the right one for your job. It boils down to a few key questions:
1. What Kind of Project Are You Working On?
This is the biggest factor. Your project will dictate the strength and appearance requirements of the fasteners.
- Structural/Framing Work (Walls, Decks, Fences): You need strength. Go for a framing nailer with larger, thicker nails (8-12 gauge).
- Siding Installation: Needs holding power but also consideration for aesthetics and material type. A siding nailer (often 15-gauge) is ideal.
- Installing Interior Trim (Baseboards, Moldings, Casings): You need a finish nailer (16-gauge) to hold securely without being too noticeable.
- Fine Woodworking & Delicate Trim (Picture Frames, Crafts): Appearance is key. A brad nailer (18-gauge) or pin nailer (23-gauge) is your best bet.
- Roofing: Specific roofing nailers with wide heads for shingles are necessary.
2. What Material Are You Nailing Into?
The hardness and thickness of your material play a role. You don’t want to use a nail that’s too thin for a dense hardwood, nor do you want to use a nail so thick it splits soft pine.
- Softwoods (Pine, Fir): Can generally handle a wider range of nail sizes.
- Hardwoods (Oak, Maple): May require slightly thinner nails (higher gauge) to prevent splitting, or it might be better to pre-drill pilot holes.
- Thin Plywood or Veneers: Requires very thin nails or pins to avoid blow-through.
- Sheathing and Rigid Foam Insulation: Often requires specific fasteners or broader staples.
3. How Important is the Appearance of the Fastener?
For projects where the nails will be visible, you want them to be as unobtrusive as possible. This is where nail gauge and head size are critical.
- Visible Work: Use smaller gauge nails with smaller heads. 18-gauge brad nailers and 23-gauge pin nailers excel here.
- Work to be Painted/Filled: A 16-gauge finish nailer often provides a good balance of strength and concealability. The nail head can easily be filled with wood putty and sanded smooth before painting.
- Structural Work: Appearance is secondary to strength. The large heads of framing nails are necessary for their holding power.
4. What is the Thickness of the Material Being Fastened?
Apart from the material you’re nailing into, consider the thickness of the piece you’re attaching. The nail needs to penetrate the first piece and securely anchor into the second piece without coming all the way through the back of the first piece.
- For most applications, about 2/3 of the nail’s length should go into the underlying material for optimal holding power.
- For example, if you’re attaching a 1/2-inch thick piece of trim to a stud, you’ll want a nail that is at least 1.5 inches long (1/2 inch for the trim + 1 inch into the stud). This typically means using a 2-inch nail, which is common for 16-gauge finish nailers.
Nailer Specification Cheat Sheet
To help you quickly compare, here’s a table summarizing common nailer types, their typical gauge, nail head diameter, and primary uses. Remember, these are general guidelines, and specific models might vary slightly.
| Nailer Type | Typical Gauge | Typical Nail Head Diameter | Primary Uses | Appearance of Fastener |
|---|---|---|---|---|
| Framing Nailer | 8-12 Gauge | Large (e.g., 0.315 inches / 8mm) | House framing, decks, fences, heavy construction | Very visible, very strong hold |
| Roofing Nailer | 11-15 Gauge | Very Large (e.g., 1 inch / 25mm) | Shingles, roofing felt | Designed to grip roofing material |
| Siding Nailer | 15 Gauge | Medium-Large (e.g., 0.203 inches / 5.1mm), often clipped heads | Siding installation (vinyl, fiber cement, wood) | Moderately visible, good grip |
| Finish Nailer (16-Gauge) | 16 Gauge | Medium (e.g., 0.113 inches / 2.8mm) | Baseboards, door/window casings, crown molding, cabinetry | Concealable, easily filled/painted |
| Brad Nailer (18-Gauge) | 18 Gauge | Small (e.g., 0.047 inches / 1.3mm) | Delicate trim, picture frames, crafts, furniture | Barely visible, minimal damage |
| Pin Nailer (23-Gauge) | 23 Gauge | Virtually none | Very fine trim, detailed woodworking, model making | Almost entirely invisible |
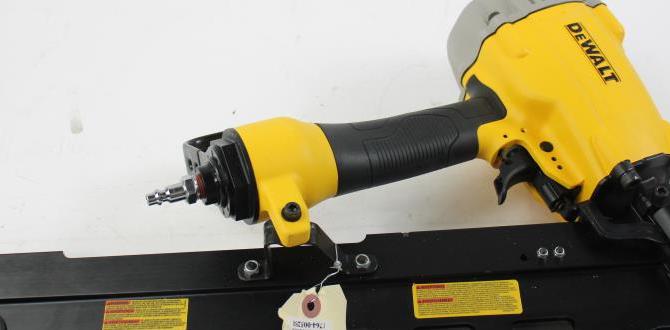
Powering Your Nailer: Pneumatic vs. Cordless
Beyond nail size, how your nailer is powered is another important consideration. This won’t change the nailer’s size (in terms of gauge it fires), but it affects its portability and performance.
Pneumatic Nailers (Air-Powered)
These use compressed air from an air compressor. They are often lighter, more powerful, and more affordable for the nailer itself. However, you’re tethered by an air hose and need to own or rent an air compressor.
- Pros: High power, lightweight nailer, more affordable nailer, reliable.
- Cons: Requires an air compressor, air hose can be cumbersome, noisy compressor.
Cordless Nailers (Battery-Powered)
These are self-contained and offer maximum portability. They use batteries for power and often have a small gas cartridge or an internal mechanism to drive the nail. They are more expensive upfront but offer the freedom to work anywhere.
- Pros: Highly portable, no hoses or compressors needed, convenient.
- Cons: More expensive upfront, can be heavier than pneumatic, battery life is a factor.
For DIYers, the choice often comes down to budget and how often you’ll use the nailer. If you’re just doing occasional trim work, a cordless option might be simpler. For serious framing or frequent use, a pneumatic setup can be more cost-effective and robust.
Safety First! Always Use Your Nailer Responsibly
Nailers are powerful tools, and safety should always be your top priority. No matter your project or the size of nailer you choose, follow these safety guidelines:
- Read the Manual: Always read and understand your nailer’s specific operating instructions and safety features.
- Wear Safety Glasses: Always wear ANSI-approved safety glasses or a face shield to protect your eyes from flying debris or ricocheting nails.
- Never Point at Yourself or Others: Keep the nailer pointed away from people at all times.
- Keep Fingers Away from the Trigger and Nose: Maintain a firm grip and be mindful of where the nose (the part that contacts the wood) is pointed.
- Use the Correct Fasteners: Always use the type and size of nail recommended by the manufacturer for your specific nailer.
- Be Aware of Your Surroundings: Ensure no one is behind the workpiece where a nail could pass through. For larger projects, consider the structural integrity of the environment, especially if working at heights. Resources from OSHA (Occupational Safety and Health Administration) offer valuable insights into safe tool operation. For example, their guidance on nail gun safety is critical for professional and serious DIYers.
- Disconnect Power/Air When Not in Use: Remove the battery or disconnect the air hose when loading fasteners, clearing jams, or leaving the tool unattended.
- Nailer Trigger Modes: Understand the difference between contact