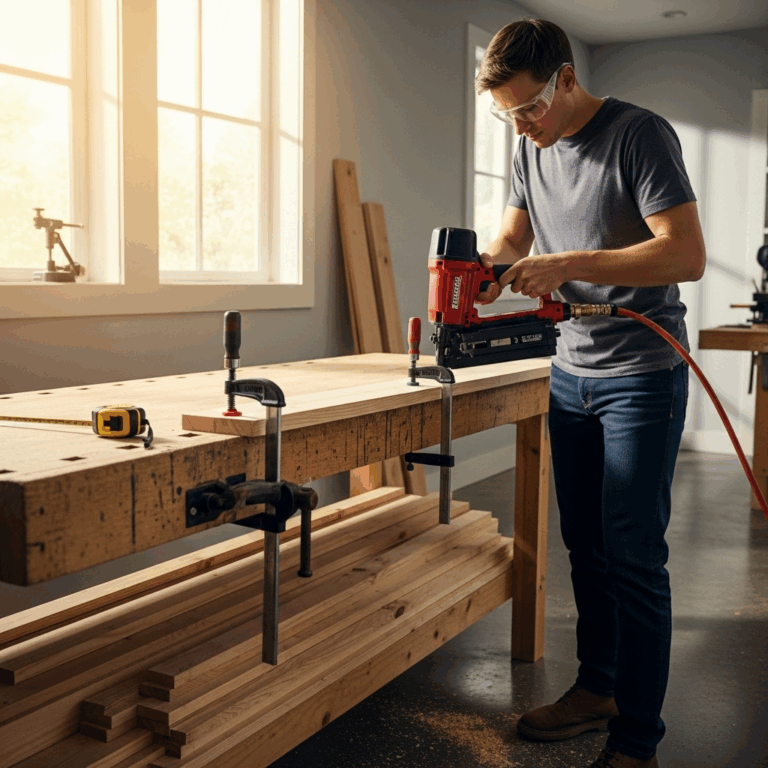
Choosing the right brad nailer involves understanding power sources, nail size compatibility, and project needs. This guide helps beginners select the perfect tool for trim, molding, and light woodworking, ensuring efficient and professional results every time.
Hey there, fellow DIYers and woodworking fans! Jack here from Nailerguy. Ever stand in the tool aisle, mesmerized by rows of shiny nailers, and wonder, “Which one is for me?” Especially when it comes to brad nailers, it can feel a little overwhelming at first. These little workhorses are fantastic for tasks like installing trim, crafting furniture, or even putting together decorative pieces. Getting the right one makes a world of difference, turning a potentially frustrating job into a smooth, satisfying experience. Don’t worry, that’s exactly why we’re here! We’ll break down exactly what you need to know, step-by-step. Get ready to pick out your perfect brad nailer!
Table of Contents
What Exactly IS a Brad Nailer, Anyway?
Think of a brad nailer as your best friend for all things delicate in woodworking. Unlike bigger nail guns that drive thick framing nails, a brad nailer uses thin, headless nails (called brads). Because they’re so thin and often have a tiny head, they leave a much smaller hole. This means less filling and sanding later, which is a big win for finishing work!
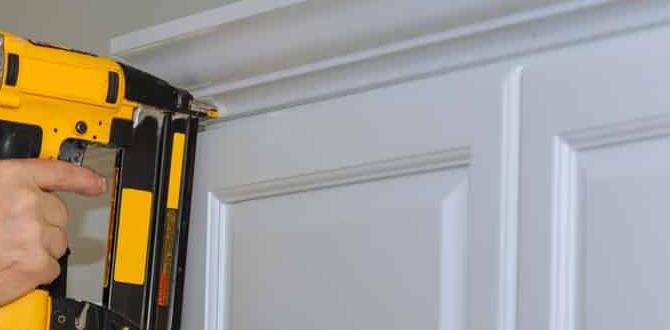
These tools are perfect for attaching delicate trim, crown molding, baseboards, window casings, and even assembling smaller craft projects or picture frames. They provide a strong hold without splitting thin wood or leaving unsightly marks. It’s all about precision and a clean finish!
Why Choosing the Correct Brad Nailer Matters
Picking the wrong brad nailer can lead to a few headaches. You might end up with a tool that’s too powerful and splits your delicate trim, or not powerful enough to sink the nail completely. Maybe it’s the wrong size for the job, or the power source is inconvenient for your workspace. The goal is to make your projects easier, faster, and better looking. A well-chosen brad nailer will:
- Save you time and effort.
- Prevent damage to your materials.
- Give your projects a professional, polished look.
- Make your DIY experience more enjoyable!
So, let’s dive into the essential factors to consider when you’re ready to make this important decision.
The Power Source Debate: Pneumatic vs. Cordless (Battery & Electric)
This is often the first big decision you’ll make because it affects how and where you can use your brad nailer. Each type has its pros and cons, and the “best” one really depends on your workflow and personal preferences.
Pneumatic Brad Nailers
These are the classic workhorses. They run off compressed air from an air compressor. If you’re already in a workshop with a compressor, or plan on doing a lot of woodworking, a pneumatic nailer is a solid choice.
Pros:
- Lightweight: The tool itself is usually lighter because the compressor and motor aren’t built-in.
- Powerful & Consistent: They deliver great power and a very consistent nail depth.
- Durable: Often built to last a long time.
- Cost-Effective (Tool): The nailer itself can be cheaper than a comparable cordless model.
Cons:
- Requires an Air Compressor: This is a significant additional investment and takes up space.
- Hose Management: You have to deal with an air hose, which can get tangled or limit your reach initially.
- Noise: Compressors can be quite loud.
- Maneuverability: The hose can make moving around a large project or tight spaces a bit more cumbersome.
Cordless Brad Nailers
These have become incredibly popular for good reason! They offer freedom from hoses and compressors, making them super convenient for a wide range of projects and locations.
Types of Cordless Brad Nailers:
- Battery-Powered (Electric): These use a rechargeable battery pack and an electric motor to drive the nail. They are the most common type of cordless.
- Fuel Cell (Gas/Propane): Less common for brad nailers but exist in some nailing categories. They use a small fuel cell and a battery for ignition. We’ll focus on battery-powered for brad nailers.
Pros:
- Ultimate Portability: No hoses, no compressors! Take it anywhere.
- Ease of Use: Just charge the battery and go.
- Quick Setup: Ready to use in seconds.
- Good for Various Locations: Perfect for job sites, attics, crawl spaces, or around the house where an outlet or compressor isn’t nearby.
Cons:
- Heavier Tool: The battery and motor add weight to the tool itself.
- Battery Management: You need to keep batteries charged, and having spares is often recommended for longer jobs.
- Cost: Generally more expensive upfront than pneumatic nailers (though you save on buying a compressor).
- Power Can Vary: While modern battery tech is impressive, some high-end pneumatic tools might offer slightly more consistent sheer power. (But for brad nailing, this is rarely an issue).
Electric (Corded) Brad Nailers
These plug directly into a wall outlet. They offer a tethered convenience, often being lighter and more affordable than battery models.
Pros:
- Lower Cost: Typically the most budget-friendly nailer option.
- Lightweight: No heavy battery pack.
- No Battery Charging: Plug it in and you’re good to go (as long as you have power).
- Consistent Power: As long as you have a good power supply, they perform reliably.
Cons:
- Tethered by Cord: The power cord can be a nuisance, limiting reach and posing a tripping hazard.
- Requires Outlet: You need to be near a power source.
- Less Powerful than Pneumatic/Some Cordless: May struggle with denser hardwoods or driving nails flush in tougher materials.
Nailerguy’s Take: For most DIYers just getting into trim work or smaller woodworking projects, a cordless battery-powered brad nailer offers the best balance of convenience, power, and portability. If you’re a seasoned woodworker with a dedicated shop and compressor, a pneumatic model is still an excellent, workhorse choice. Electric is great for very tight budgets or confined spaces where you always have power.
Brad Size and Gauge: The Tiny Details That Matter
Brad nailers are named for the nails they use. The “brad” refers to the nail itself, and the “gauge” refers to its thickness. This is crucial for selecting the right nailer for your specific application.
Understanding Brad Nail Sizes
Brads come in various lengths, typically ranging from 5/8 inch up to 2 inches or even a bit longer. The length you need depends on the thickness of the material you’re fastening and how deeply you need the nail to penetrate into the base material.
- Short Brads (under 1 inch): Good for very thin and delicate materials, like craft projects or small trim pieces where you don’t need much holding power.
- Medium Brads (1 inch to 1.5 inches): The sweet spot for most interior trim, like baseboards, window casings, and chair rails.
- Long Brads (1.5 inches to 2+ inches): Used for thicker trim or when you need a bit more holding power, though it’s important to ensure your nailer and brads are rated for this length and that you have enough material for the nail to grip into.
Understanding Brad Gauges
The gauge number tells you how thick the brad is. A lower gauge number means a thicker nail, and a higher gauge number means a thinner nail.
- 18-Gauge (often called “finish nails”): These are the most common brads. They are around 0.048 inches in diameter. They leave a very small hole, perfect for trim, molding, and furniture assembly where a clean finish is essential. Almost all dedicated “brad nailers” are 18-gauge tools.
- 16-Gauge (often called “brad nails” or “finish nails”): These are slightly thicker (around 0.062 inches in diameter) than 18-gauge brads. They offer more holding power but leave a slightly larger hole. Some tools are marketed as “brad nailers” but can fire 16-gauge nails. If you plan on doing a lot of heavier trim or need a bit more strength, a 16-gauge tool might be considered. However, for pure “brad” applications and minimal hole size, 18-gauge is king.
- 23-Gauge (often called “pins” or “micro-pins”): These are extremely thin headless nails (around 0.022 inches). They are ideal for the most delicate trim, crown molding details, or specialized woodworking where you want the nail to be virtually invisible. These require a dedicated 23-gauge pinner.
Nailerguy’s Recommendation: For general woodworking and DIY projects involving trim, an 18-gauge brad nailer is usually the most versatile and best starting point. If your projects involve very delicate, high-end molding, or you absolutely need the nail to disappear, consider a 23-gauge pinner. A 16-gauge nailer can be a good cross-over if you’re doing slightly heavier trim work and don’t mind a slightly larger hole.
Key Features to Look For
Beyond the power source and nail size, several features can make your brad nailing experience much better. Here are some important ones:
1. Depth Adjustment
This is a must-have feature! Depth adjustment allows you to control how deep the nail is driven into the wood. You want to be able to sink the nail flush with the surface, but not so deep that it punches through or creates a huge dimple. Most brad nailers have a dial or lever for this. Look for one that’s easy to access and adjust.
2. Tool-Free Jam Release
Nails can occasionally jam. A tool-free jam release means you can quickly and easily open up the nose of the nailer to clear the jam without needing to find a screwdriver or allen wrench. This saves a lot of frustration and downtime.
3. Selectable Trigger (Fire Modes)
Most brad nailers offer at least two firing modes:
- Sequential Firing: You must press the safety tip against the surface and then pull the trigger for each nail. This is safer and allows for precise placement.
- Contact Firing (Bump Firing): You hold down the trigger and “bump” the safety tip against the surface to fire nails rapidly. This is faster for installing long trim pieces but requires more control to avoid accidental firing.
A good nailer will let you easily switch between these modes, often with a button or switch near the trigger.
4. No-Mar Pad
This is a rubber or plastic tip that covers the nose of the nailer. It protects delicate surfaces (like pre-finished trim or veneer) from scratches or dents when the nailer is pressed into place. Many nailers come with one, or it’s an available accessory.
5. Dry Fire Lockout
This feature prevents the nailer from firing when it’s out of nails. It protects the tool from damage and prevents you from accidentally driving blanks (which can mar your workpiece).
6. Swivel Air Fitting (for Pneumatic)
If you’re going pneumatic, a swivel fitting on the air inlet makes it much easier to manage the hose and prevents it from kinking or getting in your way.
7. Ergonomics and Grip
You’ll be holding this tool, so comfort is key! Look for a comfortable grip, good balance, and not excessive weight (relative to its class). If you have smaller hands, check the grip size. If you have larger hands, ensure it doesn’t feel cramped.
Comparing Popular Brad Nailer Types for Common Projects
Let’s look at how different brad nailers stack up for typical DIY tasks.
Trim and Molding Installation
For baseboards, crown molding, window/door casings, and chair rails:
- Best Choice: 18-gauge cordless battery-powered brad nailer.
- Why: Offers portability for moving around rooms, enough power to set nails flush in pine and poplar, and shoots thin nails that minimize visible holes—perfect for finished surfaces. Depth adjustment is critical here. A selectable trigger is also very helpful for speed.
- Pneumatic Alternative: If you have a compressor, a good 18-gauge pneumatic brad nailer is also excellent.
- Consider 16-gauge if: You’re working with very hard woods or need extra holding power, and don’t mind a slightly larger hole.
Furniture Assembly
For building small cabinets, drawers, or attaching decorative elements:
- Best Choice: 18-gauge cordless or pneumatic brad nailer.
- Why: The thin nails are great for preventing splitting in plywood or solid wood components. Holding power is usually sufficient for secondary fastening alongside glue. Cordless gives you freedom in a workspace.
- Consider 23-gauge pinner if: You’re working with very thin hardwoods or delicate veneers where even an 18-gauge nail might be too much.
Craft Projects and Small Jigs
For making picture frames, small boxes, or assembling simple jigs:
- Best Choice: 18-gauge electric or cordless brad nailer, or a 23-gauge pinner.
- Why: The focus here is often on thin materials and a virtually invisible fastener. Electric nailers are budget-friendly and perfectly adequate for light-duty tasks. 23-gauge pinners deliver the ultimate in discretion.
Outdoor Trim (with Caution)
Attaching exterior trim can be tougher due to moisture and harder woods.
- Consider: A 16-gauge nailer or an 18-gauge nailer with longer nails (up to 2 inches).
- Why: Exterior trim often uses denser woods, and you need more holding power against weather elements. However, always ensure your nailer is capable of driving nails to the correct depth and that the nails and lumber are rated for exterior use (often stainless steel or coated).
- Important Note: For structural exterior applications, you’ll need a different type of nail gun entirely (like framing or roofing nailers). Brad nailers are for finish work.
Table: Brad Nailer Power Source Comparison
| Feature | Pneumatic | Cordless Battery | Electric (Corded) |
|---|---|---|---|
| Power Source | Air Compressor | Rechargeable Battery | Wall Outlet |
| Portability | Limited by Hose & Compressor | Excellent | Limited by Cord Length |
| Initial Cost (Tool Only) | Moderate | High | Low |
| Operating Cost | Low (after initial compressor purchase) | Moderate (battery replacement eventually) | Very Low |
| Tool Weight | Light | Moderate to Heavy | Light |
| Setup Time | Moderate (connect hose, air up) | Fast (charge battery) | Fast (plug in) |
| Best For | Shop-based projects, heavy use. | Versatile use, job sites, convenience. | Budget-conscious, small projects, consistent power access. |
Table: Brad Nail Gauge & Application Guide
| Gauge | Common Name | Nail Diameter (approx.) | Key Characteristics | Typical Applications |
|---|---|---|---|---|
| 18-Gauge | Finish Nail | 0.048 inches | Smallest hole, very neat finish. Good balance of holding power and discretion. | Interior trim, baseboards, window/door casings, chair rails, furniture assembly, cabinets. |
| 16-Gauge | Straight Brad |