Choosing the correct nail collation type is crucial for getting a clean, strong finish and avoiding frustrating job site issues, ensuring your project looks professional and lasts. This guide breaks down nail collation options so you can confidently select the best one for your next woodworking project.
Hey everyone, Jack Shaffer here from Nailerguy! Ever stare at a wall of nail boxes and feel a bit lost? You’re not alone. Picking the right nail collation type can seem like a small detail, but it makes a HUGE difference in how smoothly your project goes. Getting it wrong can lead to misfires, damaged workpieces, and wasted time. But don’t worry, by the end of this guide, you’ll be a pro at selecting the perfect nails for your nailer every time. We’ll break down exactly what collation is, why it matters, and how to match it to your tool and your task.
Table of Contents
What is Nail Collation, Anyway?
Think of collation as the binder that holds your nails together in a neat strip, ready to be fed into your nail gun. It’s how the nails are arranged and stuck together in a specific pattern so your nailer can grab them one by one and drive them into wood.
The type of collation used is directly linked to the type of nailer you’re using. Different nail guns are designed to accept nails with specific collation types. Using the wrong type can lead to:
- Nails jamming in the nailer.
- Incomplete nail drives (nails not going in all the way).
- Damage to the nailer’s firing mechanism.
- A less-than-perfect finish on your project.
So, understanding collation is key to efficient and effective nailing!
Why Does Nail Collation Type Matter So Much?
Simply put, the collation dictates how the nails are presented to the firing pin in your nail gun. The nailer has a specific mechanism designed to strip a nail from its collation strip and drive it. If the collation doesn’t match the mechanism, it just won’t work correctly. It’s like trying to put a square peg in a round hole – it’s not going to fit!
Here are the main reasons why getting the collation type right is essential:
- Tool Compatibility: Your nail gun is designed for a specific collation angle and type. Forcing the wrong nails can break your tool.
- Job Efficiency: The right collation ensures nails feed smoothly, allowing you to work quickly without constant jamming or misfires.
- Nail Finish: Correct collation helps nails drive straight and flush, giving you a cleaner, more professional look.
- Safety: A malfunctioning nailer due to incorrect collation can misfire, posing a safety risk.
The Different Types of Nail Collation Explained
Nail collation primarily differs in two ways: the material used to hold the nails together, and the angle at which the nails are set relative to each other.
1. Material of Collation
The material is what actually holds the nails in the strip. The most common types you’ll encounter are:
- Paper Collated Nails:
- These are the most popular type for framing and construction.
- The nails are held together by a paper strip, often with a small amount of adhesive or a plastic coating.
- Pros: Generally more affordable, widely available, and the paper typically disintegrates or breaks away cleanly when fired, leaving minimal debris.
- Cons: Can be sensitive to moisture, as the paper can swell or weaken if it gets wet.
- Plastic Collated Nails:
- Nails are embedded in a plastic strip.
- Pros: More durable than paper, less affected by moisture, and can sometimes offer a cleaner break from the strip. Many newer framing nailers are designed specifically for plastic collation for better performance in damp conditions.
- Cons: Can sometimes leave small plastic fragments in the wood or on the surface, and may be slightly more expensive than paper collated options.
- Wire Collated Nails:
- These are less common for general construction nailers but are used in some specialized applications or smaller gauge finish nailers.
- The nails are welded together with thin wires.
- Pros: Very strong and stable collation, not affected by weather.
- Cons: The welding wires can sometimes break off and be left in the wood, requiring removal. They can also be harder to find for common nailer types.
- Hybrid (Plastic/Wire) Collated Nails:
- A combination of plastic and wire is used for a strong yet clean-breaking collation.
- Pros: Offers good durability and weather resistance with a cleaner break than some full plastic collations.
- Cons: Can be a specialized product, potentially harder to source.
2. Angle of Collation
This is probably the MOST important factor when matching nails to your nailer. The angle refers to how the nails are positioned relative to the strip they are attached to. It’s crucial because your nailer’s magazine is designed to accept a specific angle.
The two primary angles you’ll encounter are:
- 21-Degree Nails (Plastic/Paper Collated):
- These nails are typically found in plastic collation strips.
- They are driven at a steeper angle, often by framing nailers.
- Common Uses: Framing walls, roof decking, subflooring, and other heavy-duty construction tasks where driving power is key.
- Nailer Type: Designed for 21-degree framing nailers.
- 28-Degree to 34-Degree Nails (These are often referred to as “Off-Set” or “Rafter” nails, but the industry often groups them closely, with 30-34 degrees being very common for a specific look and function):
- These nails have a distinct “off-set” head, meaning the head is not sitting directly behind the shank. This allows more nails to be packed into the magazine while keeping the tool slim.
- They are typically found in wire or plastic collation.
- Common Uses: Rafters, joists, trusses, and general framing where ease of access into tighter spaces is beneficial. The “off-set” head can also help prevent “doubling” (two nails side-by-side) in certain applications.
- Nailer Type: Designed for 30-34 degree framing nailers (often called “rafter nailers” or “off-set framers”).
- 15-Degree Nails (Coil Collated):
- These nails are held together by wire, usually in a coil.
- The nails are set at a very shallow angle.
- Common Uses: Heavy-duty framing, logging, fencing, and dock building where a large number of nails are needed quickly.
- Nailer Type: Designed for 15-degree coil framing nailers. These nailers have a large magazine capacity.
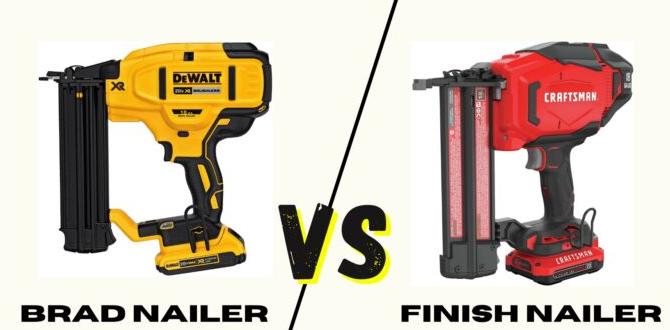
- Finish Nails (Various Angles/Methods):
- Finish nailers use very different collation types to achieve their specific purpose.
- 16-Gauge: Often come in plastic collation strips angled at around 20-25 degrees.
- 18-Gauge: Typically use plastic collation strips angled at around 25-30 degrees.
- 23-Gauge (Pin Nails): Use very fine, nearly flat strips of collation, almost like a thin plastic film holding the pins.
- Common Uses: Attaching trim, molding, and other decorative wood elements where a small or hidden nail head is desired.
- Nailer Type: Matched to the specific gauge and collation of the finish nailer.
It’s critical to look at your nailer’s specifications or the side of its magazine. It will usually tell you exactly what collation angle and type it’s made for. For example, you might see “Uses 21° Plastic Collated Nails.”
How to Choose the Correct Nail Collation Type: A Step-by-Step Guide
Let’s break down how to make the right choice for your project. This process is about matching your needs—and your tool’s capabilities—to the right nail.
Step 1: Identify Your Nailer Model
This is the absolute first step. You can’t choose the right nails if you don’t know what your nailer requires. Look for:
- The manual: If you still have it, the manual is your best friend. It will clearly state nail specifications.
- The nailer itself: Many nailers have labels on the side of the magazine indicating the accepted nail type, collation angle, and gauge.
- Manufacturer’s website: If you know the model number, you can usually find detailed specifications online.
Step 2: Determine Your Project Needs
What are you building? This will dictate the type and size of nail needed, and by extension, the collation type that houses it.
- Framing: Heavy-duty jobs like building walls, decks, or roof structures. You’ll need powerful nailers and nails with strong collation. This usually means 21-degree or 30-34 degree (off-set) framing nails or 15-degree coil nails.
- Trim work: Installing baseboards, crown molding, window casings. You need nails that create minimal damage and are easily concealed. This points to finish nailers (16ga, 18ga) or brad nailers (18ga).
- Detail work/Crafts: Little decorative pieces, upholstery, or small projects. You might use brad nailers or pin nailers (23ga).
- Outdoor projects: Fencing, deck furniture, trellises. Consider nails that are corrosion-resistant and collation that can handle moisture. Stainless steel or hot-dipped galvanized nails are key here, and the collation—paper, plastic, or wire—should be chosen based on weather tolerance.
Step 3: Match Nailer Specs to Nail Type
Once you know your nailer and your project, it’s time to directly map them:
Common Nailer Types and Their Collation Needs:
| Nailer Type | Common Gauge | Primary Collation Type | Collation Angle | Typical Uses |
|---|---|---|---|---|
| Framing Nailer | 2″ to 3-1/2″ | Paper or Plastic | 21 Degrees | Wall framing, subflooring, roof decking |
| Rafter/Off-Set Framing Nailer | 2″ to 3-1/2″ | Plastic or Wire | 30-34 Degrees | Rafters, joists, trusses, tight spots |
| Coil Framing Nailer | 1-1/2″ to 3-1/2″ | Wire | 15 Degrees | Heavy-duty framing, construction, fencing |
| Finish Nailer | 16-Gauge | Plastic | ~20-25 Degrees | Trim, baseboards, window/door casing |
| Brad Nailer | 18-Gauge | Plastic | ~25-30 Degrees | Molding, delicate trim, cabinetry |
| Pin Nailer | 23-Gauge | Plastic Film/Strip | Virtually Flat | Very fine trim, upholstery, crafting |
It’s important to note here that while we list “typical” collation angles, manufacturers might have slight variations. Always double-check your tool’s specific requirements. For instance, some 16-gauge finish nailers might take nails with a slightly different angle than others. A great resource for tool specifications is manufacturer websites like DeWalt or Milwaukee Tool, where you can often find PDF manuals for your specific model.
Step 4: Consider Environmental Factors
Will your project be exposed to moisture or extreme temperatures? This can influence your choice of collation material:
- For damp environments (outdoors, basements): Plastic collated nails are generally a better choice than paper. They won’t swell or degrade as easily. If extreme durability is needed, look for stainless steel or hot-dipped galvanized nails, often available in plastic or wire collation.
- For dry, interior work: Paper collated nails are perfectly fine and often more economical.
Step 5: Review Nail Head Style
Beyond collation, the head of the nail itself matters.
- Full Round Head (Framing Nails): These are the largest heads, offering maximum holding power. Essential for structural framing.
- Off-Set Head (Framing Nails): Smaller than full round heads, these fit more nails into the gun and are often used in specific framing applications.
- Brad Head (Finish and Brad Nails): Small, slightly rounded heads designed to be easily countersunk and filled over.
- Micro-Pin Head (Pin Nails): Tiny heads that are barely visible, ideal for applications where the fastener needs to be completely hidden.
The head style is usually determined by the nailer type, but it’s good to be aware of how it impacts the final look of your project.
Step 6: Purchase and Test
Once you’ve made your selection, buy a small quantity first if possible. Load them into your nailer and fire a few test nails into a scrap piece of wood. Observe:
- Do they feed smoothly?
- Do they drive straight and fully into the wood?
- Are there any jams or misfires?
- Is the collation strip breaking away cleanly?
If everything looks good, you’ve found your match! If not, it’s time to re-evaluate and try a different option based on the steps above.
Common Pitfalls to Avoid When Choosing Nails
Even with a guide, it’s easy to stumble. Here are some common mistakes beginners make and how to steer clear of them:
- Assuming all nailers of the same type use the same collation: Two framing nailers from different brands, or even different models from the same brand, might have slightly different magazine angles or feeding mechanisms. ALWAYS check your specific tool.
- Confusing nail gauge with nail collation: The gauge refers to the diameter of the nail shank (e.g., 18-gauge is thinner than 16-gauge). While related to the nailer type, it’s not directly the collation type.
- Buying the cheapest option without checking compatibility: While budget matters, an incompatible nail that jams your expensive tool or ruins your project is never a bargain.
- Not considering the shank and finish of the nail: You need the right collation, but also nails made for the job. For decks, you need exterior-rated nails. For fine furniture, you need something that won’t mar the wood.
- Overlooking the angle: This is the most frequent culprit of nailer frustration. If your nailer takes 21-degree nails, 34-degree nails simply won’t engage the firing mechanism correctly.
A good rule of thumb is to look for “OEM” (Original Equipment Manufacturer) or “compatible” nails explicitly stated for your nailer model. Reputable brands like Bostitch, Senco, and Paslode often provide clear compatibility guides for their nails.
External Resources for Nailer Enthusiasts
For those who want to dive deeper, here are some excellent resources:
- Occupational Safety and Health Administration (OSHA): OSHA provides safety guidelines for the use of powered nailers. Understanding these guidelines is paramount for safe operation. You can find relevant information by searching for “nail gun safety” on the OSHA website.
- Forest Products Laboratory (FPL) Research: Part of the U.S. Department of Agriculture, FPL conducts extensive research on wood properties and fastening technologies, which can provide deeper insights into fastener performance. Explore their publications for advanced understanding.