To choose the right brad nailer, consider the nail sizes you’ll use most often (e.g., 1-1/4″ to 2″), the power source (corded, cordless, pneumatic), and your budget. Prioritize tool weight and ergonomics for comfort during projects.
Hey there, fellow makers and DIY enthusiasts! Jack Shaffer here, your friendly neighborhood tool guy from Nailerguy. Ever found yourself staring at a wall of brad nailers, wondering which one will actually help you nail that trim perfectly? It’s a common puzzle, and honestly, it can feel a bit overwhelming at first. But don’t worry, we’re going to break it down together. My goal is to make choosing your next nailer as easy as driving a nail. We’ll cover everything from what a brad nailer even is to how to pick the best one for your projects. Stick with me, and you’ll be confidently selecting a tool that’ll make your woodworking dreams a reality in no time. Let’s get started!
Table of Contents
What Exactly is a Brad Nailer?
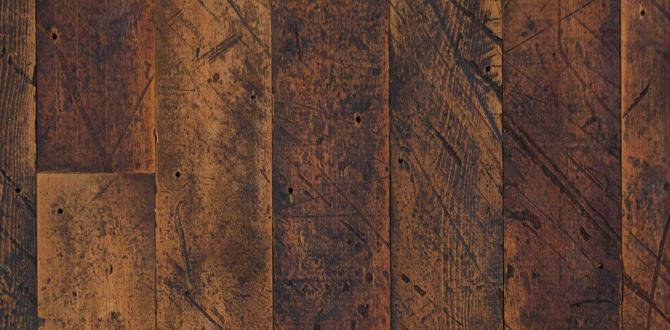
A brad nailer is a fantastic tool for woodworkers, especially those tackling trim work, cabinetry, and smaller projects. Think of it as a powered hammer that drives thin, headless nails called “brads” into wood quickly and efficiently. These brads are significantly smaller and thinner than finish nails, making them ideal for delicate tasks where you want minimal visible damage and a clean look. They’re perfect for attaching baseboards, crown molding, window casings, and even for assembling furniture pieces.
Unlike framing nailers that use chunky nails to hold together structural elements, brad nailers are all about precision and finesse. They’re your go-to for adding those finishing touches that make a project shine. The “brad” nail itself is typically made of a thin gauge wire with a very small head, designed to be almost invisible once driven into the wood. This makes them perfect for situations where you want the fastener to disappear.
Why is Choosing the Right Brad Nailer Important?
- Project Success: Using the wrong nailer can lead to difficult project completion. Too much power can split delicate trim, while too little might not secure your materials effectively.
- Aesthetics: A good brad nailer means clean, flush nails that are easy to fill and paint over, leading to a professional finish.
- Efficiency: The right tool makes your job faster and less frustrating. You’ll spend less time wrestling with your nailer and more time enjoying the woodworking process.
- Safety: While brad nailers are generally safer than manual hammering, understanding their features helps ensure safe operation.
Choosing the right brad nailer isn’t just about buying a tool; it’s about buying the right tool for your needs. We all want our projects to look good, right? And we want to get them done without a ton of hassle. A well-chosen brad nailer will become a reliable companion in your workshop or toolkit, helping you achieve those satisfyingly perfect results every time. So, let’s dive into what makes a brad nailer tick.
Understanding Key Brad Nailer Features
Before we jump into picking one out, let’s get familiar with the jargon and the essential parts of a brad nailer. Knowing these will help you understand the options out there.
1. Nail Size Compatibility
This is arguably the most crucial factor when choosing. Brad nails come in various gauges and lengths. The nailer is designed to accept specific ranges.
- Gauge: This refers to the thickness of the nail. Lower gauge numbers mean thicker nails. Brad nails are typically 18-gauge (thinner) or 16-gauge (slightly thicker, offering a bit more holding power).
- Length: Brad nails range from about 5/8 inch up to 2 inches. The length you need depends on the thickness of the material you’re fastening and the material it’s being fastened into. For example, attaching quarter-round molding (thin) to drywall or standard wood studs might only require 1-1/4″ to 1-1/2″ nails.
Pro Tip: If you’re planning on doing a lot of trim work, like baseboards and crown molding, an 18-gauge brad nailer is usually your best bet. They leave the smallest hole, making them ideal for visible surfaces. If you’re building cabinets or doing some furniture work where a little more holding power is needed and nail visibility is less of an issue, a 16-gauge might be a good choice.
2. Power Source
How your brad nailer gets its power is a major consideration, impacting portability, cost, and performance.
- Pneumatic (Air-Powered): These use compressed air from an external air compressor.
- Pros: Very powerful, lightweight nailer itself, generally more affordable up front, reliable.
- Cons: Requires an air compressor and hose, limiting portability; compressor can be noisy.
- Cordless Electric (Battery-Powered): These have their own internal motor and battery.
- Pros: Highly portable, no air hose needed, convenient for any location.
- Cons: Nailer can be heavier and bulkier due to the battery, potentially more expensive initially, battery life is a consideration.
- Cordless Electric (Gas Fuel Cell): These use a small, disposable fuel cell and a battery to ignite the fuel.
- Pros: Very portable, good power, no external cords or hoses.
- Cons: Fuel cells are an ongoing cost, can have an odor, often heavier than pneumatic or some battery models, more complex maintenance.
- Corded Electric: Less common for brad nailers, these plug directly into an outlet.
- Pros: Unlimited power (as long as you have electricity), generally lighter and less expensive.
- Cons: Limited by cord length and outlet availability, much less portable.
For most DIYers and trim work, cordless battery-powered brad nailers are becoming the most popular choice due to their convenience and portability. Pneumatic models remain a staple in professional shops where compressors are already present. If you’re just starting out and doing mostly indoor trim, a battery-powered one offers the most freedom. An excellent resource for understanding tool power sources and their implications can be found on the Tooling-Up website, which offers detailed breakdowns.
3. Firing Modes
Brad nailers have different modes for driving nails. Understanding these ensures you use the tool safely and effectively.
- Sequential Firing (Single Shot): This mode requires you to press the safety contact tip (often called the “nose”) against the workpiece and pull the trigger to drive a single nail. This is the safest mode and is ideal for precise placement of each nail. Most brad nailers come with this mode.
- Contact Firing (Bump Fire): In this mode, you can “bump” the nose of the tool as you pull the trigger, driving a nail. This is much faster for repetitive nailing but requires more caution to avoid accidental firings. Some brad nailers offer a selector switch for this.
Safety First: Always ensure your brad nailer is set to sequential firing when you’re unsure or working on delicate projects. Accidental nail discharge can be dangerous, so familiarize yourself with your tool’s safety features before using it. OSHA provides valuable safety guidelines for tool operation, which are a good read for any DIYer: OSHA Nail Gun Safety.
4. Depth Adjustment
This feature allows you to control how deep the nail is driven into the wood. It’s crucial for getting a flush finish without over-driving (which can damage the wood surface) or under-driving (leaving the nail head sticking out).
Most brad nailers have a simple dial or lever near the trigger or nose that you can adjust. You’ll want to experiment on scrap wood of the same type you’re working with to find the perfect setting. A nail head that sits ever so slightly below the surface is usually ideal, allowing for easy filling and painting.
5. Jam Release Mechanism
Nail jams happen! It’s a fact of life with nail guns. A convenient jam release mechanism makes clearing those jams quick and painless, so you can get back to your project without significant downtime.
Look for models that have tool-free jam release. This usually means a latch or lever on the nose of the nailer that allows you to open it up easily to remove a bent or jammed nail. Some older or cheaper models might require a screwdriver or allen wrench, which is much more inconvenient.
How to Choose the Right Brad Nailer for Trim Size
When we talk about “trim size” in the context of choosing a brad nailer, we’re really focusing on two things: the size of the nails the nailer can fire, and the size of the nailer itself.
Matching Nailer to Trim Thickness
- Thin Trim (e.g., 1/4″ to 1/2″ thick): For delicate trim like decorative molding, paneling, or picture frame assembly, an 18-gauge brad nailer is your best friend. The thin 18-gauge nails will drive into these materials without splitting them, and the small nail head will be barely noticeable.
- Medium Trim (e.g., 1/2″ to 3/4″ thick): For most common interior trim like baseboards, door casings, and window trim, an 18-gauge or 16-gauge brad nailer will work well. An 18-gauge is still excellent for minimizing visible holes, but a 16-gauge can provide a bit more holding power if needed, especially if you’re attaching to slightly less dense wood or plywood.
- Thicker Trim or Plywood Applications: If you’re working with thicker trim pieces or need to fasten through thicker plywood layers where a bit more strength is beneficial, a 16-gauge brad nailer is a solid choice. It offers a bit more grip than an 18-gauge without being as beefy as a finish nailer (which uses 15-gauge nails).
Nailer Size and Weight for Trim Work
When you’re maneuvering around corners, working overhead with crown molding, or just holding the tool for extended periods installing baseboards, the size and weight of the nailer matter. A heavy or bulky tool can lead to fatigue, which can cause errors and discomfort.
- Ergonomics: Look for a comfortable grip. Most good brad nailers have rubberized handles.
- Weight Distribution: Does the tool feel balanced in your hand? Even a lighter tool can feel awkward if the weight isn’t distributed well.
- Compact Nose: A slimmer nose profile can help you get into tight corners or fire nails flush against surfaces more easily.
For trim work, you’ll often be in awkward positions. Lighter, more compact cordless brad nailers typically excel here. Brands like DeWalt, Ryobi, and Metabo HPT (formerly Hitachi) offer excellent battery-powered options that are well-regarded for their balance and ease of use during prolonged trim projects.
Step-by-Step Guide to Choosing Your Brad Nailer
Ready to make a decision? Follow these steps to find the brad nailer that’s perfect for you.
Step 1: Define Your Primary Projects
What will you be using the brad nailer for MOST often? This is the most important question.
- Are you doing a lot of baseboards, door casings, and crown molding? You’ll likely want an 18-gauge brad nailer.
- Are you building cabinetry or furniture where a little more holding power is needed? A 16-gauge might be a better fit, or you might even consider a dedicated finish nailer down the line.
- Are you just doing small craft projects or picture frames? An 18-gauge is usually perfect and more affordable.
Be honest with yourself. If 90% of your work is thin trim, don’t buy a tool primarily suited for framing. Focus on the task you’ll perform most frequently.
Step 2: Decide on the Power Source
Based on your workspace and portability needs:
- No Air Compressor (Most DIYers): Go for a cordless battery-powered brad nailer. This offers the best freedom and convenience.
- Already Have an Air Compressor: A pneumatic brad nailer can be a great, often more budget-friendly option that is lighter in hand.
- Occasional Use, Limited Space: A compact corded electric brad nailer might work, but its limitations are significant.
For most beginners and DIYers tackling home improvement projects, a battery-powered 18-gauge brad nailer is usually the sweet spot.
Step 3: Consider Your Budget
Brad nailers vary in price. Pneumatic models tend to be cheaper to buy the tool itself, but you need to factor in the cost of a compressor. Cordless models are an investment, especially if you’re buying into a specific battery platform (which is great if you own other tools from that brand).
- Entry-Level ($50 – $100): Usually corded electric or basic pneumatic models. Might lack some features like tool-free jam release.
- Mid-Range ($100 – $250): Good quality pneumatic and feature-rich battery-powered 18-gauge brad nailers. Often come with good depth adjustment and jam release.
- High-End ($250+): Professional-grade cordless models, often with advanced features, better battery life, and more robust construction.
Remember, the cheapest option might cost you more in the long run through frustration or needing to replace it sooner. Think about value, not just price.
Step 4: Check the Nail Size Range Carefully
Once you’ve narrowed down the type and power source, double-check the nailer’s specifications. Ensure it fires the exact nail sizes you need. A common combo for general trim is 18-gauge brad nails from 3/4″ up to 2″.
Step 5: Read Reviews and Compare Models
Once you have a few potential candidates, dive into online reviews. Look for:
- User experiences with specific nail sizes.
- Comments on reliability and durability.
- Feedback on ease of use, weight, and ergonomics for trim work.
- Pros and cons mentioned by people who actually use the tool.
Websites like Tool Reviews or even seasoned woodworking forums are excellent places to gather this kind of real-world feedback.
Step 6: Hold it If You Can!
If possible, visit a local tool store and get a feel for the nailer. Even if you plan to buy online, holding the tool can tell you a lot about its balance, grip, and overall comfort. This step is invaluable for determining long-term usability.
Essential Brad Nailer Specifications at a Glance
To help you quickly compare, here’s a table of common brad nailer specifications based on power source. Keep in mind that exact specs will vary by model and manufacturer.
| Feature | Pneumatic Brad Nailer | Cordless Battery Brad Nailer | Corded Electric Brad Nailer (Less Common) |
|---|---|---|---|
| Nail Gauge | Usually 18-gauge. Some support 16-gauge. | Most commonly 18-gauge. Some 16-gauge battery versions available. | Typically 18-gauge. |
| Nail Lengths | Varies by model, typically 5/8″ to 2″. | Varies by model, typically 5/8″ to 2″. | Varies by model, typically 1/2″ to 1-1/4″. |
| Power Source | Air compressor (external) | Rechargeable Lithium-ion battery | Wall outlet (AC power) |
| Portability | Limited by hose and compressor. Nailer itself is light. | Very high. No hoses or cords. | Limited by cord length and outlet availability. |
| Weight |