Quick Summary: To check O-ring wear, visually inspect them for cracks, tears, flattening, or hardening. Feel for loss of elasticity. Replacing worn O-rings is crucial for maintaining your pneumatic nailer’s seal, preventing air leaks, and ensuring optimal performance. Regular checks will save you time and frustration.
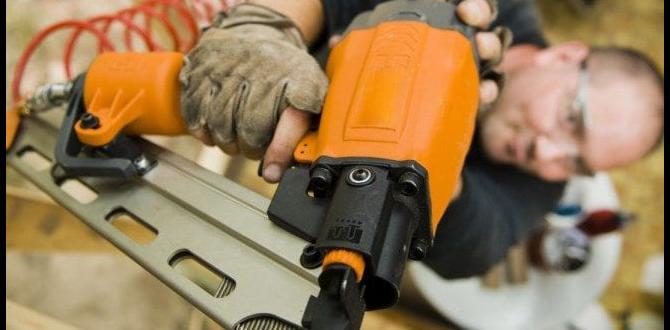
Hey there, tool enthusiasts! Jack Shaffer here from Nailerguy. Ever had your trusty pneumatic nailer sputter or lose its punch mid-project? It can be super frustrating when your tool doesn’t perform like it should, especially when you’re right in the middle of building something awesome. Often, the culprit is a tiny, often overlooked component: an O-ring. These little rubber rings are the unsung heroes that keep your nailer’s air system sealed tight. When they wear out, you can bet you’ll start seeing leaks and power loss. But don’t worry! Checking them is simpler than you might think. We’ll walk through exactly what to look for, making sure your tools are always ready to go. Let’s dive in and get your nailer back in top shape!
Table of Contents
Why O-Rings Matter in Your Pneumatic Nailer
Think of your O-rings as the seals that hold everything together in your pneumatic nailer. They sit in specific grooves and compress when the tool is assembled, creating an airtight barrier. This seal is essential for the tool’s operation. When air is compressed and released to drive a nail, these seals prevent that air from escaping elsewhere. Without a good seal, the air pressure you need to drive nails effectively will just leak out, leading to a noticeable drop in power. You might start hearing hissing sounds or notice that your nails aren’t driving in completely, or worse, not at all.
Regular maintenance, including checking your O-rings, is a key part of tool longevity and performance. It’s a small step that can prevent bigger, more costly problems down the line. Just like you wouldn’t ignore a leaky faucet at home, you shouldn’t ignore a leaky nailer. Understanding how to check and maintain these components will save you time, money, and the headache of a tool that’s out of commission when you need it most.
In a pneumatic system, O-rings are typically found in areas where two parts move against each other or where a stationary part needs to seal against a moving one. This includes components like the drive cylinder, piston, valve assembly, and trigger mechanism. The constant movement, friction, and exposure to air pressure and sometimes lubricants can take their toll. That’s why knowing when they’re worn out is so important.
Signs Your O-Rings Might Need Attention
Before you even think about taking your nailer apart, there are a few tell-tale signs that suggest your O-rings might be past their prime. If you notice any of these issues, it’s a good indicator that it’s time to investigate further.
- Air Leaks: This is the most common symptom. Listen closely for any hissing sounds coming from your nailer, especially around the housing or where the air hose connects. A persistent hiss often means air is escaping past a worn seal.
- Reduced Power: If your nailer is suddenly struggling to drive nails consistently, or if the nails aren’t seating fully into the wood, it’s likely due to a loss of air pressure. Worn O-rings are a prime suspect for this pressure loss.
- Intermittent Operation: Sometimes, a nailer might work fine one moment and then stop functioning correctly the next. This erratic behavior can be caused by a partially compromised O-ring, which might seal intermittently.
- Trigger Malfunctions: While less common, some trigger issues can be linked to the internal seals. If the trigger feels spongy or doesn’t engage the firing mechanism properly, it might be a sign of internal O-ring wear.
These symptoms aren’t exclusive to O-ring issues, but they are strong indicators that worn seals are a likely cause. Addressing them proactively will save you a lot of frustration during your DIY projects.
Tools You’ll Need
Don’t worry, you won’t need a full mechanic’s toolkit for this. Most of what you need is probably already in your home workshop. Having the right tools makes the job smoother and safer.
- Screwdriver Set: You’ll likely need a set of Phillips and/or flathead screwdrivers to access the internal components of your nailer. Make sure you have a few different sizes.
- Allen Wrench Set (Hex Keys): Some nailers use Allen bolts for disassembly.
- Needle-Nose Pliers: Useful for gripping and removing O-rings from their grooves.
- Small Pick or Awl: For gently prying out O-rings without damaging the surrounding parts. Be very careful with this!
- Clean Rags: Essential for wiping down parts and cleaning out debris.
- Lubricant: A specialized pneumatic tool oil or a light, compatible lubricant will be needed for reassembly. Check your nailer’s manual for recommendations. Sticking to manufacturer-recommended lubricants ensures compatibility and prevents damage. You can often find this information on the Occupational Safety and Health Administration (OSHA) website, which often has general guidelines on tool maintenance and safety, though specific lubricants are usually tool-dependent.
- Replacement O-Rings: The most important item! It’s best to have a kit specific to your nailer model or a general assortment if you’re unsure.
- Your Nailer’s Manual: Always a good idea to have this handy for specific disassembly instructions and parts diagrams.
- Safety Glasses: Crucial for protecting your eyes from any small parts or debris.
Remember, always disconnect your air supply and remove any nails from the nailer before you start any maintenance. Safety first!
Step-by-Step Guide: How to Check O-Ring Wear
Alright, let’s get down to business. The process involves carefully disassembling parts of your nailer to access the O-rings. Each nailer model can be slightly different, so consulting your manual is always a smart move. However, the general principles and what to look for remain the same.
Step 1: Safety First – Disconnect and Empty
Before you do anything else, ensure you are working safely. Disconnect the air hose from your compressor. Then, carefully remove any nails that might be loaded in the magazine by firing the nailer (while still disconnected from air, you can usually do this by pressing the safety contact tip against a piece of scrap wood and pulling the trigger, or consult your manual for the specific method). This prevents accidental firing during maintenance. Always wear your safety glasses.
Step 2: Identify O-Ring Locations
O-rings are positioned in critical areas that require seals. The most common wear points are usually associated with the piston and the drive cylinder. Other areas include the valve stem and possibly the exhaust port. Your nailer’s manual will have a diagram showing all the internal components and where the O-rings are located.
A typical pneumatic nailer has O-rings in these key areas:
- Piston Seal: This larger O-ring seals the piston within the drive cylinder. It’s crucial for maintaining the air pressure needed to drive the piston.
- Valve Stem Seals: Smaller O-rings that seal the valve mechanism, preventing air leaks during the firing cycle.
- Bumper/Buffer O-rings: These can be present to cushion the impact of the piston, and they can wear down over time.
- Side Plate/Housing Seals: Less common, but some models might have O-rings sealing external housings.
Step 3: Disassemble the Nailer (Carefully!)
This is where the screwdriver and Allen wrenches come into play. Referencing your manual, start by removing the necessary components. Usually, this involves:
- Removing the Magazine: Some nailers require you to remove the magazine first.
- Accessing the Piston/Cylinder Area: This often means removing the main housing cap or a specific section of the nailer’s body. Be mindful of any springs or small parts that might pop out. Keep them organized! A small tray or magnetic dish is great for this.
- Removing the Piston: Once accessible, the piston can usually be pulled out. The O-ring will be around its circumference.
- Accessing the Valve System: Depending on the nailer, you might need to remove other components to get to the valve stem O-rings.
Tip: Take pictures with your phone as you disassemble. This helps immensely when it’s time to put everything back together correctly.
Step 4: Inspect the O-Rings
Once you have an O-ring removed or exposed, it’s time for a close inspection. Look for the following signs of wear:
Visual Inspection:
- Cracks or Splits: Any visible cuts, cracks, or splits in the rubber are definite signs of wear.
- Tears: Similar to cracks, tears mean the seal is compromised.
- Flattening or Distortion: If the O-ring no longer looks perfectly round and has developed flat spots, it has likely lost its elasticity and seal. This is often due to prolonged compression or heat.
- Hardening: The rubber might feel stiff and brittle instead of pliable. Hardened O-rings lose their ability to conform to the mating surfaces and create a seal.
- Groove Marks: Sometimes, you can see indentations or marks from the groove it sat in, indicating it’s been compressed for a long time.
- Deformation: Look for any signs where the O-ring has bulged or shrunk unevenly.
Tactile Inspection:
- Loss of Elasticity: Gently try to stretch or flex the O-ring. If it feels “dead” or doesn’t spring back to its original shape, it’s probably worn out.
- Brittleness: If you can easily break or snap a piece off, it’s far too brittle and needs replacing.
Step 5: Check the O-Ring Grooves
While you have the O-rings out, take a moment to clean the grooves where they sit. Use a clean rag to wipe away any dust, debris, or old lubricant. Inspect the grooves themselves for any nicks or burrs that might prevent a new O-ring from sealing properly. If you find any sharp edges, you can often smooth them carefully with a very fine grit sandpaper or a specialized stone, but be extremely gentle not to enlarge the groove.
Step 6: Replace Worn O-Rings
If you find any O-rings showing signs of wear from Step 4, it’s time to replace them. It’s highly recommended to replace all O-rings in a particular assembly at once, even if they don’t all look equally bad. They are generally inexpensive, and replacing them all ensures a consistent seal and prolongs the effectiveness of your repair.
When installing new O-rings:
- Lubricate: Apply a light coat of the recommended pneumatic tool oil to the new O-ring. This helps it slide into its groove and its mating part more easily, and also helps it seal better. It also prevents it from binding or tearing during installation.
- Install Gently: Carefully place the lubricated O-ring into its groove. Use your fingers or a specialized plastic installation tool if you have one. Avoid using sharp metal picks, as these can easily scratch, cut, or stretch the new O-ring during installation.
- Roll it In: For larger O-rings, you might need to gently roll them into place rather than trying to force them. Ensure the O-ring is seated evenly and isn’t twisted.
It’s best to use OEM (Original Equipment Manufacturer) O-rings if possible, or high-quality aftermarket replacements specifically designed for your tool model. You can often find O-ring kits online or at reputable tool supply stores. For example, a quick search for “[Your Nailer Model] O-ring kit” should yield good results. Many manufacturers, like DeWalt, provide detailed manuals and parts lists online, which are invaluable resources.
Step 7: Reassemble the Nailer
Now, reverse the disassembly process. Refer to your photos or the manual to put everything back in the correct order. Make sure all parts are seated properly and all screws are tightened securely, but don’t overtighten, which could strip threads or crack plastic components. Ensure no wires or springs are pinched.
Step 8: Test Your Nailer
Once fully reassembled, reconnect your air supply. Test the nailer cautiously. Listen for any new air leaks. Fire a few test nails into scrap wood to ensure it’s operating with full power and consistently. If it works smoothly, you’ve successfully brought your nailer back to life!
Common O-Ring Issues and Troubleshooting
Even with careful inspection and replacement, you might encounter a few snags. Here’s a quick rundown of common issues and how to tackle them.
Issue: New O-ring causes a leak.
Troubleshooting:
- The O-ring might be the wrong size or type. Double-check your part numbers.
- The O-ring might be installed incorrectly (twisted, pinched, or not fully seated). Remove and reinstall carefully.
- The groove the O-ring sits in might be damaged, dirty, or have a burr. Inspect the groove very closely.
- The mating surface where the seal occurs might be damaged or warped. This is a more serious issue and might require part replacement or professional repair.
Issue: Nailer still lacks power after O-ring replacement.
Troubleshooting:
- There might be other worn O-rings or seals you missed. Review all potential seal locations.
- Another component, like the piston or drive valve, might be damaged and causing the power loss.
- Check your air compressor and air hose- Are they providing adequate pressure and airflow? A restriction in the air line or an underperforming compressor can mimic tool issues.
Issue: Difficulty removing old O-rings.
Troubleshooting:
- Old, hardened O-rings can be stubborn. Work carefully with a pick, trying to get under an edge and gently lever it out. A little penetrating oil (applied carefully, not getting into mechanisms) might help loosen it, but use this sparingly.
- Consider purchasing a set of plastic O-ring removal tools. They are designed to grip without damaging the surrounding material.
Maintaining Your Tool’s Health: Beyond O-Rings
While O-rings are a common cause of pneumatic nailer issues, they aren’t the only part that needs attention. Regular, preventative maintenance can keep your tools running like new for years to come.
Regular Cleaning
Keep the exterior of your nailer clean. Wipe it down after use, especially if you’ve been working in a dusty environment. Remove any sawdust or debris that might get into more sensitive areas. For internal cleaning, address specific areas if they become visibly dirty or gummed up with old lubricant.
Lubrication is Key
Most pneumatic tools require periodic lubrication. Use only the manufacturer-recommended oil. Over-oiling or using the wrong type of oil can damage internal components or carbon seals. Follow the instructions in your manual—usually, a few drops added where indicated (often into the air inlet) before each day’s use or after extended periods of non-use is sufficient. For specific guidance on lubricants, check resources from organizations like the Tooling & Manufacturing Association, which often provide industry best practices.
Inspect Other Wear Items
Beyond O-rings, other parts can wear out:
- Bumpers: The rubber bumpers at the end of the piston or cylinder can wear down, affecting the tool’s damping and potentially leading to damage if they fail completely.
- Seals in the Exhaust Port: Though less common, these can cause minor leaks or affect the direction of air exhaust.
- Drive Blade: While not a seal, the drive blade is a critical wear item. If it becomes dull or chipped, it won’t drive nails properly, and can damage the wood or the nail head.
- Springs: Various springs are used throughout the tool. While they don’t “wear out” in the same way as rubber, they can weaken over time or break.
Proper Storage
Store your nailer in a clean, dry place. Avoid extreme temperatures. If storing for a long period, it’s often recommended to