Quick Summary: Wondering how to check your nail gun warranty? It’s simple! Verify your purchase date, locate your proof of purchase (receipt or online order), and check the manufacturer’s website or product manual for warranty terms. This guide breaks down how to find and understand your nail gun’s coverage to protect your investment.
Hey there, fellow DIYers and woodworkers! Jack Shaffer here from Nailerguy. Ever bought a fantastic new nail gun, ready to tackle that dream project, only to wonder about its warranty? It’s a common question, and honestly, it can be a little frustrating not knowing exactly what’s covered or for how long. You’ve invested in a tool, and you want peace of mind, right? We’ve all been there!
Don’t worry, checking your nail gun warranty is much easier than you might think. This guide is designed to walk you through every step, jargon-free. We’ll help you find that crucial warranty information, understand what it means for you, and ensure you’re covered if anything unexpected happens. Let’s dive in and get you that reassurance!
Table of Contents
Why a Nail Gun Warranty Matters for DIYers
When you buy a nail gun, you’re investing in a tool that can make your projects faster, cleaner, and more professional. Whether you’re building a deck, crafting furniture, or just hanging some trim, a good nail gun is a game-changer. But like any power tool, things can sometimes go wrong. This is where your nail gun warranty steps in.
A warranty is essentially the manufacturer’s promise that their product will be free from defects in materials and workmanship for a specific period. It’s your safety net. If your brand-new nail gun decides to act up right out of the box, or if a component fails prematurely under normal use, a valid warranty can mean a free repair or even a replacement. That’s a huge relief and a significant saving!
Knowing how to check your warranty before you need it is key. It empowers you to understand your rights and what steps to take if a problem arises. It’s about protecting your hard-earned cash and ensuring your tool keeps working for you project after project.
Understanding Different Types of Nail Gun Warranties
Not all warranties are created equal. Manufacturers often offer different levels of coverage depending on the tool’s type, intended use, and price point. For DIYers and hobbyists, understanding these differences can help you manage expectations and choose the right tool for your needs.
Consumer vs. Professional Warranties
This is a big one. Many brands offer distinct warranty periods for tools used by professionals versus those used for occasional DIY tasks. A consumer warranty might be longer, while a professional warranty might cover more strenuous use but could be shorter in duration.
- Consumer Warranty: Typically for homeowners or hobbyists using a tool for non-commercial, personal projects. These usually have longer periods but might have limitations on usage intensity.
- Professional Warranty: For contractors and tradespeople using the tool daily for commercial purposes. These might be shorter but are designed to handle heavy, regular use, and often cover professional-grade components.
It’s crucial to know which category you fall into, as using a “consumer-grade” tool professionally can void its warranty. If you’re a serious hobbyist who uses your tool frequently and intensely, double-check if it qualifies for a professional warranty or if it’s strictly for light-duty use.
Limited vs. Full Warranties
You’ll often see the terms “Limited Warranty” and “Full Warranty.” Understanding the difference helps clarify what’s actually covered.
- Full Warranty: This is the simplest type. It means the manufacturer will repair or replace your product if it has a defect during the warranty period. No loopholes, just a straightforward promise.
- Limited Warranty: This is far more common. It means the warranty only covers specific parts of the nail gun or specific types of defects. It might exclude wear-and-tear items, damage from misuse, or certain components. Always read the fine print!
Specific Component Coverage
Some warranties itemize coverage for different parts of the nail gun. For example:
- The main body or motor might have a longer warranty than
- Consumable parts like O-rings, seals, or driving blades, which are expected to wear out over time.
- Batteries for cordless models often have their own separate, shorter warranty period.
This detailed breakdown helps you understand what types of failures are covered under warranty and what might be considered normal wear and tear.
Where to Find Your Nail Gun Warranty Information
Finding your warranty details is usually straightforward if you know where to look. It’s often tucked away in places you might not think of initially. Let’s go through the most common locations.
1. The Product Manual
This is the first and most important place to check. When you buy a new nail gun, it almost always comes with a user manual or instruction booklet. This document is packed with essential information, including:
- Operating instructions
- Safety guidelines
- Maintenance tips
- Warranty information!
Typically, the warranty section will be clearly labeled. It will outline the duration of the warranty, what it covers, what it excludes, and the procedure for making a warranty claim. Keep this manual in a safe place along with your proof of purchase.
2. The Manufacturer’s Website
Most tool manufacturers maintain comprehensive websites with dedicated support or warranty sections. Here’s how to navigate them:
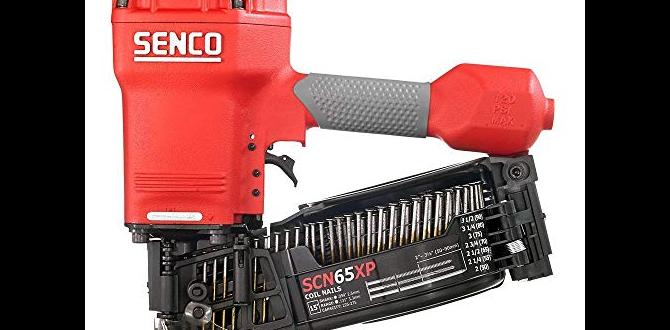
- Identify Your Manufacturer: Know the brand of your nail gun (e.g., DeWalt, Bostitch, Senco, Ryobi).
- Visit Their Official Website: Search for the manufacturer’s name online.
- Look for “Support,” “Service,” “Warranty,” or “Product Registration”: These links are usually found in the header, footer, or a navigation menu on their site.
- Find Your Model: Once on the warranty page, you might need to select your specific nail gun model from a list or enter its model number.
- Read the Terms: The website should provide detailed warranty terms and conditions for your product.
Many manufacturers also offer online product registration. Registering your tool can sometimes extend your warranty or make the claims process smoother, as they’ll have your purchase details on record.
3. The Product Packaging
Sometimes, a summary of the warranty period might be printed directly on the tool’s box or on an insert included with the packaging. While this is usually just a brief overview, it can give you a quick idea of the coverage duration while you look for the more detailed information.
4. Your Retailer’s Website or Store Records
If you purchased your nail gun online, check your order history on the retailer’s website (e.g., Amazon, Home Depot, Lowe’s). Your order confirmation email often includes product details and sometimes a link to manufacturer information or warranty details. If you bought it in-store, your physical receipt might have this information, or the store’s customer service might be able to look up your purchase if you have a loyalty card or other identifying information.
Essential Steps to Verify Your Nail Gun Warranty
Now that you know where to look, let’s get down to the practical steps for checking your nail gun’s warranty. This process ensures you have all the necessary information readily available.
Step 1: Gather Your Proof of Purchase
This is the absolute most critical piece of information. Without proof of purchase, even a valid warranty can be difficult, if not impossible, to claim. What typically counts as proof?
- Original Sales Receipt: Dated and showing the product purchased.
- Online Order Confirmation: An email or digital record clearly showing the purchase date, product, and retailer.
- Credit Card Statement: Showing the charge from the retailer for the nail gun (use this if you’ve lost the receipt, but it’s less ideal).
Action: Locate your receipt or order confirmation for your nail gun. If you can’t find it, immediately try to get a copy from the retailer or your online order history. Store this securely!
Step 2: Identify Your Nail Gun’s Model and Serial Number
Manufacturers use these numbers to track specific units and their manufacturing dates, which are tied to warranty periods. You can usually find them:
- On the Nail Gun Itself: Look for a sticker or metal plate, often on the base, side, or near the handle.
- In the Product Manual: Sometimes listed on the cover or an inside page.
- On the Original Box: The serial number is often printed here.
Action: Write down the precise model number and serial number. Keep this information with your proof of purchase and manual.
Step 3: Determine the Purchase Date
Warranties are time-sensitive. Knowing exactly when you bought the nail gun is crucial for calculating how much warranty coverage you have remaining.
Action: Refer to your proof of purchase (receipt or order confirmation). Note the date clearly.
Step 4: Check the Manufacturer’s Warranty Policy
Now, combine the information you’ve gathered to check the official warranty terms.
- Go to the Manufacturer’s Website: Find their official support or warranty page.
- Find Your Product: Navigate to your specific nail gun model.
- Read the Warranty Details: Look for the duration (e.g., 1 year, 5 years, lifetime), what’s covered (e.g., defects in materials, workmanship), and what’s excluded (e.g., user error, normal wear and tear, batteries).
- Compare Your Purchase Date: Calculate how much time is left on the warranty based on your purchase date.
Example: If your nail gun has a 3-year limited warranty and you purchased it 18 months ago, you still have 18 months of coverage remaining. If the warranty only covers motor defects and you’re having a problem with the trigger, you’ll need to check if triggers are excluded.
Step 5: Consider Product Registration
As mentioned earlier, many brands encourage or require product registration to activate or extend the warranty. Check if this was a step you needed to take and if you completed it.
Action: If you haven’t registered your nail gun, check the manufacturer’s website. Some systems allow registration even after the purchase date, though this might not always extend a standard warranty period.
What Does Your Nail Gun Warranty Typically Cover (and Not Cover)?
Understanding the scope of your warranty can save you a lot of headaches. Most manufacturer warranties aim to cover manufacturing defects, but there are common exclusions you should be aware of.
Commonly Covered Issues:
- Manufacturing Defects: Faulty parts or poor assembly that were present from the factory.
- Component Failure Under Normal Use: If a critical component like the motor, piston, or air cylinder fails unexpectedly during regular, intended operation.
- Workmanship Errors: Issues arising from how the tool was put together.
Commonly Excluded Issues:
- Normal Wear and Tear: Parts that naturally degrade over time with use, such as O-rings, seals, bumpers, and sometimes drive blades or springs. These are often considered maintenance items.
- User Error or Abuse: Damage caused by incorrect operation, dropping the tool, using it for unintended purposes, or failing to follow safety instructions.
- Lack of Maintenance: Failure to perform recommended maintenance, like cleaning, lubrication (if required), or using the wrong type of air/power source. For instance, using a compressor with too much PSI can damage a pneumatic nailer, and this damage is usually not covered. Refer to the OSHA regulations on tools for general safety standards to avoid misuse.
- Improper Power Source: Using incorrect battery types, voltage, or damaged power cords for electric or cordless models.
- Cosmetic Damage: Scratches, dents, or fading paint that don’t affect the tool’s functionality.
- Accidental Damage: Dropping the tool, running it over, or exposing it to extreme elements (unless specifically covered by an accidental damage plan, which is separate from a standard manufacturer warranty).
- Unauthorized Repairs or Modifications: Tampering with the tool or having it repaired by someone not authorized by the manufacturer.
It is quite common for batteries in cordless tools to have a separate, often shorter, warranty than the tool itself. Always check the specifics for both the tool and its accessories.
How to Make a Warranty Claim (If Needed)
If you discover a defect within your warranty period and believe it’s covered, here’s how most manufacturers handle warranty claims:
Step 1: Contact the Manufacturer’s Customer Support
Don’t go straight to the retailer unless the retailer specifically handles warranty claims for that brand. Your first point of contact should almost always be the nail gun manufacturer.
- Phone Number: Usually found in the manual or on their website.
- Email Address: A support or warranty claim email.
- Online Claim Form: Many manufacturers have a dedicated portal on their website for submitting claims.
Be prepared to provide:
- Your name and contact information.
- The nail gun’s model and serial number.
- Proof of purchase (a copy of your receipt or order confirmation).
- A detailed description of the problem you’re experiencing.
- Photos or videos can be very helpful if you can provide them.
Step 2: Follow Their Instructions
The manufacturer will guide you through the next steps. This might involve:
- Troubleshooting: They may walk you through some steps to see if the issue can be resolved without a repair.
- Return Authorization: If a repair or replacement is warranted, they will likely issue you a Return Merchandise Authorization (RMA) number.
- Shipping Instructions: They will tell you how and where to send the tool.
Step 3: Ship the Nail Gun (If Required)
Follow their packaging and shipping instructions carefully. Ensure you include the RMA number prominently. You may be responsible for shipping costs to the service center, though successful warranty claims usually cover the return shipping to you.
Step 4: Await Repair or Replacement
The time frame for repairs or replacements can vary. Be patient and keep records of your communication with the manufacturer.
Best Practices for Maintaining Your Nail Gun and Warranty
Keeping your nail gun in good working order is the best way to ensure it performs reliably and stays covered by its warranty. Proactive care can prevent many common issues.
Regular Cleaning and Lubrication
Check your manual for specific cleaning instructions. Generally, keeping the tool clean:
- Wipe down the exterior regularly.
- Ensure the magazine is free of dust and debris.
- Inspect and clean the air filter on pneumatic models.
- Apply a few drops of recommended oil to the air inlet (for pneumatic tools) or moving parts as specified in the manual.
Use the Correct Power Source
This is critical for both pneumatic and electric/battery models.
- Pneumatic: Always use the correct PSI (pounds per square inch) recommended by the manufacturer. Too much pressure can damage seals and internal components. Ensure your air compressor has a regulator and moisture trap. You can find resources on compressor safety and best practices from organizations like the Occupational Safety and Health Administration (OSHA) regarding compressed air safety.
- Corded Electric: Use appropriate gauge extension cords that meet the tool’s power requirements to avoid voltage drop.
- Cordless: Use only the batteries and chargers specifically designed for your nail gun model.
Store it Properly
When not in use, store your nail gun in a clean, dry place. A dedicated tool case or toolbox is ideal to protect it from dust, moisture, and accidental damage.
Inspect Regularly
Before each use, do a quick visual inspection:
- Check for any obvious damage.
- Ensure the safety tip is intact and functioning.
- Verify that it operates smoothly.
Read and Follow the Manual
This may sound obvious, but the manual is your best friend. It contains the manufacturer’s recommendations for operation, maintenance, and troubleshooting, all of which are crucial for keeping your tool in peak condition and your warranty valid.
Nail Gun Warranty Comparison Table (Sample)
To give you a