Quick Summary:
Looking for a budget-friendly way to add professional finishes to your DIY projects? A cheap pneumatic brad nailer offers fantastic value, providing consistent power and precision for trim work, molding, and more without breaking the bank. It’s often the best buy for beginners and hobbyists seeking reliable performance at an affordable price.
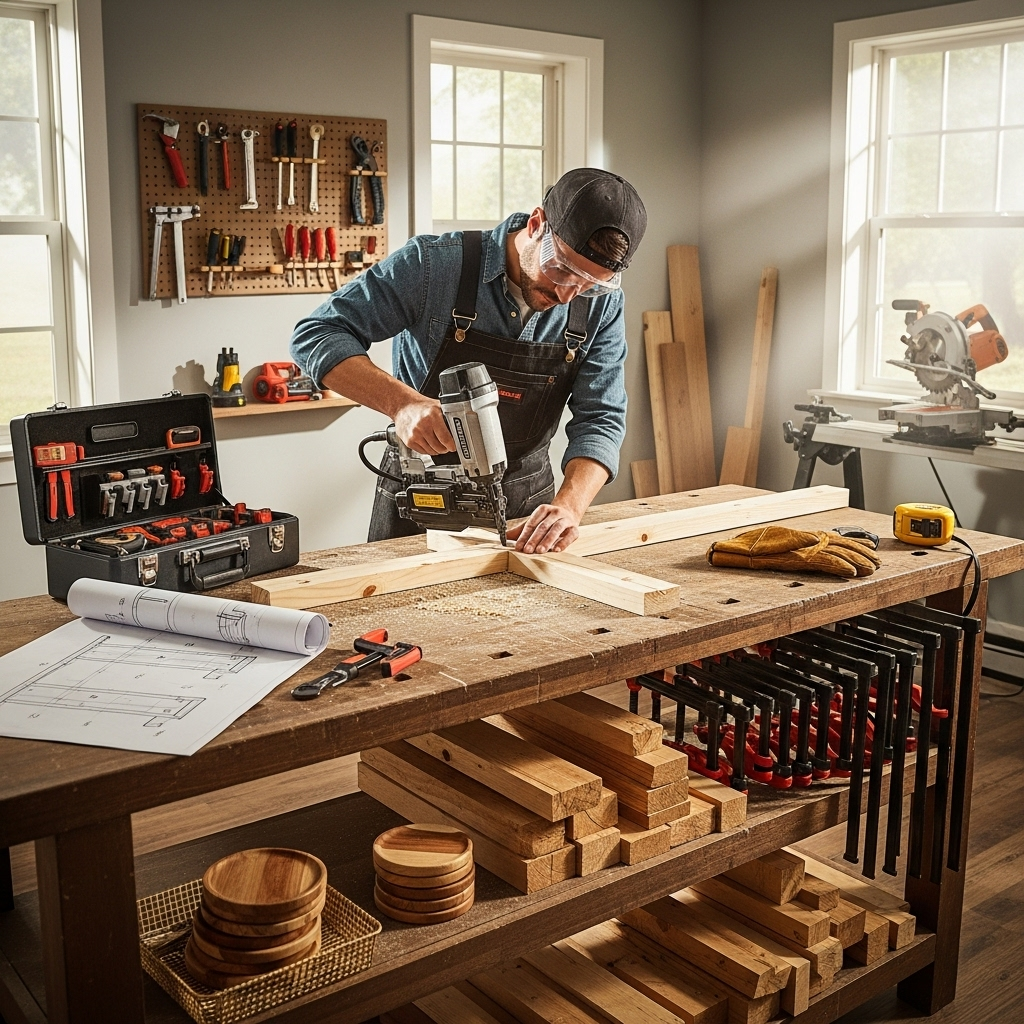
Hey there, DIYers and woodworking fans! Jack Shaffer here from Nailerguy. Are you tired of struggling with hammers and nails that just don’t want to go in straight? Do you dream of perfectly placed trim, seamless crown molding, or even building small furniture projects without all the fuss? Getting those finishing touches just right can feel like a challenge, especially when you’re starting out. But what if I told you there’s a tool that can make all of this easier and more enjoyable, without demanding a huge investment? Today, we’re diving into the world of the humble yet mighty pneumatic brad nailer and why picking up a “cheap pneumatic brad nailer for sale” might be one of the smartest decisions you make for your workshop. We’ll walk through everything you need to know to find a great deal and get nailing!
Table of Contents
Why a Pneumatic Brad Nailer is a DIYer’s Dream (Especially on a Budget)
Let’s be honest, as DIYers, we love a tool that makes our projects look professional without us needing a professional’s bank account. This is exactly where a pneumatic brad nailer shines. Unlike its battery-powered cousins, a pneumatic (or air-powered) nailer relies on compressed air to drive nails. This often means they are less expensive to purchase upfront, and the ongoing cost of maintaining them is minimal. They’re also generally lighter and simpler in design, which is a huge plus when you’re maneuvering around tricky corners or working overhead.
For beginners, the learning curve is also significantly gentler. You don’t have to worry about charging batteries or whether your tool will have enough juice to finish a project. As long as you have an air compressor and a brad nailer, you’re good to go! This combination of affordability, simplicity, and reliable performance makes a cheap pneumatic brad nailer an absolute game-changer for anyone looking to elevate their DIY game.
What Exactly is a Brad Nailer?
Before we dive into finding a great deal, let’s clarify what a brad nailer is and what it’s best used for. A brad nailer drives very thin, small-headed nails called brads. These nails are perfect for attaching delicate trim, molding, baseboards, window casings, chair rails, and even for holding pieces together while glue dries on smaller projects.
- Brad Nails: Small, thin nails with a tiny head. They leave a minimal hole that’s easy to fill and hide.
- Applications: Ideal for interior trim, delicate woodworking, picture frames, and light upholstery.
- Not For: Bracing heavy-duty structures or framing. For heavier work, you’d look at framing nailers or finish nailers, which use thicker nails.
The beauty of a brad nailer is its precision. It won’t split delicate wood like a heavier nailer might, and the small nail head means your finished project looks clean and polished. This focus on detail is what makes it such a popular tool for furniture making and interior finishing.
The “Cheap” Factor: Where Value Meets Performance
When we talk about a “cheap pneumatic brad nailer,” we aren’t necessarily talking about low quality. Often, on sale or from reputable budget brands, these tools offer incredible bang for your buck. The core technology of pneumatic nailers is mature and reliable, meaning well-made, affordable options are readily available.
The savings often come from features you might not need as a beginner. For example, some high-end nailers have tool-free jam release mechanisms, adjustable exhaust ports, or depth adjustment dials. While these are nice to have, their absence on a cheaper model doesn’t diminish the tool’s primary function: driving brad nails accurately and efficiently. You can absolutely achieve professional results with a more basic, budget-friendly model.
Key Features to Look for (Even When Buying Cheap)
Even when searching for the best deal on a “cheap pneumatic brad nailer for sale,” there are a few key features that will ensure you’re getting a tool that performs well and lasts.
- Nail Gauge Compatibility: Most brad nailers use 18-gauge brads. Ensure the nailer you choose is designed for this common size, as 18-gauge brads are widely available and affordable. Some nailers might also handle 16-gauge or even 20-gauge, but 18-gauge is the sweet spot for most DIY trim work.
- Depth Adjustment: While some cheaper models might not have a precise dial, look for some form of depth adjustment if possible. This helps you sink the nail just below the wood surface for easy filling. If it’s absent, you might need to be extra careful with your air pressure, which we’ll discuss later.
- Magazine Capacity: A good starting point is a magazine that holds at least 100 brads. This means fewer interruptions to reload, keeping your workflow smooth.
- Jam Release Mechanism: Ideally, look for a tool with a tool-free jam release. If a nail gets stuck, this feature makes it quick and easy to clear the jam without needing extra tools. If your budget model doesn’t have this, don’t fret – clearing jams is a learnable skill.
- Ergonomics and Weight: Even affordable tools should feel comfortable in your hand. If possible, hold the nailer before buying. A lighter tool will be less fatiguing during long projects.
- Air Inlet Size: Ensure the air inlet is a standard size (often 1/4-inch NPT) so you can easily connect standard air hoses.
The Companion Tool: Your Air Compressor
Remember, a pneumatic brad nailer needs compressed air to operate. This means you’ll also need an air compressor. If you’re new to air tools, this might seem like an added expense, but a small, portable compressor can be incredibly versatile for other tasks too, like airing up tires or powering other pneumatic tools. When looking for a compressor to pair with your new brad nailer, consider these points:
- PSI (Pounds per Square Inch): Most brad nailers operate in the 70-120 PSI range. Your compressor needs to be able to consistently deliver this pressure.
- CFM (Cubic Feet per Minute): This is the volume of air the compressor can deliver. A brad nailer needs very little CFM (often around 1-2 CFM @ 90 PSI), so a small pancake compressor or hot dog style compressor is usually sufficient. You don’t need a massive industrial unit for occasional DIY use.
- Tank Size: A larger tank stores more air, meaning the compressor motor runs less often. For a brad nailer, a tank size of 1-6 gallons is typically plenty.
Many starter kits include a small compressor, a brad nailer, and a hose, offering excellent value if you need the whole setup. If you already have a compressor, ensure it can meet the brad nailer’s requirements.
Setting Up and Using Your Cheap Pneumatic Brad Nailer Safely
Safety is paramount, always! Even with a budget-friendly tool, proper setup and handling will prevent injuries and ensure your success. Here’s how to get started:
Step-by-Step Setup Guide
- Unpack and Inspect: Carefully unpack your new brad nailer and check for any visible damage. Ensure all parts are present as per the manual.
- Read the Manual: Seriously, this is the most crucial step, no matter how cheap the tool is. The manual will have specific instructions for your model.
- Connect the Air Hose: Ensure your air compressor is turned off and unplugged. Attach a suitable air hose to the compressor’s outlet and then to the air inlet on your brad nailer. Most nailers use standard 1/4-inch fittings.
- Load the Brad Nails: Open the magazine (usually by pulling back a spring-loaded follower). Insert a strip of 18-gauge brads, ensuring the nails are facing the correct direction for your specific nailer (check the manual – usually they’re loaded with the heads facing up or down). Gently close the magazine.
- Connect to Air and Set Pressure: Plug in your air compressor and turn it on. Set the regulator on your compressor to the recommended PSI for your brad nailer, typically around 90-110 PSI. Start with a slightly lower pressure if you’re unsure and gradually increase if needed.
- Test Fire (Safely!): Point the nailer away from yourself and any people or pets. Press the safety contact tip (the part that sits against the wood) against a scrap piece of wood. Then, pull the trigger. You should hear the nailer fire and feel a nail embed in the wood. If you don’t, check your air pressure and nail loading.
Safety First! Essential Precautions
Working with any power tool requires attention to safety. Pneumatic nailers are no exception. Here are non-negotiable safety tips:
- Always Wear Safety Glasses: This is critical. Flying debris or stray nails can cause serious eye injury. Consider a full face shield for added protection.
- Never Point the Nailer at Anyone: Even when it’s not armed, treat it like a firearm. Accidental discharge can happen.
- Keep Fingers Off the Trigger When Not Nailing: Only place your finger on the trigger when you are ready to drive a nail.
- Ensure the Safety Contact Tip is Engaged: Most brad nailers have a safety mechanism that requires the tip to be pressed against the surface before the gun will fire. Always ensure this contact is made securely before pulling the trigger.
- Disconnect Air When Not in Use: When you’re done nailing, changing nails, or clearing a jam, disconnect the air hose from the nailer. This prevents accidental firing.
- Be Aware of Your Surroundings: Make sure no one is behind the surface you’re nailing into, especially if it’s a wall.
- Use the Right Nails: Always use the gauge and length of brad nails recommended for your specific nailer. Using the wrong size can damage the tool or cause jams. For more on nail safety and best practices, the Occupational Safety and Health Administration (OSHA) provides valuable information on power tool safety principles.
Comparing Cheap Pneumatic Brad Nailers: What to Expect
When you’re looking at “cheap pneumatic brad nailer for sale,” you’ll find a range of brands and models. While specific prices fluctuate, understanding what you get at different budget levels is helpful.
Entry-Level vs. Mid-Range Budget Options
Let’s break down what a typical cheap pneumatic brad nailer might offer compared to a slightly less “cheap” but still budget-friendly option.
| Feature | “Very Cheap” Model (e.g., <$50) | Budget-Friendly Model (e.g., $50-$100) |
|---|---|---|
| Build Quality & Materials | Often more plastic components, slightly less robust assembly. | More metal in critical parts, better overall feel and durability. |
| Jam Release | May require a tool (like a screwdriver) to clear jams. | Often features a tool-free jam release mechanism. |
| Depth Adjustment | Manual adjustment (e.g., by changing air pressure) or non-existent. | Basic depth adjustment dial or knob available. |
| Ergonomics | Functional, but might lack some comfort features. | Improved grip, better weight distribution for longer use. |
| Trigger Mechanism | Single-fire action primarily; some may have sequential fire options. | Often offers selectable trigger mode (single or contact fire). |
| Included Accessories | Nailer and a basic carrying case. | Nailer, carrying case, maybe a few starter brads or a coil of air hose. |
| Brand Reputation | Less known brands or house brands from big box stores. | Reputable budget brands or well-established brands’ entry-level lines. |
As you can see, even a small step up in price can bring significant improvements in convenience and durability. For example, a tool-free jam release is a significant quality-of-life improvement. However, if your budget is extremely tight, a “very cheap” model can still get the job done for occasional projects.
Top Brands to Watch for Deals
When you see a “cheap pneumatic brad nailer for sale,” keep an eye out for these brands. They often have excellent entry-level models or run frequent sales:
- Porter-Cable: Known for reliable tools at good price points. Their PC series brad nailers are popular budget choices.
- Hitachi/HiKOKI: Another brand that offers a great balance of quality and affordability.
- Arrow Fastener: A specialist in fastening tools, they often have very affordable and functional brad nailers.
- Stanley: A household name that offers basic, functional tools for DIYers.
- Ryobi: While famous for their cordless tools, their pneumatic offerings can also be competitive.
- Craftsman: Similar to Stanley, Craftsman provides budget-friendly options for the home user.
Always check reviews from other DIYers. Look for comments about reliability, ease of use, and common problems. Websites like Amazon, Home Depot, Lowe’s, and dedicated tool retailers are great places to start your search and compare prices.
When is a Cheap Pneumatic Brad Nailer NOT Your Best Buy?
While the allure of a low price is strong, it’s important to know when a cheap option might actually cost you more in the long run, or simply not be the right tool for your needs. Here are a few scenarios:
- Heavy, Frequent Use: If you plan on using the nailer daily, or for very demanding projects, a very cheap model might not hold up. You could end up needing repairs or replacements sooner than you’d like. For frequent, professional-level use, investing in a mid-range or higher-end tool with better durability is wise.
- Specific Project Requirements: As mentioned, a brad nailer is for trim and lighter tasks. If you’re building decks, framing walls, or doing heavy-duty construction, you need a framing nailer. Trying to use a brad nailer for tasks it’s not designed for will lead to frustration and potential failure.
- Lack of Essential Features for You: If critical features like depth adjustment or a reliable jam release are absolute must-haves for your peace of mind and project needs, a tool that completely lacks them might not be worth it, even if it’s cheap.
- Poor Reviews or Known Issues: Some bargain tools might be cheap for a reason. If a particular model is consistently reviewed as unreliable, prone to jamming, or difficult to use, it’s probably best to avoid it and look for a slightly more expensive but proven option.
Maximizing Your Investment: Tips for Making a Cheap Nailer Last
So, you’ve found a great deal on a cheap pneumatic brad nailer, congratulations! To ensure it serves you well for many projects to come, here are a few tips:
- Regular Oiling: Most pneumatic tools require a drop or two of pneumatic tool oil in the air inlet before each use or at the end of a long session. Check your manual for specifics. This keeps the internal mechanisms lubricated and prevents wear.
- Keep it Clean: After use, wipe down your nailer to remove sawdust and debris. Pay attention to the magazine and the tip.
- Clear Jams Promptly and Correctly: Don’t force jammed nails. Follow the manual’s instructions for clearing jams to avoid damaging the tool.
- Use the Right Nails: We can’t stress this enough. 18-gauge brads from a reputable brand will perform best.
- Don’t Over-Pressure: Stick to the recommended air pressure range. Too much pressure can stress the tool and potentially damage it or the workpiece. Too little, and you won’t drive nails properly.
- Store Properly: Keep your nailer in its case in a dry, safe place when not in use.
By taking these simple steps, you can significantly extend the life and performance of even an inexpensive pneumatic brad nailer.
FAQ: Your Questions Answered About Budget Brad Nailers
Here are some common questions beginners