Build a wooden letter organizer for desk effortlessly for a tidier workspace. This beginner-friendly guide provides simple steps to create a functional and attractive desk organizer, perfect for keeping your mail and important papers in order.
Is your desk drowning in a sea of papers and mail? It’s a common struggle for many of us. Piles of letters, bills, and important notes can quickly make your workspace feel chaotic and overwhelming. But what if I told you that you could create a simple, stylish solution right in your own workshop? Building a wooden letter organizer for your desk is a rewarding project that brings order and a touch of craftsmanship to your daily life. Don’t worry if you’re new to woodworking; this guide is designed to make it easy and fun. We’ll walk through everything you need, from gathering materials to the final, satisfying coat of finish. Get ready to transform your desk from cluttered to controlled!
Table of Contents
Why Build Your Own Wooden Letter Organizer?
There’s something incredibly satisfying about using something you’ve made with your own hands. When it comes to desk organization, a DIY wooden letter organizer offers several advantages:
Customization: You can build it to the exact size and style that fits your desk and your needs.
Durability: A well-built wooden organizer will last for years, unlike flimsy plastic alternatives.
Aesthetics: Wood adds warmth and a natural beauty to your workspace.
Cost-Effectiveness: Often, building it yourself is more affordable than buying a comparable high-quality organizer.
Skill Building: It’s a fantastic beginner woodworking project that teaches basic cutting, assembly, and finishing techniques.
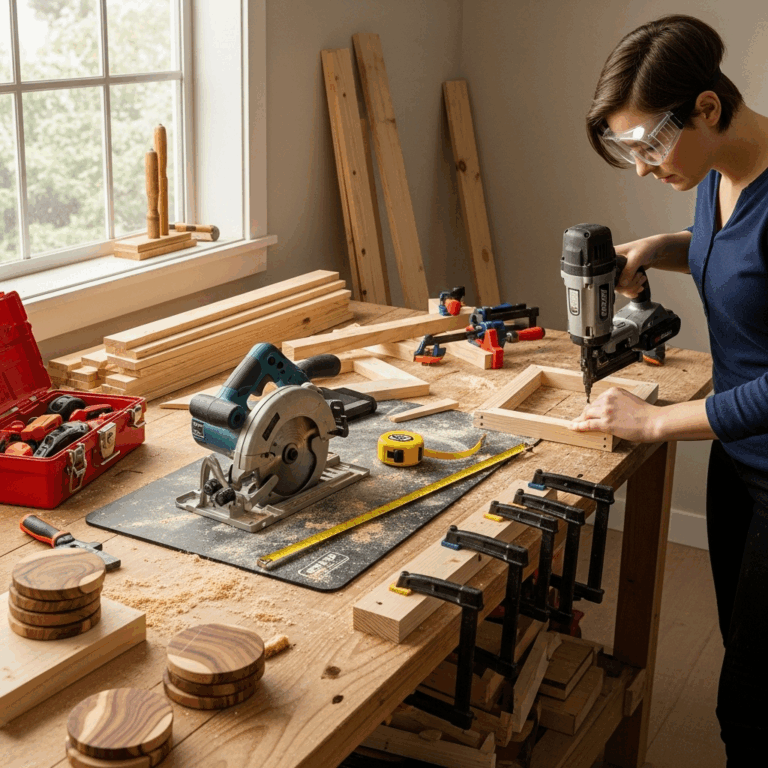
Tools and Materials You’ll Need
Before we start building, let’s gather our supplies. Think of this as your organized toolkit for this organized project! Safety first, always. If you’re unsure about any tool, check out resources like OSHA’s safety and health regulations for general industry to understand safe tool operation.
Essential Tools:
Measuring Tape: For accurate measurements.
Pencil: To mark your wood.
Safety Glasses: Non-negotiable for eye protection.
Saw: A handsaw (like a crosscut saw) is fine for beginners, or a miter saw or circular saw for quicker, straighter cuts.
Clamps: To hold pieces together while assembling.
Drill/Driver: With drill bits and driver bits.
Sandpaper: 120-grit and 220-grit for smoothing.
Sanding Block or Orbital Sander: Makes sanding easier.
Wood Glue: A strong, reliable adhesive.
Optional: Speed square (for marking straight lines), wood filler (for small imperfections).
Recommended Wood:
For a project like this, common and easy-to-work-with woods are ideal:
Pine: Inexpensive, lightweight, and easy to cut and sand. Great for beginners.
Poplar: A bit harder than pine, paints well, and takes stain reasonably.
Plywood (Birch or Maple): Offers good stability and a smooth surface. Look for 1/2-inch or 3/4-inch thickness.
For this project, we’ll assume you’re using 1/2-inch thick boards or plywood.
Material List:
One 1×6 board, 4 feet long (or equivalent plywood)
One 1×4 board, 2 feet long (or equivalent plywood)
Wood screws (e.g., 1-inch or 1 1/4-inch wood screws)
Wood finish (e.g., polyurethane, varnish, paint, or stain and sealant)
Rags for applying finish
Design and Dimensions: Planning Your Organizer
Our letter organizer will be a simple yet effective design with two compartments, perfect for separating incoming mail from outgoing items or various project papers. Here’s a common and easy-to-build layout:
Basic Design:
One back piece
Two side pieces
One bottom piece
Two dividers
Here are some suggested dimensions. Feel free to adjust these based on the thickness of your wood and the size of your desk space. We’ll aim for an organizer that’s roughly 10 inches long, 5 inches deep, and 6 inches tall at its highest point.
| Part | Dimensions (L x H) | Quantity | Wood Thickness |
|---|---|---|---|
| Back | 10″ x 6″ | 1 | 1/2″ |
| Sides | 5″ x 6″ (at back edge) tapering to 5″ at front edge | 2 | 1/2″ |
| Bottom | 9 1/2″ x 5″ | 1 | 1/2″ |
| Dividers | 4 1/2″ x 5 3/4″ | 2 | 1/2″ |
Note on Side Pieces: The side pieces will have a slight angle. The height at the tallest point (matching the back) is 6 inches. The front edge will be shorter to create a gentle slope. You can make this slope as subtle or pronounced as you like. For a gentle slope, measure 5 inches from the bottom up the front edge.
Step-by-Step: Building Your Wooden Letter Organizer
Let’s get building! Remember to measure twice and cut once. Taking your time here will ensure a great result.
Step 1: Cutting Your Wood Pieces
Using your measuring tape and pencil, carefully mark the dimensions on your chosen wood. Ensure your lines are square.
1. Cut the Back Piece: Measure and cut one piece to 10 inches long by 6 inches tall.
2. Cut the Bottom Piece: Measure and cut one piece to 9 1/2 inches long by 5 inches wide. This slightly smaller size allows it to fit inside the side and back pieces.
3. Cut the Side Pieces:
Measure and cut two pieces to 5 inches wide by 6 inches long.
On each of these side pieces, mark a point 5 inches up from the bottom on one of the 5-inch edges (this will be the front edge).
Draw a diagonal line from that 5-inch mark to the top of the opposite 5-inch edge (the back edge).
Carefully cut along this diagonal line. You should now have two trapezoid-shaped side pieces.
4. Cut the Dividers: Measure and cut two pieces to 4 1/2 inches wide by 5 3/4 inches tall. These dimensions assume the dividers will sit on top of the bottom piece and butt up against the sides.
Step 2: Sanding Your Pieces
Before assembly, it’s much easier to sand all your individual pieces.
Start with 120-grit sandpaper to remove any rough edges or saw marks.
Follow up with 220-grit sandpaper for a smooth finish that’s ready for glue and paint or stain.
Pay special attention to the cut edges.
Step 3: Assembling the Base
We’ll start by creating the main box structure.
1. Attach Sides to Bottom:
Take your bottom piece (9 1/2″ x 5″).
Stand one side piece upright on its longest edge, with the glued edge facing inwards. Apply a bead of wood glue along the bottom edge of the side piece.
Align this glued edge with one of the 5-inch sides of the bottom piece. The side piece should be flush with the edge if you intend to attach the back to the sides later, or slightly in from the edge if attaching the back to the bottom. For simplicity, let’s aim for the back to attach to the sides, so the bottom piece will sit within the sides and back.
Clamp the pieces together securely.
Pre-drill pilot holes through the side piece into the bottom piece (at least two holes).
Drive screws through the pilot holes to secure the side to the bottom.
Repeat this process for the other side piece on the opposite 5-inch edge of the bottom.
2. Attach the Back:
Apply wood glue along the back edges of both side pieces and the back edge of the bottom piece.
Align the back piece (10″ x 6″) so it’s flush with the back edges of the sides and the bottom. The sides should butt against the back piece.
Clamp everything together.
Pre-drill pilot holes through the back piece into the edges of the side pieces and the bottom piece.
Drive screws to secure the back piece.
You should now have a U-shaped structure standing upright. The angled tops of the side pieces will create a slope towards the front.
Step 4: Installing the Dividers
Now, we create the separate compartments.
1. Position Dividers: Decide where you want your two dividers to be placed. They should be parallel to the side pieces. Space them evenly in the 9 1/2-inch length of the bottom piece.
2. Glue and Screw:
Apply a bead of wood glue along the bottom edge of one divider and along the side edges where it will meet the inner walls of the organizer.
Carefully place the divider into position, resting on the bottom piece and against the side and back pieces.
Clamp it in place.
Pre-drill pilot holes through the side pieces into the edges of the divider, and through the bottom piece into the bottom edge of the divider.
Drive screws to secure the divider.
Repeat for the second divider.
Step 5: Final Sanding and Preparation
Once the glue is dry and the organizer is assembled, give it one last light sanding with 220-grit sandpaper.
Ensure all surfaces are smooth to the touch.
Wipe down the entire organizer with a tack cloth or a slightly damp rag to remove any dust. This is crucial for a good finish.
Finishing Your Wooden Letter Organizer
This is where your organizer really starts to shine! The finish not only protects the wood but also adds character.
Choosing Your Finish:
Paint: Offers a uniform color and can hide imperfections. Use primer first for best results.
Stain: Enhances the natural wood grain. You can choose a light or dark stain.
Clear Coat (Polyurethane, Varnish): Seals and protects the wood while maintaining its natural look. You can apply this over stain or directly to the wood.
Oil Finish (e.g., Tung Oil, Danish Oil): Penetrates the wood for a natural, matte finish. Easy to apply and repair.
For a beginner-friendly option, a clear coat of polyurethane is a great choice.
Applying the Finish:
1. Apply First Coat:
In a well-ventilated area, apply your chosen finish according to the manufacturer’s instructions.
Use a clean brush or rag. For polyurethane, apply thin, even coats. For stains, apply evenly and wipe off excess after a few minutes.
Let the first coat dry completely.
2. Light Sanding (if needed):
If you notice any rough spots or raised grain after the first coat dries, lightly sand with 220-grit sandpaper.
Wipe away all dust.
3. Apply Subsequent Coats:
Apply a second coat. Most finishes will require at least two coats for good protection.
Allow each coat to dry thoroughly. For oil finishes, you may be able to apply the next coat as soon as the previous one is absorbed.
4. Curing:
Allow the finish to cure fully before placing papers inside. This can take a few days to a week, depending on the product. Check the product instructions for specific curing times.
Tips for Customization and Maintenance
Once you’ve built this basic organizer, you can easily adapt it!
Customization Ideas:
Add a Small Shelf: Cut a small piece of wood to fit across the top front of the compartments to create a little ledge for pens.
Angled Dividers: Instead of straight dividers, cut them with the same angle as the sides for a more cohesive look.
Different Compartment Sizes: Adjust the width of the dividers. You could have one wide slot and one narrow slot.
Decorative Edging: Use a router to add a decorative profile to the edges of the organizer.
Labels: Paint or stencil labels onto the compartments (e.g., “Bills,” “To Mail,” “Projects”).
Color Contrasts: Paint the inside a different color than the outside for a pop of personality.
Maintenance:
Dusting: Wipe down regularly with a soft cloth.
Cleaning: For spills, wipe up immediately. If a deeper clean is needed, use a damp cloth and dry thoroughly. Avoid harsh chemicals that could damage the finish.
Touch-ups: If the finish gets scratched, you can often lightly sand the area and reapply a coat of your chosen finish for a seamless repair.
Frequently Asked Questions (FAQ)
Q1: What is the best type of wood for a beginner to use for this project?
A1: Pine is an excellent choice for beginners. It’s affordable, lightweight, and easy to cut, sand, and join. Poplar is also a good option if you plan to paint your organizer.
Q2: Can I use a handsaw for this project if I don’t have power tools?
A2: Absolutely! A sharp handsaw, like a crosscut saw, can be used. Just take your time to make straight, square cuts. Using a miter box can help guide your handsaw for accurate 90-degree cuts.
Q3: How do I ensure my screws don’t split the wood?
A3: Always pre-drill pilot holes! The drill bit should be slightly smaller than the diameter of your screw. This removes a small amount of wood, creating a channel for the screw threads and preventing the wood from splitting.
Q4: My cuts aren’t perfectly square. Will this ruin my organizer?
A4: Don’t worry! For a desk organizer, slight imperfections are often unnoticeable, especially once finished. You can use wood filler to fill small gaps before sanding and painting. Focusing on making the pieces fit together as squarely as possible during assembly is key.
Q5: How many compartments do I need?
A5: This design includes two compartments, which is great for common tasks like separating mail into “incoming” and “outgoing” piles. You can adjust this by changing the number and placement of your dividers. Three dividers would create four compartments.
Q6: What kind of screws should I use?
A6: For 1/2-inch thick wood, 1-inch to 1 1/4-inch wood screws are usually appropriate. Ensure they are not too long, as they could poke through the other side of the wood. Look for screws with a flat head, which will sit flush after driving.
Q7: How can I make my organizer look more professional?
A7: Careful sanding, clean glue lines, and a good quality finish are the biggest factors. Pre-drilling and countersinking your screws (drilling a slightly wider hole at the top of the pilot hole so the screw head sits below the surface) can also give a more polished look, especially if you plan to fill the holes with wood filler or plugs before finishing.
Conclusion
And there you have it – your very own custom-built wooden letter organizer for your desk! You’ve taken an idea and turned it into a functional, beautiful piece of workspace art. This project is a fantastic starting point for any DIYer, proving that you don’t need a fancy workshop or advanced skills to create something practical and satisfying.
Remember, the beauty of DIY is in its adaptability. Feel free to tweak the dimensions, add decorative touches, or even build an organizer with more compartments for different projects. The most important thing is that you’ve invested a little time and effort to bring order and a personal touch to your workspace. So, clear off that cluttered desk, place your new organizer with pride, and enjoy the renewed sense of calm and efficiency it brings. Happy building, and enjoy your beautifully organized space!