Have you ever tripped over a loose piece of quarter round? It can be annoying, right? This is where brad nails come to the rescue! Imagine trying to fix that wobbly trim with glue. You might end up with glue all over your hands. But with brad nails, the job is quick and clean.
Brad nails are tiny heroes for your house projects. They keep things neat and tidy. Did you know that brad nails are perfect for delicate tasks? Yes, they help keep quarter round in place without leaving dents.
Let’s journey into the world of these tiny nails. What makes them so special? And how do they magically hold things together?
Table of Contents
Optimal Brad Nails For Quarter Round: A Complete Guide

Brad Nails for Quarter Round
Ever wondered how to keep your quarter round trim in place? Brad nails are the answer! They’re perfect for this job because they’re small and sink in well, leaving no trace. You won’t need putty to cover up. These thin nails ensure the quarter round stays flush, offering a tight, clean look. Just imagine your snug, tidy room corners without a visible nail or bump — a true magic trick for your home.
Understanding Brad Nails and Their Uses
Definition and characteristics of brad nails. Common applications in woodworking and trim projects.
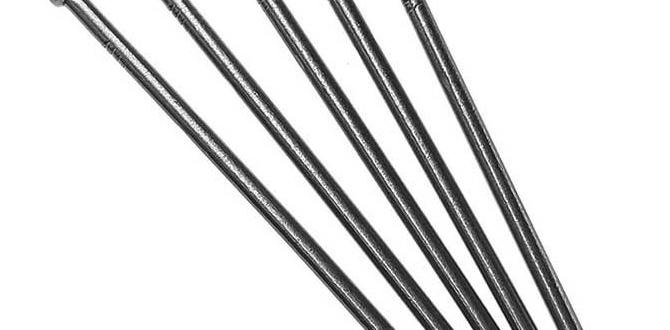
Imagine nails that are small but mighty! Yep, those are brad nails. They may look like tiny pins, but they’re heroes in woodworking and trim projects. Brad nails have slender builds; think of them as the toothpick ninjas of the nail world.
They’re ideal for attaching thin pieces without splitting. People use them for moldings, like quarter rounds. They sneak in quietly and hold things tight, making them perfect for neat, clean work where larger nails might be overkill. One popular tip: “When using brad nails, think small, work big!
Here’s a quick look at their characteristics:
| Characteristic | Details |
|---|---|
| Size | Usually 18-gauge |
| Length | 3/8 to 2 inches |
| Uses | Trim, molding, small wood projects |
Benefits of Using Brad Nails for Quarter Round
Advantages over other types of nails or fasteners. Impact on aesthetics and finish quality.
Using brad nails for quarter round has some great benefits. They are better than other fasteners because they are small, and leave a neat finish. This makes your room look nice and tidy. Brad nails help to avoid cracks in the wood, too. Their slim size doesn’t damage delicate trims, ensuring a smooth and clean appearance. These tiny nails hold tight without being seen, so your room looks polished and professional.
Why are brad nails preferred for quarter round?
Brad nails are often used for quarter round due to their small size. They disappear into the wood and create a clean look. This keeps your space looking neat. They also align well with the quarter round, improving aesthetic appeal.
How do brad nails impact finish quality?
Brad nails enhance the finish quality because they don’t split the wood. Their small heads leave tiny holes, so you get a smoother, more refined look without extra work.
- Small size prevents wood damage
- Visually discreet for a clean look
- Strong hold for secure installation
| Advantages of Brad Nails |
|---|
As a quote from a carpenter, “Brad nails make the quarter round look seamless and elegant.” With these nails, your house can have a professional finish while maintaining style.
Selecting the Right Size and Material
Recommended brad nail sizes for quarter round installation. Considerations for material types (steel vs. stainless steel).
Choosing the right nail size is crucial for a smooth quarter round install. Experts suggest a brad nail size between 1 to 1.5 inches. This length ensures that your trim stays put without poking through. But remember, not all nails wear the same armor!
Picking the right material is like choosing the best superhero costume. Steel brads are strong but can rust, while stainless steel brads are rust-proof and shiny. Here’s a quick guide to help you decide:
| Material | Pros | Cons |
|---|---|---|
| Steel | Strong, Affordable | Can Rust |
| Stainless Steel | Rust-Proof, Shiny | More Expensive |
For homes near the ocean, your best bet is stainless steel. So, choose wisely to keep your quarter round looking top-notch!
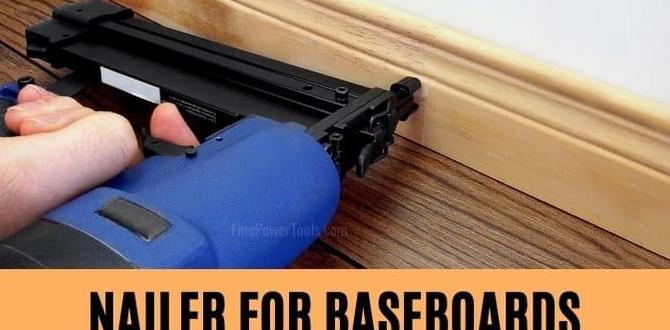
Tools Required for Installing Brad Nails
Essential tools: brad nailer, air compressor, etc.. Comparing manual versus pneumatic brad nailers.
To install brad nails for your quarter round, gather some essential tools. First, a brad nailer is your best buddy. It’s easy to use and you’ll feel like a wizard with a nail wand! There are two types: manual and pneumatic. Fancy words, right? **Manual ones** need a little muscle, while **pneumatic ones** use air. Speaking of air, you’ll need an air compressor too. It’s the breath of life for your pneumatic nailer. Let’s see how they stack up:
| Tool Type | Manual Nailer | Pneumatic Nailer |
|---|---|---|
| Power Required | Arm Strength | Air Compressor |
| Ease of Use | Needs Patience | Fast and Fun |
| Weight | Light | Moderate |
Did you know that using a pneumatic nailer can cut your work time by up to 50%? But don’t worry, there’s no test if you prefer the manual way!
Step-by-Step Guide to Installing Quarter Round with Brad Nails
Preparation and measuring for accurate cuts. Technique for nailing without splitting or damaging the wood.
Before installing quarter round, gather tools like a tape measure, saw, and brad nailer. Measure each wall to decide where to cut. Next, learn how to use brad nails. It can be tricky! Prevent the wood from splitting by placing nails at angles and keeping them in from the edge. This will help. While nailing, be gentle to keep the wood safe. If you’re stuck, ask an adult or watch a video. Now, have fun fixing up your space!
How do you make accurate cuts for quarter round?
To make accurate cuts, use a measuring tape. Measure the wall length carefully. Mark the length on the quarter round. Use a miter saw for angled cuts. Practice on scrap wood first.
Additional Cutting Tips:
- Double-check all measurements.
- Use a pencil to mark lightly.
- Wear safety glasses while cutting.
How to prevent quarter round from splitting?
To prevent splitting, keep nails away from edges. Know the right nail size. Use a nail set to push nails deep. If split happens, a bit of wood glue can help.
Installing quarter round can seem hard, but it’s not! Take your time. Work slowly and carefully. Enjoy how nice your home looks once you’re done!
Troubleshooting Common Issues
Solutions for splitting, bending, or misfiring of nails. Remedies for visible nail holes and maintenance tips.
Nailing issues can frustrate anyone. To prevent nails from splitting wood, use a thinner gauge. If nails bend, check the nailer’s pressure. Bent nails might mean it’s too high. Misfires can happen when nails jam. Make sure the nailer is clean and nails are the right size.
- If you see nail holes, fill them with wood putty.
- To keep your nailer working well, clean it often and check if it needs oil.
How do I stop nails from splitting quarter round?
Use smaller nails. Thinner nails cause less splitting.
Why are my nails bending when nailing quarter round?
Check the nailer’s pressure. Too much pressure can bend nails.
What can I do if my brad nailer keeps misfiring?
Clean and oil the nailer. This helps prevent jams.
Remember, regular maintenance can solve many issues. Once you get the hang of it, you’ll have neat and cozy quarter round every time.
Safety Tips for Handling Brad Nailers
Personal protective equipment and safe handling practices. Tips to avoid common accidents while using nail guns.
Grab your goggles and gloves before using a brad nailer—it’s safety first! Brad nailers, despite their size, can pack a punch. Ensure personal protective equipment (PPE) is worn at all times. Handling nail guns is like having a tiny superhero in your hand. Avoid pointing them at anything other than wood. Keep your fingers far from the nailing area; those brads are speedy! Remember: safety isn’t an option—it’s a necessity.
| Do | Don’t |
|---|---|
| Wear safety gear | Remove protection while working |
| Keep fingers clear | Touch nail tip casually |
Conclusion
Brad nails are great for attaching quarter round trim. They’re small and won’t split the wood. You can use a nail gun for quick, easy installation. When choosing nails, make sure they’re the right length. Now, try using brad nails in your next project. For more tips, look up videos or guides online, and you’ll become an expert in no time!
FAQs
What Length And Gauge Of Brad Nails Are Recommended For Installing Quarter Round Molding?
When you put up quarter round molding, use brad nails that are 1 to 1.5 inches long. These nails are thin, so they won’t split the wood. You should use 18-gauge nails, which are just the right thickness for this job. They hold the molding tight and keep it looking neat.
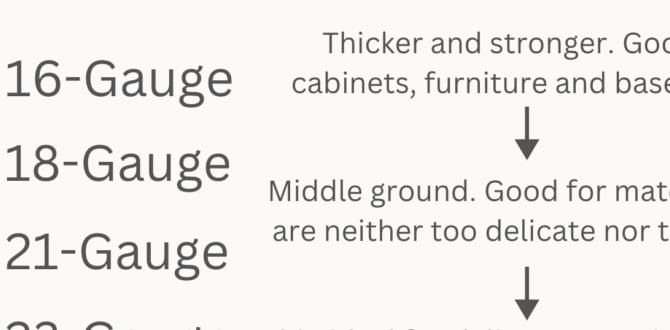
How Do Brad Nails Compare To Finish Nails When Used For Quarter Round Installation?
When we install quarter round, we can use brad nails or finish nails. Brad nails are thin and tiny. They are good for small, delicate work. Finish nails are a bit thicker and stronger. They hold better for bigger pieces of wood.
Can A Cordless Brad Nailer Effectively Install Quarter Round, Or Is A Pneumatic Nailer Necessary?
Yes, you can use a cordless brad nailer to install quarter round. It’s a type of tool that doesn’t need wires. It works well and is easier to carry around the house. A pneumatic nailer requires a noisy air compressor, which can be annoying. So, a cordless brad nailer is a good choice for this job.
What Are Some Common Mistakes To Avoid When Nailing Quarter Round With Brad Nails?
When nailing quarter round, watch out for some common mistakes. First, hold the quarter round steady so it doesn’t move. Make sure you don’t nail too close to the edge, or it might split. Keep your fingers away from the brad nailer tool to avoid getting hurt. Finally, check that the quarter round lines up straight with the wall and floor.
How Can I Ensure That Brad Nails Are Securely Fastened Without Splitting The Quarter Round?
To keep quarter round from splitting, use thinner brad nails. Make sure to place the nail in the middle. Hammer gently and slowly. If needed, make a small hole first with a drill to guide the nail.