A brad nailer makes furniture building faster, easier, and more professional. It drives thin nails through wood for secure joinery, reducing reliance on clamps and glue alone. It’s perfect for beginners needing a reliable tool for precise, clean finishes on DIY furniture projects.
Hey there, fellow builders! Ever looked at a beautiful piece of handmade furniture and thought, “Wow, that looks complicated”? I get it. Sometimes getting those joints just right can feel like a puzzle. But what if I told you there’s a tool that can make assembling furniture feel… well, effortless?
That’s where the humble brad nailer comes in. If you’re looking to build or repair furniture, this little workhorse can be your new best friend. It helps you achieve strong connections and a super clean look without all the fuss.
Don’t worry if you’ve never used one before. We’re going to walk through everything you need to know, from picking the right one to using it like a pro. By the end of this, you’ll be ready to tackle your furniture projects with more confidence and less sweat. Let’s get building!
Table of Contents
Why a Brad Nailer is Your Furniture Building Secret Weapon
So, you’re thinking about diving into furniture building, or maybe spruce up some existing pieces. You’ve probably got your wood, some glue, maybe even a staple gun. But a brad nailer? It’s a game-changer, especially for beginners.
Think about it: when you’re joining two pieces of wood for a table leg, a cabinet door, or a picture frame, you want them to stay put while the glue dries. Traditionally, you might use lots of clamps, or maybe even screws, which can leave visible holes. A brad nailer, on the other hand, drives thin, slender nails (called brads) that hold pieces together securely with minimal damage.
This means:
- Less waiting around for glue to set on its own.
- Stronger joints that can withstand regular use.
- Fewer visible marks, giving your furniture a cleaner, more professional look.
- A much quicker assembly process, so you can finish projects faster!
For furniture building, a brad nailer isn’t just a handy tool; it’s often an essential one for getting those smooth, robust, and aesthetically pleasing results that make DIY furniture shine.
Choosing the Right Brad Nailer for Furniture
Not all brad nailers are created equal, and picking the right one is key to a smooth building experience. The main things to consider are power source, gauge, and features.
Power Source: Pneumatic vs. Cordless
This is the first big decision. How will your brad nailer be powered?
Pneumatic (Air-Powered) Brad Nailers
These are the classic workhorses. They run off compressed air from an air compressor. They’re generally lighter, more powerful, and have a lower price tag for the tool itself. You’ll need to invest in an air compressor and air hose, which adds to the initial cost and takes up more space.
- Pros: Lightweight tool, high power, consistent performance, lower tool cost.
- Cons: Requires an air compressor and hose, noisy operation, need to manage the air line.
Cordless Brad Nailers
These are super convenient! They run on battery power, sometimes with a small fuel cell depending on the brand. No hoses, no compressor – just pick it up and go. They offer maximum portability and are fantastic for working in tight spaces or on the go. The newer models are very capable, though they can be heavier and more expensive upfront.
- Pros: Ultimate portability, no cords or hoses, quick setup.
- Cons: Heavier tool, battery needs charging, higher tool cost, sometimes less power than pneumatic.
Which is best for furniture building? For serious furniture builders or those who plan to do a lot of projects, a pneumatic nailer paired with a good compressor offers consistent power and reliability. However, for beginners or those who value convenience and portability above all else, a cordless model is an excellent choice and increasingly powerful.
Nail Gauge: The Thinnest is Often Best
Nail gauge refers to the diameter of the nail. For furniture building, you’ll typically want to use a brad nailer that fires either 18-gauge or 16-gauge brads.
- 18-Gauge Brad Nailers: These fire the thinnest nails (about 1mm in diameter). They create very small holes that are often invisible once filled or painted. This is usually the go-to for fine furniture work, trim, and delicate moldings.
- 16-Gauge Brad Nailers: These fire slightly thicker nails (about 1.4mm). They provide a bit more holding power but leave a slightly larger, though still small, hole. They’re great for slightly more robust projects or where you might be painting over the nails anyway.
For most furniture projects where a clean, finished look is important, an 18-gauge brad nailer is your best bet.
Key Features to Look For
Beyond the power source and gauge, here are a few features that make using a brad nailer much more pleasant for furniture building:
- Tool-Free Depth Adjustment: This lets you easily dial in how deep the nail sinks without needing to fiddle with settings or tools. Crucial for preventing nail heads from popping through delicate veneer or being too proud of the surface.
- Tool-Free Jam Release: Jams happen! A quick-release mechanism saves you time and frustration when a nail gets stuck.
- Selectable Trigger (Single/Sequential Fire): The ability to switch between firing one nail at a time (for precision) and bumping the trigger to fire multiple nails (for speed) is very handy. Most furniture tasks benefit from the precision of single fire.
- Swiveling Belt Hook: A small but useful feature for hanging the tool when you’re not using it.
- No-Mar Tip: A rubber or plastic tip on the nose of the nailer prevents it from marring the surface of your workpiece as you fire.
How to Use a Brad Nailer Safely for Furniture Projects
Safety is always the number one priority, especially when working with power tools. Brad nailers are generally considered safer than framing nailers, but they can still cause serious injury if not used correctly. Let’s go over the essentials to keep you safe and your furniture looking great.
Essential Safety Gear
Before you even plug in or load your nailer, make sure you have these on hand:
- Safety Glasses: This is non-negotiable. Always wear ANSI-approved safety glasses or goggles. Small bits of wood or even nail fragments can fly off.
- Hearing Protection: While brad nailers aren’t as loud as framing nailers, prolonged use can still affect your hearing. Earplugs or earmuffs are a good idea.
- Gloves: Work gloves can protect your hands from splinters and provide a better grip on the tool.
Understanding Your Brad Nailer’s Safety Features
Most modern brad nailers come with important safety mechanisms. Familiarize yourself with yours:
- Contact Trip Mechanism (or “Nailer Tip”): This is the part that touches the wood. The nailer won’t fire unless this tip is pressed firmly against the surface and the trigger is pulled.
- Trigger Lock-Off: A switch that prevents the trigger from being accidentally activated. Always engage this when the tool is not in use or when you’re changing nails or moving around.
Step-by-Step Safe Operation
1. Read the Manual: Seriously, every tool is slightly different. Your owner’s manual is your best friend for understanding your specific model.
2. Turn Off Power (if applicable): If you have a pneumatic nailer, disconnect it from the air source. If it’s cordless, remove the battery.
3. Insert Nails: Open the magazine and load the correct size brads. Make sure they are seated properly. It’s a good idea to have fewer than 10 nails in the magazine when initially testing or in potentially awkward positions.
4. Engage Trigger Lock: Make sure the trigger lock-off is engaged.
5. Connect Power (if applicable): For pneumatic, connect your air hose and ensure the compressor is set to the recommended PSI (usually found in your manual, often around 80-100 PSI for brad nailers). For cordless, insert the battery.
6. Test Fire (Safety First!): Point the nailer away from yourself and anyone else. Press the nose tip firmly against a scrap piece of wood. Pull the trigger. The nail should fire.
7. Position for Firing: Place the nose tip of the brad nailer firmly against the two pieces of wood you want to join. Ensure the tip is perpendicular to the surface to avoid angled or sideways nails.
8. Press Firmly and Pull Trigger: Apply firm pressure with the contact trip mechanism, then squeeze the trigger. The nail should drive into the wood.
9. Maintain Proper Stance: Stand balanced, with a good grip on the tool. Don’t overreach.
10. Disengage Trigger Lock: When you are done using the tool for a period, or when moving to a new work area, always re-engage the trigger lock.
Important Safety Reminders for Furniture Building
- NEVER point the nailer at yourself or anyone else. The contact trip mechanism is designed to prevent accidental firing, but don’t rely on it.
- Keep your fingers away from the nose of the nailer.
- Always engage the trigger lock when not actively firing nails.
- Never disable safety features.
- Be aware of where the nail will exit the workpiece, especially when working with thin materials or near edges.
- Use the correct nail size for your tool and project.
- Work in a well-lit and organized area.
Following these simple guidelines will help ensure your furniture building experience is safe and enjoyable.
Getting Started: Essential Steps for Furniture Assembly
Now that you’ve got your safety gear sorted and you understand the basics of operating your brad nailer, let’s break down how to actually use it for furniture building. It’s all about preparation and a steady hand.
Step 1: Plan Your Joinery
Even for simple furniture, thinking ahead is key. Where will the pieces meet? Will you use glue in conjunction with the nails? For most furniture projects, glue and nails work hand-in-hand. This combination provides strong, lasting bonds. For example, when attaching trim to a cabinet door, you’ll apply glue to the back of the trim, position it, and then use the brad nailer to hold it in place while the glue dries.
Step 2: Prepare Your Wood Pieces
Ensure your wood pieces are cut precisely and the edges that will join are clean and free of dust or debris. If you’re painting or finishing, this is also a good time to do any sanding needed before assembly, as it’s harder to reach those spots later.
Step 3: Load Your Brad Nailer
As mentioned in the safety section, load the correct gauge brads for your tool. Ensure the magazine is seated correctly.
Step 4: Set the Nail Depth
This is crucial for a good finish. You want the nail head to be just slightly below the surface of the wood, ready to be filled with putty or sanded flush.
- Test Depth: Use a scrap piece of the same wood you are working with.
- Adjust: Use your tool-free depth adjustment. If the nail is too deep (making a large dimple), reduce the depth. If it’s not deep enough (sticking out too far), increase the depth.
- Aim for Flush or Slightly Recessed: For a clean finish, you want the nail head either flush with the wood surface or sunk just a hair below it.
Step 5: Position for Nailing
Hold the pieces firmly together. If needed, use clamps to keep them from shifting while you position the nailer.
Place the brad nailer’s nose tip firmly against the surface where you want the nail to enter. Ensure it’s perpendicular to the wood.
Consider Nail Placement: For common joinery like a cabinet door frame, you’ll typically drive nails from the outside of the frame into the ends of the cross pieces. For attaching face frames to cabinet boxes, you’ll nail through the face frame into the box.
Spacing: Space your nails appropriately – usually 6-12 inches apart, depending on the joint strength needed. Don’t overdo it, as too many nails can split wood or make filling a chore.
Step 6: Fire the Nail
Once everything is positioned and you’re holding the brad nailer firmly, pull the trigger. The nail will fire.
Step 7: Repeat and Secure
Continue firing nails along the joint, maintaining firm contact and proper spacing.
Step 8: Clean Up and Counter-Sink (if needed)
Wipe away excess glue immediately with a damp cloth.
If any nail heads are slightly proud, you can gently tap them down with a nail set and hammer. Be careful not to dent the wood.
* Fill Nail Holes: Once the glue is dry, you can fill the nail holes with wood putty or filler that matches or can be stained/painted to match your wood.
Common Furniture Projects Perfect for a Brad Nailer
The versatility of a brad nailer means it can help with a surprising number of furniture projects. Whether you’re building something from scratch or making repairs, here are some ideas:
1. Building Cabinet Doors and Drawer Fronts
This is where an 18-gauge brad nailer truly shines. When building a cabinet door frame with stiles and rails, you’ll typically use glue and then brad nails to hold the joints together while the glue cures. The small holes are easily filled, leaving a professional-looking finish. The same applies to attaching decorative molding or beadboard to drawer fronts for added detail.
2. Attaching Face Frames to Cabinet Boxes
If you’re building your own cabinets, a face frame adds both structure and a finished look. After applying glue to the cabinet box, you can use your brad nailer to tack the face frame in place before proceeding with more permanent fasteners or simply to hold it while the glue dries if you’re going for a nail-only or glue-and-nail approach for certain styles.
3. Installing Trim, Molding, and Architectural Details
From baseboards and crown molding to decorative trim on furniture pieces, a brad nailer is indispensable. It allows you to secure trim quickly and cleanly without the need for excessive clamping or visible screw holes if you’re aiming for a smooth finish.
4. Assembling Small Boxes and Crate-Style Furniture
For projects like small decorative boxes, toy chests, or rustic crate-style shelving, a brad nailer is perfect for quickly joining the panels. It’s often used in conjunction with glue for strong, fast assembly.
5. Repairing Loose Joints or Reattaching Trim
Don’t underestimate the power of a brad nailer for fixing existing furniture! If a piece of trim has come loose, you can often re-secure it with a few strategically placed brads after applying some wood glue. Similarly, minor joint repairs on items like chairs or tables can sometimes be reinforced with brad nails.
6. Upholstery Support
While not directly for the fabric itself, if you’re building or modifying furniture for upholstery, a brad nailer is excellent for attaching the solid wooden frame components that the upholstery will be attached to, or for tacking on thin plywood sheathing for smooth surfaces.
Brad Nailer vs. Other Nail Guns for Furniture
It’s easy to get confused by all the different types of nail guns out there. For furniture building, a brad nailer is usually the top choice, but let’s quickly look at why and how it differs from others.
Brad Nailer (18-Gauge or 16-Gauge)
- Nail Size: Thin, 1.4mm (16-gauge) to 1mm (18-gauge).
- Purpose: Holding trim, moldings, small framing, delicate joinery, decorative elements.
- Hole Size: Very small, often invisible after filling.
- Best For: Furniture building, trim work, crafts, cabinetry.
Finish Nailer (15-Gauge)
- Nail Size: Slightly thicker, ~1.8mm.
- Purpose: Securing thicker trim, baseboards, chair rails, heavier moldings, and frame assembly where a bit more strength is needed but you still want to avoid large holes.
- Hole Size: Small, but noticeable and usually needs filling.
- Best For: More robust trim work, some furniture framing, when slight more holding power than a brad nailer is desired.
Dewalt DCBP034 20V MAX Cordless Brad Nailer
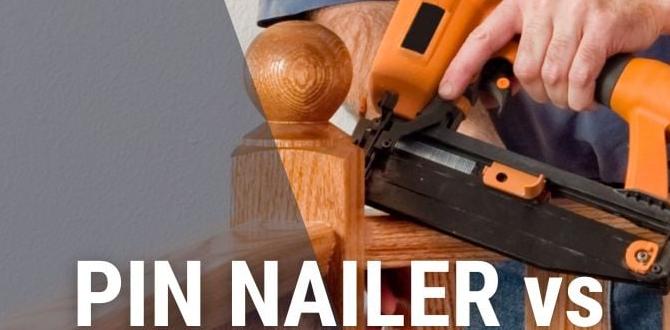
Brad Nailers vs. Pin Nailers (23-Gauge)
- Nail Size: Extremely thin, essentially headless pins (0.6mm).
- Purpose: Securing very delicate trim, aligning small parts, or when absolutely no visible hole is acceptable (pins can often be left as-is or are almost invisible).