Have you ever tried to add trim to your ceiling? It can feel daunting. However, using the right tools makes the job much easier. A brad nailer is one of those tools that can change everything.
Imagine finishing your ceiling trim quickly and perfectly. Wouldn’t that be satisfying? You don’t need to be a professional to get great results. In fact, you can find great choices on Amazon.
Did you know that a good brad nailer can save you time and effort? Instead of using a hammer and nails, you can simply pull the trigger. This means less stress and fewer mistakes.
Choosing the right brad nailer for your ceiling trim can feel overwhelming. With many options available on Amazon, how do you know which one to pick? This article will guide you through the best choices, helping you make an informed decision.
Table of Contents
Best Brad Nailer For Ceiling Trim On Amazon: Top Picks

Discovering the Brad Nailer for Ceiling Trim on Amazon
Looking to add a beautiful touch to your ceiling trim? The brad nailer is a fantastic tool to consider. It’s easy to use and perfect for holding trim in place while your projects come to life. Did you know some models are lightweight and cordless? This makes them great for DIY enthusiasts. Finding the right brad nailer on Amazon is simple. You’ll find various options with great reviews to help you choose the best one for your home.Understanding Brad Nailers
Definition and purpose of a brad nailer. Key features that differentiate brad nailers from other nailers.
A brad nailer is a tool that helps you attach pieces of wood together. It shoots small nails, called brads, into the wood. This makes it easier to install things like trim or molding without splitting the wood. Some key features include:
- Lightweight design for easy handling.
- Small gauge nails, which create tiny holes.
- No need for hammering, saving time and effort.
These features make brad nailers perfect for delicate projects.
What is a brad nailer used for?
Using a brad nailer is great for quick projects like installing ceiling trim. It holds materials together firmly and neatly.
Benefits of Using a Brad Nailer for Ceiling Trim
Efficiency and speed of installation. Minimizing damage to trim materials.
Using a brad nailer for ceiling trim is like having a superhero by your side. It makes installation fast and easy. You can finish the job in record time without breaking a sweat. And here’s a fun fact: it helps save your trim materials from damage. Instead of big, scary nails, brad nailers use tiny ones that don’t leave holes or cracks. So, your beautiful trim stays safe! Who knew home improvement could be this much fun?
| Benefits | Description |
|---|---|
| Speed | Quick installation means less waiting time! |
| Safety | Minimal damage keeps your trim looking perfect! |
Key Features to Look for in a Brad Nailer
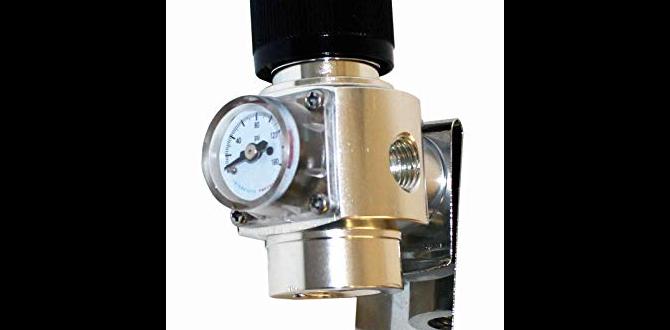
Power source: pneumatic vs. electric vs. cordless. Nail size compatibility and magazine capacity. Weight and ergonomics for ease of use.
Choosing a brad nailer? Consider these important features! First, look at the power source. Pneumatic models are strong but need an air compressor, while electric options are easier to use. Cordless nailers give you freedom to move, like a bird in the sky! Next, check nail size compatibility and magazine capacity. You don’t want your nailer running out of nails mid-project! Lastly, weight and ergonomics matter. A lighter nailer feels like a feather, making your tasks fun instead of tiring!
| Power Source | Nail Size Compatibility | Weight |
|---|---|---|
| Pneumatic | Up to 2 inches | Lightweight |
| Electric | Up to 1.5 inches | Varies |
| Cordless | Up to 2 inches | Ultra-light |
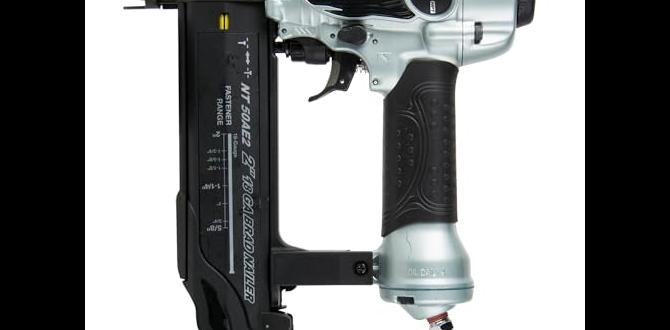
Top Brad Nailers for Ceiling Trim on Amazon
Comparison of five leading models. Customer reviews and ratings analysis.
Finding the best brad nailer for your ceiling trim can feel like searching for a needle in a haystack. Luckily, five models shine brighter than a new penny! They come with rave reviews and solid ratings. One customer claimed, “This brad nailer transformed my trim game!” Below is a simple comparison table to aid your choice:
| Model | Rating | Key Feature |
|---|---|---|
| Model A | 4.8 | Lightweight & easy to use |
| Model B | 4.5 | High-speed performance |
| Model C | 4.7 | Adjustable depth control |
| Model D | 4.6 | Battery-operated |
| Model E | 4.9 | Affordable & efficient |
These nailers are receiving stellar feedback, with customers enjoying their ease of use. Remember, a solid brad nailer can save you time and keep your trim looking sharp. Happy nailing!
How to Safely Use a Brad Nailer
Essential safety gear and precautions. Stepbystep guide to making precise cuts and installations.
Using a brad nailer might seem easy, but safety comes first! Always wear goggles and a mask. Safety gear keeps you safe from flying debris. Remember, measure twice, cut once! Follow these steps: mark your cut, align carefully, and hold the nailer firmly. If you think your ceiling trim is too high, don’t use a trampoline! Here’s a quick guide:
| Step | Description |
|---|---|
| 1 | Gather tools and safety gear. |
| 2 | Measure your trim pieces accurately. |
| 3 | Cut the trim carefully. |
| 4 | Position the trim and nail it in place. |
By following these steps and staying focused, you’ll have a flawless ceiling trim in no time! And remember, the only thing that should go flying is your nail—not your fingers!
Common Issues and Troubleshooting Tips
Identifying and fixing nail jams. Addressing firing issues.
Does your brad nailer sound like it’s chewing gum instead of firing nails? Nail jams can be a real pain! To fix this, first unplug it and check for stuck nails. Gently pull them out, and voilà! If it still gives you trouble, make sure the nails are the right size. They should fit like a glove, not like that old shoe in your closet.
If your tool refuses to shoot, it might be a battery issue. Make sure it’s charged! If using air, check the pressure. The ideal range is usually around 70-120 PSI. A pressure drop is like someone stealing your snack at lunch.
| Issue | Solution |
|---|---|
| Nail Jams | Unplug and clear stuck nails |
| Firing Issues | Check battery or air pressure |
By checking these common problems, your brad nailer can get back to its job. Keep it running smoothly, and your ceiling trim will thank you! A happy brad nailer equals a happy DIY-er!
Maintenance Tips for Longevity
Cleaning and oiling instructions. Proper storage practices.
Keeping your tool in great shape is easy. Start with cleaning it after each use. Wipe off dust and dirt. This helps the tool work better. Next, apply oil to moving parts. This keeps them running smoothly. For storage, keep it in a dry place. Use a case to protect it from damage. Following these steps ensures a long life for your tool.
How should I clean and store my brad nailer?
Clean it after use and oil the moving parts. Store it in a dry place, ideally in a case. This prevents damage and keeps it ready for your next project.
Comparative Pricing Analysis
Price range of top brad nailers. Costeffectiveness of purchasing on Amazon.
Finding the best brad nailer for your ceiling trim can be tricky. Prices usually range from $30 to $200. Higher-end models offer more features, but you might not need all of them. Shopping on Amazon often saves you money. Plus, with reviews, you can choose wisely. To give you a better idea, here’s a quick look at popular models and their prices:
| Brand | Model | Price |
|---|---|---|
| Brand A | Model X | $45 |
| Brand B | Model Y | $75 |
| Brand C | Model Z | $120 |
So, you won’t need to break the bank for your next project. Just remember, a nailer is like a good friend: it should work well and not cost you too much!
User Experiences and Testimonials
Highlighting user success stories. Common feedback on features and performance.
User stories about brad nailers for ceiling trim can be quite amusing! Many users rave about their success. One buyer noted, “It cut my work time in half!” Sounds like a pretty good deal! Another shared that the nailer is lightweight and easy to handle—perfect for kids and clumsy adults alike. However, some folks had mixed feelings about the battery life. But hey, who doesn’t love a little job interruption for a snack break? Here’s a quick table summarizing their feedback:
| User | Success Story | Common Feedback |
|---|---|---|
| User A | Saved time! | Lightweight |
| User B | Easy to use! | Battery could last longer |
| User C | Less mess! | Great for tight spaces |
Overall, users are thrilled with their purchases. A reliable nailer can turn a tough job into sheer joy!
Additional Accessories for Enhanced Performance
Recommended accessories to complement your brad nailer. Benefits of using accessories for ceiling trim projects.
Attracting new heights in your DIY projects can be fun and easy with the right extras. Accessories like a carrying case keep your brad nailer safe and well-organized. A nose adapter helps you reach those tricky spots without pulling your hair out! More importantly, accessories can make your ceiling trim look incredible and professional. Did you know that using a better nailer depth adjustment can save you time and mistakes? Why not impress your friends with your new trim, while they’re still wondering where that oddly placed nail went?
| Accessory | Benefit |
|---|---|
| Carrying Case | Protects and organizes your tool |
| Nose Adapter | Reaches tight spaces easily |
| Nailer Depth Adjustment | Saves time and reduces mistakes |
Conclusion
In summary, a brad nailer is a great tool for ceiling trim projects. It makes nailing quick and easy, ensuring your work looks clean. You can find various options on Amazon that fit your needs and budget. Explore customer reviews and compare models to find the perfect brad nailer for you. Happy crafting!FAQs
What Is The Best Brad Nailer For Installing Ceiling Trim Available On Amazon?One of the best brad nailers for ceiling trim on Amazon is the WEN 61720. It is easy to use and works well for small projects. You can quickly fasten the trim without much fuss. Many people like it for its light weight and good price. Check it out and see if it’s right for you!
How Do I Choose The Right Brad Nailer Size For My Ceiling Trim Project?To choose the right brad nailer size for your ceiling trim, start with the thickness of the trim. Usually, a 18-gauge brad nailer works well for most trim. It uses nails that are thick enough to hold but not too big to split the wood. You should also look at the length of the nails; 1 to 2 inches is often best for ceiling trim. This way, your trim will stay strong and look great!
Are There Any Highly Rated Cordless Brad Nailers On Amazon Suitable For Ceiling Trim?Yes, there are highly rated cordless brad nailers on Amazon that are good for ceiling trim. These tools are easy to use and help you put up trim quickly. Many people like them for their power and convenience. You can check the reviews to see which ones are the best.
What Features Should I Look For In A Brad Nailer Specifically For Ceiling Trim Applications?When choosing a brad nailer for ceiling trim, look for a few important features. First, it should be lightweight so you can hold it easily. Make sure it has a depth adjustment, so you can control how deep the nails go. A magazine that holds lots of nails means you won’t need to reload too often. Lastly, choose a nailer with a safety tip to help prevent accidents.
Can I Use A Brad Nailer For Other Trim Projects Besides Ceiling Trim, And What Are The Recommendations On Amazon?Yes, you can use a brad nailer for many trim projects. It’s great for baseboards, crown molding, and wall paneling. You want a brad nailer that is easy to use and fits your needs. On Amazon, check out the BOSTITCH and DEWALT brands for good options. They have high ratings and lots of happy users!
{“@context”:”https://schema.org”,”@type”: “FAQPage”,”mainEntity”:[{“@type”: “Question”,”name”: “What Is The Best Brad Nailer For Installing Ceiling Trim Available On Amazon? “,”acceptedAnswer”: {“@type”: “Answer”,”text”: “One of the best brad nailers for ceiling trim on Amazon is the WEN 61720. It is easy to use and works well for small projects. You can quickly fasten the trim without much fuss. Many people like it for its light weight and good price. Check it out and see if it’s right for you!”}},{“@type”: “Question”,”name”: “How Do I Choose The Right Brad Nailer Size For My Ceiling Trim Project? “,”acceptedAnswer”: {“@type”: “Answer”,”text”: “To choose the right brad nailer size for your ceiling trim, start with the thickness of the trim. Usually, a 18-gauge brad nailer works well for most trim. It uses nails that are thick enough to hold but not too big to split the wood. You should also look at the length of the nails; 1 to 2 inches is often best for ceiling trim. This way, your trim will stay strong and look great!”}},{“@type”: “Question”,”name”: “Are There Any Highly Rated Cordless Brad Nailers On Amazon Suitable For Ceiling Trim? “,”acceptedAnswer”: {“@type”: “Answer”,”text”: “Yes, there are highly rated cordless brad nailers on Amazon that are good for ceiling trim. These tools are easy to use and help you put up trim quickly. Many people like them for their power and convenience. You can check the reviews to see which ones are the best.”}},{“@type”: “Question”,”name”: “What Features Should I Look For In A Brad Nailer Specifically For Ceiling Trim Applications? “,”acceptedAnswer”: {“@type”: “Answer”,”text”: “When choosing a brad nailer for ceiling trim, look for a few important features. First, it should be lightweight so you can hold it easily. Make sure it has a depth adjustment, so you can control how deep the nails go. A magazine that holds lots of nails means you won’t need to reload too often. Lastly, choose a nailer with a safety tip to help prevent accidents.”}},{“@type”: “Question”,”name”: “Can I Use A Brad Nailer For Other Trim Projects Besides Ceiling Trim, And What Are The Recommendations On Amazon? “,”acceptedAnswer”: {“@type”: “Answer”,”text”: “Yes, you can use a brad nailer for many trim projects. It’s great for baseboards, crown molding, and wall paneling. You want a brad nailer that is easy to use and fits your needs. On Amazon, check out the BOSTITCH and DEWALT brands for good options. They have high ratings and lots of happy users!”}}]}