Have you ever looked at a piece of furniture and wondered what makes it so beautiful? The secret often lies in the wood stain used on it. Birch wood has a lovely, light color that many people adore. But how do you choose the right stain for it?
Imagine you just bought a new birch wood table. It looks nice, but you want to make it pop with color. A good stain can enhance its natural grains and give it character. This birch wood stain guide will help you discover the best options.
Did you know that birch wood can take stains differently than other woods? It’s true! This means the right stain can really change how your wood looks. In this guide, we will explore various stains, tips, and tricks for achieving the perfect finish on your birch wood projects.
So, are you ready to turn ordinary birch wood into something amazing? Let’s dive into the world of wood stains and find the perfect shade for your next project!
Table of Contents
A Comprehensive Birch Wood Stain Guide For Beginners

Birch Wood Stain Guide: Key Insights
Birch wood is special, but it can be tricky to stain. This guide shows you the best types of stains to use. For a light finish, consider water-based stains. They bring out birch’s natural beauty. Did you know that oil-based stains can darken the wood? Remember to prepare your surface well. A clean, smooth finish makes a big difference. Choosing the right color can transform your project, giving it a fresh, exciting look.Understanding Birch Wood
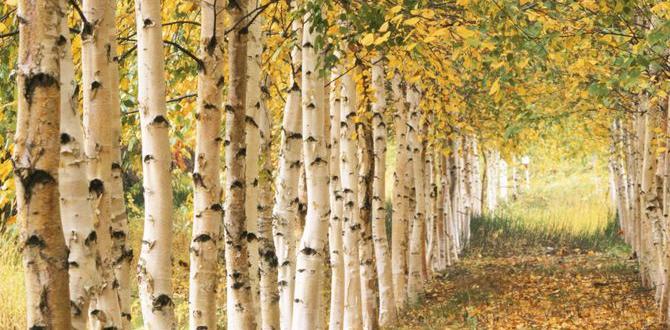
Characteristics of birch wood and its uses. Differences between yellow and white birch.Birch wood is known for its light color and smooth texture. It is strong yet flexible. This makes it perfect for furniture, cabinets, and flooring. There are two common types: yellow birch and white birch. Yellow birch has a warm, golden hue and is used in high-quality furniture. White birch is lighter and offers a bright finish. Both types are durable and attractive for various projects.
What are the main uses of birch wood?
Birch wood is popular for furniture, cabinetry, and hardwood flooring. Its beauty and strength make it a favorite choice for many people.
Characteristics of yellow and white birch:
- Yellow Birch: Warm color, used for fine furniture.
- White Birch: Bright color, great for light finishes.
Choosing the Right Stain for Birch Wood
Types of stains: waterbased vs. oilbased. How color selection affects the appearance of birch.When picking a stain for birch wood, think about two main types: water-based and oil-based. Water-based stains dry quickly and are easy to clean with water. Oil-based stains offer deeper colors but take longer to dry. Color choice matters too! Different shades can change how birch looks, making it warmer or cooler. Remember, light colors can show off the wood grain, while dark colors create a bold look.
What stains work best for birch wood?
The best stains for birch wood are usually water-based for quick jobs and oil-based for richer colors. Each brings a unique style to your project.
Types of Stains:
- Water-Based: Quick drying, easy cleanup.
- Oil-Based: Deeper colors, longer drying time.
Preparing Birch Wood for Staining
Necessary tools and materials for preparation. Steps for sanding and cleaning the surface.Get ready to prep your birch wood! You’ll need some simple tools and materials for a smooth finish. Grab sandpaper, a clean cloth, and wood cleaner. Start by gently sanding the surface. This helps remove any rough spots and opens up the wood’s pores. After sanding, wipe the surface with the clean cloth to remove dust. Finally, use wood cleaner to ensure the surface is ready for staining.
What tools do I need to prepare birch wood?
You need sandpaper, a clean cloth, and wood cleaner.Steps for Preparation:
- Sand the wood.
- Wipe with a cloth.
- Use wood cleaner.
Applying Birch Wood Stain
Techniques for even application. Recommended application tools (brushes, rags, and sprayers).To create a lovely finish on your birch wood pieces, even application is key. Start by selecting the right tools; for example, a smooth brush works wonders, while rags can help wipe off extra stain. Sprayers are great if you want to feel like a wood-staining ninja! Remember to apply the stain in the direction of the wood grain. You wouldn’t want your beautiful wood looking like it’s had a bad hair day, right?
| Application Tool | Advantages |
|---|---|
| Brush | Great for detail work |
| Rags | Easy cleanup and stain control |
| Sprayer | Fast and even coverage |
Just remember to test your chosen method on a small piece first and avoid any “oops” moments! Stick with these tips for a staining experience that’s smooth as butter.
Drying and Curing Process
Importance of drying times for different stain types. Tips for optimal curing conditions.Drying times matter a lot when using different stain types. Some stains set faster while others take their sweet time, like a turtle in a marathon. Follow the instructions on the can to get the best results. Keep the area warm and dry to help your project cure properly. Avoid drafts—your stain needs some love, not a chilly breeze! Here’s a table to help you remember staining and drying times:
| Stain Type | Drying Time | Curing Conditions |
|---|---|---|
| Oil-based | 6-8 hours | Warm, no humidity |
| Water-based | 1-2 hours | Cool, dry |
| Gel stain | 24 hours | Moderate temperature |
Staying patient is key. So, hold tight—your birch wood masterpiece will thank you later!
Common Mistakes to Avoid When Staining Birch Wood
Issues with blotchiness and how to prevent it. Overapplying stain and its consequences.Staining birch wood can be tricky. One big mistake is getting blotchiness. This can happen if you don’t apply a wood conditioner before staining. The condition helps the wood soak up the stain evenly. Another common error is overapplying stain. This can lead to a sticky and uneven finish.
- Use a wood conditioner to prevent blotchiness.
- Apply thin layers of stain to avoid stickiness.
- Always test on a scrap piece of wood first.
Remember, patience is key when staining birch wood.
What causes stains to be blotchy on birch wood?
Blotches occur when the stain doesn’t soak in evenly. This can be caused by uneven wood grain or not using a conditioner.
How do I avoid overapplying stain?
- Apply small amounts at a time.
- Use a brush or cloth to spread the stain evenly.
- Wipe off excess stain before it dries.
Post-Staining Care and Maintenance
Recommended sealants and finishes to protect stained wood. Cleaning and maintenance tips for longevity.After staining your wood, it’s important to protect it. Use high-quality sealants and finishes like a polyurethane or varnish. These products keep your wood safe from moisture and scratches. Regular cleaning helps too. Dust and wipe surfaces gently to maintain their beauty. Avoid using harsh chemicals. Instead, use warm soapy water for a clean and shiny finish.
What sealants should I use?
Use polyurethane or varnish for best results.
Maintenance Tips:
- Dust regularly with a soft cloth.
- Wipe spills immediately to prevent stains.
- Avoid harsh cleaners; stick with mild soap.
FAQs About Birch Wood Staining
Common questions and misconceptions. Troubleshooting common problems encountered during the staining process.Staining birch wood can lead to many questions. Here are some common concerns and troubleshooting tips.
What are common misconceptions about birch wood staining?
Many people think birch wood is easy to stain. In reality, its smooth surface can cause uneven color. Others believe all stains work the same. Different stains react differently with birch.
How can I fix common problems during staining?
- If the stain looks blotchy: Try a pre-stain conditioner first.
- If the stain is too dark: Lightly sand it and apply a lighter stain.
- If you see streaks: Use a clean cloth and wipe in the same direction.
Staining birch can be tricky, but with the right tips, you’ll get great results!
Conclusion
In summary, using a birch wood stain can enhance your projects beautifully. Choose the right stain shade for your needs. Prepare your wood surface well for the best results. Always test the stain before applying it to the whole piece. Now that you know these tips, dive into your next woodworking project with confidence! Happy staining!FAQs
What Are The Best Types Of Stains For Enhancing The Natural Beauty Of Birch Wood?The best stains for birch wood usually come in light colors. Water-based stains work well because they are easy to use and dry fast. You might like shades like light brown, honey, or natural. These colors make the wood’s grain look pretty without hiding it. Try testing a small area first to see what you like best!
How Can I Properly Prepare Birch Wood Before Applying A Stain?To prepare birch wood for stain, start by sanding it. Use medium sandpaper first, then switch to fine sandpaper. This smooths the wood and helps the stain stick better. Next, clean the dust off with a cloth. Finally, make sure the wood is dry before you apply the stain.
Are There Specific Techniques For Applying Stain To Birch Wood To Achieve An Even Finish?To get an even finish on birch wood, start by sanding the surface. Use a soft cloth to wipe away dust. Apply the stain with a brush or cloth in the same direction as the wood grain. Work in small sections and don’t let it dry too long before wiping off extra stain. Finally, let it dry completely before using the wood.
What Are The Differences Between Oil-Based And Water-Based Stains When Staining Birch Wood?Oil-based stains are thicker and take longer to dry. They usually give a richer color and last longer. Water-based stains dry faster and clean up easily with soap and water. However, they may not show the wood’s natural grain as well. Choose the one that fits your project and how you want your birch wood to look!
How Can I Remove Excess Stain From Birch Wood To Prevent A Blotchy Appearance?To remove excess stain from birch wood, you can use a clean, dry cloth. First, wipe the area gently to soak up extra stain. If it’s still too dark, you can use some mineral spirits on a cloth. This will lighten the color. Always test it on a small spot first to see how it looks.
{“@context”:”https://schema.org”,”@type”: “FAQPage”,”mainEntity”:[{“@type”: “Question”,”name”: “What Are The Best Types Of Stains For Enhancing The Natural Beauty Of Birch Wood? “,”acceptedAnswer”: {“@type”: “Answer”,”text”: “The best stains for birch wood usually come in light colors. Water-based stains work well because they are easy to use and dry fast. You might like shades like light brown, honey, or natural. These colors make the wood’s grain look pretty without hiding it. Try testing a small area first to see what you like best!”}},{“@type”: “Question”,”name”: “How Can I Properly Prepare Birch Wood Before Applying A Stain? “,”acceptedAnswer”: {“@type”: “Answer”,”text”: “To prepare birch wood for stain, start by sanding it. Use medium sandpaper first, then switch to fine sandpaper. This smooths the wood and helps the stain stick better. Next, clean the dust off with a cloth. Finally, make sure the wood is dry before you apply the stain.”}},{“@type”: “Question”,”name”: “Are There Specific Techniques For Applying Stain To Birch Wood To Achieve An Even Finish? “,”acceptedAnswer”: {“@type”: “Answer”,”text”: “To get an even finish on birch wood, start by sanding the surface. Use a soft cloth to wipe away dust. Apply the stain with a brush or cloth in the same direction as the wood grain. Work in small sections and don’t let it dry too long before wiping off extra stain. Finally, let it dry completely before using the wood.”}},{“@type”: “Question”,”name”: “What Are The Differences Between Oil-Based And Water-Based Stains When Staining Birch Wood? “,”acceptedAnswer”: {“@type”: “Answer”,”text”: “Oil-based stains are thicker and take longer to dry. They usually give a richer color and last longer. Water-based stains dry faster and clean up easily with soap and water. However, they may not show the wood’s natural grain as well. Choose the one that fits your project and how you want your birch wood to look!”}},{“@type”: “Question”,”name”: “How Can I Remove Excess Stain From Birch Wood To Prevent A Blotchy Appearance? “,”acceptedAnswer”: {“@type”: “Answer”,”text”: “To remove excess stain from birch wood, you can use a clean, dry cloth. First, wipe the area gently to soak up extra stain. If it’s still too dark, you can use some mineral spirits on a cloth. This will lighten the color. Always test it on a small spot first to see how it looks.”}}]}


