Quick Summary
Choosing the best roofing nail gun for asphalt shingles is crucial for a smooth, efficient, and durable roofing job. Look for pneumatic models with adjustable depth, a light trigger, and a tool-free jam release. Consider brands known for reliability and ease of use to make your shingle installation project a success.
Hey there, DIYers! Jack Shaffer here from Nailerguy, ready to help you tackle that roofing project. Installing asphalt shingles can seem daunting, but with the right tool, it becomes surprisingly manageable. That’s where a good roofing nailer comes in. If you’ve ever felt overwhelmed by the sheer number of options or wondered if a nail gun is really necessary, you’re not alone. Many folks find it a challenge to pick the perfect nailer that won’t break the bank and will actually get the job done right. But don’t worry! I’m here to walk you through everything you need to know to find the best roofing nail gun for asphalt shingles, making your next DIY job easier and more professional than ever. We’ll cover what to look for, some top contenders, and how to use it safely and effectively.
Table of Contents
Why a Roofing Nail Gun is Your Best Friend for Shingle Installation
Let’s be honest, hand-nailing asphalt shingles is slow, back-breaking work. It’s also more prone to errors, like under-driven or over-driven nails, which can lead to leaks and premature roof failure. A roofing nail gun transforms this tedious task into a much quicker and more consistent process. It drives nails precisely and consistently, ensuring each shingle is secured properly, which is vital for the longevity and weather resistance of your roof. Think about it: saving time, reducing physical strain, and getting a more professional, watertight finish is a win-win-win!
Key Features to Look for in the Best Roofing Nail Gun for Asphalt Shingles
When you’re shopping for a roofing nail gun, not all models are created equal. To make sure you get the most bang for your buck and a tool that performs well, keep an eye out for these essential features:
- Power Source: Most roofing nailers are pneumatic, meaning they run on compressed air. This is generally the best option for power and speed. You’ll need an air compressor that can keep up with the demands of frequent firing.
- Adjustable Depth of Drive: This is arguably the most critical feature. You need to be able to set the nail depth precisely. Nails that are too deep can damage the shingle and underlayment, while nails that are too shallow won’t hold effectively and can become a hazard. Look for a tool with an easy-to-adjust dial or lever.
- Nail Compatibility: Make sure the gun fires the correct type and size of roofing nails. Standard roofing nails are typically 1-1/4 inches long and have a clipped or rounded head. Your nailer should be designed to handle these specific fasteners.
- Lightweight Design: You’ll be holding and operating this tool for extended periods, often on an uneven surface. A lighter gun will significantly reduce fatigue and improve maneuverability.
- Ergonomic Grip: A comfortable grip is essential for control and reducing fatigue. Look for models with rubberized or padded handles.
- Tool-Free Jam Release: Jams are inevitable, especially with high-volume use. A tool-free jam release means you won’t need to hunt for an Allen wrench or other tools to clear a jammed nail, saving you valuable time and frustration.
- Safety Features: Most roofing nailers have a safety contact tip or trigger. This prevents the gun from firing unless it’s pressed against a surface, which is a crucial safety measure when working with potentially heavy tools at heights.
- Magazine Capacity: A higher capacity means fewer reloads, which speeds up the process. Many roofing nailers hold around 100-120 nails.
Understanding Nailer Types: Pneumatic vs. Other Options
While other types of cordless nailers exist, like battery-powered or gas-powered, pneumatic roofing nailers are the go-to for asphalt shingles for several good reasons:
- Power and Speed: Pneumatic nailers deliver consistent, high power needed to drive nails through shingles and into the roof deck efficiently. They are generally the fastest option.
- Reliability: Compressed air systems are known for their durability and consistent performance, especially in varying temperatures, which can sometimes affect battery performance.
- Cost-Effectiveness: While there’s an initial investment in a compressor, the nail guns themselves tend to be more affordable than their high-end cordless counterparts, and air is a cheaper medium than batteries or fuel cells over time.
Battery-powered and fuel-powered nailers might be convenient for some applications where an air hose is cumbersome, but for large shingle roofing jobs, the power, speed, and cost-efficiency of pneumatic tools usually make them the best roofing nail gun for asphalt shingles choice.
Top Picks: Some of the Best Roofing Nailers for Asphalt Shingles
Based on user reviews, professional recommendations, and performance records, here are a few roofing nail guns that consistently stand out for asphalt shingle installation. Remember, the “best” can depend on your specific needs and budget, but these are excellent starting points:
| Brand & Model | Key Features | Ideal For | Price Range (Approx.) |
|---|---|---|---|
| Hitachi/Metabo HPT NV45AE(S) | Lightweight, excellent depth adjustment, durable construction, tool-free jam release, comfortable grip. Fires nails from 3/4″ to 1-3/4″. | DIYers and professionals seeking a reliable, high-performance tool. | $$$ |
| Bostitch RN46 | Robust build, easy depth adjustment, powerful, good nail capacity (120 nails). Fires nails from 7/8″ to 1-3/4″. | Frequent DIYers or those tackling larger projects. Known for durability. | $$ to $$$ |
| DeWalt DCN480B (18V Cordless/Pneumatic Option) | While this is a battery-powered option that can be used with a compressor, it offers cordless convenience. Excellent depth control, consistent performance. Uses 18V XR batteries. | Those who prefer cordless but need the power for roofing. Can be run via compressor too. | $$$ to $$$$ (tool only) |
| Senco RH102 (or RH15) | Lightweight, balanced, tool-free safety, excellent depth control. Fires nails from 3/4″ to 1-3/4″. Known for comfort during long use. | Professionals and serious DIYers who prioritize comfort and efficiency. | $$$ |
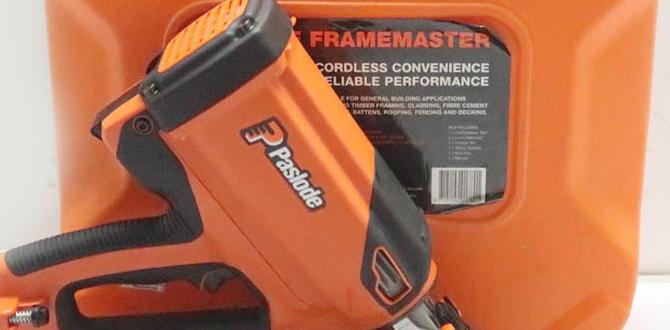
A Note on Brands: While I’ve listed some specific models, remember that companies like Paslode, Stanley Bostitch, Hitachi (now Metabo HPT), Senco, and DeWalt are all reputable brands in the tool industry. Often, their mid-range to higher-end roofing nailer offerings will serve you well.
Essential Accessories: What Else You’ll Need
Beyond the nail gun itself, you’ll need a few other things to get your roofing job done safely and effectively:
- Air Compressor: As mentioned, this is necessary for pneumatic nailers. Look for one with a tank capacity of at least 20 gallons and a CFM (Cubic Feet per Minute) output that meets or exceeds the nail gun’s requirements. Consistent airflow is key!
- Air Hose: A durable, kink-resistant hose (1/4″ diameter is common) of sufficient length to reach your work area comfortably is essential.
- Air Fittings and Couplers: You’ll need quick-connect fittings to attach the hose to the nail gun and the compressor.
- Safety Glasses: Non-negotiable! Protect your eyes from flying debris, dust, and accidental nail misfires. Look for ANSI Z87.1 rated safety glasses.
- Work Gloves: Protect your hands and improve grip.
- Roofing Nails: Ensure you have the correct size and type (typically 1-1/4″ shank, clipped or rounded head).
- Roofing Harness and Fall Protection: This is critical for safety when working at heights. Always prioritize fall prevention. Organizations like OSHA provide extensive guidelines on fall protection for roofing work.
How to Use Your Roofing Nail Gun Safely and Effectively
Now that you have your tool and accessories, let’s talk about making it work for you. Safety should always be your number one priority.
Step-by-Step Guide to Using Your Roofing Nail Gun
- Read the Manual: Seriously, every nail gun is a little different. Familiarize yourself with your specific model’s operation, safety features, and maintenance requirements.
- Set Up Your Air Compressor: Connect your air hose to the compressor. Ensure the compressor has enough air pressure. For most roofing nailers, this will be between 70-120 PSI, but always check your tool’s manual.
- Load the Nails: Open the nail magazine on your gun and load the correct roofing nails. Ensure they are seated properly. Close the magazine securely.
- Adjust Depth of Drive: This is crucial! Place the nail gun against a scrap piece of shingle and a piece of plywood (or the actual roof deck material). Fire a test nail. Check the depth. If it’s too deep (sunken into the shingle), increase the depth setting slightly. If it’s too shallow (sticking out), decrease the depth setting. Repeat until nails are driven just below the surface of the shingle, but not so deep that they break through the asphalt. A properly set nail head should be flush or slightly dimpled into the shingle surface.
- Connect the Air Hose: Attach the air hose to your nail gun using the appropriate fittings. Ensure the connection is secure.
- Turn On Compressor and Check Air Flow: Turn on your compressor and allow it to build pressure. Once it reaches the desired PSI, turn off the compressor or set it to cycle.
- Begin Nailing:
- Place the tip of the nail gun firmly against the shingle where you want to drive a nail.
- Ensure the safety contact is engaged.
- Pull the trigger to drive the nail.
- Lift the nail gun and move to the next nailing position.
- Maintain a Consistent Pattern: Follow the manufacturer’s recommendations for shingle installation, paying close attention to nail placement and exposure lines. Proper nailing is vital for wind resistance. Check out resources from the Asphalt Roofing Manufacturers Association (ARMA) for best practices.
- Clear Jams Promptly: If a nail jams, disconnect the air hose immediately. Use the tool-free jam release mechanism to clear the obstruction. Refer to your manual if unsure.
- Disconnect and Store: When you’re finished, disconnect the air hose from the nail gun. Turn off and drain your air compressor. Store your nail gun in a clean, dry place.
Safety First! Critical Safety Tips
Working on a roof is inherently risky. Here are some non-negotiable safety practices:
- Always wear safety glasses. No exceptions.
- Use a fall protection system. A roofing harness and lanyard are essential.
- Ensure your footing is secure. Clear debris from the roof surface.
- Never point the nail gun at yourself or others. Even when the air is disconnected, there can be residual pressure.
- Be aware of your surroundings. Watch out for power lines and other hazards.
- Disconnect the air supply before performing any maintenance or clearing jams.
- Keep the safety contact tip engaged on the work surface before and during firing.
- Do not overreach. Move your feet to maintain balance.
- Work during good weather conditions. Avoid rain, high winds, or icy surfaces.
Maintenance for Your Roofing Nail Gun
A little regular maintenance goes a long way in keeping your roofing nailer in top working condition:
- Oiling: Most pneumatic tools require a few drops of lightweight pneumatic tool oil in the air inlet each day before use. Check your manual for specific instructions.
- Cleaning: Keep the exterior of the gun clean. Wipe off dust and debris. Periodically, you might need to clean the nosepiece.
- Inspection: Before each use, inspect the gun for any damage, loose parts, or worn O-rings.
- Storage: Store the tool in a clean, dry environment, preferably in its original case or a tool bag to protect it.
Troubleshooting Common Roofing Nail Gun Issues
Even the best tools can have occasional hiccups. Here are a few common problems and how to fix them:
- Nails not driving fully:
- Check and increase air pressure.
- Adjust the depth of drive setting to be less aggressive.
- Ensure you’re using the correct nails and they are loaded properly.
- The tool might need lubrication.
- Nails driving too deep:
- Adjust the depth of drive setting to be more superficial.
- Ensure you’re not pressing too hard into the shingle.
- Nail gun firing intermittently:
- Check the air connection and ensure it’s secure.
- The tool may require lubrication or internal cleaning/maintenance.
- Debris might be obstructing the firing mechanism.
- Jamming frequently:
- Ensure you’re using quality, undamaged nails.
- Check for bent nails or debris in the magazine or driver blade area.
- The tool might need professional servicing if jams persist.
FAQ: Your Top Roofing Nailer Questions Answered
Q1: Do I really need a specialized roofing nail gun for asphalt shingles?
A1: Yes, it’s highly recommended. Roofing nail guns are designed with specific features like adjustable depth, a safety contact tip, and the power to drive nails through shingles and into the roof deck quickly and consistently. This saves time, reduces physical strain, and ensures a much more reliable and professional installation compared to hand-nailing or using general-purpose nail guns.
Q2: What size nails do roofing nail guns use?
A2: Most roofing nail guns for asphalt shingles fire 1-1/4 inch long nails. These nails typically have a shank diameter of around 11-12 gauge and feature either a clipped head (allowing for closer nailing) or a rounded head. Always check your nail gun’s specifications to ensure you use the correct nail size and type.
Q3: How much PSI do I need for a roofing nail gun?
A3: The required PSI (pounds per square inch) varies by nail gun model, but most operate effectively within a range of 70-120 PSI. It’s crucial to consult your nail gun’s manual for its specific recommended operating pressure. Too little pressure can result in nails not driving fully, while too much can damage the shingles.
Q4: Can I use a battery-powered nail gun for roofing shingles?
A4: Some battery-powered nailers are now powerful enough for roofing, offering cordless convenience. However, they can be more expensive and sometimes struggle with sustained high-volume use on a hot roof compared to pneumatic models. Pneumatic nailers, paired with a reliable air compressor, are still generally considered the most efficient and cost-effective choice for asphalt shingle installation for most DIYers.
Q5: How do I adjust the depth of drive on my roofing nail gun?
A5: Most roofing nail guns have an adjustment dial or lever, often located near the nose of the gun or on the side. You’ll typically turn it clockwise to drive nails deeper and counter-clockwise to set them shallower. Always test fire on scrap material to dial in the perfect depth – the nail head should be flush or slightly below the shingle surface.
Q6: What is the most important safety feature on a roofing nail gun?
A6: The most critical safety feature is the “contact trip” or “safety contact tip.” This mechanism prevents the nail gun from firing unless