The best all-purpose nailer for most DIYers is a cordless framing nailer. It offers unmatched versatility, power, and freedom from hoses and compressors, making it ideal for a wide range of projects from framing walls to building decks and fences.
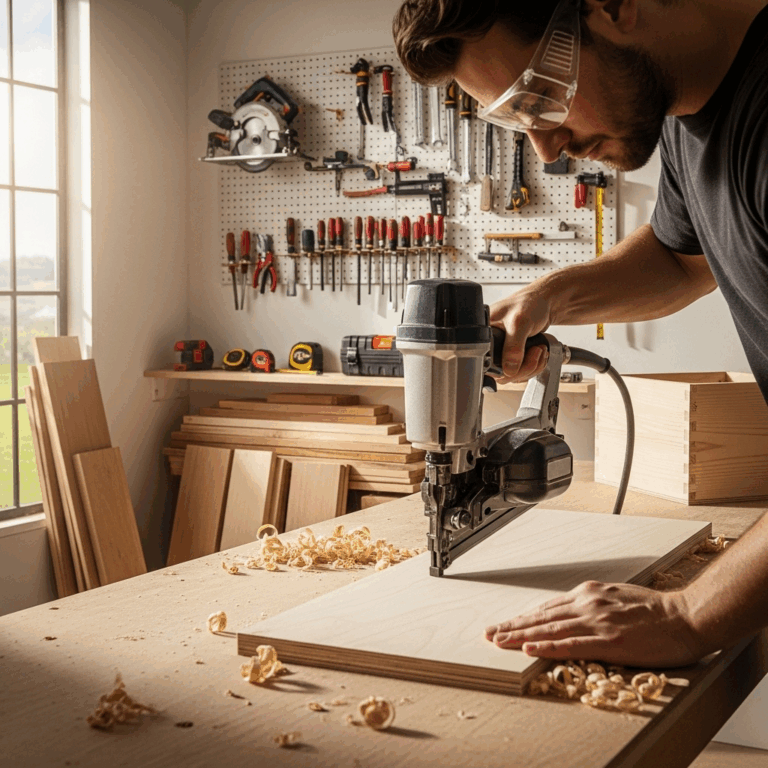
Hey there, fellow DIYer! Jack Shaffer here from Nailerguy. Ever felt like you’re juggling too many tools for one job? Especially when it comes to nailing, it can get complicated. Different projects need different nailers, right? You’ve got your tiny brad nailers for trim, your staplers for upholstery, and those big framing nailers for serious construction.
It’s a lot to keep track of, and honestly, it can be a bit overwhelming when you’re just starting out. But what if there was one tool that could handle a whole bunch of your projects without a fuss? Wouldn’t that be amazing? Well, you’re in luck! Stick around as we uncover the “best all-purpose nailer” that can seriously level up your DIY game.
Table of Contents
Finding Your Go-To Tool: What Makes a Nailer Truly “All-Purpose”?
The dream of an “all-purpose” tool is strong, isn’t it? For nailing, it means finding a nailer that’s not too specialized but can still tackle a decent variety of tasks. We’re talking about everything from building a sturdy bookshelf to putting up some decorative molding, or even tackling a weekend deck project. The trick is to find a balance between power, size, and the types of fasteners it can drive.
When we say “all-purpose” in the nailer world, we’re usually looking for a tool that can handle:
- Medium to larger projects: Think framing, decks, fences, and even backyard sheds.
- Nails of various sizes: It should be able to drive both longer framing nails and perhaps shorter finish nails.
- Versatility: Can it work with different materials? Can it be moved easily around a job site or your home?
It’s important to set realistic expectations. No single nailer is perfect for every single nailing task out there. For example, a nailer that’s great for framing a house might be overkill for delicate crown molding. However, there’s definitely a category of nailers that come closest to being that one-stop shop for the majority of DIY needs. We’re going to explore which one that is and why.
The Contender: Why Cordless Framing Nailers Shine as All-Purpose Tools
If I had to pick one nailer that comes closest to being the “best all-purpose nailer” for the average DIY homeowner and hobbyist woodworker, it would be the cordless framing nailer. Now, before you say, “But Jack, that sounds too powerful for small jobs!” hear me out. Modern cordless framing nailers are incredibly versatile and much easier to use than you might think. They’ve come a long way!
Here’s why they earn the all-purpose title:
- Power to Spare: They can easily drive large framing nails (typically 2-3.5 inches) through dense lumber. This means they can handle structural projects like building decks, fences, sheds, or even framing a small addition or a playhouse.
- Versatility with Nail Types: While designed for framing nails, many models are also capable of driving shorter nails (like 2-inch or even 1.5-inch nails) with the right settings and magazine adjustments. This can cover some lighter framing or even basic construction jobs where precision isn’t paramount.
- Freedom from Hoses and Compressors: This is a HUGE game-changer. No more wrestling with air hoses that get tangled or having to lug around a noisy compressor. You just grab your battery-powered nailer and go! This makes them fantastic for quick fixes, working in tight spaces, or job sites where power is limited.
- Adjustable Depth Control: Most good cordless framing nailers have a depth adjustment feature. This allows you to set how deep the nail drives into the wood. You can sink nails fully for structural strength or leave them slightly proud for certain applications.
- Sequential and Bump Fire Modes: Many models offer both. Sequential fire (or single shot) is precise – one trigger pull, one nail. Bump fire lets you rapidly drive nails by rocking the nose of the tool against the wood while holding the trigger. This is great for speed on larger repetitive tasks.
While they might not be the ideal tool for super fine trim work (where a brad nailer or finish nailer is better suited), their sheer capability and ease of use make them the undisputed champion for most “all-around” DIY needs. You can tackle the big stuff and often manage smaller construction tasks effectively too.
Understanding the Different Types of Nailers (And Why They Aren’t Always “All-Purpose”)
To truly appreciate why the cordless framing nailer is such a good all-rounder, let’s quickly look at some other common nailer types and where they excel (and where they fall short for general use).
1. Brad Nailer:
- What it’s for: Driving thin, small-headed nails (brads) into wood for interior trim, delicate decorative work, and light cabinetry.
- Why it’s NOT all-purpose: Lacks the power and nail size for any structural or heavy-duty construction. Very limited nail length (usually 5/8″ to 2.5″).
2. Finish Nailer:
- What it’s for: Driving nails with a slightly larger head than brads, suitable for attaching baseboards, crown molding, window casings, and other interior trim.
- Why it’s NOT all-purpose: Still not powerful enough for framing or deck building. Primarily for thinner materials and lighter construction.
3. Roofing Nailer:
- What it’s for: Specifically designed to quickly fasten asphalt shingles to roof decks. Has a large, flat or cup-shaped head to hold shingles.
- Why it’s NOT all-purpose: Utterly specialized. Nails are designed for roofing, and the tool is built for that one job. Useless for anything else.
4. Framing Nailer (Pneumatic):
- What it’s for: The workhorse for building house frames, decks, and other heavy-duty construction. Drives large, heavy nails.
- Why it’s almost all-purpose, but not quite: It has the power, but it requires an air compressor and hose. This makes it less convenient, less portable, and more setup-intensive than its cordless counterpart.
This quick comparison shows that while specialized nailers do specific jobs exceptionally well, they lack the breadth of capability that makes a tool truly “all-purpose” for a DIYer’s varied projects. The cordless framing nailer hits that sweet spot.
Choosing the Right Cordless Framing Nailer: Key Features to Look For
So, you’re convinced a cordless framing nailer is the way to go. Great! But not all cordless framing nailers are created equal. Here’s what seasoned pros and smart DIYers look for:
Power Source: Battery vs. Fuel Cell
Cordless nailers come in two main flavors:
- Battery-Powered (Li-Ion): These are the most popular and generally considered the best for all-around use. They use rechargeable lithium-ion batteries. You get consistent power, and the batteries can often be used with other tools from the same brand (like drills, saws, etc.). The drawback? Battery life can be a consideration for very long or demanding jobs, and batteries add to the cost.
- Fuel Cell + Battery: These use a small canister of fuel (like propane) ignited by a spark from the battery system to power the nailer. They can offer very high power and can often drive nails in very cold temperatures better than pure battery models. However, you have the ongoing cost of buying fuel cells, and some people prefer to avoid the smell or the “explosive” nature of the fuel system.
Recommendation: For most DIYers, a pure battery-powered (Li-Ion) cordless framing nailer is the most convenient and cost-effective choice in the long run, especially if you plan to invest in other tools from the same manufacturer’s battery platform. Brands like DeWalt, Milwaukee, Metabo HPT (formerly Hitachi), and Senco offer excellent battery-powered options.
Nail Capacity and Type Compatibility
Framing nailers use nails that are typically held together with a wire or plastic collation. The angle of the magazine (where the nails load) is critical.
- Common Angles: 21-degree (plastic collation) and 28-degree (wire collation).
- Nail Length: Most can handle nails from around 2 inches up to 3.5 inches.
- Nail Diameter: Look for common diameters like .113 (standard framing) to .131 or .148 (for tougher jobs).
Recommendation: Check what kind of fasteners are readily available and affordable in your area or online. If you plan on using it for some lighter tasks, ensure it can handle shorter nails (e.g., 2 inches). Most good framing nailers will specify their compatible nail lengths and collation types.
Weight and Ergonomics
You’ll be holding this tool for extended periods, so comfort matters. A heavy tool can lead to fatigue quickly.
- Try to hold the nailer if possible.
- Consider the balance of the tool.
- Look for comfortable grip materials.
Features to Enhance Usability
- Adjustable Depth of Drive: As mentioned, this is crucial for controlling how far the nail sinks.
- Tool-Free Jam Release: When a nail jams (it happens!), you want to clear it quickly without needing extra tools.
- Rafter Hook: Handy for hanging the nailer on your belt or a rafter while you’re on a ladder.
- LED Work Light: A small but very useful feature for dimly lit areas.
- Mode Selector (Sequential/Bump Fire): Essential for switching between precise nailing and rapid firing.
How to Use Your Cordless Framing Nailer Safely and Effectively
Safety is paramount with any power tool, especially one that drives nails with significant force. Here’s how to get the most out of your cordless framing nailer while staying safe.
Safety First: Essential Precautions
Before you even load a nail, let’s talk safety. It could save you a trip to the emergency room. For more detailed information on tool safety, the U.S. Consumer Product Safety Commission (CPSC) provides excellent guidelines. You can find their publications on tool safety at CPSC.gov.
- ALWAYS Wear Safety Glasses: This is non-negotiable. Flying debris or ricocheting nails are a real danger. Consider wearing safety glasses with side shields or a full face shield for maximum protection.
- Hearing Protection: While not as loud as an air compressor, nail guns can still be noisy. Earplugs or earmuffs are recommended, especially for prolonged use.
- Keep Fingers Away from the Trigger and Nose: Never point the nailer at yourself or anyone else. Be mindful of where the nose (the part that contacts the wood) is pointing.
- Understand the Firing Modes: Know whether your nailer is in sequential (single shot) or bump fire mode and use the correct mode for the task.
- Never Disable Safety Features: Don’t try to bypass the safety contact tip or any other engineered safety mechanisms.
- Check Your Work Surface: Ensure you know what’s behind the material you’re nailing. You don’t want to shoot a nail into electrical wires or plumbing.
- Secure Your Workpiece: Make sure the material you are nailing is stable and won’t move unexpectedly.
- Read the Manual: Every nailer is a bit different. Read your tool’s specific instruction manual thoroughly.
Step-by-Step: Loading and Firing Your Nailer
Let’s get this beautiful tool fired up!
- Ensure the Nailer is Off or Disconnected: If it has a power switch, turn it off. If it’s battery-powered, remove the battery.
- Open the Magazine: Most nailers have a spring-loaded magazine. You’ll usually pull back on a follower or release a latch to open it.
- Load the Nails: Carefully insert a strip of nails into the magazine. Make sure they are oriented correctly (usually with heads facing the right way for your specific nailer). Ensure the nails are of the correct size and collation type for your tool.
- Close the Magazine: Firmly slide the follower back until it latches securely, holding the nails in place.
- Reconnect Power: Reinsert the battery.
- Select Your Firing Mode: If your nailer has a mode selector, choose either sequential or bump fire. For most general DIY tasks where precision is needed, start with sequential.
- Position the Nailer: Place the nose of the nailer firmly against the wood where you want to drive the nail. Ensure the safety contact tip is depressed against the surface.
- Drive the Nail:
- Sequential Mode: Squeeze the trigger (this sets the nail). Then, push the nose of the nailer into the wood. The nail will fire.
- Bump Fire Mode: Keep the trigger squeezed. Then, quickly tap or “bump” the nose of the nailer against the wood. A nail will fire with each bump. Use this mode for speed when accuracy in exact placement isn’t critical.
- Adjust Depth (If Needed): If your nail isn’t sinking deep enough or is sinking too far, use the depth adjustment feature on your nailer. You might need to experiment on a scrap piece of wood.
- When Finished: Remove the battery and store the nailer safely.
Tips for Common DIY Projects
- Building a Deck Frame: Use sequential mode for precise placement of structural connections. Ensure you’re using the correct length and gauge of nails for joists and beams.
- Building a Fence: Bump fire can be very efficient for attaching pickets to rails, but use sequential for the main structural posts.
- Outdoor Furniture/Planter Boxes: A cordless framing nailer in sequential mode works great. You can often get away with 2-inch nails for these projects if your nailer supports them.
- Small Sheds/Playhouses: This is where the cordless framing nailer truly shines. It’s fast, portable, and powerful enough for almost all framing and sheathing tasks.
When the All-Purpose Isn’t Enough: What to Use Next
We’ve established that a cordless framing nailer is a fantastic all-rounder, but there are times when it’s not the best tool for the job. That’s when you’ll want to consider adding specialized nailers to your collection.
Here’s a quick cheat sheet:
For Fine Interior Trim & Molding:
- Brad Nailer: Ideal for delicate trim, baseboards, window casings, and where you want minimal visible nail holes.
- Finish Nailer: A step up from a brad nailer, good for slightly larger trim pieces and situations where the nails need a bit more holding power.
For Delicate Woodworking & Crafts:
- Staple Gun (Crown Stapler): For upholstered furniture, attaching fabric to frames, or securing thin plywood.
- Pin Nailer: Drives extremely small, headless pins, leaving almost invisible marks. Perfect for the finest woodworking details, mirror frames, or intricate projects.
For Roofing:
- Roofing Nailer: Specifically designed for the fast, efficient, and secure attachment of roofing shingles.
Think of your cordless framing nailer as your primary workhorse. As you take on more diverse projects, you can then add these specialized tools. It’s a journey, and building a comprehensive tool collection takes time and experience.