Best Nailer For Tongue And Groove Flooring: Proven Guide
For stunning tongue and groove flooring, the best nailer is typically a pneumatic flooring nailer (or a power stapler) designed specifically for this purpose, using L-shaped staples or blind nails at the correct angle to secure the flooring without damaging its appearance. This guide will help you find the right one.
Hey there, DIYers! Jack Shaffer here, your go-to guy for all things nailers. Laying tongue and groove flooring can seem a bit daunting at first, especially when it comes to fastening it down securely and beautifully. You want that perfect, seamless look without any nails showing, right? It’s a common puzzle many homeowners face when tackling wood flooring projects. You might be wondering if your old nail gun will do the trick or if you need a special tool. Don’t sweat it! This guide is here to walk you through everything you need to know to choose the perfect nailer for your tongue and groove flooring. We’ll break down the options, highlight what to look for, and ensure you feel confident moving forward. Get ready to nail this project!
Table of Contents
Understanding Tongue and Groove Flooring Fastening
Tongue and groove flooring is a fantastic choice for a clean, professional look. The way it’s designed – with a “tongue” sticking out on one edge and a “groove” on the other – allows planks to interlock. This makes installation smoother and creates a strong, unified surface. But here’s the rub: you want to fasten these planks securely without marring the beautiful wood surface. That means traditional face-nailing (driving nails straight down through the face of the plank) is usually a no-go for a pristine finish. We need a smarter way to get those fasteners hidden.
The magic behind securing tongue and groove flooring lies in blind fastening. This technique involves driving fasteners through the tongue of the board, at an angle, into the subfloor. Because the fastener is hidden within the tongue, it remains invisible once the next board is locked in place. This is exactly why specialized flooring nailers are so effective and, frankly, essential for a professional-looking job. They are engineered to drive fasteners at precisely the right angle and depth to achieve this beautiful, hidden connection.
Why the Right Nailer Matters for Tongue and Groove
Choosing the wrong tool can lead to a world of frustration. Imagine: you’re halfway through laying your gorgeous new floor, and your nails are either not going in straight, splitting the wood, or – the worst! – popping out and ruining the surface. Not fun. A dedicated flooring nailer, whether it’s a manual, pneumatic, or electric model, is designed to overcome these challenges. It ensures:
- Hidden Fasteners: The primary goal is a clean look with no visible nails or staples on the floor’s surface.
- Proper Angle: The tool drives fasteners at an optimal angle directly into the tongue.
- Consistent Depth: It sets the fastener just right, so it’s secure but not damaging the wood.
- Speed and Efficiency: Especially with pneumatic models, installation becomes much faster.
- Less Material Waste: Avoiding damaged planks means less material to discard.
Ultimately, the right nailer saves you time, reduces stress, and ensures your beautiful new floor looks exactly how you envisioned – professionally installed and flawless.
Types of Nailers for Tongue and Groove Flooring
When it comes to fastening tongue and groove flooring, you encounter a few main categories of tools. Each has its own strengths and use cases, and understanding them is key to making the best choice for your project and budget.
1. Pneumatic Flooring Nailers (The Pro Choice)
These are what most professionals use, and for good reason. Pneumatic nailers are powered by compressed air from an air compressor. They offer a great combination of power, speed, and control.
- How they work: Air pressure drives a piston that hammers the fastener into the wood. Many models also incorporate a mallet head, allowing you to lightly tap each plank into place before firing the fastener.
- Fasteners used: Typically use L-shaped staples (often called flooring staples) or specialized blind nails.
- Pros:
- Fastest installation speed.
- Powerful and consistent driving force.
- Durable and built for heavy use.
- Less physical exertion required once set up.
- Cons:
- Requires an air compressor and air hose, adding to cost and setup complexity.
- Can be heavier than other options.
- Initial investment can be higher.
2. Manual Flooring Nailers (The Budget-Friendly & Small Project Option)
These are often called “pull-bar” or “cleat nailers” because they typically use nails that are driven by striking a plunger with a mallet. They are a more manual approach.
- How they work: You place the nail into a slot, position the tool against the board, and strike the plunger with a mallet. The force of the mallet drives the nail through the tongue.
- Fasteners used: Usually specialized “cleats” or L-shaped nails.
- Pros:
- Most affordable option.
- No need for an air compressor or power source.
- Lightweight and portable.
- Good for small areas or occasional use.
- Cons:
- Much slower installation process.
- Requires considerable physical effort.
- Can be harder to maintain consistent nail depth and angle.
- May not be suitable for very hard woods.
3. Electric Flooring Nailers/Staplers (The Middle Ground)
These electric models aim to offer the convenience of a power tool without the need for an air compressor. Some are specialized for flooring, while others are more general-purpose staplers that can be adapted.
- How they work: They use an electric motor to drive the fastener. Some are specifically designed to fire staples at the correct angle for tongue and groove, often with a built-in mallet. Others are more versatile staplers that can attach flooring with some manual angling.
- Fasteners used: Primarily staples, but some might use nails.
- Pros:
- No compressor needed, easier setup.
- More portable than pneumatic setups.
- Faster than manual methods.
- Cons:
- Can be more expensive than manual nailers.
- May not offer the same speed or power as pneumatic options.
- Less variety specifically designed for blind fastening compared to pneumatic.
For most DIYers tackling a significant tongue and groove flooring project, a pneumatic flooring nailer is often the recommended tool if your budget allows. However, if you’re on a tight budget or only doing a small area, a manual nailer can still get the job done with patience.
Key Features to Look for in a Flooring Nailer
When you’re shopping for the best nailer for tongue and groove flooring, several features can make a big difference in performance and ease of use. Don’t just grab the first one you see! Here’s what to prioritize:
1. Fastener Compatibility
This is crucial. Ensure the nailer you choose is designed for the type of fasteners recommended for your specific flooring material. For most wood tongue and groove, this means it should work with:
- L-Shaped Flooring Staples: These are very common and effective for blind fastening.
- Blind Nails (Cleats): Some nailers use specialized narrow nails driven at an angle.
Check the specifications of the nailer and the flooring manufacturer’s recommendations. Using the wrong fastener can damage both the flooring and the tool.
2. Angle of Drive
The nailer must be able to drive fasteners at an appropriate angle (typically 30-45 degrees) into the tongue of the flooring. This is what allows for the blind fastening we talked about. Dedicated flooring nailers are designed with this angle built in.
3. Depth Control
You need to set the fastener to the correct depth. Too deep, and it might break through the surface of the next board or weaken the tongue. Too shallow, and the floor won’t be secure. Look for nailers with adjustable depth settings or a good reputation for consistent performance.
4. Integrated Mallet (for Pneumatic/Electric)
Many pneumatic and some electric flooring nailers have a built-in striking surface where you can gently tap each new board into place before firing the nail. This is incredibly useful for ensuring a snug fit and preventing gaps between planks.
5. Ergonomics and Weight
You’ll be using this tool for extended periods. Consider its weight, balance, and how comfortable the grip is. If you’re going with a pneumatic model, remember you also have the hose to manage.
6. Durability and Build Quality
Flooring installation can be tough on tools. Look for nailers made from durable materials like hardened steel. Reviews can be very helpful in gauging long-term reliability.
7. Ease of Loading
How easy is it to reload the fasteners? A quick and simple loading mechanism means less downtime on the job.
Recommended Nailers for Tongue and Groove Flooring (Examples)
While specific models can change, here are some highly regarded types and brands that consistently perform well for tongue and groove flooring. Remember to check current reviews and availability.
For Pneumatic Flooring Nailing:
- Bostitch MIIIFN: This is a workhorse in the industry. It’s known for its durability, reliability, and ability to handle a vast range of wood flooring, from softwoods to hardwoods. It shoots L-shaped staples and has integrated functionality for setting the nail.
- QuicKut 4-in-1 Flooring Tool: While not solely a nailer, this versatile tool often gets praise for its ability to staple, nail, and even act as a pull bar, making it a flexible option for DIYers. Check models specifically for tongue and groove use.
- Freeman PFL618C Pneumatic Flooring Nailer: A popular choice for DIYers and professionals alike, often praised for its balance of performance and price. It’s designed for both staples and cleat nails, offering versatility.
For Manual Flooring Nailing:
- Stanley-Bostitch Flooring N54FNA: A well-regarded manual cleat nailer. It’s straightforward to use with a mallet and is a solid choice for smaller projects or when an air compressor isn’t an option.
- Powernail 1600 or PRG500: Powernail is a brand synonymous with high-quality manual flooring tools. Their models are durable and designed for consistent performance, though they come at a higher price point for a manual option.
For Electric Flooring Nailing/Stapling:
- Roberts 10-20 & 10-22 Combination Flooring Nailers: Roberts offers electric options that are designed for this type of flooring. They can be a good compromise if you want power without the compressor.
Always research the specific model you are considering, read user reviews, and ensure it’s compatible with your flooring thickness and type. Reputable wood flooring suppliers often have specific tool recommendations for their products.
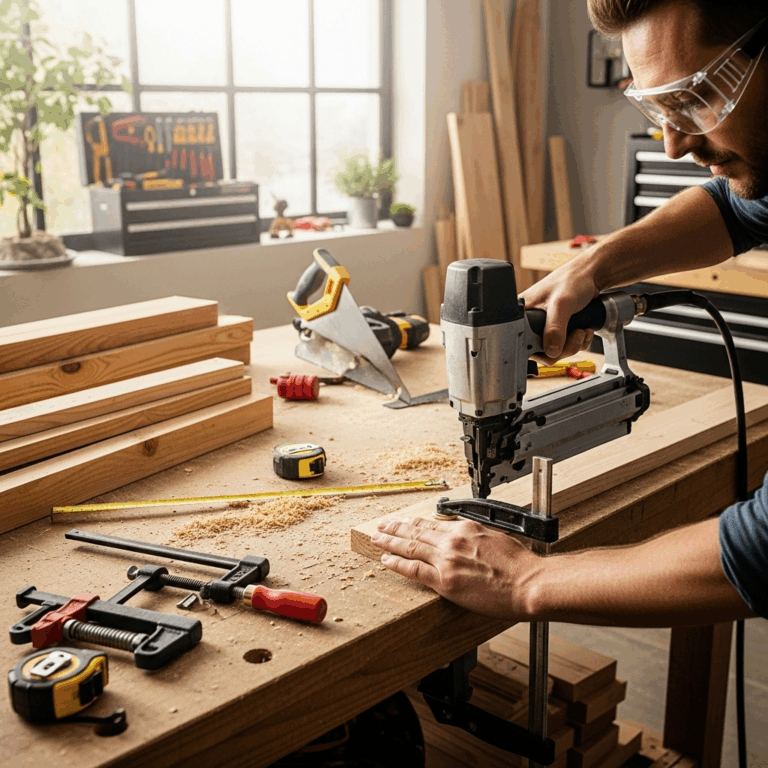
Step-by-Step Guide: Using a Pneumatic Flooring Nailer
Let’s walk through how to use a pneumatic nailer. This process is generally similar across most brands, but always refer to your tool’s manual for specific instructions.
Step 1: Preparation is Key
- Acclimate Flooring: Ensure your wood flooring has been acclimated to the room’s humidity and temperature for the manufacturer’s recommended time (usually 48-72 hours).
- Check Subfloor: Make sure your subfloor is clean, dry, flat, and securely attached. Any squeaks or loose spots in the subfloor will be amplified by the new floor.
- Gather Tools: You’ll need your flooring nailer, an air compressor (if using pneumatic), an air hose, safety glasses, gloves, a tape measure, a chalk line, a carpenter’s square, a utility knife, and potentially a saw for cutting planks.
- Inspect Flooring: Unpack planks and inspect them for any defects before installation.
Step 2: Set Up Your Compressor and Hose
- Place your air compressor in a well-ventilated area, away from direct dust and moisture if possible.
- Connect the air hose securely to the compressor and to your flooring nailer.
- Set the air pressure on your compressor according to the nailer manufacturer’s recommendations. This is usually between 70-100 PSI. Too little pressure can cause weak drives; too much can damage the tool or flooring.
Step 3: Lay the First Row
The first row is critical as it sets the foundation for the entire floor. Lay the first row of planks with the tongue facing the wall. You’ll likely need to remove the tongue from the edge of the planks facing the wall using a table saw or router. Secure these planks using a flooring nailer from the side (face nailing, though some tools can do this blind) or using screws. Ensure this row is perfectly straight and in position using a chalk line and straight edge. Your flooring nailer will typically be used starting from the second row.
Step 4: Engaging the Nailer
For the second row and beyond, the tongue of the board will face outwards.
- Position the flooring nailer’s magazine against the edge of the plank, ensuring the foot of the nailer is firmly seated on the tongue of the flooring. The angled nose of the nailer should be aligned with the groove of the previous plank.
- If your nailer has an integrated mallet, gently tap the nailer’s hammer head with a rubber mallet. This seats the plank snugly into the groove of the previous board.
- Hold the nailer firmly against the flooring. Depress the trigger to fire the fastener. The nail should go into the tongue at an angle.
Step 5: Fastening the Planks
- Drive fasteners every 6-8 inches along the length of the plank.
- Ensure each fastener is properly seated. If a fastener is too proud or too deep, remove it (if possible) and try again on that plank or the next.
- Continue this process, ensuring each plank is tightly engaged with the previous one before fastening.
Step 6: Handling End Joints and Cuts
When you reach the end of a row or need to make cuts:
- Measure and cut planks as needed, ensuring a tight fit. Stagger your end joints so they don’t line up between rows – this creates a stronger floor. A general rule is to have end joints offset by at least 6 inches.
- For the last plank in a row, you might need to use a pry bar or pull bar to snug it into place.
- The final few rows against the opposite wall may require you to cut off the tongue from the flooring planks and face-nail them, or use a specialized pull bar to get them in place and then blind nail. Some installers prefer to install the last row upside down and use a pry bar to pull it into place, then face nail, and install baseboards to hide the nail heads.
Step 7: Finishing Up
- Once all planks are installed, remove any dust and debris from the floor.
- Inspect all fasteners to ensure they are set correctly.
- Install baseboards and trim to cover any expansion gaps around the perimeter of the room.
Remember, practice on a scrap piece of flooring first to get a feel for your nailer’s pressure settings and how it drives the fasteners!
Tips for Success with Your Flooring Nailer
Beyond the basic steps, a few pro tips can elevate your flooring project from “good enough” to “wow!”
- Practice First: Seriously, grab some scrap pieces of your flooring and your nailer. Get a feel for the air pressure, the angle, and how much force is needed. There’s a learning curve, and practicing beforehand prevents costly mistakes on your actual floor.
- Keep it Clean: Dust and debris can clog the tool, especially the nose. Wipe it down regularly. Also, blowing out dust from the edges of your installed flooring before the next plank goes on ensures a tight fit.
- Don’t Overtighten: If your pneumatic nailer has a built-in mallet, use gentle taps. You’re not trying to smash the plank into place; you’re just ensuring a snug, gap-free joint.
- Listen to Your Tool: If the nailer sounds weak or the nails aren’t fully sinking, check your air pressure. If it’s sounding strained or driving too hard, you might need to reduce pressure slightly or investigate if something is stuck.