Best Nail Gun for Hardwood Floor Installation: Essential Guide
Choosing the best nail gun for hardwood floor installation is crucial. A properly selected nail gun ensures a secure, professional finish for your new hardwood floors. This guide will help you understand your options, from pneumatic to electric, and make the right choice for your DIY project, ensuring a beautiful and durable result.
Table of Contents
The Ultimate Beginner’s Guide to the Best Nail Gun for Hardwood Floor Installation
Hey there, DIY champs! Jack Shaffer, your Nailerguy, back with another guide to conquer your woodworking dreams. Laying a hardwood floor can be one of the most rewarding DIY projects you can tackle. The look, the feel, the sound—it’s beautiful! But let’s be honest, getting those hardwood planks securely fastened can feel a bit daunting, especially when it comes to choosing the right tool. Gone are the days of hammering every single nail by hand (phew!). Today, we’ve got specialized tools that make the job faster, easier, and way more professional. We’re talking about nail guns, specifically the best nail guns for hardwood floor installation. Stick with me, and by the end of this, you’ll know exactly what you need to get those beautiful hardwood floors laid down perfectly.
Why is the Right Nail Gun So Important for Hardwood Floors?
When you’re installing hardwood flooring, each plank needs to be securely fastened to the subfloor. This isn’t just about aesthetics; it’s about creating a stable, long-lasting floor that won’t squeak, shift, or warp over time. A good hardwood floor nailer drives nails at the perfect angle and depth, ensuring a strong bond without damaging the precious hardwood. Using the wrong tool can lead to several headaches:
- Damaged Boards: Overdriving nails or using the wrong size can split the wood or leave unsightly dents.
- Weak Installation: Underdriven nails won’t hold the boards securely, leading to squeaks and movement down the line.
- Slow Progress: Manual nailing is incredibly time-consuming and physically demanding.
- Frustration: Dealing with tool malfunctions or improper results can quickly turn an exciting project into a dreaded chore.
The right nail gun, however, makes the process remarkably smooth. It’s designed to hit that sweet spot: strong hold, minimal damage, and impressive speed. We’ll dive into the types of nail guns best suited for this job!
Understanding the Types of Nail Guns for Flooring
When it comes to hardwood flooring, we’re generally looking at two main types of nail guns, each with its own power source and benefits:
1. Pneumatic Nailers (Air-Powered)
These are the workhorses of the construction world and a popular choice for hardwood flooring. They use compressed air from an air compressor to drive the nail.
Pros of Pneumatic Nailers:
- Power and Speed: They deliver a powerful punch, driving nails quickly and efficiently.
- Lightweight Design: The gun itself is usually lighter because the compressor does the heavy lifting.
- Reliability: Generally very durable and reliable with proper maintenance.
- Cost-Effective: Once you have a compressor, the guns themselves can be quite affordable.
Cons of Pneumatic Nailers:
- Requires an Air Compressor: This is an additional piece of equipment you’ll need to buy, store, and maintain.
- Hose Management: You’ll be working with an air hose, which can sometimes get in the way or snag on flooring.
- Noise: Compressors can be quite loud.
For hardwood flooring specifically, you’ll want a pneumatic nailer that is designed for flooring. These are often called “flooring nailers” or “cleat nailers” and are angled to drive the fastener into the tongue of the hardwood plank at a precise angle (usually around 30 degrees). This is crucial for a secure grip.
Why a specialized flooring nailer? A standard framing or finish nailer won’t work well. Framing nailers drive too large a fastener, and finish nailers drive nails straight, which can split the hardwood or not hold it securely. Flooring nailers use “cleats” – L-shaped fasteners specifically designed for wood flooring.
2. Electric/Cordless Nailers
These nailers are becoming increasingly popular for DIYers due to their convenience. They run on batteries, and some models also have a corded option or use a small gas cartridge.
Pros of Electric/Cordless Nailers:
- Portability: No hoses or compressors means you can move around freely.
- Ease of Use: Simply charge the battery, load the nails, and go!
- Quiet Operation: Generally quieter than pneumatic setups.
- No Additional Equipment: You don’t need to invest in a compressor.
Cons of Electric/Cordless Nailers:
- Power Limitations: While powerful, they might not always match the raw driving power of a robust pneumatic nailer for very dense hardwoods.
- Battery Life: You’re dependent on battery charge, so you’ll need spares or a charging plan.
- Weight: The tool itself carries the weight of the motor and battery, which can make it feel heavier over a long installation.
- Cost: Cordless nailers, especially high-quality ones designed for flooring, can be more expensive upfront.
For hardwood flooring, you’ll typically be looking at cordless “finish nailers” or specific “cordless flooring nailers.” If you opt for a finish nailer, ensure it can handle the length of fasteners required for your flooring (usually 1.5 to 2 inches) and that you can drive the nails at the correct angle. Some cordless flooring nailers are designed with the angled head like their pneumatic counterparts.
What to Look for in the Best Nail Gun for Hardwood Floors
When you’re on the hunt for the “best nail gun for hardwood floor installation,” here are the key features and specifications to keep your eyes peeled for:
1. Nail Type and Size (Cleats!)
As mentioned, hardwood flooring typically uses L-shaped fasteners called “cleats.” These are cut nails, not wire nails, and are designed to grip the tongue of the hardwood plank securely without splitting the wood. The most common sizes for hardwood are:
- 16-gauge cleats: Good for softer hardwoods and engineered flooring.
- 18-gauge cleats: Ideal for slightly easier application or when you want less chance of splitting, though they offer a bit less holding power than 16-gauge.
Make sure the nail gun you choose is specifically designed for these cleats and can accommodate the length appropriate for your flooring thickness (usually 1/2″ to 3/4″ thick.”
2. Power Source
As we discussed, this will be pneumatic (air-powered) or electric (cordless/corded). For large-scale hardwood installations, pneumatic often takes the crown for raw power and sustained use. However, for smaller DIY projects or if you value portability, a good cordless flooring nailer can be a fantastic choice.
3. Angled Head Design
This is critical for hardwood. The nailer needs to drive the cleat at an angle into the tongue of the floorboard. This angle (typically around 30 degrees) provides the best holding power and minimizes the risk of splitting the wood. You’ll see this feature on dedicated hardwood flooring nailers.
4. Depth Adjustment
The ability to adjust how deep the nail is driven is essential. You want the nail to be fully countersunk, meaning it’s below the surface of the wood, but not so deep that it tears through the tongue or creates an unsightly dimple. Look for a nailer with an easy-to-use depth adjustment mechanism, often a dial or lever.
5. Magazine Capacity and Loading
A larger magazine means you’ll reload less often, saving time. Also, consider how easy it is to load the cleats into the magazine. Some are front-loading, while others might have a different mechanism.
6. Weight and Ergonomics
You’ll be holding and operating the nailer for extended periods. A tool that is too heavy or uncomfortable to grip can lead to fatigue and affect your accuracy. Look for a balanced tool with comfortable grips. If you’re going pneumatic, remember to factor in the weight of the compressor and hose.
7. Durability and Brand Reputation
Invest in a reputable brand known for quality tools. These tools are often an investment, and you want something that will last through your project and potentially future ones. Brands like Bostitch, DeWalt, Porter-Cable, and Senco are well-regarded in the flooring tool space.
Top Nail Guns for Hardwood Floor Installation (Beginner-Friendly Picks)
Alright, let’s get down to brass tacks. Here are a few types of nailers that stand out for hardwood floor installation, keeping beginner-friendliness and effectiveness in mind. I’ve tried to include both pneumatic and cordless options.
1. Pneumatic Flooring Nailing Systems
These are often sold as a kit, including the nailer, an air hose, and sometimes even a small compressor. This is a great all-in-one solution for beginners looking to go the pneumatic route.
Example: A Bostitch MFN-18 18-Gauge Flooring Nailer paired with an air compressor. This type of nailer is designed specifically for hardwood and engineered flooring. It uses 16 or 18-gauge cleats and has the essential angled head.
What to look for in a kit:
- Included Nailer: Ensure it’s designed for hardwood flooring (cleat nailer).
- Air Compressor: A small, portable pancake compressor is usually sufficient for DIY flooring projects.
- Hose: At least a 25-foot hose will give you decent reach.
- Safety Glasses: Always essential!
2. Cordless Flooring Nailing Guns
These offer ultimate convenience. You’re not tethered by an air hose, which can be a huge plus in navigating rooms and around furniture.
Example: A DeWalt 20V MAX XR Cordless Flooring Nailer (e.g., DCN682B). This type of tool uses a battery to power its nail-driving mechanism and is often designed to accept specific flooring fasteners. They are often lighter and more maneuverable than pneumatic options.
Key Features of good cordless options:
- Battery Powered: Look for models with good battery life, and consider if extra batteries are needed.
- Accepts Flooring Cleats: Crucial! Ensure it drives the correct type of fastener.
- Adjustable Depth: Essential for a clean finish.
- Lightweight: Easier to handle for extended use.
3. Pneumatic Finish Nailers (With Caveats)
While not ideal, some DIYers might already own a good quality pneumatic finish nailer. If your flooring is a thinner engineered hardwood and you’re very careful, you might be able to use it. However, this is generally NOT recommended for solid hardwood planks.
Why it’s a compromise:
- Angle: Finish nailers drive nails straight, which isn’t optimal for floorboards.
- Nail Type: They use straight nails, not L-shaped cleats.
- Risk of Damage: Higher risk of splitting or not getting a secure hold.
If you go this route, you’d need to practice extensively on scrap pieces and ensure you’re using the right gauge and length of nail that can be driven flush or slightly below the surface without damaging the tongue or groove.
Comparison: Pneumatic vs. Cordless for Hardwood Flooring
To help you decide, let’s break down the strengths of each type in a table:
| Feature | Pneumatic Flooring Nailer | Cordless Flooring Nailer |
|---|---|---|
| Power | Excellent, consistent power for all wood types. | Very good, but might struggle with extremely dense hardwoods compared to top-tier pneumatics. |
| Portability | Less portable due to compressor and hose. | Highly portable, no cords or hoses. |
| Setup Time | Slightly longer (connect compressor, hose). | Quick (charge battery, load nails). |
| Tool Weight | Nailer is lighter; compressor is separate. | Nailer is heavier (contains battery/motor). |
| Initial Cost | Can be higher if you don’t own a compressor. | Can be higher for premium models, but no compressor cost if you’re starting fresh. |
| Maintenance | Compressor oiling, air filter checks. | Battery charging, occasional cleaning. |
| Best For | Large areas, professionals, those who already own a compressor, very dense hardwoods. | DIYers, smaller to medium projects, those prioritizing ease of use and mobility. |
Essential Accessories and Safety Gear
Beyond the nail gun itself, a few other items will make your hardwood floor installation go smoothly and safely:
1. Air Compressor (for Pneumatic)
If you go pneumatic, you’ll need an air compressor. For DIY flooring, a “pancake” style compressor (around 6 gallons) is usually sufficient. Look for one that delivers at least 3-4 CFM (cubic feet per minute) at 90 PSI, which is the standard for most pneumatic nailers.
Find more information on compressor CFM requirements from resources like Popular Mechanics’ Air Compressor Buying Guide to ensure you get one that meets your nailer’s needs.
2. Air Hose (for Pneumatic)
A 25-foot or 50-foot rubber or Goodyear hose is standard. Ensure it has the correct fittings (usually 1/4-inch NPT) to connect to your compressor and nailer.
3. Safety Glasses
This is non-negotiable! Always wear safety glasses when operating any power tool, especially a nailer. Your eyesight is too precious to risk.
4. Ear Protection
Nail guns, and especially air compressors, can be loud. Protect your hearing with earplugs or earmuffs.
5. Gloves
Good work gloves will protect your hands from splinters and provide a better grip on the tool.
6. Safety Shoes or Boots
Protect your feet from dropped tools or flooring materials.
7. Mounting Block and Pull Bar
These are essential tools for tapping planks into place and for working with stubborn boards, especially near walls. They are not directly related to the nail gun but are crucial for a good floor installation.
Step-by-Step: How to Use a Flooring Nailer for Hardwood Installation
Here’s a simplified overview of how you’ll be using your chosen nail gun. Remember to always read your specific tool’s manual!
Step 1: Prepare the Subfloor
Ensure your subfloor is clean, dry, and level. Remove any old flooring, debris, or nails. A smooth, flat surface is essential for a successful installation and to prevent damage to your new hardwood.
Step 2: Set Up Your Nail Gun
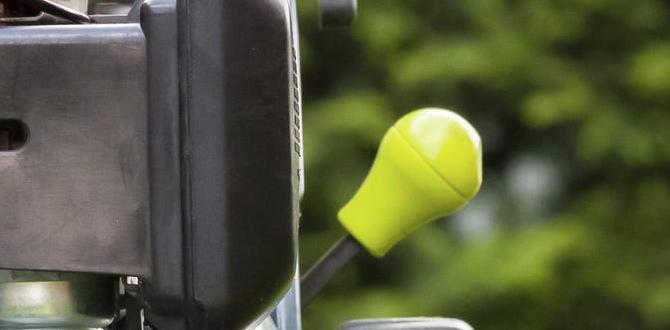
- Pneumatic: Connect the air hose to your compressor and the nailer. Set your compressor to the recommended PSI (usually between 70-100 PSI, check your nailer’s manual).
- Cordless: Ensure your battery is charged and properly inserted into the tool.
Step 3: Load the Cleats
Open the magazine of your nailer and load the appropriate hardwood flooring cleats. Make sure they are seated correctly according to your tool’s instructions. Do not force them.
Step 4: Adjust Nail Depth
Before you start, test the nail depth on a scrap piece of your hardwood flooring. You want the cleat to be fully countersunk—flush with or slightly below the surface of the wood tongue—without damaging the plank.
Step 5: Position the Nailer
Place the nose of the nailer firmly against the tongue of the first row of flooring planks. The angle of the nose should fit snugly