The best nail gun for fence picket installation is typically a cordless or pneumatic framing nailer, specifically one designed to handle 2-inch to 3-inch nails. Choosing the right nailer ensures a secure, efficient, and quick fence picket project.
Building a beautiful, sturdy fence can seem daunting, especially when it comes to attaching all those pickets. Nobody wants a fence that looks like it wobbles with every gust of wind! That’s where the right nail gun comes in. It can turn a tedious, nail-by-nail job into a smooth, fast DIY project. If you’re holding a hammer and thinking, “There has to be a better way,” you’re absolutely right!
We’re going to break down exactly what makes a nail gun great for fence pickets, what features to look for, and the types that will make your project a breeze. Get ready to build that fence with confidence and speed!
Table of Contents
Why a Nail Gun is Your Best Friend for Fence Pickets
Let’s face it, hammering each picket into place, one by one, can be exhausting. Your arms get tired, and it’s easy to get inconsistent results. A nail gun changes all that.
Speed: This is the big one. Nail guns drive nails in a fraction of a second. What might take minutes with a hammer can take seconds with a nail gun, significantly speeding up your project time.
Efficiency: Less physical strain means you can work longer and more effectively. You’re less likely to get fatigued and make mistakes.
Consistency: A nail gun drives nails to a consistent depth every time, giving your fence a cleaner, more professional look. No more accidentally sinking nails too deep or leaving them sticking out.
Power: They can easily drive nails through tough wood, even hardwoods, without much effort.
Understanding Nail Gun Types for Fence Pickets
Not all nail guns are created equal, and each has its strengths. For fence pickets, we’re primarily looking at framing nailers, but there are a few variations to consider based on your setup and preferences.
1. Pneumatic Framing Nailers
These are the traditional workhorses. They require an air compressor to operate.
How they work: Connected via a hose to an air compressor, the compressed air powers the nail driving mechanism.
Nail Range: They can handle a wide range of nail sizes, including the longer nails often needed for fence pickets.
Pros:
Generally lighter to hold than cordless models.
Powerful and durable.
Lower initial tool cost (though you need a compressor).
Less vibration.
Cons:
Requires an air compressor, which adds bulk, noise, and requires a power source.
The air hose can be cumbersome and limit your reach.
The cost of the compressor itself can be significant.
Ideal for: Those who already own an air compressor or plan to do a lot of larger projects requiring one.
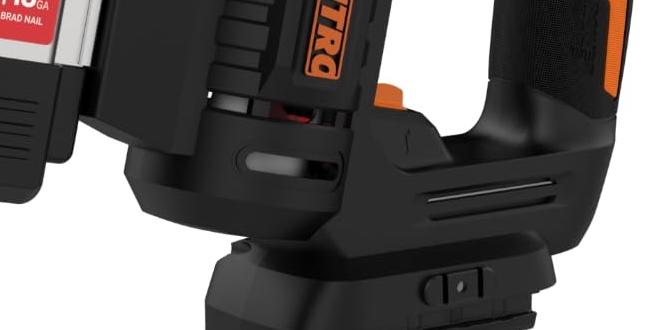
2. Cordless Battery-Powered Framing Nailers
These are the modern marvels, offering convenience and power without the air compressor.
How they work: They use a battery to power a motor, which either drives a gas cartridge or directly powers a pneumatic mechanism.
Nail Range: Most can handle nails similar in size to their pneumatic counterparts, making them perfectly suitable for fence pickets.
Pros:
Ultimate portability and freedom of movement – no hoses or compressors to drag around.
Quick setup and pack-up.
Great for remote locations or when you need to move around frequently.
Cons:
Can be heavier due to the battery pack.
Higher initial tool cost.
Battery life can be a limitation on very long projects (though batteries are getting better).
May have slightly less consistent power on very dense wood compared to high-end pneumatic models.
Ideal for: DIYers who value convenience, portability, and don’t want to invest in or deal with an air compressor.
3. Cordless Gas/Air Combination Framing Nailers ( Less Common for Pickets)
These use a combination of a fuel cell and a small battery.
How they work: A small amount of fuel is ignited to drive the nail, and the battery powers the fan to clear the exhaust.
Pros:
Good power.
No trailing airline.
Cons:
Requires purchasing fuel cells.
Fumes from the fuel can be an issue.
Can be noisy.
Maintenance can be more involved.
Ideal for: Specific professional applications; generally not the top pick for most DIY fence picket projects due to running costs and fumes.
Recommendation for Fence Pickets: For most DIY fence picket installations, a cordless battery-powered framing nailer offers the best balance of convenience, power, and speed. If you’re on a tighter budget and already have a compressor, a pneumatic framing nailer is a fantastic, reliable choice.
Key Features to Look For in Your Fence Picket Nailer
Beyond the type of nailer, several specific features will make your fence picket installation smoother and more successful.
1. Nail Size Compatibility
This is crucial. Fence pickets are typically attached with nails ranging from 2 inches to 3 inches in length. Ensure the nail gun you choose can comfortably drive these sizes. Most framing nailers are designed for this range. Always check the manufacturer’s specifications.
2. Depth Adjustment
The ability to easily adjust the depth at which the nail drives is vital. You want your nails flush with the wood, not sticking out or buried too deep, which can split the wood. Look for a tool with a simple, tool-free depth adjustment mechanism, often a dial or lever near the nose of the gun.
3. Racking vs. Sequential Firing Mode
Sequential Mode (Single Fire): This is the safer mode. You must intentionally bump the nose of the nailer against the wood and pull the trigger for each nail to fire. This prevents accidental discharge. Highly recommended for beginners.
Racking Mode (Contact Fire): With this mode, you can hold down the trigger and bump the nose of the nailer against the wood to fire nails rapidly, like a hammer. This is faster but can be less precise and carries a higher risk of accidental firing if not used carefully.
Recommendation: Always start with sequential mode. Most good nail guns offer a switch to change between them.
4. Weight and Ergonomics
You’ll be holding this tool for extended periods, often at awkward angles. A lighter nailer with a comfortable grip and good balance will save your arm and wrist. Try to hold different models if possible before buying.
5. Power Source & Battery System (for Cordless)
If you opt for cordless, consider the battery system. If you already own other tools from a particular brand (like DeWalt, Milwaukee, Ryobi, etc.), sticking with that brand’s battery platform will save you money, as you can often buy the tool “bare” (without batteries and charger). Check the battery capacity (Ah) – higher Ah means longer run time.
6. Jam Clearance
Nail jams happen. A good nailer will have an easy, tool-free system for clearing jams to get you back to work quickly.
Choosing the Right Nails for Your Fence Pickets
The nail gun is only half the equation; the nails themselves matter a lot!
Type: Use framing nails. These are strong and designed for structural fastening.
Size: As mentioned, 2-inch to 3-inch galvanized nails are usually best for holding fence pickets securely. A 2.5-inch nail is a common and effective choice.
Material: For outdoor fences, galvanized nails are essential. This coating prevents them from rusting and staining the wood over time. Stainless steel is even better but more expensive.
Coating: Some nails have collation coatings that help them drive more easily. Ring shank or screw shank nails offer even better holding power compared to smooth shank nails, which is beneficial for a fence that endures wind and weather, though they might be slightly harder to drive.
Here’s a quick look at common nail types and their relevance:
| Nail Type | Description | Best For Fence Pickets? | Notes |
| :————– | :——————————————————————– | :———————- | :———————————————————————- |
| Smooth Shank | Standard nail with a smooth shaft. | Yes | Easiest to drive, but offers the least holding power. |
| Ring Shank | Has rings around the shaft that grip the wood fibers. | Yes | Provides excellent holding power against pull-out. |
| Screw Shank | Twisted shaft, similar to a screw thread. | Yes | Offers maximum holding power, but can be harder to drive; may require more powerful nailer. |
| Brad Nails | Thin, small-headed nails. | No | Too weak for structural fastening like fence pickets. |
| Finish Nails| Thinner than framing nails, with a small head for discreet fastening. | No | Not strong enough; heads will likely sink too deep or split wood. |
| Framing Nails| Thicker, stronger nails designed for construction. | Yes | The standard for fence pickets, available in various shanks and lengths. |
How to Choose and Use Your Nail Gun for Fence Pickets: A Step-by-Step Guide
Ready to get building? Here’s how to select and use your nail gun for a fantastic fence picket installation:
Step 1: Assess Your Project Needs and Budget
Fence Size: How many pickets will you be installing? A large fence might justify a more robust tool, while smaller sections might be fine with a mid-range option.
Wood Type: Are you using soft pine or a harder wood like cedar or redwood? Hardwoods might require a more powerful nailer.
Existing Tools: Do you already have an air compressor or batteries from a specific tool brand? This can heavily influence your choice.
Budget: Cordless nailers are generally more expensive upfront than pneumatic ones, but remember to factor in the cost of an air compressor and hose if going pneumatic.
Step 2: Select Your Nail Gun
Based on the above, choose between a pneumatic or cordless framing nailer. Read reviews specifically mentioning fence installation or outdoor projects. Look for models known for reliability and ease of use.
Step 3: Gather Your Materials
Nail Gun: Your chosen framing nailer.
Nails: The correct size (2-3 inches) and type (galvanized framing nails with ring or screw shanks recommended).
Air Compressor & Hose (if pneumatic): Ensure it meets the PSI (pounds per square inch) and CFM (cubic feet per minute) requirements of your nailer.
Batteries & Charger (if cordless): Make sure they are fully charged.
Safety Gear: Safety glasses are non-negotiable! Hearing protection is also a good idea, especially with pneumatic nailers. Work gloves can protect your hands.
Measuring Tape & Pencil: For marking picket placement.
Level: To ensure pickets are plumb.
Shims (optional): For minor adjustments in spacing.
Step 4: Set Up Your Nail Gun
Pneumatic:
1. Connect the air hose to your compressor and the nail gun.
2. Set the compressor to the PSI recommended by the nail gun manufacturer. This is usually printed on the tool or in its manual. Typically around 90-120 PSI.
3. Ensure the nail gun is dry-fired (no nails loaded) before connecting air.
Cordless:
1. Ensure a fully charged battery is securely attached.
2. Load the nails into the magazine according to the manufacturer’s instructions. Ensure they are loaded facing the correct direction and are the right collation angle for your gun (often 15 or 21 degrees for framing nailers).
Step 5: Load the Nails
Open the magazine by sliding the follower back.
Slide the strip of nails into the channel, ensuring the collation (the glue or plastic holding them together) is oriented correctly. Most guns have an indicator.
Close the magazine follower firmly until it latches.
Never attempt to drive nails without a full strip or when the follower is not fully engaged, as this can cause jams.
Step 6: Practice Firing
Safety First: Put on your safety glasses!
Find a scrap piece of wood that’s similar in thickness to your fence pickets.
Set your nail gun to sequential firing mode (if available).
Hold the nail gun firmly against the scrap wood.
Press the nose of the gun (the contact trip) against the wood.
Pull the trigger. A nail should fire.
Experiment with different depths if your gun has depth adjustment. Aim for the nail head to be flush or just slightly below the surface.
Step 7: Mark Your Picket Positions
Decide on your desired spacing between pickets. A common gap is 1/2 inch to 1 inch for privacy, or wider for other styles.
Use a measuring tape to mark the desired location for each picket on your fence rails. A pencil mark on the rail is usually sufficient.
Step 8: Attach the First Picket
Hold the picket in place against the fence rails.
Use your level to ensure it’s perfectly vertical.
Position the nail gun at the top of the picket where it meets the top rail.
Place the nose of the nailer firmly against the picket.
Pull the trigger.
Without repositioning the gun, drive a second nail into the bottom of the picket where it meets the bottom rail. Ensure the nails are driven into the solid part of the rail, not the edge. Using two nails per rail intersection generally provides excellent stability.
Step 9: Continue Nailing Pickets
Move to the next picket.
Hold it in place, ensuring your desired spacing from the previous picket.
Nail it securely to the rails as you did the first one.
Keep your work area clean and organized.
Step 10: Troubleshooting and Maintenance
Nail Jam: If a nail fails to drive or jams, remove the safety clip and battery (or disconnect air). Open the jam clearance mechanism and carefully remove the jammed nail. Reload and resume.
Nail Not Driving Deep Enough: Increase air pressure slightly (pneumatic) or check battery status. Ensure you are pressing the gun firmly against the wood. Adjust depth setting if available.
Nail Driving Too Deep/Splitting Wood: Reduce air pressure. Adjust depth setting. Ensure you are not hitting the very edge of the wood, which can cause splitting.
Clean Your Tool: After use, wipe down your nail gun and store it in a dry place. Refer to your owner’s manual for specific cleaning and maintenance instructions.
Popular Nail Gun Brands and Models to Consider
While I can’t give specific stock recommendations, here are some highly reputable brands known for their quality nail guns that are excellent for DIY projects. Looking for models within their framing nailer lines is your best bet.
DeWalt: Known for their robust cordless systems (20V MAX and FLEXVOLT). Their cordless framing nailers are popular for a reason.
Milwaukee: Another top contender with a strong M18 battery platform. Their FUEL line offers high performance.
Metabo HPT (formerly Hitachi): Excellent for both pneumatic and cordless options. Their cordless framing nailers are powerful and reliable.
Ryobi: A great budget-friendly option, particularly if you’re already in their ONE+ battery system. They offer solid performance for DIYers.
Paslode: Often considered a professional-grade brand, particularly known for their cordless framers that use fuel cells.
When choosing, look for specific models within their framing nailer categories and check reviews related to fence building or outdoor woodworking.
Safety First! Essential Precautions for Nail Gun Use
Nail guns are powerful tools, and safety should always be your top priority. Think of them as faster, more efficient hammers, but with a bit more power and risk if not handled correctly.
Always Wear Safety Glasses: This cannot be stressed enough. A nail or fragment can ricochet.
Read the Manual: Familiarize yourself with your specific nail gun’s operation, safety features, and maintenance.
Use Sequential Firing Mode: Especially when you’re learning or working in potentially crowded areas. Switch to racking mode only when you are comfortable and understand the risks.
Never Point the Nail Gun at Anyone: Even when not loaded, it’s a bad habit. Treat all nail guns as if they are always loaded.
Keep Fingers Away from the Trigger: Don’t rest your finger on the trigger while carrying or operating the tool.
Secure Your Workpiece: Make sure the wood you are nailing into is stable. Don’t try to nail small scraps that can easily be knocked around.
Be Aware of Your Surroundings: Ensure no one is behind the material you are nailing, as a nail can potentially pass through.
Disconnect Power When Not in Use: Remove the battery or disconnect the air hose when cleaning, clearing jams, or leaving the tool unattended.
Proper Grip: Maintain a firm grip on the nail gun.
Avoid Overreaching: Maintain good balance. Work from a stable position.
Understanding and respecting these safety guidelines will ensure your fence building experience is productive and injury-free.