The best nail gun for DIY woodworking projects is often a cordless brad nailer or finish nailer, offering a great balance of power, portability, and ease of use for common home improvement tasks without needing an air compressor.
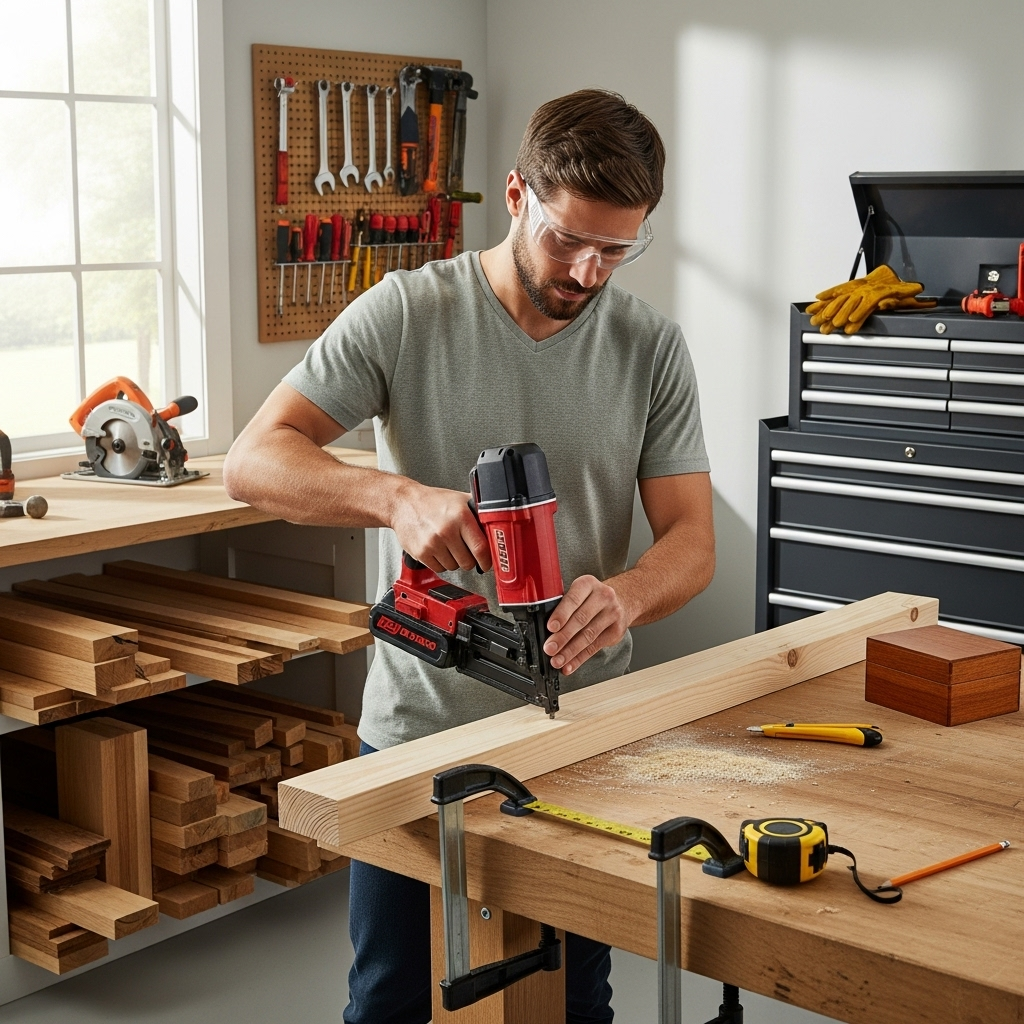
Hey there, fellow DIYers! Jack Shaffer here from Nailerguy. Ever stared at a woodworking project, or even just a simple home repair, and thought, “Man, hammering nails feels so slow and clunky”? You’re definitely not alone! Many of us dream of building beautiful, sturdy projects from scratch or making quick fixes around the house, but the thought of tackling all those nails by hand is enough to make anyone reconsider.
It can be frustrating feeling like a simple job is taking forever. But what if I told you there’s a tool that can make nailing faster, cleaner, and way more enjoyable? Stick around, because by the end of this guide, you’ll know exactly which nail gun is your perfect DIY partner.
Table of Contents
Why a Nail Gun is a DIY Game Changer
For anyone diving into DIY woodworking projects, big or small, a nail gun isn’t just a luxury – it’s a secret weapon. Think about the time saved. Hammering in dozens of nails for a simple shelf or a picture frame takes a considerable amount of effort and patience. A nail gun, with a simple pull of a trigger, sinks them in precisely and rapidly. This speed means you can complete projects faster, freeing up your time for other things you enjoy.
Beyond speed, nail guns offer a level of precision that’s hard to match with a hammer, especially for beginners. They drive nails straight into the wood, reducing the chance of bending nails or damaging the surface you’re working on. This leads to a cleaner, more professional-looking finish, giving you a real sense of accomplishment. Plus, let’s be honest, it’s pretty cool to use power tools!
Understanding Nail Gun Types for DIYers
Before we pick the “best” nail gun, it’s crucial to understand the main types available. Each has its own strengths, making them ideal for different tasks. For DIYers, we’re usually looking for versatility and ease of use.
1. Brad Nailers
Brad nailers are fantastic for delicate work. They fire thin, small-headed nails (called brads) that leave a tiny hole, making them almost invisible once filled and painted. This makes them perfect for attaching trim, molding, paneling, and even small furniture components where a seamless finish is key.
- Best for: Attaching trim, molding, decorative pieces, cabinet assembly, and detailed woodworking.
- Nail Size: Typically 18-gauge brads (very thin) or 16-gauge brads (slightly thicker, but still slender).
- Pros: Leaves minimal damage, excellent for finishing work, lightweight.
- Cons: Not strong enough for structural framing.
2. Finish Nailers
Finish nailers are the workhorses for slightly heavier tasks than brad nailers. They use slightly larger nails (15 or 16 gauge) with a small head. These are great for installing baseboards, crown molding, window casings, and assembling cabinets where you need a bit more holding power than a brad nailer can provide, but still want a relatively discreet fastener.
- Best for: Installing baseboards, crown molding, door and window casings, chair rails, and general trim work.
- Nail Size: Commonly 16-gauge or 15-gauge nails.
- Pros: Good holding power, leaves a smaller hole than a framing nailer, versatile for many trim jobs.
- Cons: Can split thinner wood if not careful, not for heavy-duty framing.
3. Framing Nailers
These are the beasts of the nail gun world. Framing nailers are designed for heavy-duty tasks like building decks, framing walls, and assembling larger wooden structures. They fire much larger, thicker nails and pack a powerful punch. For most DIY home projects, a framing nailer is overkill, and they can be heavier and more intimidating to use.
- Best for: Structural framing (walls, floors, roofs), building decks, fences, and other large outdoor structures.
- Nail Size: Usually 2-inch to 3.5-inch nails, typically 8-gauge to 12-gauge.
- Pros: Immense power and holding strength, very fast for large projects.
- Cons: Heavy, large nail holes, can damage softer woods, usually requires an air compressor.
4. Specialty Nailers
There are also roofing nailers (designed for shingles), concrete nailers (for masonry), and pallet nailers (heavy-duty for industrial use). These are very niche and generally not what a typical DIY homeowner needs for woodworking projects.
The Power Source: Pneumatic vs. Cordless vs. Electric
How your nail gun is powered is just as important as its type. This decision often dictates its portability and convenience.
Pneumatic (Air-Powered) Nailers
These are the traditional choice. They require an air compressor to supply the power. You connect the nailer to the compressor with a hose.
- Pros: Generally more powerful, often less expensive for the tool itself, longer lifespan.
- Cons: Requires a bulky, noisy air compressor, tethered by a hose which can be cumbersome and limit reach, requires maintenance of the compressor.
For most DIYers, the hassle and cost of an air compressor push them towards other options.
Cordless (Battery-Powered) Nailers
These are powered by rechargeable batteries. They are becoming incredibly popular for DIY and professional use due to their convenience. Many brands offer a system where one battery can power multiple tools.
- Pros: Highly portable (no cords or hoses!), easy to use anywhere, quiet operation compared to pneumatics (no compressor noise), quick setup.
- Cons: Can be more expensive upfront, battery life is a consideration (though usually sufficient for DIY tasks), can be slightly heavier due to the battery.
Electric (Corded) Nailers
These plug directly into a wall outlet. They are typically lighter and more affordable than cordless models but have the obvious limitation of needing a power source nearby.
- Pros: Usually the most affordable option, lightweight, no battery charging needed.
- Cons: Limited by cord length and outlet availability, can be less powerful than pneumatic or good cordless models, not ideal for large projects or working far from power.
The Best Nail Gun for DIY Woodworking Projects: Our Top Pick
Drumroll, please! For the vast majority of DIY woodworking projects, including home renovations, furniture assembly, and decorative trim work, the cordless brad nailer or cordless finish nailer is your undisputed champion.
Why? Because they offer the perfect blend of power, portability, and ease of use for the kinds of tasks most DIYers tackle. You get the convenience of no compressor and no cords, allowing you to move freely around your project or even take it to a job site without lugging around extra equipment.
When choosing between a brad nailer and a finish nailer for general DIY, consider what you’ll be doing most often:
- If your projects primarily involve delicate trim, decorative elements, or thin molding where a nearly invisible nail head is crucial, a 18-gauge brad nailer is likely your best bet.
- If you’ll be installing baseboards, door casings, or assembling small furniture where a bit more holding power is needed without leaving a huge mark, a 16-gauge finish nailer is probably the better all-rounder.
Many DIYers find that owning both a brad nailer and a finish nailer offers the ultimate versatility. However, if you’re just starting and need one tool, a 16-gauge finish nailer often provides a good balance for a wider range of common home improvement and basic woodworking tasks.
Key Features to Look for in a DIY Nail Gun
Once you’ve decided on the type and power source, here are some features to keep in mind when shopping:
1. Depth Adjustment
This is crucial. It allows you to control how deep the nail is driven into the wood. You want to be able to set it so the nail head is flush with the surface, or slightly countersunk for easy filling, without blowing through thinner materials. Look for tool-free depth adjustment wheels or levers – they’re much easier to use.
2. Firing Modes (Sequential vs. Bump Fire)
- Sequential Firing (Single Shot): You must press the safety tip against the wood AND pull the trigger for each nail. This offers maximum precision, perfect for detailed work where you want to place each nail exactly. It’s also the safest mode.
- Bump Fire (Contact Trip): You hold the trigger down and “bump” the nose of the nailer against the wood to fire nails rapidly. This is much faster for repetitive tasks like attaching trim or siding, but offers less precision if you’re not careful.
Many DIY-friendly nailers come with a selector switch to choose between these modes.
3. Dry Fire Lockout
This feature prevents the nailer from firing when it’s out of nails. It’s a small but important detail that saves wear and tear on the tool and prevents accidental marks on your workpiece.
4. Weight and Ergonomics
You’ll be holding this tool, so comfort matters. A lighter tool with a comfortable grip will be much less fatiguing, especially on longer projects. If you have smaller hands, consider tools designed for a good fit.
5. Jam Clearing
Nail jams happen, but how easy it is to clear them makes a big difference. Tool-free jam clearing mechanisms are a lifesaver. You simply open up a panel, remove the obstruction, and you’re back to work in seconds.
6. Battery Life (for Cordless Models)
For cordless nailers, check the battery capacity (usually measured in Amp-hours or Ah). A battery with a higher Ah will last longer. Most DIYers will find a 2.0 Ah or 4.0 Ah battery more than sufficient for a day’s work.
Popular Brands for DIY Nail Guns
Several brands offer excellent nail guns suitable for DIY projects. Here are a few reliable choices known for their performance and value:
| Brand | Typical For | Key Strengths |
|---|---|---|
| Metabo HPT (formerly Hitachi) | Cordless Brad & Finish Nailers | Excellent power-to-size ratio, professional-grade performance, often good value. |
| DeWalt | Cordless Brad, Finish, & Framing | Robust battery platform (20V MAX), durable tools, wide availability. |
| Ryobi | Cordless Brad & Finish Nailers | Affordable, strong entry-level option, part of their extensive ONE+ battery system. |
| Milwaukee | Cordless Brad, Finish, & Framing | High performance, M12 and M18 battery systems, innovative feature sets. |
| Arrow | Electric & Manual Tackers/Nailers | Great budget-friendly options, particularly for lighter duty electric models. |