The best nail gun for DIY projects depends on your specific needs, but for most general home improvement and woodworking tasks, a cordless electric or a gas-powered framing nailer offers versatility, power, and convenience. For finer trim work, an electric or pneumatic brad or finish nailer is usually the top choice.
Hey there, DIY enthusiasts! Jack Shaffer here, your friendly neighborhood Nailerguy. Ever stare at a project, envisioning perfect joints and sturdy builds, only to realize your trusty hammer is going to take forever and might not give you that pro finish? You’re not alone! Choosing the “best” nail gun can feel like navigating a minefield of options. But don’t worry, I’m here to help you cut through the noise and find the perfect tool to make your DIY dreams a reality. We’ll break down what makes a nail gun great for home projects, explore the different types, and figure out which one will be your new best friend in the workshop!
Table of Contents
Your DIY Nail Gun Journey Starts Here: Understanding the Basics
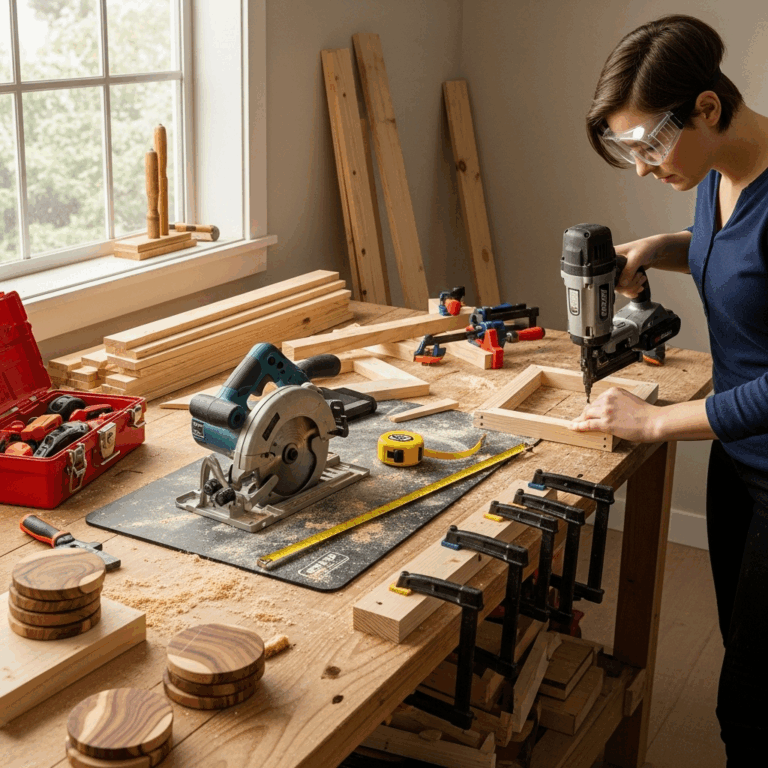
Before we dive into the nitty-gritty of specific nailers, let’s get a handle on what a nail gun actually is and why it’s a game-changer for DIYers. Think of a nail gun as a super-powered hammer that drives nails quickly and accurately. It uses compressed air, a battery, or a small combustion charge to fire nails into wood (and sometimes other materials). This means faster work, less fatigue, and often, a cleaner, more professional-looking result. For homeowners tackling everything from framing a shed to installing trim, a nail gun can transform your projects from daunting tasks into enjoyable accomplishments.
Why a Nail Gun is a DIYer’s Best Friend
Let’s be honest, swinging a hammer for hours can be exhausting and can lead to sore wrists. A nail gun takes the grunt work out of fastening. Here’s why it’s such a valuable addition to your toolkit:
- Speed: Drive dozens of nails in the time it takes to swing a hammer a few times.
- Accuracy: Most nail guns place the nail exactly where you aim, reducing errors.
- Consistency: Each nail is driven to a similar depth, creating a uniform look.
- Less Fatigue: Significantly reduces physical strain, allowing you to work longer and more comfortably.
- Versatility: Different nail guns handle different nail sizes and types, perfect for a wide range of tasks.
Types of Nail Guns: Which One Is Right for Your Project?
The world of nail guns can seem a bit overwhelming at first, but it breaks down nicely into a few main categories based on how they are powered and what they do. Understanding these differences is key to picking the tool that best suits your DIY needs.
1. Framing Nailers: The Heavy Hitters
If you’re thinking about building or repairing structures – decks, sheds, fences, or even room additions – a framing nailer is what you need. These are the beefiest nail guns, designed to drive large nails quickly and powerfully into dense lumber.
- Power Source: Primarily pneumatic (requiring an air compressor), but increasingly popular are cordless electric (battery-powered) and gas-powered models.
- Nail Size: Drives longer, thicker nails (typically 2 to 3.5 inches).
- Best For: Structural framing, subflooring, framing walls, building decks and fences.
Pros: Unmatched power for tough jobs. Excellent speed for large projects.
Cons: Can be heavy and bulky. Pneumatic models require an air compressor and hose, which adds to the setup and cost.
2. Roofing Nailers: For Shingle Duty
Got a leaky roof or need to replace some shingles? A roofing nailer is a specialized tool that makes this task much faster. They’re designed to drive short, wide-headed nails specifically for attaching roofing materials.
- Power Source: Usually pneumatic, some cordless options exist.
- Nail Size: Drives specialized roofing nails (typically 1 to 1.5 inches) with wide heads.
- Best For: Attaching asphalt shingles, felt underlayment, and other roofing materials.
Pros: Extremely fast for roofing applications. Features often include depth adjustment and a rafter hook.
Cons: Very specialized; not useful for other DIY projects. Requires careful nailing to avoid damaging shingles.
3. Finish Nailers: For That Smooth Look
When you need to attach decorative molding, trim, or anything where you want a clean, professional finish without visible nail heads, a finish nailer is your go-to. They drive thinner, smaller-diameter nails.
- Power Source: Available as pneumatic, cordless electric, and gas-powered. Cordless electric is particularly popular for DIY trim work due to ease of use.
- Nail Size: Drives finish nails (around 1 to 2.5 inches long) which are much thinner than framing nails.
- Best For: Installing baseboards, crown molding, window and door casings, wainscoting, and furniture assembly.
Pros: Creates clean, unobtrusive nail holes that are easy to fill and paint over. Less likely to split delicate wood.
Cons: Not powerful enough for structural work. Nails are weaker than framing nails.
4. Brad Nailers: For Delicate Jobs
A step down in size from finish nailers, brad nailers use even smaller, thinner nails called “brads.” These are perfect for very fine woodworking, delicate trim, or attaching thin materials where minimal marring is essential.
- Power Source: Pneumatic, cordless electric, and gas. Cordless electric is fantastic for portability.
- Nail Size: Drives brad nails (typically from 0.5 to 1.25 inches). These nails have very small heads.
- Best For: Attaching small trim pieces, craft projects, securing thin plywood or paneling, and delicate furniture repairs.
Pros: Extremely minimal damage to the wood. Ideal for small, intricate projects.
Cons: Not suitable for any structural holding power. Primarily for aesthetic fastening or holding pieces while glue dries.
5. Pin Nailers: The Invisible Touch
For the most discreet fastening, look no further than a pin nailer. These drive tiny headless pins, leaving virtually no visible mark. They’re great for holding pieces together while glue sets or for attaching very delicate trim.
- Power Source: Mostly pneumatic, but cordless electric options are gaining popularity.
- Nail Size: Drives headless pins (around 0.5 to 1 inch).
- Best For: Securing very thin moldings, attaching small decorative elements, and holding pieces for glue-up.
Pros: Virtually invisible fastening. No need for filling or sanding nail holes.
Cons: Offers almost no holding power; purely for positioning or very light decorative tasks.
6. Micro Pin Nailers: The Ultimate in Stealth
These are even smaller than standard pin nailers, using minuscule pins to create almost invisible anchor points. They are the absolute champions of hidden fasteners for delicate work.
- Power Source: Predominantly pneumatic.
- Nail Size: Tiny, headless pins, often under 0.5 inches.
- Best For: Delicate picture frames, marquetry, model making, and super-fine trim work.
Pros: The most discreet fastening method available. Zero visible marks.
Cons: No structural integrity whatsoever. Only for the most delicate and decorative applications.
7. Concrete/Redhead Nailers (or Powder-Actuated Tools): For Tough Surfaces
If your projects involve fastening wood directly to concrete or steel, you’ll need a specialized tool. These are often called powder-actuated tools (PATs).
- Power Source: Utilizes a small explosive charge (like a blank cartridge) to drive a nail or fastener.
- Fastener Type: Specialized nails or pins designed for concrete or steel.
- Best For: Attaching framing to concrete foundations, electrical boxes to concrete, furring strips to concrete walls.
Pros: The only effective way to reliably fasten wood to concrete or steel. Very fast for these specific tasks.
Cons: Loud, requires special training and safety precautions. Not for general woodworking. Often an expensive option.
For safety and regulatory information on using powder-actuated tools, always consult resources like the Occupational Safety and Health Administration (OSHA) guidelines. OSHA guidance on Powder-Actuated Tools
Corded Electric, Cordless Electric, Pneumatic, or Gas? Powering Your Nailer
Once you know the type of nailer you need, the next big decision is its power source. Each has its own set of advantages and might be better suited for different DIY scenarios.
Pneumatic Nailers (Air-Powered)
These are the traditional workhorses. They connect to an air compressor via a hose, and the compressed air drives the nail.
- How it Works: Air compressor supplies pressurized air through a hose to the nailer.
- Pros: Generally lighter in hand than cordless models, often more affordable for the tool itself, very powerful, reliable.
- Cons: Requires a bulky and noisy air compressor, an air hose that can get tangled or be a tripping hazard, and needs a power outlet for the compressor.
- Best For: Serious DIYers who already have an air compressor, workshops where portability isn’t key, and large jobs where consistent power is paramount.
Cordless Electric Nailers (Battery-Powered)
These are becoming incredibly popular for DIYers. They run on rechargeable batteries, offering excellent portability and ease of use.
- How it Works: Uses a rechargeable battery to power a motor that drives a piston (either directly or via a pneumatic system within the tool).
- Pros: No hoses or compressors needed! True freedom of movement, quick setup, great for working in tight spaces or remote locations. Many brands offer battery platforms that work across multiple tools.
- Cons: Can be heavier and bulkier than pneumatic counterparts due to the battery, battery life can be a limiting factor on very long projects, often more expensive upfront than pneumatic tools.
- Best For: Homeowners who do a variety of projects, trim work, furniture building, framing where you need to move around a lot.
Gas-Powered Nailers
These use a small fuel cell (like isobutane) and a battery-powered igniter to drive nails. They offer excellent power and portability without a hose.
- How it Works: A small amount of fuel is injected into a chamber, ignited by a spark, creating a small explosion that drives the piston.
- Pros: Very powerful, completely cordless (no hose or air compressor), lightweight compared to some cordless models.
- Cons: Requires purchasing fuel cells. Can have a distinct smell. Performance can be affected by extreme temperatures. The fuel cells add an ongoing cost.
- Best For: Framing and roofing, especially when working on job sites without easy access to power, or for very frequent use where cord restriction is a major issue.
Corded Electric Nailers (Plugs into the Wall)
These are less common for framing but are found in some specialized staplers and smaller nailers. They don’t use a compressor but require a power outlet.
- How it Works: Powered directly by AC power from a wall outlet.
- Pros: No batteries to charge, no fuel to buy, generally lighter and less expensive than cordless.
- Cons: Tethered by a cord, limiting portability and posing a tripping hazard. Usually less powerful than other types.
- Best For: Upholstery, craft projects, or light trim work where you won’t be moving far from an outlet.
Choosing the Right Nailer for Your DIY Projects: A Practical Guide
So, what’s the actual “best” nail gun for your DIY projects? It boils down to the most common tasks you’ll be undertaking. Let’s break it down by project type.
For General Home Improvement & Basic Woodworking (Deck Repair, Fencing, Small Framing):
A cordless electric framing nailer is often the sweet spot. It offers the power needed for most structural tasks without the hassle of an air compressor. You get portability and power in one package.
Alternatively, if you already have a good air compressor, a pneumatic framing nailer is a reliable and often more budget-friendly choice for the tool itself.
For Trim Work, Cabinets, and Furniture Building:
This is where cordless electric finish nailers (15-gauge or 16-gauge) and brad nailers (18-gauge) shine. The convenience of not having a hose or compressor is invaluable when you’re maneuvering around delicate workpieces or need to move from room to room.
- 15-Gauge Finish Nailer: Great for baseboards, door casings, and window trim. The slightly larger nail offers good holding power while still being discreet.
- 18-Gauge Brad Nailer: Perfect for molding, drawer assembly, and smaller trim pieces where minimal damage is key.
For Roofing Projects:
A dedicated roofing nailer is the clear winner here. Whether pneumatic or cordless, its specialized design will save you immense time and effort.
For Extremely Delicate or Inconspicuous Work:
A pin nailer (23-gauge) is your best bet for tasks where you absolutely cannot have visible nail heads. This is more for hobbyists or very specific decorative applications.
Key Features to Look for in a DIY Nail Gun
Beyond power source and type, several features can make a nail gun more user-friendly and effective for DIY projects.
- Adjustable Depth Setting: Lets you control how deep the nail is driven without damaging the wood surface. Essential for flush or countersunk nails.
- Tool-Free Jam Release: If a nail gets jammed, you want to be able to clear it quickly and easily without needing extra tools.
- Sequential vs. Contact Fire:
- Sequential (Single Shot): You must pull the trigger for each nail. Safer and more precise.
- Contact (Bump Fire): You can hold the trigger down and bump the nose against the wood to fire nails rapidly. Faster, but requires care to avoid accidental firing. Many modern nailers offer a selector switch.
- No-Mar Tip: A rubber or plastic tip on the nose to prevent marring delicate wood surfaces.
- Swiveling Air Connector (for pneumatic): Allows the hose to rotate, preventing tangles.
- Battery Indicator: Lets you know how much charge is left.
- Integrated Belt Hook: Handy for easily hanging the tool when not in use.
- Ergonomics: A comfortable grip and balanced weight distribution make a big difference during extended use.
Safety First! Using Your Nail Gun Responsibly
Nail guns are powerful tools, and safety should always be your top priority. Treating them with respect will ensure you get the job done without injury and keep your projects running smoothly.
- Always Wear Safety Glasses: This is non-negotiable. Flying nails, debris, or tool parts can cause serious eye injury.
- Read the Manual: Every nail gun is slightly different. Familiarize yourself with your specific tool’s operation and safety features.
- Never Point the Nailer at Yourself or Others: Treat it like a loaded firearm.
- Keep Fingers Away from the Trigger When Not Firing: Especially important with contact fire modes.
- Disconnect Power When Not in Use or Clearing Jams: Unplug pneumatic hoses, remove batteries from cordless tools, or remove fuel cells from gas tools.
- Use the Correct Nails for Your Tool: Using the wrong nails can cause jams or damage the tool.
- Be Aware of Your Surroundings: Ensure no one is behind the workpiece where a nail could unexpectedly exit.
- Secure Your Workpiece: Make sure the wood you’re nailing into is stable.
For more on tool safety, check out resources like ToolTrain’s Comprehensive Safety Guide.
Making the Choice: Comparing Popular Nailer Types for DIY
To help you visualize your options, here’s a quick comparison table of the most common nailer types for DIY projects:
| Nailer Type | Primary Use | Nail Size | Power Source Options | Pros |
|---|