Quick Summary: For DIY furniture building, the “best nail gun” depends on your project. Brad nailers are versatile for trim and smaller pieces, while finish nailers excel at slightly larger tasks. For framing, a framing nailer is essential. Choose pneumatic for power and corded/battery for convenience, always prioritizing safety and the right nail size for strong, beautiful furniture.
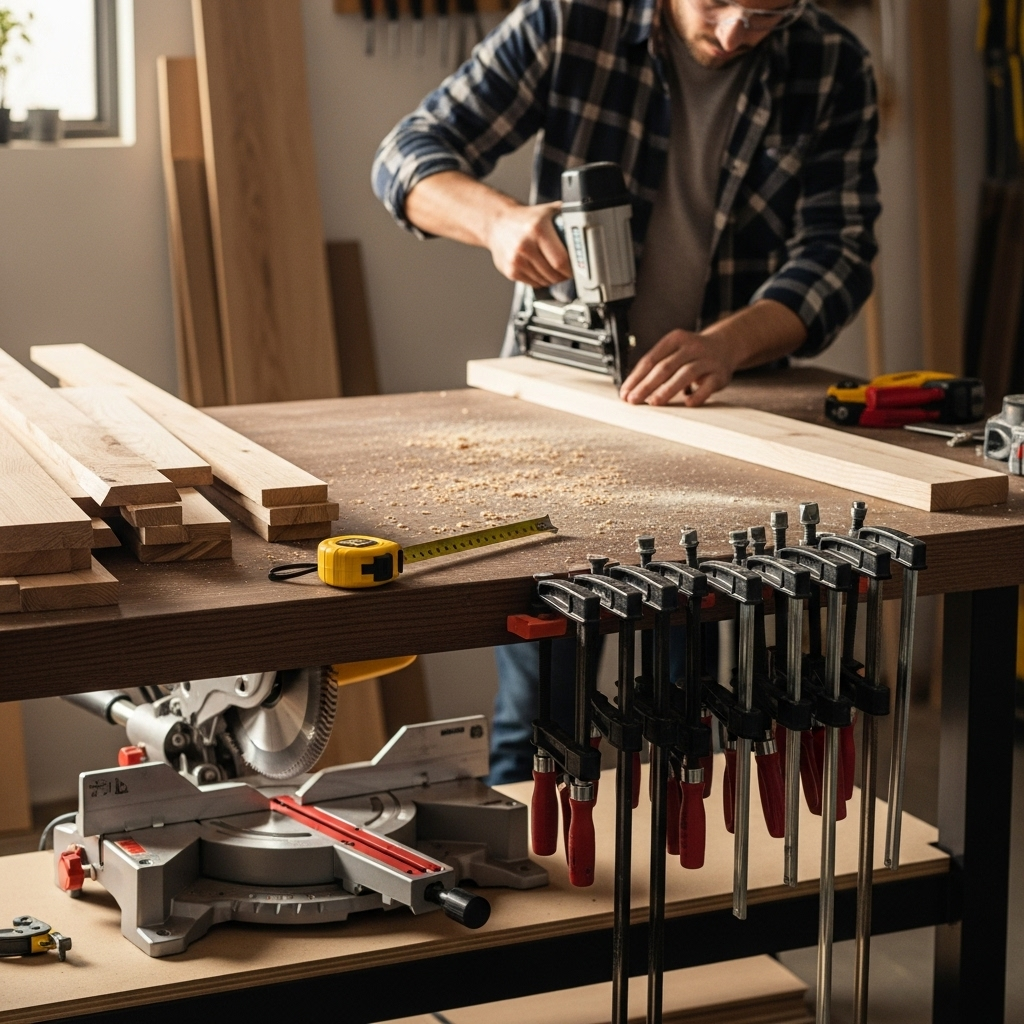
Building your own furniture can be incredibly rewarding. You get to create pieces that perfectly fit your space and style, and save money too! But wrestling with hammers and nails can be frustrating and slow, especially for beginners. You might end up with bent nails, split wood, or just an uneven result. That’s where a nail gun comes in! It’s a game-changer for DIY furniture projects, making assembly faster, easier, and with much more professional-looking results. Forget the old-school hammering; a nail gun lets you drive nails precisely and powerfully with just the pull of a trigger. We’ll walk you through choosing the right nail gun for your furniture adventures, making sure you get the job done right the first time.
Table of Contents
Why a Nail Gun is Your DIY Furniture Building BFF
Think about those furniture plans you’ve gathered – maybe a sturdy bookshelf, a cozy coffee table, or a custom bench. Attaching those pieces securely and neatly is critical. A hammer can work, but it’s often slow and can leave dents. A nail gun, however, is designed for speed and precision. It drives nails quickly and cleanly, creating strong joints with minimal effort. This means less time spent on tedious fastening and more time enjoying your finished creation. Plus, it significantly reduces the chance of damaging your wood or injuring yourself.
For DIYers, a nail gun isn’t just a tool; it’s an investment in efficiency and quality. It empowers you to tackle more ambitious projects and achieve a level of finish that was previously difficult. Whether you’re attaching trim, assembling cabinet boxes, or building frames, the right nail gun will make the process smoother and more enjoyable.
Types of Nail Guns for Furniture Building
Not all nail guns are created equal, and the best one for your furniture project depends on the size and type of work you’re doing. Let’s break down the most common types you’ll encounter:
1. Brad Nailers
Brad nailers are fantastic for delicate work and smaller projects. They use thin, short nails called brads, which are ideal for attaching thin trim, decorative molding, or assembling smaller items like jewelry boxes or picture frames. Because the nails are so thin, they leave minimal holes that are easy to fill and hide.
- Best for: Attaching trim, molding, small decorative pieces, lightweight crafts.
- Nail Size: Typically 18-gauge brads (around 5/8” to 2”).
- Pros: Lightweight, easy to maneuver, minimal damage to wood, small nail holes.
- Cons: Not suitable for structural joints or heavy-duty assembly.
2. Finish Nailers
Once you step up to finish nailers, you’re moving into slightly more robust territory. These use slightly thicker nails (16-gauge or 15-gauge) than brad nailers. They’re excellent for attaching baseboards, door casings, crown molding, and assembling cabinet boxes or other furniture pieces where you need a bit more holding power than a brad can provide, but still want to minimize visible fastener marks.
- Best for: Baseboards, door casings, crown molding, cabinet assembly, chair rails.
- Nail Size: Typically 16-gauge (1.5” to 2.5”) or 15-gauge (1.5” to 2.5”).
- Pros: Good balance of holding power and minimal damage, versatile for many furniture tasks.
- Cons: Nail holes are slightly more noticeable than with brad nailers.
3. Framing Nailers
These are the heavy-hitters. Framing nailers are designed for constructing the structural elements of larger projects, like sheds, decks, or the main frame of substantial furniture pieces. They drive larger, thicker nails with significant force. You likely won’t need this for most typical DIY furniture projects unless you are building very large, robust items like a heavy-duty workbench or a large outdoor structure.
- Best for: Rough framing, building furniture frames from thick lumber, larger structural projects.
- Nail Size: Typically 8-gauge to 10-gauge (2” to 3.5”).
- Pros: Extremely powerful, drives large nails for strong structural connections.
- Cons: Overkill for most furniture, larger and heavier, leaves significant nail holes.
4. Pin Nailers (Zero-Nail Finishers)
These are the most delicate of the nail gun family. Pin nailers use ultra-fine, headless pins (23-gauge or thinner). They are perfect for tiny decorative elements, picture frames, or tacking very small trim pieces in place while glue dries. They literally leave almost invisible holes, making them ideal for the most demanding finishing work.
- Best for: Miniature projects, very fine trim, tacking delicate pieces, attaching delicate moldings.
- Nail Size: Typically 23-gauge headless pins (around 1/2” to 1”).
- Pros: Virtually invisible holes, excellent for the most delicate finishing.
- Cons: No holding power, only for tacking or decorative elements where glue does the work.
For most DIY furniture building, especially if you’re assembling cabinet carcasses, attaching trim, or putting together wooden boxes, a brad nailer or a finish nailer will be your go-to tools. They offer the best balance of power, control, and finish for these tasks.
Choosing Your Nail Gun Power Source
Once you know the type of nail gun you need, the next big decision is how it’s powered. There are three main options:
1. Pneumatic (Air-Powered) Nailers
These are the traditional workhorses of the nail gun world. They connect to an air compressor via a hose and deliver consistent, powerful nail-driving force. They are often the most powerful and reliable options.
- Pros: Lightweight tool itself (the compressor does the heavy lifting), powerful, consistent performance, generally less expensive upfront per tool.
- Cons: Requires an air compressor (additional cost and space), tethered by a hose, compressor can be noisy.
Important Tip: If choosing a pneumatic nailer, make sure your air compressor has enough “tank size” (gallons) and “air flow” (CFM – Cubic Feet per Minute) to support the nail gun you select. Check the nail gun’s specifications for its CFM requirement.
2. Electric (Corded) Nailers
These nailers plug directly into a standard electrical outlet. They are convenient because they don’t require a compressor, but they are tethered by a power cord.
- Best for: Hobbyists and DIYers who don’t have a compressor and do smaller projects.
- Pros: No compressor needed, plug and play convenience, generally lighter than cordless.
- Cons: Limited by the power cord’s length, less power than pneumatic or high-end cordless.
3. Cordless (Battery-Powered) Nailers
Cordless nailers are the most convenient for DIYers. They run on rechargeable batteries and don’t need a compressor or a cord. They often use a small gas cartridge for some models or rely solely on battery power for driving the nail.
- Best for: Versatile use around the workshop and job site without cords or compressors.
- Pros: Ultimate freedom of movement, no compressor or cord needed, increasingly powerful.
- Cons: Can be heavier due to the battery, battery life is a consideration, can be more expensive upfront.
For beginner DIY furniture builders, a cordless finish nailer often hits the sweet spot of convenience, power, and versatility, though a smaller pneumatic kit can be a great value if you plan on doing a lot of work and don’t mind the compressor.
Essential Features to Look For
When you’re shopping for the best nail gun for DIY furniture building, keep these features in mind:
- Depth Adjustment: This is crucial. It allows you to control how deep the nail drives into the wood. You want to be able to countersink nails just slightly (so the head is below the surface) for easy filling, or drive them flush. Too deep, and you’ll damage the wood; too shallow, and they won’t be secure.
- Tool-Free Jam Release: Jams happen. A feature that lets you clear a jammed nail quickly without needing extra tools saves a lot of frustration.
- Selectable Trigger: Look for a nailer that allows you to switch between “contact fire” (fire when trigger is pulled and nose is pressed) and “sequential fire” (fire only when trigger is pulled after nose is pressed). Sequential fire is safer and more precise for furniture building.
- Adjustable Belt Hook: Handy for hanging the tool on your belt or workbench edge when you’re not actively using it.
- Swivel Air Fitting (for Pneumatic): Prevents the air hose from twisting and getting in your way.
- Ergonomics and Weight: You’ll be holding the tool potentially for extended periods. Make sure it feels comfortable in your hand and isn’t overly heavy, especially if you’re working overhead or in tight spaces.
- Nail Capacity: How many nails fit in the magazine? A higher capacity means fewer reloads during your project.
Putting It All Together: A Table of Common Furniture Nails
Understanding the different nail types and their uses is key to successful furniture assembly. Here’s a quick look at what you’ll typically use with your nail gun:
| Nail Type | Gauge (Thickness) | Typical Lengths | Primary Use in Furniture Building | Holding Power | Visibility of Hole |
|---|---|---|---|---|---|
| Brad Nail | 18-Gauge | 5/8″ – 2″ | Attaching trim, molding, small decorative elements, light assembly | Low to Moderate | Very Low (easy to fill) |
| Finish Nail | 16-Gauge | 1.5″ – 2.5″ | Baseboards, door casings, cabinet assembly, chair rails, attaching face frames | Moderate to High | Low (fairly easy to fill) |
| Pin Nail | 23-Gauge (or thinner) | 1/2″ – 1″ | Attaching tiny trim, picture frames, holding small pieces while glue dries | Very Low (for tacking only) | Extremely Low (virtually invisible) |
| Common Nail (Framing) | ~8-10 Gauge | 2″ – 3.5″+ | Rough framing, heavy-duty structural construction (rare for DIY furniture) | Very High | High (difficult to hide) |
For the majority of DIY furniture projects—think cabinet boxes, attaching trim to a bookshelf, building a simple table—you’ll likely reach for a 16-gauge finish nailer or an 18-gauge brad nailer. They offer the best blend of strength and a clean finish for these applications.
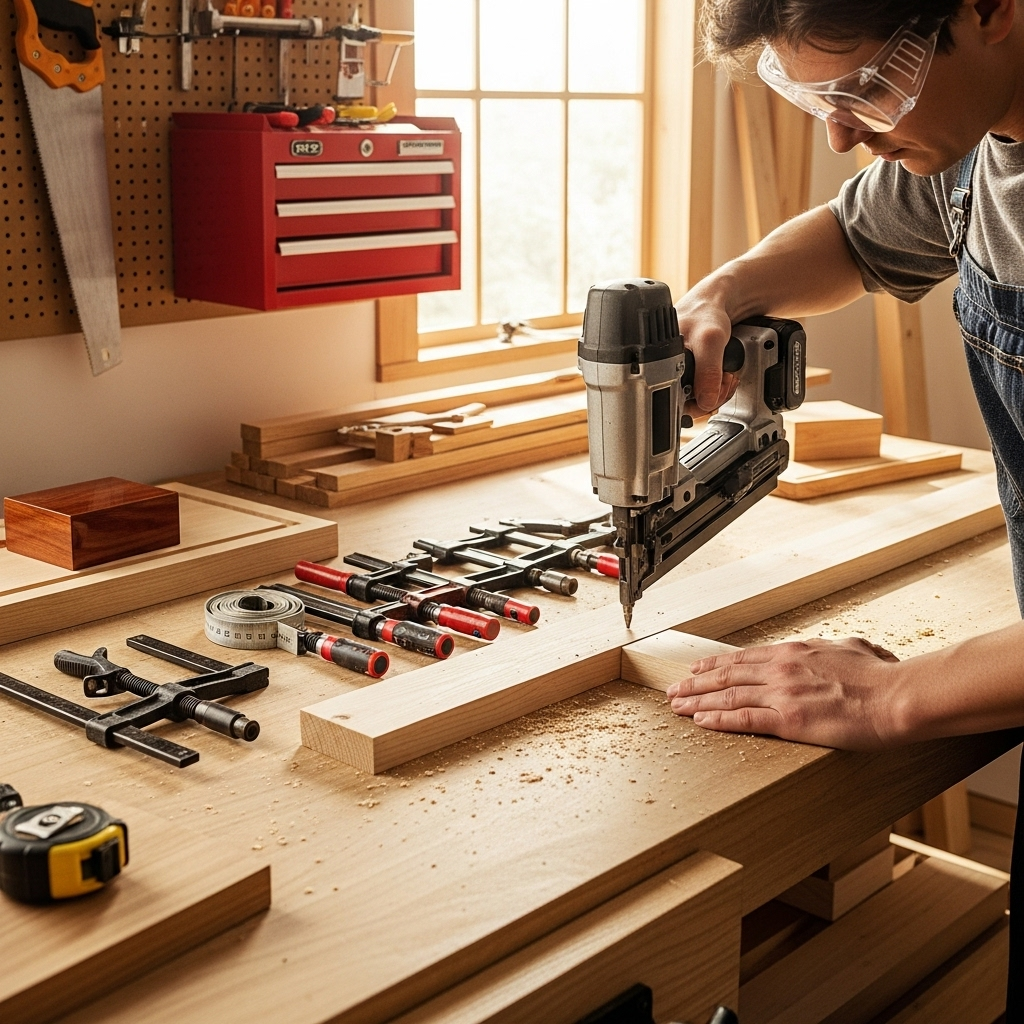
Step-by-Step: Using Your Nail Gun Safely and Effectively
Using a nail gun is straightforward, but safety and proper technique are paramount. Here’s how to get started:
-
Read the Manual!
This is the MOST important first step. Every nail gun is slightly different. Understand its specific features, safety warnings, and maintenance requirements.
-
Choose the Right Nail Gun and Nails
As we’ve discussed, select the nail gun type (brad, finish, etc.) and the correct length and gauge of nails for your specific project and wood thickness. Using nails that are too long can pierce through the other side of your material, while nails that are too short won’t hold securely.
-
Connect Power (and Air if Pneumatic)
Pneumatic: Connect the air hose securely to the nailer and your air compressor. Ensure the compressor is set to the recommended PSI (pounds per square inch) for your nail gun. Most nail guns operate efficiently between 70-120 PSI, but always check your tool’s manual.
Electric/Cordless: Ensure the battery is charged and inserted correctly, or that the cord is plugged into a working outlet. For cordless tools, make sure you’re using the correct battery type recommended by the manufacturer. Reputable sources like Energy.gov offer great general advice on tool efficiency.
-
Load the Nails
Open the magazine, most often by sliding a part of the magazine backward. Insert a strip of the correct nails, ensuring they are seated properly against the magazine follower. Close the magazine securely. Many nailers have a nail count indicator so you know when you’re running low.
-
Set Depth and Trigger Mode
Depth: Practice on scrap wood first! Adjust the depth setting until the nail head sinks just below the wood surface, or is flush, as desired. You don’t want to overdrive (damage the wood) or underdrive (leave the nail head sticking out).
Trigger: If your tool has a selectable trigger, ensure it’s set to sequential fire for safety and precision. This prevents accidental firing.
-
Position the Nailer
Place the nose of the nail gun firmly against the wood surface where you want to drive the nail. Ensure the contact tip is flush against the material.
-
Fire the Nail
With the nailer firmly in position, squeeze the trigger. The nail will be driven into the wood. For sequential fire, you must press the contact tip against the wood then pull the trigger.
-
Maintain Consistent Pressure
Apply firm, even pressure as you fire. This ensures good seating and prevents the nail gun from bouncing, which can cause misfires or damage.
-
Reload as Needed
When the nail supply is low, repeat step 4.
-
Clean and Store
After use, disconnect the power source (and air if pneumatic). Follow your manufacturer’s instructions for cleaning and storing the tool. This might involve a quick wipe-down and proper storage in a dry place. Proper maintenance, as recommended by institutions like The U.S. Consumer Product Safety Commission, is key to longevity and safety.
When to Use Glue with Your Nail Gun
A nail gun is excellent for fastening, but for strong, durable furniture, glue is usually your best friend. Here’s when and why to combine them:
- Structural Joints: For any joint that bears weight or stress (like table legs to aprons, shelf supports), always use wood glue in addition to nails. The nails hold the pieces together tightly while the glue dries and cures, creating a bond that is often stronger than the wood itself.
- Preventing Wood Splitting: When attaching trim or thinner pieces where splitting is a risk, applying a bead of glue can help reinforce the wood and make it less prone to splitting when the nail is driven.
- Filling Gaps: Sometimes, even with careful cutting, small gaps can occur. A little glue can help fill these minor imperfections before you nail.
Pro Tip: Apply glue to the surfaces that will be joined, then use your nail gun to clamp the pieces together as the glue sets. Wipe away any excess glue that squeezes out immediately with a damp cloth. Dried glue is much harder to remove and can affect finishing later.
Safety First: Always!
Nail guns are powerful tools and must be treated with respect. Here are the golden rules of nail gun safety:
- Never point the nail gun at yourself or anyone else. Even when it’s not charged or connected to air, there could be a nail in the chamber.
- Always wear safety glasses. Flying debris or a ricocheting nail can cause serious eye injury.
- Keep your fingers away from the trigger and the nose of the gun when not actively firing