Looking for the best nail gun for building wooden furniture? For most DIYers, a brad nailer or a finish nailer is your go-to. Consider cordless for ultimate freedom or pneumatic for power. Choosing the right one makes furniture projects smoother and more professional. This guide will help you pick perfectly!
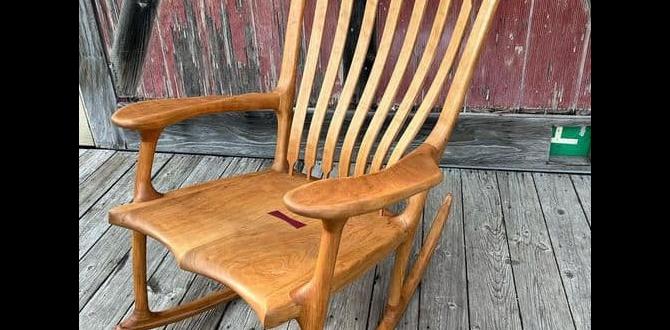
Hey there, fellow makers! Jack Shaffer here, your go-to guy for all things nail guns and woodworking. Building beautiful wooden furniture can feel a bit daunting when you’re just starting out. You see those perfectly joined pieces in magazines and wonder how they get that seamless look. Often, the secret weapon isn’t just skill, but the right tool – and for furniture building, that’s usually a nail gun. Choosing the best nail gun for building wooden furniture can seem like a puzzle, with so many types and features out there. Don’t sweat it! I’m here to break it all down for you, step-by-step. By the end of this guide, you’ll know exactly which nailer will help you create stunning furniture pieces with confidence and ease.
Table of Contents
Why a Nail Gun is a Game-Changer for Furniture Building
Let’s face it, hammering nails by hand is tiring, time-consuming, and can lead to a lot of frustrating dents and misaligned pieces on your beautiful lumber. A nail gun changes all of that. It drives fasteners quickly, accurately, and efficiently, giving your projects a professional, clean finish. This means less time spent fighting with tools and more time enjoying the process of bringing your furniture designs to life. When you’re assembling intricate joints, attaching trim, or just need a strong hold, a nail gun is invaluable. It elevates your craftsmanship and makes larger projects far more manageable.
Understanding the Different Types of Nail Guns for Furniture
Not all nail guns are created equal, especially when it comes to furniture. The most common types you’ll encounter and likely use for your projects are brad nailers and finish nailers.
Brad Nailers
What they are: Brad nailers use thin, small-gauge nails (typically 18-gauge). These nails have very small heads, which means they leave tiny holes that are easy to fill and conceal. This makes them perfect for delicate work where appearance is key.
Best for: Attaching thin trim, delicate molding, decorative elements, corner blocks, and assembling smaller, less structural furniture pieces. They are also great for furniture repair where you want minimal damage.
Pros:
- Leaves very small, almost invisible holes.
- Ideal for intricate details and delicate wood.
- Lightweight and easy to maneuver in tight spots.
- Quick fastening speed.
Cons:
- Not strong enough for structural joints or heavy-duty assembly.
- Nails can bend easily in hardwoods.
Finish Nailers
What they are: Finish nailers use slightly thicker and larger gauge nails (commonly 15-gauge or 16-gauge) compared to brad nailers. The nails they drive have slightly larger heads that offer better holding power but are still relatively discreet and easy to fill.
Best for: Attaching baseboards, crown molding, chair rails, door casings, and assembling more robust furniture components where a stronger hold is needed than a brad nailer can provide. They’re excellent for joining cabinet frames, attaching drawer fronts, and larger decorative panels.
Pros:
- Stronger holding power than brad nailers.
- Good balance between fastener size and visibility.
- Versatile for a wider range of furniture applications.
- Can handle slightly thicker trim and wood pieces.
Cons:
- Holes are more noticeable than brad nailer holes.
- Can still be too light for primary structural framing in very heavy furniture.
Other Nailer Types to Be Aware Of (But Likely Not Your Primary Furniture Tool)
While brad and finish nailers are the stars for furniture building, you might encounter others:
- Framing Nailers: These are heavy-duty workhorses for structural framing in house construction. They drive large nails (often 2-inch to 3.5-inch) and are far too powerful and overkill for delicate furniture work.
- Pin Nailers: Even finer than brad nailers (23-gauge), these are for the most delicate tasks or where you absolutely cannot have any visible hole. They offer almost no holding power and are mainly for positioning small decorative pieces.
- 2-in-1 Nailer/Staplers: Some tools can fire both nails and staples. While versatile, they might not excel at either task as much as a dedicated nailer for precise furniture work.
Nail Gun Power Sources: Cordless vs. Pneumatic
The power source of your nail gun significantly impacts its usability and your workflow.
Pneumatic Nailers (Air-Powered)
What they are: These nail guns require an air compressor to operate. The compressor pumps air into a tank, and when you pull the trigger, a burst of compressed air drives the nail.
Pros:
- Generally more powerful and reliable for consistent firing.
- Often lighter in hand, as the motor is the compressor, not the tool itself.
- Typically less expensive upfront than cordless models.
- Require less maintenance.
Cons:
- Requires a separate air compressor, which is an additional cost and takes up space.
- You are tethered by an air hose, limiting mobility and potentially creating a tripping hazard.
- The compressor can be noisy.
Great for: Workshops where you have a dedicated space and don’t need to move around much. If you already own an air compressor, this is often a cost-effective and powerful choice.
Cordless Nailers (Battery-Powered)
What they are: These nail guns have an integrated motor and battery, offering complete freedom from air hoses and power cords. Some use small fuel cells (in older models) or gas engines, but battery-powered is the modern standard.
Pros:
- Ultimate portability and freedom of movement – no cords or hoses!
- Quick setup: just charge the battery and go.
- Safer to use without hoses to trip over.
- Perfect for on-site work or moving around a large furniture piece.
Cons:
- Can be heavier in hand due to the integrated battery and motor.
- Higher upfront cost compared to pneumatic tools.
- Battery life is a consideration; you might need extra batteries for long work sessions.
- May have slightly less consistent power delivery than pneumatic, especially during rapid firing.
Great for: Beginners, those who value mobility, and anyone working in spaces without easy access to power outlets or an air compressor setup. Many modern DIYers prefer the convenience of cordless.
Corded Electric Nailers
What they are: These are powered directly by plugging into a wall outlet. They are less common for furniture building compared to pneumatic or cordless, often found in lighter-duty staplers or smaller brad nailers.
Pros:
- Lower cost than cordless.
- No batteries to charge or fuel cells to buy.
Cons:
- Tethered by a power cord, limiting mobility.
- Generally less powerful and suitable for lighter tasks.
Great for: Very occasional use on small, simple projects where mobility is not an issue.
Key Features to Look for in a Furniture Nail Gun
Beyond the type and power source, several features can make a nail gun a joy (or a pain) to use for furniture building.
1. Depth Adjustment
This is crucial. You need to control how deep the nail drives into the wood. Too shallow, and the nail head sticks out, ruining your finish. Too deep, and you might blow through thin wood or create an unnecessary large hole. Look for an easy-to-use depth adjustment, often a dial or lever near the nose of the gun.
2. Jam Release Mechanism
Nails can sometimes jam. A good nail gun will have an easy-access panel to clear jams quickly without needing special tools. This saves a lot of frustration mid-project.
3. Safety Contact Tip (Safety Mechanism)
This is paramount for safety. The nail gun won’t fire unless the safety tip is pressed firmly against the workpiece. This prevents accidental firing. Ensure it’s sensitive enough to work easily but not so sensitive it fires when you just bump it.
4. Swiveling Exhaust Port
On pneumatic guns, the exhaust port blows air out after each shot. A swiveling port allows you to direct this air away from your face and your workpiece, preventing dust and debris from being blown around.
5. Ergonomics and Weight
You’ll be holding this tool for extended periods. It should feel comfortable in your hand, with good grip and balanced weight. This is especially important for cordless models where the battery adds weight.
6. LED Work Light
A small LED light that illuminates the firing area is a fantastic feature, especially when working in dimly lit corners or under cabinets.
7. Sequential vs. Contact Firing Mode
- Sequential (or Single Fire): You must engage the safety tip and then pull the trigger to fire one nail. This is precise and safe.
- Contact (or Bump Fire): You engage the safety tip and can then “bump” the trigger repeatedly to fire nails as you press the tip to the wood. Faster, but less precise and requires more control.
For furniture, sequential firing offers better control for precise placement, which is often preferred.
Top Picks: Best Nail Gun For Building Wooden Furniture
Based on these considerations, here are a few types of nailers that consistently rank high for furniture building. While specific models change rapidly, these categories represent excellent choices.
For DIY furniture building, you’re primarily looking at a cordless 18-gauge brad nailer or a cordless 16-gauge finish nailer. These offer the best balance of precision, power, and portability for most home woodworking projects.
Recommended Nailer Types for Furniture Projects
| Nailer Type | Gauge | Common Applications | Power Source | Best For |
| :—————— | :—- | :——————————————————– | :—————– | :————————————————————————————————— |
| Brad Nailer | 18 | Trim, moldings, decorative elements, small assemblies | Cordless/Pneumatic | Finishing details, delicate joinery, projects where nail heads must be invisible. |
| Finish Nailer | 16 | Baseboards, crown molding, cabinet frames, door casings | Cordless/Pneumatic | More robust joinery, attaching larger trim pieces, projects requiring stronger hold than brad nailers. |
| Pin Nailer | 23 | Tiny decorative accents, glass holding, extremely delicate work | Cordless/Pneumatic | When absolute invisibility of the fastener is paramount and holding power is minimal. |
When choosing between a brad and a finish nailer, consider the typical thickness of the wood you’ll be working with and the required holding power. If you’re building primarily with 1/4-inch plywood and thin trim, an 18-gauge brad nailer might be sufficient and offer a cleaner finish. If you’re building cabinet carcasses, attaching thicker trim, or need more holding power for joints, a 16-gauge finish nailer is usually the better bet. Many serious hobbyists end up owning both!
Genius Tips for Using Your Nail Gun Like a Pro
Now that you’ve got an idea of what to look for, let’s talk about how to use your new nail gun effectively and safely.
Safety is always the priority when working with power tools. Always read your tool’s manual before its first use. A great resource for general tool safety is OSHA’s Consumer Tools Safety page, which provides excellent fundamental advice.
1. Nail Selection is Key
- Always match the nail size (gauge) and length to your project and the nailer. A common mistake is using a nail that’s too long and blows through the other side of your workpiece, or too short to provide adequate holding power.
- For hardwoods, consider using slightly longer or even two nails close together if one isn’t holding.
- Ensure your nails are straight and free of burrs; damaged nails can cause jams.
2. Practice Makes Perfect (On Scrap Wood!)
Before you touch your actual furniture project, grab some scrap pieces of the same wood you’ll be using. This is where you’ll dial in the depth setting and get a feel for the tool. Fire a few nails to see how deep they go. Adjust the depth setting until the nail head sits just slightly below or flush with the wood surface.
3. Master the Depth Setting
This is probably the most important tip. Every wood type is different. Pine is soft, oak is hard, and plywood can have voids.
- Too shallow: Nail head sticks out.
- Too deep: Nail head sinks too far, damaging the wood fibers, or even blows through thin material.
Start with a moderate depth setting and fire a test nail. If it’s too proud, increase the depth. If it’s too deep, decrease it. You’re looking for a nail head that is barely recessed (kissing the surface) or sunk just a hair, making it easy to fill later. For most fine furniture, a slight countersink is ideal to hold the wood filler.
4. Proper Trigger and Safety Engagement
- Hold Firmly: Apply firm, consistent pressure with the nail gun’s nose against the wood.
- Press Trigger Smoothly: Once the nose is engaged, pull the trigger. Don’t yank it; a smooth pull is more accurate.
- Be Aware of “Bump Fire”: If your nailer has bump fire (often activated by holding the trigger down while engaging the nose), use it deliberately. For precise work, it’s often better to use sequential firing mode.
5. Angle Your Shots Wisely
Whenever possible, drive nails straight into the wood. However, sometimes you’ll need to drive a nail at a slight angle to get into a tricky spot or to hit a hidden piece of lumber. Be careful not to angle too sharply, as this can cause the nail to blow out the side of the wood.
6. Workspace Setup for Success
- Clear the Area: Ensure your workbench or floor is clear of obstructions.
- Good Lighting: Make sure you have ample light to see what you’re doing.
- Ventilation: Especially if using pneumatic tools or working with wood glues and finishes, good ventilation is crucial.
- Safety Gear: Always wear safety glasses! Hearing protection is also recommended, especially for pneumatic nailers.
7. Filling Nail Holes for a Professional Finish
No nail gun is perfectly invisible. For a truly professional look:
- Allow any wood glue to dry completely before filling nail holes.
- Use a high-quality wood filler or putty that matches your wood species.
- Apply the filler with a putty knife, pressing it firmly into the holes.
- Once dry, sand the area smooth. For very visible areas, you might need to apply a second coat of filler.
- Match stains or finishes carefully.
A great resource for wood finishing techniques can often be found on educational sites like Woodworking.org, which aggregates advice from various woodworking communities and experts.
8. Maintenance Matters
Keep your nailer in good working order:
- Clean it regularly: Wipe down the exterior and check for any debris around the nose.
- Lubricate (Pneumatic): If you have a pneumatic nailer, use a few drops of specialized pneumatic tool oil in the air inlet regularly.
- Check O-rings and Seals: For both pneumatic and cordless, keep an eye out for any worn-out seals that might cause air leaks or power loss.
- Store Properly: Keep it in its case or a safe, dry place when not in use.
Building a Simple Wooden Project: Step-by-Step with a Nail Gun
Let’s walk through building a basic wooden box or small shelf unit to put these tips into practice. This is a project perfect for a beginner using their new brad nailer or finish nailer.
Project: Simple Wooden Box Shelf
Materials You’ll Need:
- Pre-cut wooden boards (e.g.,