Looking for the best finishing nailer for trim work? A good finishing nailer makes installing baseboards, crown molding, and other trim effortless, creating a professional look for your DIY projects. We’ll guide you to the perfect nailer for your needs, ensuring clean, precise results every time.
Trim work can transform a house, adding character and polish. But getting that perfect, seamless finish can feel like a challenge, especially when it comes to attaching delicate trim pieces. The right tool makes all the difference, and for trim work, that tool is the finishing nailer. A finishing nailer drives smaller, slimmer nails that leave a tiny, easy-to-fill hole, preserving the beauty of your wood. Forget the hammer and nails; a finishing nailer is your key to faster, cleaner, and more professional-looking trim installations. Let’s dive into how to choose the best one and get your projects looking sharp!
Table of Contents
Why a Finishing Nailer is Your Trim Work BFF
Imagine trying to perfectly place every nail by hand for intricate crown molding or elegant baseboards. It’s possible, but it’s tedious and often results in visible hammer marks or bent nails. A finishing nailer automates this process with precision and speed.
Speed and Efficiency: Drive nails in seconds, not minutes. This significantly cuts down project time.
Cleanliness: Finishing nails are slim, and the resulting nail holes are small. This makes them much easier to fill and conceal for a smooth, paint-ready surface.
Precision: You can control the depth of the nail, ensuring it sits flush with or slightly countersunk into the wood, ready for finishing.
Versatility: While designed for trim, they’re also fantastic for other light woodworking tasks like attaching decorative elements or furniture components.
Types of Finishing Nailers: Corded vs. Cordless
When you’re looking for the “best finishing nailer,” one of the first decisions you’ll make is between corded and cordless models. Each has its own perks and drawbacks.
Corded/Pneumatic Finishing Nailers
These are the classic workhorses. They require an air compressor and a hose to operate.
| Pros | Cons |
|---|---|
| Generally more affordable upfront. | Requires an air compressor, which adds cost and can be noisy. |
| Lighter weight, as the motor and power source are separate. | The air hose can be cumbersome and limit your range. |
| Often have excellent power and consistency. | Setup takes longer due to connecting the compressor and hose. |
| Very reliable and durable. | Less portable for quick jobs or working far from a power outlet. |
Pneumatic nailers are a favorite for many professionals due to their consistent performance and long lifespan. If you already own a compressor or plan on doing a lot of woodworking, this might be your best bet.
Cordless Finishing Nailers
Cordless models have become incredibly popular, offering freedom and convenience. They come in two main flavors: battery-powered and fuel-cell (gas-powered).
Battery-Powered Finishing Nailers
These use rechargeable lithium-ion batteries for power.
| Pros | Cons |
|---|---|
| Ultimate portability – no hoses or compressors needed. | Can be heavier due to the battery pack. |
| Quick setup – just grab and go. | Battery life can be a limitation if you have extended projects and no spare batteries. |
| No fuel cells to purchase or replace. | Can be more expensive upfront, especially if batteries and chargers are not included. |
| Quieter operation compared to fuel-cell models. | Nail depth can sometimes vary slightly with battery charge level. |
Battery-powered nailers are fantastic for DIYers and anyone who values convenience. Brands like DeWalt, Ryobi, and Makita offer excellent cordless options.
Fuel-Cell (Gas-Powered) Finishing Nailers
These use a combination of a small fuel cell (like those used in propane torches) and a battery for ignition.
| Pros | Cons |
|---|---|
| Very powerful and consistent, with excellent “pancake” compressors that are very small and light. | Requires purchasing fuel cells, adding to the ongoing cost. |
| Consistent depth of drive. | Can produce exhaust fumes, so good ventilation is a must. |
| Lightweight compared to some battery models. | Fuel cells and batteries are consumables that need eventual replacement. |
| Good for a wide range of temperatures. | Can be louder than battery-powered models. |
Popular brands in this category include Paslode. These are often favored by professionals working on new construction sites where power might be intermittent.
Choosing the Right Nail Size for Trim Work
The “finishing nailer” title doesn’t mean all nails are the same. They come in different gauges (thicknesses) and lengths. For trim work, you’re typically looking at the slimmer gauges.
18-Gauge (Finish Nailer): These are the most common for trim work. They drive nails that are around 1/16th of an inch thick. The hole they leave is very small, making them ideal for delicate molding, window casings, and door jambs, especially in hardwoods where you don’t want to split the wood.
16-Gauge (Nailer): These are slightly thicker (about 5/64th of an inch) and offer a bit more holding power. They’re suitable for heavier trim like baseboards or thicker moldings where less emphasis is placed on concealing the nail hole as much as with 18-gauge. The holes are still relatively small and easy to fill.
15/16-Gauge (Brad Nailer): While not technically a “finishing nailer” in the same vein, brad nailers (which fire even slimmer nails) can be used for very delicate trim or decorative trim pieces. However, they offer less holding power.
For most DIY trim projects, an 18-gauge finishing nailer is the sweet spot. It provides enough holding power for most molding and leaves the smallest, easiest-to-hide hole.
Key Features to Look For in a Finishing Nailer
Beyond power source and gauge, several features will make your life easier.
Nail Depth Adjustment: This is crucial! It allows you to set how deep the nail drives into the wood. You’ll want it to countersink slightly so the head is below the surface, ready for putty, but not so deep it tears through veneer or splits brittle wood.
Tool-Free Jam Release: Jams happen. A tool-free mechanism lets you quickly clear a jammed nail without fumbling for an Allen wrench.
Selectable Trigger (Sequential/Contact Firing):
Sequential firing: You must pull the trigger for each nail. This is safer and better for precise placement.
Contact firing (or “bump mode”): You hold the trigger down and “bump” the nose of the nailer against the wood to drive a nail. This is faster for repetitive work but requires more control to avoid accidental nailing. Having both options gives you versatility.
Swivel Air Fitting (for Pneumatic): A swivel fitting on the air hose connection prevents the hose from getting tangled as you move around.
Ergonomics: How does it feel in your hand? A comfortable grip and balanced weight can prevent fatigue during long projects.
No-Mar Tip: A rubber or plastic tip on the nose of the nailer prevents marring the surface of your trim, which is especially important when working with soft woods or pre-finished trim.
Belt Hook: A handy feature for keeping the nailer accessible when you need to move to a different section or take a break.
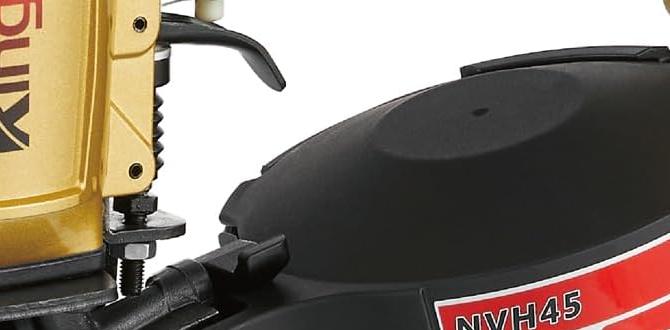
Top Finishing Nailer Brands and Models (for Trim Work Focus)
While many brands offer great finishing nailers, here are a few consistently well-regarded options that stand out for trim work. We’ll focus on 18-gauge models, as they are the workhorses for trim.
1. Bostitch 18-Gauge Cordless BTFP71917 (Battery)
Bostitch is known for robust tools. Their cordless 18-gauge nailer offers excellent power, a tool-free jam release, and adjustable depth control. It’s a solid all-around performer.
2. DeWalt DCN680B 18-Gauge Cordless Brad Nailer (Battery)
DeWalt’s XR line is popular, and this 18-gauge nailer is a favorite among DIYers and pros alike. It’s lightweight, well-balanced, and delivers consistent performance. It also features a brushless motor for greater efficiency and runtime.
3. Ryobi P325 One+ 18V Cordless 18-Gauge Airstrike Brad Nailer (Battery)
For budget-conscious DIYers, Ryobi’s One+ system is a fantastic entry point. This cordless nailer is affordable, lightweight, and surprisingly capable for most trim applications. If you already own Ryobi One+ batteries, the cost is significantly reduced.
4. Paslode 18-Gauge Cordless XP (Fuel Cell)
Paslode is a leader in fuel-cell technology. Their 18-gauge cordless XP nailer offers exceptional power and the freedom of no cords or hoses. It’s designed for high-volume use and challenging materials.
Factors for Comparison
| Feature | Bostitch BTFP71917 | DeWalt DCN680B | Ryobi P325 Airstrike | Paslode 18-Gauge Cordless XP |
| :—————– | :————————————– | :——————————————— | :——————————————— | :———————————————- |
| Power Source | Battery (20V MAX) | Battery (20V MAX) | Battery (18V ONE+) | Fuel Cell + Battery |
| Gauge | 18 | 18 | 18 | 18 |
| Weight | ~6 lbs | ~5.2 lbs | ~5.5 lbs | ~4.4 lbs (tool only) |
| Trigger Type | Selectable (Sequential/Contact) | Selectable (Sequential/Contact) | Selectable (Sequential/Contact) | Selectable (Sequential/Contact) |
| Depth Control | Yes | Yes | Yes | Yes |
| Jam Release | Tool-Free | Tool-Free | Tool-Free | Tool-Free |
| Typical Use | General Trim, DIY, Semi-Pro | Trim, Molding, Cabinetry, DIY | Basic Trim, DIY Projects | High-volume trim, Professional |
| Price Range | Mid-High | Mid-High | Low-Mid | High |
Note: Prices and specifications can vary. Always check current retailer listings.
How to Use Your Finishing Nailer Safely and Effectively
Using a finishing nailer is much simpler than traditional methods, but safety and proper technique are paramount for great results and avoiding injury.
Safety First!
Always Wear Safety Glasses: This is non-negotiable. Flying debris or expelled nails can cause serious eye injury.
Read the Manual: Familiarize yourself with your specific nailer’s features and safety warnings.
Keep Fingers Away from the Nose: Never place your finger near the firing mechanism or the nose of the nailer.
Treat it Like a Loaded Weapon: Never point the nailer at yourself or anyone else.
Secure Your Workpiece: Ensure the material you are nailing is stable. Use clamps if necessary.
Be Aware of Your Surroundings: Make sure no one is behind the workpiece where a nail might pass through.
Step-by-Step Trim Installation Guide
Let’s walk through attaching a piece of baseboard.
1. Gather Your Materials: You’ll need your finishing nailer, appropriate finishing nails (e.g., 18-gauge, 1-1/4″ to 1-1/2″ for typical baseboards), your trim material, a measuring tape, a pencil, safety glasses, and a nail set (if your nailer doesn’t countersink perfectly).
2. Measure and Cut Your Trim: Measure the wall section accurately. Use a miter saw for clean, angled cuts where trim pieces will meet at corners. Precision here prevents gaps later.
3. Position the Trim: Hold the trim piece firmly against the wall in its final position. Ensure it’s straight and flush. For baseboards, it should sit snugly against the floor and the wall.
4. Set Your Nail Depth: Before firing any nails into your good trim, test the nail depth on a scrap piece of the same wood. Adjust the nailer’s depth setting until the nail head is just below the surface, ready for filler. You want it countersunk but not so deep that it tears the wood or veneer.
5. Choose Your Firing Mode: For precise placement, use sequential firing. Hold the trigger down and then “bump” the nose of the nailer against the trim and wall where you want the nail. For faster, repetitive nailing along a long straight section, you might switch to contact firing (bump mode) once you’re confident with placement.
6. Nail Strategically:
Start a few inches from the end of the board.
Drive nails approximately every 16-24 inches along the length of the trim.
Place nails into studs whenever possible for the strongest hold. You can locate studs with a stud finder.
Drive a nail near each end of the trim piece to secure it firmly against the wall.
When nailing at an angle (like for inside or outside corners), ensure the nail is driven at an angle that will secure the trim to the framing.
7. Check Nail Heads: After nailing, inspect each nail. If any nail heads are proud of the surface, use a nail set and hammer to gently tap them flush or slightly below. Most modern nailers are good about countersinking, but it’s always good to check.
8. Fill Nail Holes: Once all trim is installed and you’re happy with the placement, use a paintable wood filler or putty to fill all the nail holes. Allow it to dry, then sand smooth.
9. Finish: Prime and paint or stain your newly installed trim to match your room!
Troubleshooting Common Finishing Nailer Issues
Even the best tools can run into minor hiccups. Here are a few common problems and how to fix them.
Nail Not Driving Fully:
Pneumatic: Check air pressure. It might be too low. Ensure the compressor is set to the recommended PSI for your nailer (usually 70-120 PSI).
Battery/Fuel Cell: Battery might be low, or fuel cell nearing empty. The wood might be exceptionally hard. Try adjusting depth or check if the nose is clean.
Wood Hardness: Very dense hardwoods can sometimes be challenging.
Nail Jammed:
Safely Disconnect: For pneumatic nailers, disconnect the air hose. For battery or fuel cell models, remove the battery or trigger the gun in a safe direction without a nail loaded.
Clear the Jam: Consult your manual, but most have an easy-open nose housing for clearing jams.
Nail Depth Inconsistent:
Battery Power (Cordless): Ensure the battery is fully charged.
Air Pressure (Pneumatic): Ensure consistent air pressure.
Depth Adjustment: Double-check that the depth adjustment setting is correctly configured and not bumped.
Nail Curving or Bending:
Usually caused by hitting a nail or screw from previous construction, or by hitting a knot in the wood. If it persists, ensure you’re using the correct nail size for the nailer.
Beyond Trim: Other Uses for Your Finishing Nailer
While trim work is its bread and butter, your finishing nailer is a versatile tool that can help with many other projects:
Cabinetry: Attaching face frames, assembling cabinet boxes, or installing decorative trim on cupboards.
Picture Frames: Creating sturdy, professional-looking frames for your artwork or photos.
Decorative Molding: Adding intricate decorative elements to furniture or walls.
Wainscoting: Installing panels and the decorative trim that goes with them.
* Small Projects: Assembling birdhouses, small shelves, or other craft projects.
According to occupational safety resources like the NIOSH publications on nail gun safety, understanding your tool and using it correctly is key to preventing injuries and ensuring efficient work.