The best finish nailer for window casing is typically a 16-gauge or 18-gauge pneumatic or cordless model with a slim magazine and the ability to drive nails flush into softwood and hardwood without splitting. For beginners, a 16-gauge with a comfortable grip and depth adjustment is ideal for precise, clean results on trim work.
Hey there, fellow DIYers and aspiring woodworkers! Jack here from Nailerguy. Installing window casing might sound like a small job, but getting it right makes a huge difference in the final look of your room or home. That annoying moment when your nails just won’t sit flush, or worse, they split the beautiful trim? We’ve all been there! But don’t worry, choosing the right tool can transform this task from frustrating to fantastically satisfying. With the correct finish nailer, you’ll achieve that professional, seamless look that makes your projects shine. In this guide, we’ll walk through everything you need to know to pick the perfect nailer for your window casing projects and nail that perfect finish, every single time.
Table of Contents
Why the Right Finish Nailer Matters for Window Casing
Window casing is the trim that frames your windows. It’s not just functional (hiding gaps between the wall and the window frame), but it’s also a key decorative element. The quality of your installation really shows here.
Using the wrong tool can lead to:
- Splintered trim: Especially with harder woods, a nailer that drives too hard or the wrong type of nail can cause unsightly splits.
- Nails sticking out: This leaves you with frustrating touch-up work, hammering nails in by hand (which can also damage the wood), and visible nail heads.
- Dimpled wood: Overpowering the wood with a nailer can leave dents that are difficult to hide.
- Inconsistent results: Different types of wood and trim profiles require different approaches.
The “best” finish nailer for window casing should be precise, gentle yet effective, and easy to handle for smooth, clean results. We’re talking about a tool that helps you achieve a professional finish, even if you’re just starting out.
Understanding Finish Nailer Gauges: 16 vs. 18 Gauge
When it comes to finish nailers for trim work like window casing, two gauges are the most common: 16-gauge and 18-gauge. The gauge refers to the thickness of the nail (a lower number means a thicker nail).
Here’s a quick breakdown:
16-Gauge Finish Nailers
These are generally considered the workhorse for window casing and other trim applications. 16-gauge nails are a bit thicker, offering more holding power.
- Nail Size: Typically drives nails ranging from 3/4 inch to 2 1/2 inches.
- Holding Power: Excellent. The slightly thicker nail provides a stronger hold, which can be beneficial for heavier trim or areas that might experience more stress.
- Nail Head: Small enough to be relatively inconspicuous, easily set slightly below the wood surface for filling.
- Best For: Window casing, door casings, baseboards, crown molding, and other substantial trim pieces.
- Pros: Stronger hold, less likely to split thicker hardwoods (though care is still needed), good for most residential trim.
- Cons: Slightly larger nail hole than an 18-gauge, might still require careful hammering for very delicate trim.
18-Gauge Finish Nailers
These are the “brad nailers” that use thinner nails, leaving a much smaller hole. They are excellent for delicate work.
- Nail Size: Usually drives nails from 5/8 inch to 1 1/2 inches.
- Holding Power: Sufficient for lighter trim and craft projects, but generally less holding power than a 16-gauge.
- Nail Head: Very small, creating a nearly invisible hole that often doesn’t need filling.
- Best For: Small trim, delicate moldings, picture frames, craft projects, and situations where an invisible fastening is paramount.
- Pros: Minimal marring, very small holes, great for detailed work and very thin trim.
- Cons: Less holding power, more prone to splitting delicate hardwoods if not used carefully, not ideal for securing heavier trim sections on their own.
Which is Best for Window Casing?
For most standard window casing projects, a 16-gauge finish nailer is the preferred choice. It offers a good balance of holding power, a relatively small nail head for a clean look, and is robust enough for most common trim materials, including MDF, pine, and even some hardwoods.
An 18-gauge nailer can be used if you’re working with very thin, delicate casing or if you’re absolutely certain you want the smallest possible nail hole and plan to use plenty of brads for support.
Types of Finish Nailers: Powering Your Project
Beyond the gauge, finish nailers come in a few different power sources. Each has its advantages and disadvantages, and the best one for you will depend on your setup, budget, and preferences.
Pneumatic Finish Nailers
These are the traditional workhorses of the finishing world. They run off compressed air from an air compressor.
- How They Work: An air compressor supplies pressurized air to the nailer, which then drives the nail. You’ll need an air hose to connect the two.
- Pros:
- Generally lighter in weight (the nailer itself, not including the hose and compressor).
- Often more affordable than cordless options.
- Reliable and consistent performance.
- Unlimited “magazine” life (you can keep firing as long as you have nails and air).
- Cons:
- Requires an air compressor, which adds cost, noise, and takes up space.
- The air hose can be cumbersome to manage, especially around corners or in tight spaces.
- Need to be tethered to the compressor.
- Beginner Recommendation: A great option if you already have a compressor or plan to do a lot of woodworking and nailer use. The consistent power is a big plus for beginners learning depth control.
Cordless Battery-Powered Finish Nailers
These are becoming increasingly popular because they offer true freedom from hoses and compressors.
- How They Work: They use a combination of a battery-powered motor and a small gas cartridge or a firing mechanism that uses the battery to drive the nail.
- Pros:
- Completely portable – no hoses or compressors needed.
- Quick setup and takedown.
- Great for job sites or areas without easy power access.
- Modern models offer excellent power and consistency.
- Cons:
- Generally more expensive upfront.
- Nailer itself can be heavier due to the battery and motor.
- Batteries need to be charged, and runtime is limited by battery capacity.
- Some models have a “recovery time” between shots as the motor or firing mechanism recharges.
- Beginner Recommendation: Fantastic for ease of use and portability, especially for DIYers tackling projects around the house. The freedom from air hoses is a game-changer for many.
Electric (Corded) Finish Nailers
These plug directly into a wall outlet and use a motor to drive the nail.
- How They Work: A powerful electric motor drives a mechanism that fires the nail.
- Pros:
- No compressor needed, and no battery charging required.
- Usually more affordable than cordless models.
- Consistent power as long as plugged in.
- Cons:
- You’re tethered by a power cord, which can be a hassle.
- Can be heavier than pneumatic counterparts.
- May not have the consistent power of pneumatic or high-end cordless for thicker trim.
- Beginner Recommendation: A viable option for trim work if you don’t want to invest in a compressor and your projects are within reach of an extension cord. Less common for professional trim carpenters but useful for DIYers.
Key Features to Look For in a Window Casing Nailer
When you’re shopping for the best finish nailer for window casing, keep these crucial features in mind:
1. Nail Gauge (Revisited)
As discussed, 16-gauge is generally the sweet spot for window casing. Ensure it drives nails of appropriate lengths (e.g., 1 1/4″ to 2″).
2. Depth Adjustment
This is a MUST-HAVE feature. It allows you to control how deep the nail penetrates the wood. You want to be able to set the nail slightly below the surface so you can fill it for a seamless finish, or flush with the surface if you plan to leave it visible. Look for an easy-to-use adjustment wheel or lever.
A common mistake for beginners is not using depth adjustment, leading to nails popping out or driving too deep and damaging the wood.
3. Tool-Free Jam Release
Even the best nailers can jam occasionally. A jam release that doesn’t require tools (like Allen wrenches) makes it quick and easy to clear a jam. This saves valuable time and frustration on a project.
4. No-Mar Tip (Contact Nose Pin)
The tip of the nailer that contacts the wood should be made of a soft material or have a cover to prevent marring or denting the trim as you fire. Some nailers come with interchangeable tips for this purpose.
5. Ergonomics and Weight
You’ll likely be holding the nailer for extended periods while working around multiple windows. A comfortable grip and a balanced tool that isn’t too heavy will reduce fatigue and improve accuracy. Check reviews for comments on how the tool feels in hand.
6. Firing Modes: Sequential vs. Contact Actuation
- Sequential Actuation: You must press the contact nose against the surface first, then pull the trigger to fire a nail. This is safer and more precise, giving you exact nail placement.
- Contact Actuation (Bump Fire): You can hold the trigger down and then “bump” the nailer against the surface to fire nails rapidly. While faster, it’s less precise and can lead to accidental nail firing.
For window casing, where precise placement is key, sequential actuation is generally preferred and safer for beginners. Many professional nailers offer a switch to select between modes.
7. Magazine Capacity and Loading
Consider how many nails the magazine holds. More nails mean fewer reloads. Also, check how easy it is to load nails. Top-loading magazines are usually the most user-friendly.
8. Dry Fire Lockout
This feature prevents the nailer from firing when it’s out of nails. It saves wear and tear on the tool and prevents accidental “dry fires” that can mark your wood.
Top Picks: Best Finish Nailers for Window Casing (2024)
Based on performance, reliability, and features tailored for trim work, here are some excellent choices you can consider. We’ll focus on 16-gauge models as they are most suitable for window casing.
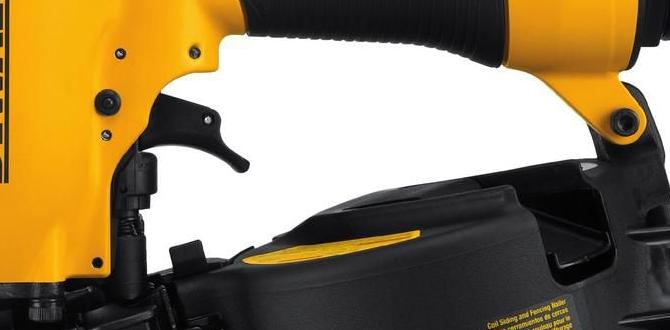
1. DeWalt 16-Gauge XRP Cordless Li-Ion Brushless Finish Nailer (DC616K)
DeWalt is a trusted name in power tools, and this cordless model is a standout for trim work. It uses a brushless motor for power and efficiency, and the XRP battery platform means you can use the same batteries across other DeWalt tools.
- Gauge: 16-Gauge
- Power Source: Cordless Battery (20V MAX XR)
- Key Features: Brushless motor, tool-free depth adjustment, tool-free jam release, sequential or contact actuation, LED lights.
- Pros: Excellent power, consistent firing, no pneumatic setup, long battery life.
- Cons: Can be a bit heavier, higher price point.
2. Metabo HPT 16-Gauge 2″ Cordless Angled Finish Nailer (NT1855DMQ4)
Metabo HPT (formerly Hitachi) offers robust tools. This cordless angled nailer (or straight, depending on model) is excellent for getting into tighter corners and is known for its reliability.
- Gauge: 16-Gauge
- Power Source: Cordless Battery (18V Li-Ion)
- Key Features: Brushless motor, tool-free depth adjustment, tool-free jam release, dry fire lockout, belt hook.
- Pros: Powerful, lightweight for its class, responsive firing, doesn’t require gas cartridges.
- Cons: Battery platform specific.
3. Senco Fusion Pro 16-Gauge Cordless Pneumatic Nailer (FP65XP)
Senco is renowned for its pneumatic nailers, and their Fusion Pro line brings that quality to cordless efficiency. It uses a unique “trapped air” system that acts like pneumatic power without the compressor.
- Gauge: 16-Gauge
- Power Source: Cordless Battery (18V/20V)
- Key Features: No ramp-up time, consistent power, tool-free depth control, tool-free jam release, LED fuel gauge.
- Pros: Feels like a pneumatic nailer in terms of power and speed, no gas cartridges, reliable, quiet operation.
- Cons: Pricier than some options, battery run time can vary.
4. BOSTITCH 16-Gauge ¼-Inch Straight Brad Nailer (BTFP71926)
If you’re going the pneumatic route and already have a compressor, BOSTITCH offers reliable and often more budget-friendly options. This model is consistently praised for its performance on trim.
- Gauge: 16-Gauge
- Power Source: Pneumatic
- Key Features: Tool-free depth adjustment, rear exhaust, lightweight magnesium body, tool-free jam release.
- Pros: Excellent value for performance, lightweight, powerful enough for most trim, readily available parts.
- Cons: Requires an air compressor and hose.
| Nailer Model | Gauge | Power Source | Typical Price Range | Key Strength | Consider For |
|---|---|---|---|---|---|
| DeWalt DC616K | 16-Gauge | Cordless Battery | $$$ | Powerful, XR platform | Existing DeWalt users, frequent DIYers |
| Metabo HPT NT1855DMQ4 | 16-Gauge | Cordless Battery | $$$ | Reliability, angled option | Those needing versatility, professional results |
| Senco Fusion Pro FP65XP | 16-Gauge | Cordless Battery | $$$$ | Pneumatic feel, no ramp-up | Users who want top-tier cordless performance |
| BOSTITCH BTFP71926 | 16-Gauge | Pneumatic | $$ | Great value, strong performance | Those with an air compressor, budget-conscious |
Note: Prices are approximate and can vary based on sales and retailers.
How to Use Your Finish Nailer for Window Casing: Step-by-Step
Now that you’ve chosen your nailer, let’s get to work! Proper technique is key to a professional finish.
Step 1: Gather Your Supplies
Before you start nailing, make sure you have everything ready:
- Your chosen 16-gauge finish nailer
- Nails (16-gauge, correct length for your trim thickness, usually 1 ¼” to 2”)
- Safety glasses (ESSENTIAL!)
- Ear protection (especially with pneumatic nailers)
- Measuring tape
- Pencil
- Miter saw (for cutting trim to size)
- Clamps (optional, but helpful for holding trim in place)
- Wood filler or putty (