Quick Summary
For beginners tackling DIY projects, the best cordless nailers offer ease of use, power, and portability. Look for models with adjustable depth settings, safety features, and good battery life. Battery-powered models are perfect for home renovation, eliminating air hoses and compressors for quicker, cleaner work.
Hey there, DIYers! Jack Shaffer here from Nailerguy. Ever felt a bit lost when trying to nail things together for your home projects? Maybe you’ve wrestled with tangled air hoses or lugged around a noisy compressor? It’s a common frustration, especially when you’re just starting out. But what if I told you there’s a simpler, more powerful way to get those nails driven precisely where you want them? Cordless nailers are a game-changer for home renovation and woodworking. This guide is all about finding the best cordless nailers for home renovation beginners. We’ll demystify the options, highlight what makes a nailer beginner-friendly, and help you pick the perfect tool to boost your confidence on your next project. Get ready to nail it!
Table of Contents
Why Cordless Nailers Are a Beginner’s Best Friend
Let’s be honest, starting a DIY project can feel a little intimidating. You want tools that make the job easier, not harder. That’s where cordless nailers shine, especially for beginners. They ditch the bulky air compressor and annoying hoses, giving you incredible freedom to move around your workspace. This means less setup time and more time actually building or fixing!
Think about it: no tripping over hoses, no needing to drag a compressor from the garage to your project site, and no constant noise. Just pick it up, load the nails, and you’re ready to go. They are designed to be intuitive, with features that help you control the depth of the nail and ensure it drives straight. This level of control is crucial for beginners who want professional-looking results without the steep learning curve.
Cordless nailers are versatile too. Whether you’re installing trim, building a bookshelf, or putting up drywall, there’s a cordless nailer that can handle it. They’re truly a fantastic investment for anyone looking to step up their DIY game.
Understanding Cordless Nailer Types: What Beginners Need to Know
When you start looking at cordless nailers, you’ll notice there are a few main types, each designed for different tasks. For beginners, understanding these differences is key to picking the right tool for your projects. The most common types are:
- Battery-Powered (Impulse) Nailers: These are the most common and versatile. They use a battery to power both a motor and a small fan (or sometimes a spring piston). The motor spins up, and then a puff of air or a compressed spring drives the nail. They offer excellent power and control, making them great for finish carpentry, framing, and even some heavier-duty tasks.
- Fuel-Cell (Gas) Nailers: These use a small propane or butane fuel cell inserted into a separate chamber. When you pull the trigger, a spark ignites the fuel, driving the nail. They are very powerful and often preferred for framing and heavy-duty applications. However, they can have a slight odor from the fuel and require purchasing fuel cells.
For most beginner DIYers embarking on home renovation projects like trim work, installing baseboards, or even building simple furniture, the battery-powered impulse nailers are usually the best bet. They are cleaner, quieter, and don’t require consumables like fuel cells. They offer a great balance of power, convenience, and ease of use, making them ideal for getting started.
Key Features to Look for in Your First Cordless Nailer
Choosing your first cordless nailer can seem overwhelming with all the options out there. But focus on these beginner-friendly features, and you’ll be well on your way to making a smart purchase:
- Adjustable Depth Setting: This is a must-have! It lets you control how deep the nail sinks into the wood. Too deep, and you might damage the surface; too shallow, and the nail head might stick out. Being able to dial this in easily ensures a clean finish.
- Tool-Free Depth Adjustment: Some nailers have a dial or lever for this, which is super convenient.
- Contact Actuation (Sequential Firing) vs. Bump Firing:
- Sequential Firing (Safety First!): This means you have to press the nose of the nailer against the material first, then pull the trigger. This prevents accidental nail firing and is highly recommended for beginners for safety.
- Bump Firing: This mode lets you hold the trigger down and “bump” the nailer against the wood to fire nails rapidly. It’s faster but can lead to accidental nail discharges if you’re not careful. Many beginner-friendly nailers offer both modes, but you’ll want to start with sequential.
- Integrated LED Light: A small but mighty feature! It illuminates your work area, helping you see exactly where you’re placing the nail, especially in dim lighting.
- Battery Compatibility (If You Own Other Tools): If you’re already invested in a particular brand (like DeWalt, Ryobi, Makita, etc.), check if the nailer uses the same battery platform. This can save you money and hassle.
- Lightweight and Ergonomic Grip: You’ll be holding this tool for a while. A comfortable, balanced design that doesn’t feel too heavy will make your work much more enjoyable and less tiring.
- Jam Release Mechanism: Sometimes, nails can jam. A tool that lets you clear jams quickly and easily without needing extra tools is a huge plus.
- Belt Clip: Handy for when you need to set the nailer down for a moment and keep it within easy reach.
Prioritizing these features will ensure your first cordless nailer is not only effective but also safe and easy to operate, building your confidence with every project.
Top Cordless Nailer Recommendations for Beginners
Based on ease of use, performance, and beginner-friendly features, here are a few types of cordless nailers that consistently earn high marks for DIYers just starting out. Remember, the “best” depends on your specific projects, but these categories are a great starting point:
1. Cordless Finish Nailers (16-Gauge & 18-Gauge)
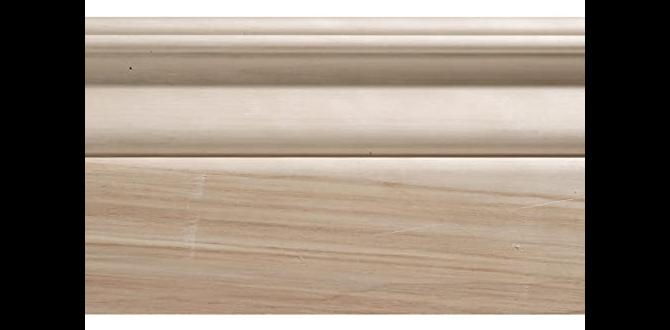
These are arguably the most versatile and beginner-friendly cordless nailers. They are perfect for trim work, installing baseboards and crown molding, attaching decorative elements, and building lighter furniture.
- 18-Gauge (Brad Nailer): Drives thin, small-headed nails (brads). Leaves a tiny hole that’s easy to fill and hide. Excellent for delicate trim and detailed work.
- 16-Gauge (Finish Nailer): Drives slightly thicker nails with a bit more holding power. The nail head is larger than an 18-gauge but still relatively easy to conceal. Great for most trim, doors, window casings, and DIY cabinetry.
Why they’re great for beginners:
- Relatively lightweight.
- Less recoil than framing nailers.
- Nail holes are easy to repair.
- Excellent control for precise placement.
- Wide range of battery options available.
2. Cordless Brad Nailers (20-Gauge)
For the most delicate work, a 20-gauge brad nailer is the king. It fires incredibly thin nails that leave almost no visible mark. If you’re working with very thin material or want a nearly invisible fastening point, this is your go-to.
Why they’re great for beginners:
- Extremely fine nail size, minimal impact on wood.
- Very lightweight and easy to handle.
- Ideal for crafts, model building, and very light trim.
3. Cordless Roofing Nailers
While maybe not the first tool a beginner might buy, if your project involves roofing, a cordless option is a huge upgrade from manual nailing. These are designed for the specific task of attaching shingles quickly and efficiently.
Why they’re great for beginners (for roofing):
- Dramatically speeds up the roofing process.
- Drives nails consistently to the correct depth, preventing damage to shingles.
- Battery power means no compressor needed on the roof.
4. Cordless Framing Nailers
These are the heavy hitters, designed for structural work like building walls, decks, or fences. They drive larger nails with more power. For beginners tackling these kinds of projects, they offer a massive speed and power advantage over a hammer.
Why they’re great for beginners (for framing):
- Significantly faster than hand-nailing.
- Drives nails through tougher materials.
- Battery-powered options offer mobility on job sites.
- Look for good balance and adjustable depth.
Pro Tip: For most general home renovation and DIY projects (trim, baseboards, doors, simple furniture), a 16-gauge or 18-gauge cordless finish nailer will be your most valuable and versatile first cordless nailer purchase. They offer the best blend of power, precision, and ease of use for beginners.
Comparing Power Sources: Battery vs. Fuel Cell
As we touched on earlier, cordless nailers get their power from either a battery or a fuel cell. Understanding the pros and cons of each will help you make the best choice for your needs:
| Feature | Battery-Powered (Impulse) Nailers | Fuel Cell (Gas) Nailers |
|---|---|---|
| Power Source | Rechargeable battery pack | Combination of a fuel cell (gas) and a small battery for ignition and fan. |
| Initial Cost | Can be higher for the tool and battery, but long-term battery cost is lower. | Often lower tool cost, but ongoing expense for fuel cells. |
| Operating Cost | Minimal (electricity to charge batteries). | Ongoing cost of fuel cells (each cell drives appx. 1000-1200 nails). |
| Power/Performance | Excellent for most applications, especially finish and framing. Some high-power framing models are available. | Very powerful, often preferred for high-volume framing and demanding applications. |
| Speed of Use | Fast, ready to go. | Fast, but requires loading fuel cells and can have a slight startup delay. |
| Ease of Use | Very intuitive, plug-and-play (charge and go). | Slightly more complex due to fuel cell insertion and maintenance. |
| Maintenance | Minimal; keep battery charged and tool clean. | Requires cleaning of the fuel cell combustion area periodically. |
| Environmental Impact & Emissions | Cleaner operation, no combustion fumes. | Combustion fumes from fuel cell; some find the odor noticeable. |
| Best For Beginners | Highly Recommended. Simpler, cleaner, and most versatile for general DIY. | Good for dedicated framing, but can be less beginner-friendly due to fuel cost and slight complexity. |
For beginners and most home renovation tasks, the battery-powered nailers are usually the superior choice. They offer a fantastic balance of convenience, power, and a straightforward user experience.
Safety First! Essential Cordless Nailer Safety Tips
Even with beginner-friendly tools, safety should always be your top priority. Cordless nailers are powerful, and injuries can happen if you’re not careful. Here are some crucial safety tips to follow:
- Always Wear Safety Glasses: This is non-negotiable. Wear ANSI-approved safety glasses or goggles every time you use a nailer, and keep them on until you’re completely finished and the tool is put away. Wood, nails, or debris can fly unexpectedly.
- Understand Your Nailer’s Firing Mode: Most professional-grade nailers have selectable modes. For beginners, always start with sequential firing (contact trip). This requires you to press the contact tip against the surface before pulling the trigger. This prevents accidental nail drives. Never disable safety features.
- Never Point the Nailer at Yourself or Others: Treat every tool like it’s loaded. Even if you think it’s not armed, accidents can happen.
- Keep Fingers Away From the Trigger and Nose: When not actively driving a nail, keep your finger off the trigger and away from the nose of the tool.
- Be Aware of Your Surroundings: Ensure no one else is too close to your project area. Also, be mindful of electrical wires or plumbing running behind the surface you’re nailing into. A quick check with a stud finder or consulting building plans can prevent costly and dangerous mistakes.
- Use the Correct Nails: Always use the nails recommended by the manufacturer for your specific nailer. Using the wrong size or type can cause jams or damage the tool.
- Disconnect Battery When Not in Use or Clearing Jams: To absolutely ensure the nailer can’t fire accidentally, remove the battery pack when you’re cleaning it, clearing a jam, or storing it.
- Read the Manual: Seriously! Every tool is a little different. Take a few minutes to read the owner’s manual for your specific nailer. It contains vital information about operation, maintenance, and safety.
- Secure Your Workpiece: Make sure the material you are nailing is stable and won’t move. Use clamps if necessary.
Following these safety guidelines will help ensure your DIY projects are successful and injury-free. It’s about building confidence while respecting the power of your tools.
Step-by-Step: How to Use a Battery-Powered Cordless Nailer for the First Time
Ready to fire up your new tool? It’s simpler than you might think! Follow these steps, and you’ll be driving nails like a pro in no time.
Step 1: Charge the Battery
Most new tools come with batteries that have a partial charge, but it’s always best to give it a full charge according to the manufacturer’s instructions. This ensures you have ample power for your first few uses and helps the battery maintain its health.
What you’ll need:
- Your cordless nailer kit (including battery and charger)
- Power outlet
Step 2: Load the Nails
Open the nail magazine. This is usually done by sliding a latch or lever. Insert the correct size and type of nails for your specific nailer, ensuring they are seated properly against the magazine’s guides. Close the magazine securely until it clicks shut. Never force nails in.
What you’ll need:
- Your cordless nailer
- The correct nails for your nailer (check your manual!)
Step 3: Insert the Battery
With the nailer set aside and your finger well away from the trigger, slide the fully charged battery pack into its designated slot on the nailer. Ensure it locks firmly into place. You might hear a click.
What you’ll need:
- Your cordless nailer
- Charged battery pack
Step 4: Select Firing Mode (If Applicable)
If your nailer has selectable firing modes, ensure it is set to sequential firing (contact trip) for your first uses. This is the safest mode for beginners. Refer to your manual for how to switch modes.
What you’ll need:
- Your cordless nailer
Step 5: Prepare Your Workpiece
Position the material you want to nail. Ensure it’s stable and won’t move. If you’re nailing two pieces together, make sure they are aligned correctly. A clamp can be very helpful here to hold pieces steady.
What you’ll need:
- Material to be worked on
- Clamps (optional but recommended)
Step 6: Set Depth Adjustment
Before driving your first nail, adjust the depth setting. For most tasks, you want the nail head to sink just slightly below the surface of the wood (this is called “setting” the nail), so it can be easily filled for a smooth finish. If the nail is too proud, gradually increase the depth. If it sinks too deep and craters the wood