Quick Summary: Looking for the best cordless nail gun for your deck or fence project? A powerful, battery-operated nail gun makes building and repairs faster and easier. Choose a model with appropriate nail size, battery life, and power for your specific needs, and enjoy a smooth, efficient build.
Hey DIYers! Jack Shaffer here from Nailerguy, and I get it. You’re ready to build that dream deck or sturdy fence, but the thought of wrestling with cords and air hoses is a real drag. It slows you down and can be downright frustrating. But what if I told you there’s a way to make fastening those boards a breeze?
That’s where the magic of cordless nail guns comes in. These battery-powered wonders are game-changers for outdoor projects. They offer freedom, power, and convenience that can turn a daunting task into an enjoyable one.
In this guide, we’ll dive deep into finding the absolute best cordless nail gun for your deck and fence builds. We’ll cover what makes a nailer perfect for these jobs, what features to look for, and how to pick the right one without all the confusing jargon. Get ready to build with confidence and ease!
Table of Contents
Why a Cordless Nail Gun is Your Deck & Fence Best Friend
Building a deck or a fence involves driving a lot of nails. Doing it manually with a hammer is time-consuming and can lead to sore arms and inconsistent results. Traditional pneumatic nailers require a bulky air compressor and a tangled air hose, limiting your mobility and adding setup time.
Enter the cordless nail gun. It’s the perfect blend of power and portability. Powered by a rechargeable battery, these tools let you move freely around your project site without being tethered to a power outlet or compressor. This means you can:
- Work faster and more efficiently.
- Reach difficult spots with ease.
- Achieve clean, professional-looking results every time.
- Reduce fatigue, making your project more enjoyable.
For outdoor projects like decks and fences, where power sources might be scarce and you need to cover a lot of ground, a cordless nail gun isn’t just a convenience – it’s practically essential. It streamlines the entire building process, letting you focus on the craftsmanship rather than the struggle.
Key Features to Look for in a Deck & Fence Cordless Nail Gun
Not all cordless nail guns are created equal, especially when it comes to demanding outdoor applications like deck and fence building. Here’s what to keep your eyes peeled for:
Nail Compatibility
This is paramount! For decks, you’ll typically be using larger nails, often 2.5 to 3 inches long, to securely fasten deck boards to joists and framing. Fences might use similar lengths or slightly shorter nails depending on the post and board thickness. Ensure the nail gun you choose can handle the gauge and length of nails required for your specific project.
- Gauge: Lower gauge numbers mean thicker nails. For decks, you’ll often want 8-gauge or 10-gauge nails.
- Length: Look for nail guns that can drive at least 3-inch nails for most deck and fence applications.
Power Source: Battery Type and Runtime
Cordless nail guns are powered by lithium-ion batteries. Consider:
- Voltage (V): Higher voltage generally means more power, which is crucial for driving longer nails into tougher materials. 18V is common, but for heavy-duty tasks, 20V or higher might be preferable.
- Amp-Hours (Ah): This tells you how long the battery will last on a single charge. For a big deck or fence project, you’ll want batteries with a higher Ah rating (e.g., 4.0 Ah or more) or invest in a second battery so you can charge one while using the other.
- Battery System Compatibility: If you already own cordless tools from a particular brand, check if the nail gun uses the same battery platform. This can save you money and avoid battery clutter.
Firing Speed and Mode
For efficiency, especially when laying down a lot of deck boards, a fast firing rate is a plus. Most cordless nailers offer:
- Sequential Firing: Fires one nail each time the trigger is pressed. This offers precision for placement.
- Contact Firing (Bump Fire): Fires a nail whenever the nose touches the wood and the trigger is held down. This is much faster for repetitive tasks like decking. Many models allow you to switch between modes.
Depth Adjustment
Being able to control how deep the nail is driven is crucial. You don’t want nails sticking out on your deck or fence, but you also don’t want them driven so deep they lose holding power. A tool-free depth adjustment is a fantastic feature that lets you easily dial this in.
Magazine Capacity
The magazine is where the nails are held. A larger capacity means fewer interruptions to reload. For deck and fence work, a capacity to hold at least 100 nails is desirable.
Weight and Ergonomics
You’ll be holding this tool for extended periods. A comfortable grip, good balance, and manageable weight will significantly reduce fatigue and make the job easier and safer.
Durability and Weather Resistance
Deck and fence projects often happen outdoors. While no tool is fully waterproof, look for models that are built tough and can withstand a bit of dust and moisture. Check user reviews for insights on long-term durability.
Types of Cordless Nail Guns for Decks and Fences
When we talk about cordless nail guns for decks and fences, we’re usually looking at two main types, distinguished by the type of nails they fire:
Cordless Framing Nailers
These are the heavy hitters. They use larger headed nails, typically 2 to 3.5 inches long, often referred to as framing nails. They are designed for structural applications where strong holding power is essential, making them perfect for:
- Attaching deck boards to joists (3-inch nails are common here).
- Assembling deck framing.
- Building fence posts and panels.
- Any structural wood-to-wood fastening.
They usually have more power to sink longer nails reliably into dense wood. Be aware that framing nailers can be a bit bulkier and heavier than other types.
Cordless Finish Nailers / Brad Nailers
While not the primary tool for structural deck framing or fence building, these smaller nailers have a role in adding to your outdoor projects. They use smaller, thinner nails (like brads or slim head finish nails) that leave a smaller hole, making them ideal for:
- Attaching decorative trim to deck railings.
- Securing lattice panels on a fence.
- Installing trim boards.
- Applying decorative elements or caps to fence posts.
They offer a more refined finish and are much lighter and more maneuverable. You’ll likely need a separate framing nailer if you’re building the core structure of your deck or fence from scratch.
Top Cordless Nail Guns for Deck & Fence Projects (Our Picks)
Based on power, reliability, and features suitable for outdoor building, here are some excellent cordless nail gun options that make great choices for deck and fence work. Remember to check nail compatibility for your specific project needs!
| Brand & Model | Nail Type | Max Nail Length | Key Features | Best For |
|---|---|---|---|---|
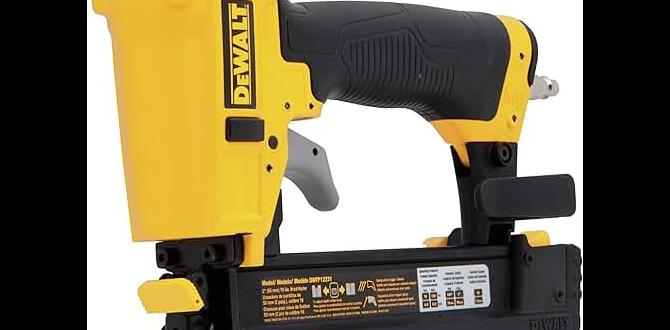
| DeWalt DCN692B 20V MAX XR Brushless Framing Nailer | 20-22 Degree Plastic Collated Full Round Head Framing Nails | 3-1/2 inches | Brushless motor for power and runtime, selectable trigger (sequential/contact), tool-free depth adjustment, rear-mounted motor for balance. | Heavy-duty framing, deck joists, large fence structures. |
| Metabo HPT NR36DAQ4 36V Multi Volt Cordless 3-1/2″ Metal Connector & Framing Nailer | 20-22 Degree Plastic Collated Full Round Head Framing Nails | 3-1/2 inches | Powerful 36V Multi Volt battery system, excellent power for driving long nails, lightweight for its class, reliable feeding. | Tackling tough wood, driving up to 3-1/2″ nails into dense lumber for robust decks and fences. |
| Senco Fusion F-35XP Pneumatic-Like Framing Nailer | 21 Degree Plastic Collated Full Round Head Framing Nails | 3-1/2 inches | “Pneumatic-like” power without a compressor, integrated air cylinder, good balance, reliable firing. | Users wanting a cordless feel with the power of pneumatic, great for framing and structural elements. |
| Paslode 902100 Cordless 16-Gauge LiHD Straight Finish Nailer | 16-Gauge Straight Finish Nails | 2-1/2 inches | Lightweight, excellent balance, fast actuation, integrated battery and fuel cell system, good for trim and finishing touches. | Adding decorative trim to decks and fences, installing railing caps, or any fine woodworking elements. (Not for structural framing). |
Note: Always check the manufacturer’s specifications for the exact nail sizes and types supported by each tool. Battery and charger are often sold separately for bare tool options (indicated by ‘B’ in DeWalt models, for example).
Step-by-Step Guide: Using Your Cordless Nail Gun for Deck & Fence Projects
Using a cordless nail gun is straightforward, but a little preparation and technique go a long way to ensure safety and efficiency. Let’s break it down.
1. Safety First! Understand Your Tool and Your Surroundings
Before you even pick up the nailer:
- Read the Manual: Every tool is different. Familiarize yourself with its specific operation, safety features, and maintenance. Visit the manufacturer’s website for digital copies if you can’t find your paper manual.
- Wear Safety Gear: ALWAYS wear safety glasses to protect your eyes from flying debris or ricocheting nails. Hearing protection is also recommended as nail guns can be loud.
- Know the Danger Zone: Never point the nail gun at yourself or anyone else. Ensure the “work contact element” (the tip that presses against the wood) is only pressed against your workpiece when you intend to fire.
- Clear Your Workspace: Ensure the area is free of obstacles, especially trip hazards like cords (even though you’re cordless, you might have battery chargers or extension cords for other tools). Check for hidden electrical wires or pipes if you’re working near existing structures.
2. Prepare Your Nail Gun
This is quick and easy with cordless models:
- Charge the Battery: Make sure your battery is fully charged. If you have a big job, having a spare charged battery ready is a smart move.
- Load the Nails: Open the nail magazine according to the tool’s instructions. Load the correct type and size of nails for your project—remember our discussion on gauge and length! Make sure they are seated properly in the magazine and that the feeder mechanism is engaged.
- Select Firing Mode: If your nailer has selectable firing modes, choose the one best suited for your task. For general deck and fence construction, “contact” or “bump” fire is usually fastest. For precise placement, use “sequential” fire.
- Adjust Depth Setting: Test the depth setting on a scrap piece of the same lumber you’ll be using. Adjust the depth control until the nails are driven just below the surface without damaging the wood.
3. Positioning and Firing
Now for the action:
- Position the Nailer: Place the nose of the nail gun firmly against the wood where you want to drive a nail. Ensure the work contact element is flush against the surface.
- Drive a Nail (Sequential Mode): Put the nose against the wood, then pull the trigger.
- Drive a Nail (Contact/Bump Mode): Hold the trigger down, then press the nose of the nail gun against the wood. The nail will fire. Lift the nose, and it’s ready for the next shot.
- Maintain a Firm Grip: Keep a steady grip on the tool to control recoil and ensure accurate placement.
- Work Systematically: For decks, work your way down the joists, fastening boards one by one. For fences, work along the fence line, securing pickets to rails.
4. Troubleshooting & Maintenance
Even the best tools can have minor hiccups:
- Nails Not Firing: Check battery charge, ensure nails are loaded correctly, confirm the safety tip is pressed against the work surface, and make sure the tool isn’t jammed.
- Nails Jamming: This can happen. Consult your manual for instructions on how to safely clear jams. Often, it involves opening the magazine and carefully removing the offending nail.
- Incorrect Depth: Re-adjust the depth setting as described in Step 2.
- Basic Maintenance: Keep the tool clean and dry. Refer to your manual for any lubrication requirements.
By following these steps, you’ll be well on your way to efficiently and safely completing your deck and fence projects!
When to Choose a Cordless Framing Nailer vs. Other Options
We’ve talked a lot about framing nailers for the heavy lifting, but it’s worth clarifying when that’s the right choice and when you might consider alternatives or supplements.
Choose a Cordless Framing Nailer When:
- Building Structural Elements: Your primary goal is to join large pieces of lumber for the main frame of a deck, attach deck boards to joists, or construct sturdy fence posts and rails.
- Using Long Nails: You need to drive nails of 2 inches or longer, especially 3-inch or 3.5-inch nails, into dense wood.
- Speed and Efficiency Are Key: You’re tackling a large area and need to drive a high volume of fasteners quickly.
- Mobility is Crucial: You need to move around a large job site without being tethered to a compressor or power outlet.
- Convenience is a Priority: You want to avoid the hassle of hoses, compressors, and air fittings.
Consider Alternatives or Supplements When:
- Working with Delicate Materials: If you’re attaching thin trim or decorative elements, a framing nailer will likely overdrive the nails and cause damage. A cordless finish nailer or brad nailer is much better suited for this.
- Working Indoors in Tight Spaces: While cordless is great, if you’re working on an interior deck or in a very confined space where a compressor hose might be less of an issue, a pneumatic framing nailer might offer slightly more power or a lighter tool weight (though high-end cordless models are closing this gap rapidly).
- Budget is Extremely Limited: While cordless nailers are an investment, they can be more expensive upfront than basic pneumatic setups. However, over time, the convenience and lack of consumables like air fittings can offset this.
- You Only Need a Few Nails: For a tiny repair or a single post, a hammer might suffice. But for any significant deck or fence construction, a nail gun is a worthwhile investment.
Think of your cordless framing nailer as the workhorse for the main construction, and perhaps a smaller cordless finish nailer as the detailer for the finishing touches. This combination gives you the best of both worlds.
Maintaining Your Cordless Nail Gun for Longevity
To keep your best cordless nail gun running smoothly for years to come, a little regular maintenance goes a long way. Think of it like tending to a reliable tool that’s your partner in DIY.
Regular Cleaning
- After each use, especially if you’ve been working in dusty or dirty conditions, wipe down the exterior of the nail gun with a clean, dry cloth.
- Pay special attention to the nose and the work contact element. Remove any sawdust, debris, or wood glue that might have accumulated.
Magazine Care
- Keep the nail magazine clean. Sawdust and debris inside can cause jams.
- Occasionally, you might need to lubricate the moving parts within the magazine if your manual suggests it. Use only the recommended lubricant.
Battery Maintenance
Lithium-ion batteries are pretty low-maintenance, but here are a few tips:
- Store Properly: Store batteries in a cool, dry place, away from direct sunlight or extreme temperatures. Avoid storing them fully discharged.
- Charge Wisely: Don’t leave batteries on the charger indefinitely after they’re full. Most modern chargers have overcharge protection, but it’